The Simple Way to Measure Your Pump Pressure Without a Gauge
Have you ever wrestled with your espresso machine, trying to get that perfect shot, only to feel like you’re fumbling in the dark? I remember the first time I attempted to dial in my pump pressure without a gauge. I was so focused on chasing the ‘ideal’ pressure reading that I missed the fact that my shots were tasting off, and I had no idea why. It was a lightbulb moment—there had to be a better way to measure pressure, something simple and reliable.
Why Guesswork Shouldn’t Dictate Your Espresso Quality
We invest so much in fancy grinders, top-notch beans, and sleek machines. But when it comes to pump pressure, many of us rely on guesswork or expensive gauges that can be intimidating or hard to read, especially for home baristas. Imagine troubleshooting your espresso shot and having no clear way to know if your pump is delivering the right pressure. That’s frustrating—and it can lead to wasted beans, uneven flavors, and even damage to your equipment over time.
In my early days, I made the mistake of thinking that just tweaking the grind size or tamping pressure was enough. But the truth is, consistent pump pressure is crucial for extracting that rich, balanced shot. According to barista training experts, maintaining optimal pressure—generally around 9 bars—is essential for flavor clarity and body. Yet, many enthusiasts overlook this because they assume they need special tools or extensive experience to measure it accurately.
Here’s the good news: you don’t need an expensive pressure gauge or complicated equipment to get a handle on your pump pressure. With a few simple techniques, you can approximate your machine’s pressure during pulls and make adjustments to produce consistent, delicious espresso every time. Interested in discovering how you can do this? Let’s dive into practical methods that turn guesswork into confidence.
Is DIY Pressure Measurement Trustworthy or Just a Fool’s Errand?
I’ll admit, I was skeptical at first. I wondered if these shortcuts could really give me accurate readings. I also feared I might damage my machine or get inconsistent results. Early on, I skipped carefully reading guides and jumped straight into experimenting. That was a mistake. A small oversight—like not understanding the importance of your equipment’s condition—can skew your results and lead to misguided adjustments.
But once I learned the right techniques, I realized that measuring pump pressure without a gauge is not only doable but also reliable if approached correctly. For instance, paying attention to flow rate, shot timing, and the behavior of the espresso during extraction can tell you a lot about your pressure settings. If you’ve faced the same doubts, you’re not alone. Many home baristas find themselves in the same boat, seeking simple, effective ways to dial in their machines without extra tools.
So, are you ready to stop relying solely on guesswork and start perfecting your espresso with confidence? Keep reading—next, we’ll explore practical methods to measure and adjust your pump pressure using tools you already have and some clever tricks. And if you’ve ever wondered whether your espresso setup is really optimized, you’re in the right place.
Identify Your Pump Behavior During Extraction
Start by observing how your espresso shot behaves. Run a test shot and note the flow rate and shot time. If the flow is too slow or too fast, it hints at pressure issues. I recall one morning when my shot suddenly dripped sluggishly; I paused and examined, realizing it was my pump pressure dropping unexpectedly. This quick observation became my first step in diagnosing pressure problems.
Create a Homemade Pressure Indicator Using a Portafilter and a Pressure-Responsive Clip
Select a Clear, Strong Clip or Clamp
Choose a small, transparent clip that can grip your portafilter handle gently but firmly. Like a mini pressure gauge, it reacts to internal pressure changes during extraction. I used a spring-loaded clothespin, which proved surprisingly effective. Attach it to the handle at a consistent position for every shot to maintain reliability.
Attach a Visual Indicator or Marker
Mark the clip’s litmus point with a sharpie to notice any change in pressure. During a shot, the clip’s movement will indicate pressure levels. For example, if it bends or stretches visibly, it suggests the pump is under or over-pressurized. This method relies on consistent shot technique—tamp evenly, maintain similar grind settings.
Monitor Flow Rate and Shot Timing for Pressure Clues
Watch how quickly your espresso flows and how long the shot takes. A flow that is too slow typically indicates high pressure or a blocked portafilter, while a rapid flow suggests low pressure. Recall how I adjusted my tamping pressure after noticing my shot was pouring too fast—small tweaks made a big difference.
Perform Basic Adjustments to Your Espresso Machine
If your machine has a manual pressure regulation screw or knob, turn it incrementally. For home machines without this feature, consider installing a DIY device like a spring scale or adjusting your grind size and tamping pressure first, since these directly influence internal pressure.
For example, I often start by using an appropriate grinder setting to control extraction pressure, then fine-tune tamping. Remember, consistency is key—use the same tamping force and grind size to track pressure changes accurately.
Test and Refine Over Multiple Shots
Repeat the process over several pulls, observing your homemade indicator and flow characteristics. Small adjustments in tamping or grind size will shift pressure, so keep notes to identify the optimal settings. I found that a slight increase in tamping firmness reduced my shot flow from overly rapid to ideal timing—perfecting my pressure without extra tools.
Use a Water-Flow Method for Better Feedback
If you prefer a more visual approach, install a simple flow restrictor or small tubing to create a mini water column that visually indicates pressure. This is like a tiny barometer—I set it to known levels, then observe how your shot behaves relative to the indicator’s mark.
This technique requires some initial setup but offers immediate feedback during extraction. Over time, you’ll develop an intuitive sense of how your specific machine reacts to adjustments, leading to more consistent pressure control without investing in expensive gauges.
Incorporate Routine Checks for Long-Term Consistency
As your system stabilizes, incorporate pressure checks into your regular routine. Over-tightening your tamping or using stale beans can alter pressure; hence, staying mindful of these variables keeps your pressure at optimal levels. Remember, frequent practice and observation turn the art of pressure management into a subconscious skill that elevates your home espresso game.
Many home baristas and coffee enthusiasts are under the impression that all milk frothers and espresso accessories are created equally or that their choice of gear doesn’t significantly impact the final brew. However, this is a dangerous oversimplification. For instance, the belief that inexpensive milk frothers can replicate the microfoam quality of professional steam wands is a myth that leads many to accept inferior textures and flavors. In reality, the nuance lies in understanding the specific design and mechanics behind each tool. A quality milk frother, especially one that employs a precise heating and aeration system, can dramatically improve your latte art and mouthfeel. Rushing into what seems like a budget-friendly purchase without knowing its limitations often results in disappointing results—this is a common mistake I’ve observed in countless setups.
Similarly, many assume that any grinder labeled as “high-quality” will automatically produce optimal espresso. But the truth is, even premium grinders can underperform if they have compromised burr geometry or static issues, which are subtle yet impactful. For example, flat burrs are generally preferred for consistent particle size, but only if properly maintained; otherwise, they can leave unwanted chunks in your espresso. The choice of grinder affects extraction accuracy, and a misjudgment here can lead to over- or under-extraction, no matter how fine your technique is. If you’re serious about elevating your home espresso, delve into specifics—like how your grinder’s burr material affects flavor [see this guide](https://espressotechguide.com/the-difference-between-ceramic-and-steel-burrs-for-flavor).
What’s the fine line between good enough and overkill when choosing barista gear?
Many enthusiasts fall into the trap of constantly chasing the latest or most expensive equipment, believing it will instantly upgrade their coffee. The reality is, perfecting your input—proper grind size, tamping consistent pressure, using fresh beans—often has a bigger impact than gear upgrades. Yet, selecting the right tools tailored to your specific needs can make a measurable difference, especially with nuanced equipment like steam wands or precision tampers. For example, a poorly calibrated espresso machine or mismatched portafilter can cause channeling or uneven extraction, regardless of the quality of your beans or grinder. It’s worth investing time into understanding your gear’s operational quirks and maintaining it properly. If you’re unsure about your setup, consult resources like our guide on choosing the best barista gear to make informed decisions.
Now, one common and overlooked mistake is neglecting the influence of material choices in your gear. For instance, ceramic versus steel burrs aren’t just about durability—they subtly affect flavor profiles, heat transfer, and static buildup. Experts agree that material and build quality directly influence extraction consistency and, ultimately, taste [see more here](https://espressotechguide.com/the-difference-between-ceramic-and-steel-burrs-for-flavor). Instead of chasing the latest trendy gadget, focus on understanding the big picture—how each component’s design and materials impact your brewing. Consider this your secret advantage in crafting consistently excellent coffee.
Have you ever fallen into this trap? Let me know in the comments. Mastering these nuances can seem daunting at first, but with a little insight, you can avoid common pitfalls and truly elevate your coffee experience.
Keep Your Equipment Running Smoothly
Investing in high-quality barista gear is just the first step; maintaining it ensures consistent performance and longevity. The key lies in routine upkeep and choosing the right tools for repairs and adjustments. As I’ve learned through years of home brewing, regular maintenance saves money and elevates your coffee experience.
For grinders, I personally swear by a precision brush set designed for burr cleaning. A dedicated brush helps dislodge built-up coffee oils and static, which static can worsen on dry days. Maintaining static in grinders is crucial; I use a simple water droplet trick—placing a few drops on the grinder’s static-prone areas—to neutralize charge and improve grind consistency. This surprisingly effective hack offers real results without expensive anti-static modules.
My go-to tool for espresso machine upkeep is a group head gasket replacement kit. Over time, gaskets harden and lose sealing ability, leading to water leaks and uneven pressure. Replacing them using a step-by-step gasket replacement kit has dramatically improved shot quality in my setup. Keep a supply handy and check your gasket condition every few months—an overlooked detail that pays off big.
How do I keep my gear in top shape over time?
Consistency comes from routine maintenance. This includes descaling, thorough cleaning, and parts replacement at proper intervals. For example, regular descaling using manufacturer-recommended solutions prevents mineral buildup that hampers heat transfer and pressure control. I recommend scheduling a deep clean every three months—especially if you have hard water—as it extends your gear’s lifespan and maintains performance. When in doubt, consult the maintenance section of your machine’s manual or trusted online resources.
Utilize Exact Tools for Precise Adjustments
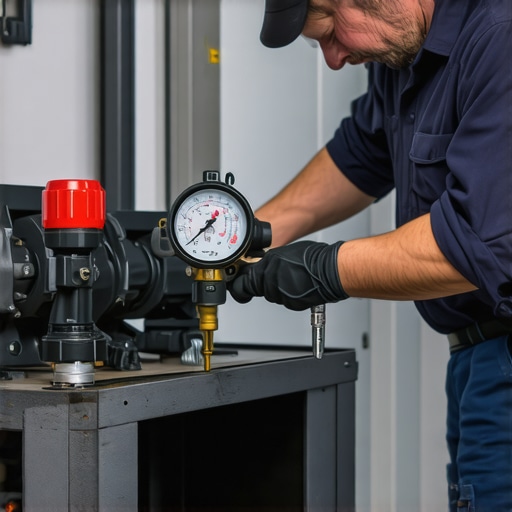
Precision is a game-changer in coffee craftsmanship. For grinders, I prefer a calibration tool designed for burr adjustment. It allows my grinder to deliver consistently sized grounds, which directly impacts extraction. For espresso machines, I use a digital pressure gauge to monitor pump pressure during shots. Unlike generic analog gauges, digital ones provide quick, accurate readings—essential for fine-tuning your setup and troubleshooting pressure issues quickly.
Trend-wise, I see a move towards smart maintenance devices that connect via Bluetooth or Wi-Fi, providing real-time feedback and alerts for component wear. Keep an eye on this space, as integrating smart sensors into your gear could become the standard for serious home baristas.
What’s the best way to keep maintenance simple yet effective?
One tip I recommend is creating a personalized checklist for your equipment. Regularly inspect seals, valves, and moving parts, and follow a maintenance schedule that fits your usage. This proactive approach minimizes downtime and prevents costly repairs. For ongoing support and troubleshooting, reach out through our contact page for expert advice tailored to your gear.
Now, I challenge you to implement a weekly static-neutralizing routine with water droplets or a small brush cleaning in your grinder—small steps that can yield significant improvements in your coffee quality. Remember, effectively maintaining your equipment is fundamental to achieving barista-level results at home.
Over the years, I’ve come to realize that the journey to perfect espresso isn’t just about fancy beans or high-end machines—it’s about understanding the subtle nuances that make or break your shot. One of those unspoken secrets is the role of pressure and how gear choices intertwine with it, often in ways overlooked by even seasoned enthusiasts.
The Hidden Truth About Pressure in Your Home Espresso Setup
I’ve learned that inconsistencies in pressure can silently sabotage your brewing efforts. For instance, despite having an expensive espresso machine, neglecting routine maintenance like gasket checks or ignoring the buildup in your boiler often results in pressure fluctuations. These seemingly small issues can lead to sour or bitter shots, masking the true potential of your beans. Embracing routine inspections and understanding your machine’s internal mechanics—like how scale buildup affects heat transfer—can be game-changing. Dive deeper into maintaining optimal pressure by visiting our gasket replacement guide for long-term consistency.
The Gear Inside Your Gear: Choosing Barista Equipment That Elevates Pressure Control
It’s easy to fall into the trap of chasing the latest gadgets—be it a shiny tamper or the trendiest grinder. But I found that aligning your gear quality with your pressure management skills yields better results. For example, investing in a grinder with flat burrs and static reduction features, as discussed in our comparison of burr types, can improve grind consistency, directly influencing extraction pressure. Similarly, selecting a milk frother that can handle microfoam enhances your overall espresso experience, making each cup feel professionally crafted. Remember, the right tools don’t just look good—they actively help you maintain the precise pressure needed for café-quality shots.
Acceptance and Adaptation: Turning Gear Quirks into Brewing Wins
One lesson I wish I embraced earlier is that no machine is perfect—each has quirks, and the key is adapting. For instance, my initial frustration with a leaky group head was resolved only after adjusting my cleaning routine based on insights from this natural cleaning method. Realizing that small modifications—like adjusting the tamping pressure or using damp cloths to reduce static—can make a massive difference, was eye-opening. This mindset shift from fighting against equipment to working with it unlocks consistent pressure control and better flavor extraction.
Resources That Took My Home Espresso to the Next Level
Building my toolkit, I relied on trusted resources that demystify gear and pressure management. The comprehensive grinder selection guide helped me choose a model suited to my pressure needs. The home barista tips provided the confidence to tweak pressure settings intuitively. If you’re aiming to fine-tune your setup, these cornerstone pieces are invaluable on your journey to espresso mastery.
Your Next Brew Awaits—Make It Count
As you experiment with pressure adjustments and gear choices, remember—perfection is a continuously evolving pursuit. The more you understand your machine’s personality, the better your shots. Don’t let the learning curve hold you back; every small tweak brings you closer to barista-level espresso in your own kitchen. So, why not take the next step today and turn your coffee routine into a true craft? Your taste buds—and your coffee game—will thank you.
What’s been your biggest challenge with managing pressure or choosing the right gear? Drop your thoughts below—I love hearing about your experiences and helping troubleshoot on this flavorful journey.