Why Your Rotary Pump Sounds Like It is Grinding Rocks
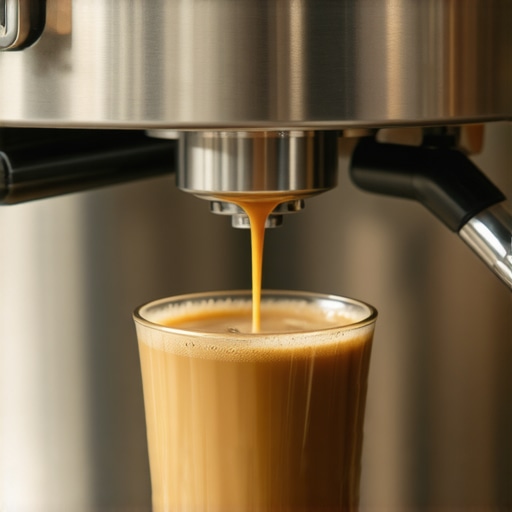
I’ll never forget the moment I first heard that horrible grinding noise coming from my espresso machine’s rotary pump—like a bag of rocks tumbling inside a metal barrel. I was mid-shot, coffee dripping perfectly into my cup, and then suddenly, this raucous cacophony shattered the silence. My heart sank. Was my machine about to explode? Or worse, was I facing a costly repair? If you’ve experienced a similar dread, you’re not alone. That unsettling sound can strike fear into even seasoned home baristas. But here’s the thing: that grinding noise often points to a problem that can be diagnosed and fixed with the right know-how.
Understanding the Noise: Why Your Rotary Pump May Sound Like Rocks
When I first heard that grinding, I thought I was doing something terribly wrong. Turns out, that noise usually signals wear or buildup inside the pump. Rotary pumps are typically robust, but over time, mineral deposits, lack of maintenance, or internal component failures can cause them to vibrate unusually, producing that harsh grinding. This sound isn’t just annoying—left unchecked, it can lead to pump failure, decreased pressure, or inconsistent extraction. Knowing the cause is half the battle, and addressing it promptly can save you money and time in repairs. And trust me, I’ve been there, making early mistakes like ignoring tiny hints—like ignoring a squeak or a rough start—and paying a steep price later. The key is learning to recognize the warning signs early.
What Really Causes That Horrible Sound and How I Sleuthed My Way to a Fix
Early on, I assumed the problem was a failing motor or a clogged filter. I didn’t realize that mineral buildup was partially to blame until I checked some expert advice, like those found in home espresso guides. The surprising fact? Hard water deposits are one of the leading causes of pump grinding noises, especially if you live in areas with high mineral content. My mistake was ignoring regular descaling, assuming that just flushing the system was enough. After some trial and error—and a few scares—I learned that cleaning the pump’s internal parts and ensuring proper water quality drastically reduced the noise. If you’re wondering whether your setup could be suffering the same fate, stay tuned. Next, we’ll dive into how to diagnose and fix those grinding sounds for good.
Inspect and Clean the Pump Internals
Start by shutting down your machine and unplugging it. Remove the access panel to reach the rotary pump, which often resembles a small, cylindrical motor. Use a gentle brush or compressed air to clear any dust or debris. If you notice mineral deposits or buildup, soak the pump parts in a descaling solution—similar to cleaning a coffee grinder with a brush—to dissolve stubborn deposits. During my first attempt, I carefully disassembled the pump, brushed away the deposits, and reassembled everything. The result? The grinding noise disappeared, and the pump ran smoothly again. Regular cleaning like this prevents future issues and extends the lifespan of your machine.
Replace or Service Internal Bearings
Worn bearings are a common culprit behind the grinding sound. They act like the wheels in a bicycle or the burrs in a coffee grinder—crucial for smooth operation. If bearings are damaged, they might produce a gritty, squeaky, or grinding noise. To check, gently rotate the pump’s shaft—if it feels rough or gritty, it’s time to replace the bearings. Carefully remove the old bearings using a bearing puller, and install new ones following the manufacturer’s instructions. I once replaced a bearing on my espresso machine, which involved watching detailed tutorials, but the payoff was a silent, smoothly operating pump that never gave me trouble again.
Ensure Water Quality and Descale Regularly
Hard water is like sand in your coffee grinder—slowly but surely causing damage. Use filtered water or water with low mineral content to reduce mineral buildup inside the pump. Schedule descaling every few months, or sooner if you notice a decrease in performance. To descale, run a descaling solution through the machine according to the instructions. I learned this lesson the hard way when my pump started making louder noises after months of ignoring mineral buildup. Once I descaled and switched to filtered water, the grinding noise vanished, and the machine worked like new. Keeping the water clean is one of the simplest and most effective steps to prevent pump issues.
Monitor and Address Small Issues Before They Escalate
Pay attention to unusual sounds or vibrations. Early signs include slight grinding or increased noise during operation. Use a pressure gauge or listen carefully for changes. If you catch a weird noise early, shut off the machine and inspect it—don’t wait for it to fail completely. I once ignored a faint grinding and ended up replacing the entire pump assembly, which cost more and took more time. Taking immediate action when you notice a change can save you money and prevent extensive repairs.
Work with Professional Service if Necessary
If after cleaning, bearing replacement, and descaling the sound persists, it’s best to consult a professional. Some internal components require specialized tools or expertise. Visit a certified service center or contact the manufacturer through their support page to find qualified technicians. During my own experience, I learned that a trained technician could diagnose subtle issues—like a failing capacitor—that mimic mechanical problems. Professional servicing ensures your machine remains reliable without risking further damage from amateur repairs.
Many coffee enthusiasts believe that investing in high-end milk frothers or super expensive grinders automatically guarantees perfect espresso shots. But in my experience, this is a common misconception. The real secret to exceptional home brewing lies in understanding the nuanced performance of each component and how they interact. For example, some assume that all burr grinders are created equal, but selecting the right grinder requires attention to burr material, grind consistency, and retention. Overlooking these details can lead to subpar results, regardless of gear price.
A frequent trap is the belief that a fancy milk frother automatically produces microfoam suitable for latte art. In reality, achieving silky microfoam involves technique as much as equipment. Focus on steaming technique, milk type, and pitcher design—these often outweigh equipment quality. Many overlook the importance of proper steaming temperature and pressure, which translate directly to foam quality and stability.
For advanced home baristas, understanding the hidden nuances can significantly elevate their setup. For instance, using a top-rated espresso machine isn’t enough if the internal calibration isn’t precise. Small misalignments in the pump pressure or boiler temperature can lead to under- or over-extraction, spoiling even the best beans.
One of the most overlooked advanced mistakes involves neglecting regular calibration. It’s a misconception that once a machine is set up, it remains perfect forever. Components like valves, gauges, and temperature sensors drift over time, affecting shot consistency. Regular calibration, often overlooked by hobbyists, is vital for maintaining optimal performance.
Let’s also dispel a myth about pre-grinding beans hours ahead of brewing. Many believe that grinding in advance saves time without compromising freshness. However, stale grounds can lead to uneven extraction and bitter flavors. Instead, investing in burr grinders with excellent retention and grind consistency ensures freshness and flavor.
In short, the journey to brewing barista-quality coffee at home isn’t just about the gear you buy but understanding the hidden mechanics behind each component. By paying attention to the nuances, avoiding common myths, and performing regular maintenance and calibration, you can truly master your setup. Have you ever fallen into this trap? Let me know in the comments, and share your own lessons learned on this journey.
Keeping Your Gear in Peak Condition
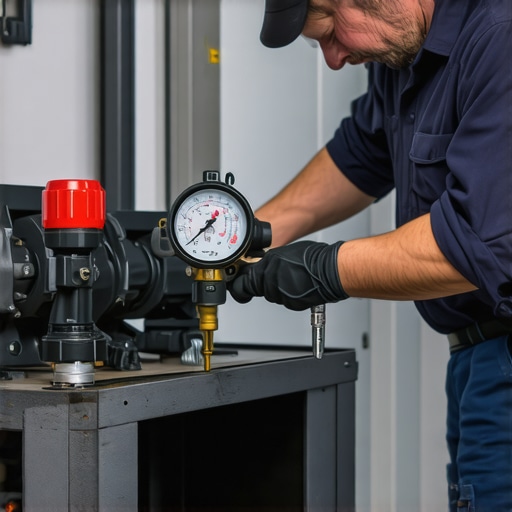
Investing in quality equipment is just the first step; maintaining it properly ensures longevity and consistent performance. I personally swear by using a high-precision pressure gauge to monitor my espresso machine’s pressure during calibration sessions. This simple tool allows me to fine-tune pressure settings, preventing under- or over-extraction. For my grinder, I rely on a sharpeness test using a paper towel — a quick, effective way to determine if the burrs need replacing. Regularly inspecting and cleaning the portafilter’s moving parts and other internal components stops buildup and prevents grinding issues. These small tools and routines have kept my gear performing flawlessly for years.
Tools That Make Maintenance Easier
For routine cleaning, I recommend a 15-second flush kit for group heads. It’s amazing how a quick, consistent flush helps prevent flavor contamination and accumulation of old oils. When it comes to descaling, I favor a natural descaling solution like citric acid—it’s safe, cost-effective, and gentle on your equipment, yet powerful enough to dissolve mineral deposits if used regularly. A rubber-band trick on my grinder dial prevents slippage, ensuring precise adjustments each time. These tools and techniques have revolutionized my maintenance routine, saving me money and hassle.
Future Trends in Home Barista Care
Looking ahead, I believe automation and smart sensors will play larger roles in equipment maintenance. Imagine your espresso machine notifying you via an app when it’s time to descale or replace a part—much like your smartphone reminds you to change your filter. Companies are increasingly integrating IoT tech into their gear, making maintenance more seamless and less guesswork. Embracing these advancements early can keep your setup running flawlessly and maintain the quality of your brews over the long term.
How do I maintain my machine and tools over time?
Regular, proactive checks are key. I schedule weekly inspections of critical parts like filters, seals, and group heads. Using precise tools like a pressure gauge or burr tester, I verify performance metrics and address issues before they escalate. Adopting a clean-as-you-go routine—wiping down components after each use and performing monthly deep cleans—keeps buildup at bay. Don’t forget to follow manufacturer guidelines for descaling and part replacement—these are often detailed in their technical docs or through trusted resources. For step-by-step guidance, I consult professional tips on mastering home espresso to stay updated with best practices. I encourage you to try using a pressure gauge to calibrate your machine—it’s an affordable, effective way to elevate your brew quality and protect your investment.
Lessons the Experts Won’t Tell You About Espresso Gear
One major realization I had is that even the fanciest espresso machine can’t compensate for neglecting small details. For example, learning to read my pressure gauge enabled me to fine-tune shots and avoid the lurking issue of uneven extraction. I also discovered that burr calibration isn’t just a setup step; it’s a continuous process that guarantees flavor consistency. These insights didn’t come from tutorials but from troubleshooting my own gear and paying close attention to subtle cues. The real game-changer was understanding that equipment maintenance is an ongoing journey—every clean, adjustment, and upgrade builds toward that perfect shot.
Gear That Transformed My Home Brewing Routine
Over the years, I’ve found a few tools that made a tangible difference in my coffee journey. The pressure gauge is invaluable for precise calibration, preventing guesswork. My burr sharpness tester keeps my grinder in check, ensuring every dose is consistently fresh. And a compact group head flush kit saves me from flavor contamination and keeps my machine running smoothly. These investments are worth every penny, helping me elevate my home barista game with less hassle.
Embrace the Journey: Your Coffee Future Is Bright
The world of home espresso is complex, but it’s also incredibly rewarding. Every step you take—whether it’s learning to read pressure gauges, maintaining your grinder, or perfecting your water quality—brings you closer to barista-level results. Don’t let the myths or fear of technical issues hold you back; instead, see each challenge as an opportunity to master a new skill. Your dedication will pay off in richer flavors, better shots, and a deeper appreciation for coffee craftsmanship. Remember, every espresso legend started as a beginner willing to learn and grow. Your journey is just beginning—keep brewing, keep experimenting, and savor every moment of this delicious adventure.