How to Properly Lubricate Your E61 Group Head Cam
I woke up at 6:00 AM, eager for that first syrupy shot, and pulled the lever on my E61 group head. Instead of the usual silky-smooth resistance, I heard a high-pitched, metallic screech that made my teeth ache. It felt like I was dragging a rake across a gravel driveway. My heart sank. I’d spent months mastering the art of home espresso, yet here I was, potentially grinding down the brass internals of my pride and joy. This wasn’t just a noise; it was the sound of friction eating away at my machine’s lifespan. If you’ve ever winced while lifting your brew lever, you know exactly what I’m talking about. Today, I’m going to show you how to restore that buttery feel and protect your investment without needing a degree in mechanical engineering.
That Gritty Lever Feeling is a Warning Sign
When I first started out with top-rated espresso machines, I made a classic rookie mistake: I was too clean. I backflushed with heavy-duty detergent every single day. While my coffee tasted great, the detergent was busy stripping away every last molecule of lubricant from the internal cam. One morning, the lever actually stuck in the upright position. It’s a common pitfall—we focus so much on the flavor that we forget the mechanical soul of the machine. Properly greasing the cam is the move for better espresso without buying a new machine because it ensures consistent pressure application and prevents the sneeze that happens when a dry cam snaps back into place. Have you noticed your lever getting harder to move lately, or does it feel like there is sand trapped inside the assembly?
Does Special Grease Actually Matter?
You might be tempted to reach for whatever is in your kitchen drawer, but stop right there. I once thought a tiny dab of vegetable oil would do the trick—it didn’t. It went rancid and turned into a sticky, gummy mess within days. According to the performance data for Molykote 111, a high-quality silicone lubricant is non-negotiable because it is insoluble in water and maintains its consistency at the 200-degree temperatures required for brewing. Using the wrong stuff won’t just fail; it can actually migrate into your coffee or cause your group head gasket to leak prematurely. We aren’t just looking for slipperiness; we are looking for food-safe durability that survives hundreds of shots.
Tear Down the Lever Assembly
To get started, you need to reach the heart of the machine: the cam. Ensure your machine is completely cool and the power is off. You’ll need a 24mm wrench, but here is a pro tip: wrap the wrench jaws in electrical tape or use a cloth. The chrome on these machines is surprisingly soft, and one slip can leave a permanent scar. I learned this the hard way during my first maintenance session. I was so excited to fix the squeak that I gripped the nut with bare pliers and left deep, ugly teeth marks in the finish. It was a painful reminder that choosing the best barista gear for coffee enthusiasts includes having the right protective tools for the job.
Extract the Cam and Pins
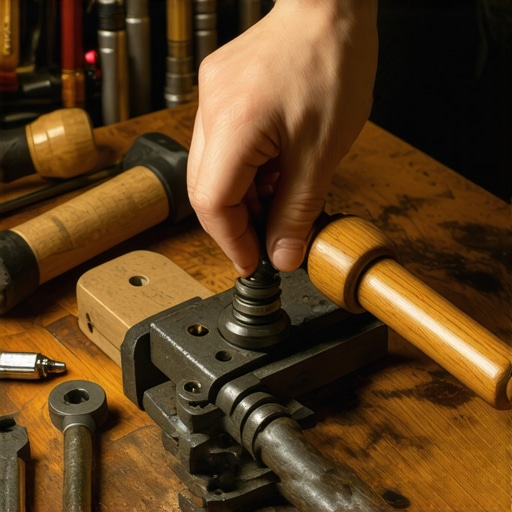
Once you unscrew the large end-bolt on the group head, the entire lever and cam assembly will slide out. Be careful as you pull it; there are two small brass pins (the pre-infusion and exhaust valves) that the cam pushes against. If they don’t drop out naturally, don’t force them. This friction is exactly why your manual lever feels harder to pull than usual. The metal-on-metal contact creates microscopic burrs over time if they aren’t coated in a protective layer of silicone. When I pulled mine out for the first time, the cam looked like it had been scrubbed with sandpaper. It was bone dry and covered in a fine black dust—essentially pulverized brass.
Clean the Metal Surfaces Thoroughly
Before you even think about applying new grease, you must remove the old, oxidized remains. Use a clean microfiber cloth to wipe down the cam and the internal chamber of the group head. Do not use paper towels; they leave behind tiny fibers that can clog the delicate channels. I once made the mistake of using a cheap shop rag that shed lint everywhere. Two days later, my shots were channeling because a tiny thread had lodged itself in the shower screen. If you find heavy coffee oil buildup during this stage, it’s a sign that your cleaning routine might need an adjustment, much like how mastering the art of home espresso requires constant attention to cleanliness.
Apply the Lubricant with Precision
Now for the main event. Take your Molykote 111 and apply a pea-sized amount to the lobes of the cam. Think of the cam like a knee joint; it doesn’t need to be swimming in grease, it just needs a smooth, consistent film. Use your finger to spread it evenly over the surfaces that make contact with the internal pins. 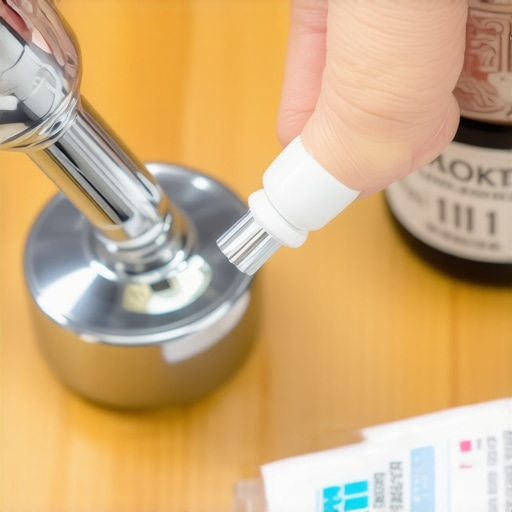 If you apply too much, the excess will just squeeze out and potentially find its way into your brew water. You want just enough so the metal looks wet, but not glopped. This simple act is the move for better espresso without buying a new machine because it restores the tactile feedback you need to feel the infusion process.
Put Everything Back Together Without Over-Tightening
Slide the cam back into the group head, ensuring the lever is pointing downward in the ‘off’ position. When you thread the 24mm nut back on, do it by hand first to avoid cross-threading. Tighten it until it is snug, but don’t go overboard. While you have the assembly apart, take a quick look at the seals. If they look flattened or cracked, that might be why your group head gasket is leaking after just one month of heavy use. Once the nut is secure, move the lever up and down. It should move with a silent, hydraulic-like smoothness that feels premium rather than industrial.While most manuals suggest a chemical backflush at the end of every session, I’m here to tell you that’s overkill for the home barista. Everyone says a clean machine is a happy machine, but in my experience, over-cleaning with aggressive detergents is the fastest way to turn a high-end E61 into a grinding, metal-on-metal nightmare. You see, those detergents are designed to dissolve coffee oils, but they are also incredibly efficient at stripping the silicone grease we just applied. If you’re pulling 2-3 shots a day, a full chemical backflush every 24 hours is like using a pressure washer on a fine watch. You’re better off doing a plain water backflush daily and saving the chemicals for every two weeks.
Does mechanical friction affect your actual extraction pressure?
Advanced enthusiasts often overlook how the physical resistance of the lever changes the ‘feel’ of the pre-infusion. When the cam is dry, you lose the subtle tactile feedback that tells you the 3-way valve has fully engaged. According to a technical study by the Coffee Science Foundation, inconsistent mechanical movement in lever-actuated machines can lead to pressure variances of up to 0.5 bar during the critical first few seconds of extraction. This mechanical drag is often the reason your manual lever pull feels spongy or unresponsive. If you can’t feel the puck resisting the water, you’re flying blind.One major ‘trap’ I see people fall into is the ‘clean-freak’ spiral. They notice the lever getting stiff, so they assume it’s coffee buildup and use more detergent, which only strips more grease, making it even stiffer. It’s a self-defeating cycle that leads to permanent scoring on the brass internals. This lack of lubrication is also why your group head gasket is leaking after just one month; without a slick surface, the gaskets drag and tear rather than sealing smoothly. You also need to be careful with the rest of your choosing the best barista gear for coffee enthusiasts. I once saw a fellow enthusiast use a metal pipe cleaner to scrub the internal channels of their group head, thinking they were being thorough. All they did was create deep scratches that became breeding grounds for rancid oils. If you need to deep clean, stick to soft brushes and patience. This attention to detail is just as important as knowing how to select the perfect coffee grinder for your brew. Have you ever fallen into this trap of over-cleaning until things started to break? Let me know in the comments. We often focus so much on the flavor that we neglect the physics of these top-rated espresso machines. Remember, maintenance isn’t just about removing dirt; it’s about preserving the delicate balance of friction and flow.
The Tool Kit I Actually Use Daily
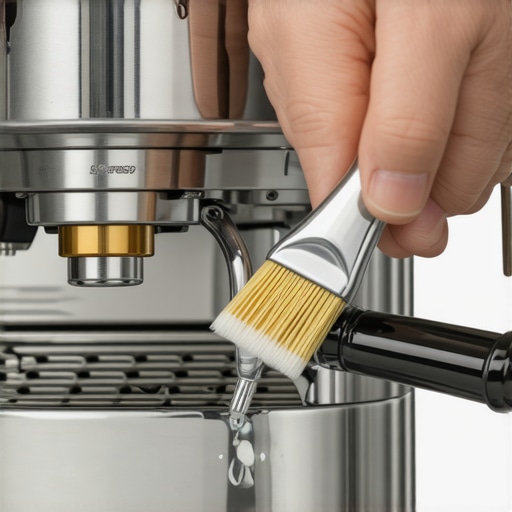
I used to think that a standard kitchen rag and a bit of elbow grease were enough to keep my setup pristine. I was wrong. Over time, I’ve realized that professional-grade maintenance requires a few highly specific items that make the job easier and more effective. For instance, I never start a deep clean without my Pallo Coffeetool. Most people use a basic brush, but the angled neck on this thing is a lifesaver; it prevents scalding water from running down your arm while you scrub the group head. It’s a small detail, but when you’re mastering the art of home espresso, comfort leads to consistency. I also keep a stash of specialized pipe cleaners because how to clean the inside of your steam wand pipe isn’t just about purging; it’s about removing the hidden proteins that can harbor bacteria. Keeping these tools handy is a core part of choosing the best barista gear for coffee enthusiasts because it shifts maintenance from a chore to a ritual.
How do I maintain my espresso setup for the long haul?
Long-term reliability isn’t about one big annual service; it’s about the cumulative effect of small, precise actions. Every month, I perform a flow rate test to ensure the pump isn’t struggling against scale. Knowing how to check your espresso machines group head flow rate can save you hundreds in repair costs by catching a failing solenoid before it dies. According to the La Marzocco USA Water Specifications, maintaining a total hardness of 3 to 6 grains (50–100 ppm) is the gold standard for preventing internal damage. If your water is too hard, you’ll be searching for the best way to descale a boiler without using harsh vinegar far sooner than you’d like. I personally use a BWT Bestsave pouch in my reservoir as a cheap insurance policy against calcium deposits.
Sensors and Smart Alerts are the Future
Looking ahead, the days of guessing when to lubricate your E61 cam or change your group gasket are numbered. I predict that the next generation of top-rated espresso machines will feature integrated ‘maintenance sensors’ that track cycles and actual mechanical resistance. We are already seeing this in commercial super-automatics, but the tech will soon migrate to prosumer levers and dual boilers. Imagine an app notification telling you that your brew lever friction has increased by 15%, prompting you to apply grease before any brass-on-brass damage occurs. This data-driven approach will be just as revolutionary as learning how to select the perfect coffee grinder for your brew. In the meantime, don’t wait for a sensor to tell you something is wrong. My best tip? This weekend, take five minutes to pull your shower screen and soak it in a backflush detergent. You’ll be shocked at what’s hiding behind that stainless steel mesh.
What That Gritty Lever Taught Me About Machine Longevity
Over the years, I’ve realized that the E61 group head is a living, breathing mechanical heart. It’s not enough to just press a button; you have to listen to what the metal is telling you. Here are a few lightbulb moments I’ve had while mastering the art of home espresso:
- The ‘Feel’ Trumps the Calendar: Don’t wait for a six-month reminder if your lever starts feeling like it’s rubbing against sandpaper. Friction is an immediate problem that requires an immediate fix.
- Water is a Solvent: Even if you aren’t using detergent, the constant flow of hot water eventually erodes your lubricant. If you brew frequently, check your cam more often to ensure smooth operation.
- Gentle Hands Save Chrome: You don’t need to torque the group head nuts like you’re working on a truck. Snug is enough; over-tightening is a leading cause of mechanical stress that can lead to needing to know how to fix a stuck pressure stat in an older machine.
- The Shower Screen Secret: While you have the lever out, always check why your group head shower screen is getting clogged so fast. Often, it’s back-pressure from a poorly lubricated exhaust valve causing coffee oils to settle rather than flush.
The Toolkit That Keeps My Morning Coffee Silent
You don’t need a massive workshop to keep your machine in peak condition. My daily maintenance ritual relies on just a few high-quality items. First, Molykote 111 is non-negotiable for its thermal stability. Second, a Pallo Coffeetool is the best way to scrub the group head without burning your hands. For the internal health of the boiler, I swear by the BWT Bestsave pouch. It’s essentially the best way to descale a boiler without using harsh vinegar because it prevents the scale from ever attaching to your heating element. Finally, always keep a 24mm wrench wrapped in electrical tape—it’s the only way to protect the beautiful finish on top-rated espresso machines while you work.
#IMAGE_PLACE_HOLDER_E#
Your Machine Deserves a Long Life
Maintaining your gear is an act of respect for the craft. When you take the time to lubricate that cam and check those seals, you aren’t just doing chores; you are ensuring that your first shot tomorrow morning is as perfect as the one you had today. These machines are built to last a lifetime, but they rely on you to be their guardian. Don’t let a little bit of friction get in the way of your pursuit of the perfect cup. Have you ever experienced that heart-sinking screeching sound from your lever, or did you catch it before the friction started? Let me know your maintenance horror stories in the comments below!