The Trick to Swirling Milk Without Splashing Out of the Pitcher
I still remember the morning I nearly threw my steam wand through the kitchen window. It was 6:30 AM, I was half-asleep, and I decided that today was the day I’d finally master that elusive, glossy vortex. I opened the steam valve, the milk caught a weird angle, and within two seconds, I was wearing a hot, sticky latte-to-be across my favorite shirt. It’s a classic beginner’s mistake, one I made more times than I’d like to admit before I realized that splashing isn’t a sign of steam power—it’s a sign of poor positioning. We’ve all been there, staring at a counter covered in bubbles, wondering why the trick to getting the perfect swirl feels like a dark art reserved for pro baristas. Today, I’m going to show you exactly how to tame that dairy tiger so you can focus on the heart in your cup, not the cleanup on your floor.
Stop Painting Your Kitchen with Frothed Milk
When I first started my journey with home espresso, I thought more power meant better foam. I’d crank that steam wand to the max and hope for the best. The result? A literal volcano of milk. The real issue wasn’t the steam pressure or the quality of my top rated espresso machines; it was my hands. Most of us struggle because we try to create the swirl too deep or too centered in the jug. The secret lies in the ‘sweet spot’—that tiny millimeter of difference where the air incorporates without creating a tidal wave. If you’ve struggled with why your milk pitcher position is ruining your texture, you know that frustration of seeing great foam turn into a mess in a split second. According to research from the Specialty Coffee Association (SCA), the ideal milk vortex isn’t just about aesthetics; it’s about the physics of distributing air bubbles evenly to create a stable microfoam structure that doesn’t collapse or separate. When you get it right, the milk moves in a silent, powerful circle. When you get it wrong, you’re basically just whisking the air into giant, unstable bubbles. Have you ever felt like you were doing everything right, only to have the milk jump out of the jug at the last second?
Is a Specialized Pitcher Really Worth the Money?
You might be thinking that your hardware is the problem. I used to blame my cheap, unbranded jug for every splash. I even spent hours researching handling large milk pitchers for small drinks just to give myself more ‘splash room’ as a safety net. But here’s the reality: even the most expensive barista gear won’t save you if your entry angle is off. I once thought buying a pitcher with a sharper spout would magically fix my vortex, but I just ended up splashing from a more expensive container. Splashing happens when the steam force hits the wall of the pitcher at a perpendicular angle or when the tip is too close to the surface without being submerged enough to create a draw. It’s about finding that balance between the ‘chic-chic’ sound of air stretching and the silent roll of the heating phase. Let’s dive into the mechanics of how to anchor your pitcher and find that silent, splash-free spin.
Anchor the Pitcher Before You Crank the Steam
The biggest mistake most people make isn’t how they hold the wand, but how they don’t hold the pitcher. Think of your steam wand as a high-pressure jet engine. If you leave your pitcher floating in the air with no support, that jet will push it around, causing the tip to bob in and out of the milk. This is exactly how you end up with a face full of dairy. I remember the first time I used a professional machine with a four-hole steam tip; I thought I could just ‘wing it’ like I did with my entry-level setup. The moment I opened the valve, the pressure was so intense it actually kicked the pitcher out of my hand. I learned quickly that you need to use the steam wand itself or the machine’s casing as an anchor. By resting the spout of your jug against the wand and locking your hand against the machine, you create a stable tripod. If you’ve been wondering why your milk pitcher position is ruining your texture, it’s likely because you’re lacking this physical stability.
Find the 12-O’Clock Sweet Spot
To get that perfect spin without the splash, you need to think about geometry. Don’t put the wand in the center. If the tip is dead center, the milk just crashes against itself and goes vertical—straight up and out of the jug. Instead, place the tip slightly to the right or left of the center, about halfway between the middle and the edge of the pitcher. This off-center placement acts like a rudder on a boat, forcing the milk to move in a circle. Before you even turn the steam on, make sure you know the best way to purge your steam wand without getting burned to clear out any condensed water. Once the wand is positioned, tilt the pitcher slightly toward you. This creates a ramp for the milk to climb, which naturally initiates the vortex as soon as the pressure hits.
Listen for the Paper Tear and Nothing Else
Once you’ve found the position, the sound tells you everything. You’re looking for a sharp, intermittent ‘tsh-tsh’ sound, almost like someone is gently tearing a piece of paper. This is the air being ‘stretched’ into the milk. If you hear a loud, deep roar, your wand is too deep; if you hear a frantic splashing or see big bubbles forming, you’re too high. This is the critical moment where you can how to stop your milk foam from turning into a big bubble by keeping that tip just a millimeter below the surface. During my early morning practice sessions, I used to get impatient and pull the pitcher down too far, thinking more air meant thicker foam. All I got was a soapy mess that looked nothing like the glossy microfoam needed for latte art.
Submerge Early to Avoid the Volcano
The splashing usually happens at the very end of the process when the milk gets thin and hot. The secret to a clean finish is to submerge the wand about half an inch deeper once the milk reaches body temperature (around 100°F or 37°C). At this point, you’ve added all the air you need. Now, your only job is to let that vortex pulverize the bubbles you just created. This transition from ‘stretching’ to ‘rolling’ is what separates a latte from a cappuccino. If you are learning how to texture milk for a flat white versus a latte, remember that the rolling phase is where the magic happens. By submerging the wand, you stabilize the milk’s surface, ensuring the trick to getting the perfect swirl results in a silk-like finish rather than a kitchen-cleaning session.
Power Is Often the Enemy of Perfection
Common wisdom in the coffee world suggests that more steam power is always better. Most home baristas believe that if they could just get their hands on those top rated espresso machines with massive commercial boilers, their milk would magically turn into silk. But here is the contrarian truth: high-velocity steam on a small domestic scale is a recipe for disaster. When you have too much pressure and a small four-hole tip, the window of time to incorporate air becomes dangerously small—often less than three seconds. In my experience, slowing things down by actually reducing your boiler pressure (if your machine allows it) can give you the control needed for world-class latte art. It is a classic mistake to think that professional barista gear fixes a lack of technique; in reality, it often exposes your flaws faster.
Does the Number of Holes in Your Steam Tip Really Matter?
I get asked this constantly. Some swear by two-hole tips, others won’t touch anything without four. The nuance most people miss is that the hole count must match your boiler’s recovery rate and your pitcher size. If you are struggling because the best way to handle large milk pitchers for small drinks still leaves you with a mess, your tip might be the culprit. A four-hole tip on a small pitcher creates a chaotic turbulence that prevents the vortex from ever stabilizing. According to data from the Specialty Coffee Association (SCA), the stability of milk foam is heavily dependent on the ‘denaturation’ of proteins, which happens best when heat is applied evenly. If your steam tip is too aggressive, you’re essentially scalding the milk proteins before they have a chance to trap the air, leading to a foam that looks okay for ten seconds before collapsing into a watery mess.
Beware the Invisible Killer of Glossy Foam
The most sophisticated ‘trap’ in milk steaming is something called ‘wet steam.’ You can have the best technique in the world, but if why your espresso machine steam is wet and spluttery is a question you haven’t answered, you’ll never get that glossy finish. Wet steam is essentially steam that contains too many water droplets. This dilutes the milk, making it heavy and preventing those tiny microbubbles from bonding. If you’ve noticed the reason your steam wand only makes thin hot milk despite following every tutorial, check your boiler level. An overfilled boiler leaves no room for dry steam to accumulate. It’s these tiny mechanical nuances—not just the brand of your milk frothers—that dictate the final quality of your drink. Have you ever fallen into this trap of blaming your skills when it was actually a hardware quirk? Let me know in the comments! Also, if your equipment is acting up, you might need to know how to fix a steam wand that only blows out weak air before your next practice session.
Scrub the Gunk Before It Scratches the Chrome
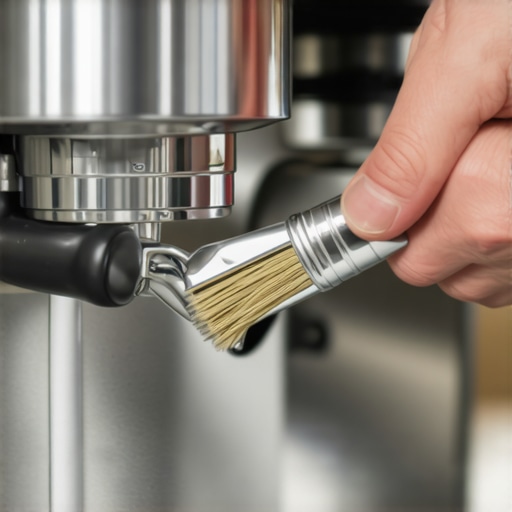
I learned the hard way that a neglected machine is a slow death for great coffee. That ‘gritty’ feeling when you turn your steam knob? That’s not just wear and tear; it’s often a build-up of mineral deposits or dried milk that has worked its way into the threading. If you’ve noticed the reason your steam wand valve feels gritty, you’re already behind on maintenance. I now make it a religious habit to deep-clean my tips every week. I’ve found that even if you purge diligently, why your steam wand tips keep getting blocked by milk residue usually comes down to the microscopic layers that build up inside the holes. According to the La Marzocco Home technical maintenance guide, if you don’t use a dedicated milk cleaner, those proteins can polymerize, creating a ‘biofilm’ that is nearly impossible to remove with just hot water. I personally use a small paperclip to clear the holes, but you have to be incredibly gentle—scratching the internal bore can actually create more surface area for milk to stick to next time.
Why Your Tiny Scale Is Actually Your Best Friend
You might think using a scale for milk is overkill, but it’s the only way I finally achieved consistency. I used to eyeball the milk level in the jug, but a 10g difference in starting weight changes how the vortex behaves entirely. When I started weighing my milk, I realized why your espresso scale is jumping numbers while the shot is pulling—it’s often due to the vibration of the machine, so I moved my scale to a separate tamping mat. This precision, combined with how to select the perfect coffee grinder for your brew, ensures that every variable is locked in. If your grinder is producing clumpy or inconsistent grounds, your espresso will be sour, and no amount of perfect milk texture can save a bad shot. I recommend the Acaia Lunar for its water resistance, as it can survive the inevitable milk splashes that happen when you’re still mastering the ‘paper tear’ sound.
How do I keep my gear running like day one?
The secret isn’t a magic chemical; it’s water chemistry and consistency. I’ve seen beautiful top rated espresso machines ruined in six months because the owner used hard tap water. You must learn the best way to descale a boiler without using harsh vinegar, which can leave a permanent aftertaste and damage sensitive gaskets. Long-term results come from the boring stuff: backflushing daily, wiping the wand immediately after every use, and checking your seals. If you’re not sure about your current setup, I’ve found that knowing how to check if your portafilter gasket is actually sealed can save you from a kitchen-flooding disaster. I predict that in the next few years, we will see milk pitchers with integrated thermal sensors that talk directly to the machine to auto-stop the steam, but until then, your hands and ears are your best tools.
Automation Is Coming for Your Latte Art
We are already seeing the beginning of this with machines like the Decent Espresso or the Morning Dream, which use high-precision sensors to mimic a barista’s touch. However, there is a soul to doing it manually that automation can’t touch. To truly scale your skills, you need to move beyond just ‘not splashing’ and start focusing on the micro-movements. My challenge to you: next time you steam, try to keep the pitcher completely still. Don’t ‘surf’ the surface manually; find the angle where the milk draws the air in on its own. It’s a game-changer for texture. If you’re looking for more advanced barista gear to help with this, check out our recommended gear list. And if you have questions about a specific machine quirk, don’t hesitate to contact us or check our privacy policy for how we handle your data.
Stop Blaming the Boiler and Fix Your Angle
After years of trial and error, I’ve realized that the ‘splash’ isn’t a hardware failure; it’s a lack of respect for the vortex. One of the most lightbulb moments in mastering the art of home espresso was realizing that the whirlpool should be silent. If you hear a roar, you’re making bubbles, not microfoam. Also, remember that your milk temperature dictates the sweetness; if you over-steam, you’ll end up wondering why your espresso tastes burnt even with light roast beans when it’s actually just scalded dairy masking the coffee’s notes. Lastly, the ‘v’ in your pitcher spout isn’t just for pouring—it’s a physical guide for your steam wand to sit in for maximum stability.
#IMAGE_PLACEHOLDER_E#
My Unfiltered Gear Recommendations for Beginners
You don’t need a thousand-dollar setup to avoid a mess, but a few choice items make the learning curve much flatter. I always recommend choosing the best barista gear for coffee enthusiasts based on ergonomics rather than just brand names. A heavy-bottomed stainless steel pitcher is my first choice because it absorbs heat slower, giving you more time to fix a chaotic vortex. I also swear by a dedicated microfiber cloth—milk builds up faster than you think. Once you have your texture down, you can finally move on to the fun stuff, like learning the secret to pouring a perfect swan in your latte.
Make Your Next Latte Art Masterpiece
Steaming milk is a tactile skill that requires patience, a bit of physics, and a lot of practice. Don’t get discouraged by a few splashes; they are just stepping stones toward that perfect, glossy finish. With the right barista gear and a steady hand, you’ll be pouring cafe-quality drinks in no time. If you run into any weird technical hurdles, feel free to contact us or read our privacy policy to see how we help our community of coffee lovers. Have you ever accidentally sprayed milk across your kitchen while trying to find the sweet spot? Let me know your funniest barista fail in the comments below!