Why Your Espresso Tastes Burnt Even with Light Roast Beans
I stood in my kitchen at 6 AM, the sun just barely peeking through the window, clutching a bag of high-altitude Ethiopian beans like it was a sacred relic. I had spent nearly thirty dollars on this 12-ounce bag, lured by the promise of “jasmine notes and a peach-like finish.” I ground them carefully, tamped with precision, and pulled what looked like a beautiful shot. Then I took a sip. My face contorted. It didn’t taste like peach; it tasted like I’d licked the bottom of a charcoal grill. I felt betrayed by my own hobby. I’d spent years mastering the art of home espresso, yet here I was, failing at the most basic level. If you have ever poured a “bright” light roast into the sink because it tasted like a tire fire, trust me, I’ve been there. Today, we are going to dig into why this happens and how you can stop your gear from ruining your morning.
Stop Blaming the Beans for That Charred Aftertaste
When we encounter a bad flavor, our first instinct is to point the finger at the roaster. We think, “They must have scorched the batch.” But with light roasts, the beans physically haven’t been roasted long enough to develop those deep, carbonized flavors on their own. The “burnt” sensation you’re experiencing is likely happening right inside your portafilter. Early in my journey, I made the huge mistake of neglecting my PID settings. I assumed my top-rated espresso machines were smart enough to stay consistent. I was wrong. I was effectively flash-cooking my coffee. This is a common issue, especially when your espresso tastes bitter even with a fast pull. The science backs this up: the Specialty Coffee Association (SCA) notes that water temperature stability is a cornerstone of flavor, and even a three-degree spike can turn a delicate acidity into a harsh, acrid mess. We have to ask ourselves: is the heat coming from the water, or is it a result of mechanical friction? Have you ever noticed your shot smelling like smoke even when the beans look like cinnamon? It’s a frustrating puzzle, but one with a very logical solution.
Can a light roast really taste like charcoal?
It sounds like a contradiction. How can a bean that is barely brown taste like a burnt steak? The answer lies in the chemistry of extraction. When you use a coffee grinder that isn’t perfectly aligned, you create “fines”—microscopic dust particles that over-extract instantly. These tiny particles give up their bitterness immediately, while the larger chunks are still trying to find their flavor. I once spent an entire Saturday tearing my hair out over a bag of Kenyan coffee, only to realize why my espresso tasted like burnt rubber was simply because I hadn’t cleaned my group head in a month. Old, charred oils from previous dark roasts were hitching a ride on my new, expensive light roast. We often overlook the simplest maintenance in favor of complex theories. If your machine is holding onto heat or old residue, your light roast doesn’t stand a chance. We’re going to break down the mechanical and thermal reasons for this “ghost” bitterness so you can finally taste the jasmine notes you were promised. It’s time to stop the cycle of wasted beans and frustrating mornings.
Dialing in the Heat Without Scorching Your Shot
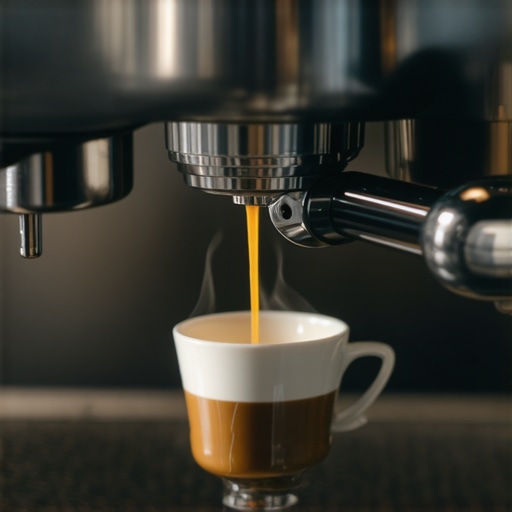
Temperature management is the first line of defense. Think of your espresso machine like a high-performance engine; if you redline it for too long, the components start to warp the output. For light roasts, we often aim for high temperatures—around 200°F to 204°F—to pull out those stubborn sugars. However, if your machine is a heat exchanger or a single boiler, the “idle” water sitting in the group head can easily climb to 210°F. When that flash of boiling water hits your puck, it doesn’t extract fruit; it incinerates the surface. The secret to getting consistent shots on a dual boiler or any machine is the cooling flush. Before you even lock in your portafilter, run the pump for three seconds. You’ll see a brief hiss of steam—that’s the “burnt flavor” leaving the building. Once the stream is steady, you’re ready to brew. I recall a particularly painful Sunday morning where I skipped this. I was hosting brunch and cranking through shots of a delicate Ethiopian Yirgacheffe. By the fourth person, the coffee tasted like liquid smoke. It wasn’t the beans; I had simply let the group head become a furnace. I had to stop and let the machine breathe, a humbling reminder that even the best barista gear requires patience.
Look for the Hidden Heat in Your Grinder
We often forget that friction equals heat. If you are grinding for multiple shots back-to-back, your burrs act like a heating element. Why your grinder burrs are getting hot during a single dose is usually a matter of high-speed friction. This heat transfers to the coffee grounds instantly, beginning an oxidation process before the water even touches them. If your espresso tastes like charcoal, feel the exit chute of your grinder. If it’s warm to the touch, you’re likely scorching your “fines.” These microscopic particles have more surface area and absorb heat faster than the rest of the dose. To counter this, I’ve started using a small spray of water (RDT) to reduce static and keeping my grinding sessions spaced out. If you’re in a rush, you might need to recalibrate how to select the perfect coffee grinder for your brew to one with larger burrs that rotate at lower RPMs to keep the flavor profile intact.
Clean Your Path to Better Flavor
The most common culprit for a “burnt” taste isn’t a setting at all; it’s the ghost of espressos past. Every time you pull a shot, a tiny amount of coffee oil sticks to the shower screen and the internal group head. Over time, these oils bake under the constant heat of the machine. They turn into a bitter, carbonized resin. If you haven’t performed a backflush recently, you aren’t tasting your expensive beans; you’re tasting the charred remains of last week’s dark roast. How to check your espresso machines group head flow rate will often reveal if your screen is clogged with these oils. I make it a habit to use a group brush after every single session. It takes ten seconds but prevents that acrid, rubbery finish from ruining a $30 bag of coffee. You should also look into the best way to clean a grinder without taking it apart to ensure no rancid oils are clinging to the burr housing. When your equipment is spotless, the acidity of the light roast can actually shine through without being masked by mechanical bitterness.
One of the biggest lies we are told as beginners is that you need to press down with exactly thirty pounds of force. I used to keep a bathroom scale in my coffee nook just to practice, which in hindsight, was a waste of time. It’s a total myth. In reality, once you’ve compressed the air out of the puck, the coffee isn’t going to get any ‘denser.’ What actually ruins a shot is an uneven bed, not a light touch. If you’re struggling with wrist pain or inconsistency, look into the simple hack for a more ergonomic tamping position. Whether you are currently debating how to choose between a flat and a rippled tamper base, remember that the goal is a level surface, not raw power. Over-tamping often leads to micro-channels that you can’t even see, which creates those bitter, charred pockets in an otherwise good light roast.
Milk texture is about chemistry, not just bubbles
Another nuance many home baristas miss is the thermal chemistry of milk. We often focus on the height of the foam, but the real magic happens when you break down lactose into simpler sugars through controlled heating. This chemical reaction is the reason your milk tastes sweet without adding sugar. However, if you push the temperature past 155°F, those proteins denature and the sweetness vanishes, replaced by a sulfurous, ‘cooked’ flavor. Even with milk frothers that transform your coffee experience, you have to be vigilant. For those working with plant-based options, there is a specific secret to steaming alternative milks without the bubbles that involves very early aeration and a prolonged vortex. It’s a delicate balance that separates a ‘latte’ from a cup of hot, soapy milk.
Why does your coffee taste hollow despite perfect parameters?
You might be a victim of your own water filtration system. While we all fear lime scale, water that is too ‘pure’—meaning zero Total Dissolved Solids (TDS)—actually lacks the magnesium and calcium ions needed to ‘grab’ the flavor compounds from the coffee grounds. Research published in the Journal of Agricultural and Food Chemistry highlights that specific mineral concentrations are essential for pulling out the bright, floral notes in high-altitude beans. If you have stripped your water of everything, you need to learn how to tell if your water is too soft for brewing. You can spend thousands on top-rated espresso machines, but if your water is chemically ’empty,’ your espresso will always taste thin or metallic. This often leads people to grind finer, which then causes the over-extraction and ‘burnt’ flavors we’ve been discussing.
Avoid the deep clean trap
Finally, there is a common ‘oops’ factor involving maintenance. In an effort to be thorough, I once used a tiny drop of dish soap to clean my group head. Never do this. This is the dish soap mistake that ruined your group head seal and left a lingering chemical taste that no amount of flushing could fix. Furthermore, if you are experiencing a strange tang, it might be the reason your espresso tastes metallic after descaling because the acids haven’t been fully neutralized. Home espresso is as much about chemistry and mechanical maintenance as it is about the beans themselves. Have you ever fallen into this trap or accidentally ‘sabotaged’ your morning shot? Let me know in the comments.
I’ve learned the hard way that a $2,000 machine is only as good as the person who cleans it. Most home baristas wait for a total mechanical failure before they crack open the manual, but the real experts look for the subtle warning signs. For instance, if you hear your pump straining or if your steam pressure feels ‘thin,’ you are already past the point of simple prevention. I personally keep a small logbook next to my setup to track my backflush cycles and burr cleaning. It might sound excessive, but it is the only way to ensure that the jasmine notes stay jasmine and don’t turn into charcoal. If you are starting to notice a drop in performance, you should learn how to tell if your machine boiler is accumulating lime scale before it requires a full teardown.
How do I maintain my espresso setup for the next decade?
The secret to longevity is upgrading the components that actually touch the coffee. I always recommend swapping out your factory-standard shower screen for an IMS Nanotech screen. The specialized coating prevents coffee oils from sticking, which means you won’t have to scrub as hard, and your flow remains perfectly even. Similarly, you need to be proactive with your grinder. Using the best way to clean a grinder without losing your settings will save you from the frustration of wasting half a bag of beans just to get back to your sweet spot. I have seen too many people try ‘hacks’ they found online, but according to Baratza’s official technical documentation, using materials like rice can actually overheat the motor or cause unnecessary wear on the burr carriers. Stick to dedicated cleaning tablets that are designed to bind with coffee oils. If you ever find yourself struggling with the mechanics, knowing how to fix a grinder adjustment ring that is stuck can save you a week of downtime and a costly repair bill.
Looking ahead, the world of home coffee is moving toward extreme precision. I predict that in the next few years, we will see a massive shift toward ‘smart’ thermal profiling. We are already seeing this in the latest top-rated espresso machines, where sensors adjust the water temperature in real-time based on the resistance of the coffee puck. It is an incredible era for anyone choosing the best barista gear for coffee enthusiasts, as the gap between commercial quality and kitchen-counter convenience continues to shrink. However, even the most advanced AI-driven machine cannot compensate for a dirty group head or calcified heating elements. As the Specialty Coffee Association (SCA) Water Quality Handbook emphasizes, the chemistry of your water is the ‘invisible ingredient’ that determines the lifespan of your copper and brass internals. If you aren’t testing your water, you are essentially gambling with your equipment’s future. This weekend, I want you to take thirty minutes to perform a deep clean—pull that shower screen, soak your baskets, and purge your grinder. Your palate will thank you on Monday morning.
The Expensive Lessons Only a Sunk-Cost Hobby Can Teach
After a decade of chasing the ‘god shot,’ I’ve realized that the most frustrating failures are rarely about the beans and almost always about the variables we overlook because they feel too simple. One of the hardest truths I had to swallow was that my water chemistry was sabotaging my extraction long before the pump even engaged. If you are noticing a strange tang, it might be the reason your espresso tastes metallic after descaling. Another ‘lightbulb moment’ for me was realizing that my grind settings weren’t just about size, but about heat management; if your grinder is straining, it’s cooking your coffee. I also learned that why your espresso shot is blonde from the very start often stems from temperature instability rather than just a coarse grind. Finally, remember that your equipment is a living system. If you ignore the small signs of wear, like a stiff dial, you’ll eventually need to know how to fix a grinder adjustment ring that is stuck. Efficiency comes from maintenance, not just upgrades.
The High-Value Toolkit That Saved My Morning Routine
I don’t believe in buying gear for the sake of spending money, but there are a few essentials that radically changed my workflow. First, I stopped relying on the basic metal basket and moved to precision-drilled options which allowed me to experiment with the simple paper filter trick for better bottomless shots for unmatched clarity. Second, I invested in a dedicated maintenance kit—not just a brush, but specific cleaners that avoid the chemical residues that plague many home setups. I also recommend keeping a digital log of your water hardness to ensure you aren’t slowly calcifying your internals. For those who want a deeper dive, I always point people toward the Specialty Coffee Association’s technical handbooks; they provide the scientific foundation that makes mastering the art of home espresso a predictable science rather than a guessing game.
#IMAGE_PLACEHOLDER_E#
Stop Chasing Perfection and Start Chasing Consistency
It is easy to get caught up in the minutiae of pressure profiles and flow rates, but the true joy of coffee is in the ritual itself. Don’t let a single bitter shot ruin your enthusiasm for the craft. The journey of refining your home espresso is a marathon, not a sprint. Every mistake, from a charred light roast to a messy puck, is just data helping you understand your machine better. Take the time to clean your gear, respect the chemistry of your water, and trust your palate over the digital readouts. Have you ever spent an entire morning troubleshooting a shot only to realize it was a simple maintenance fix? Let me know in the comments below.