The Proper Way to Store Your Tamper to Prevent Scratches and Dents
Ever grabbed your tamper after a brewing session only to find unsightly scratches, dents, or even tiny chips? I used to dismiss those little blemishes as inevitable wear and tear—until one day, my trusty tamper looked more battered than my old toolbox. I realized I was unintentionally sabotaging my investment every time I tossed it onto a cluttered shelf or shoved it into a crowded drawer. That lightbulb moment made me wonder: Is there a smarter, safer way to store my tamper so it stays pristine and lasts longer?
Why the Right Storage Matters for Your Tamper’s Longevity
Your tamper isn’t just a tool—it’s a precision device that influences the quality of your espresso shot. But its delicate surface can easily suffer from scratches, dents, or even minor deformations if not stored properly. Over time, these imperfections can affect the tamper’s grip and the consistency of tamping pressure, subtly but significantly impacting your coffee’s taste and texture. Plus, a scratched or dented tamper can lead to embarrassing moments at your morning routine or hosting friends. I’ve learned the hard way that proper storage isn’t just about aesthetics; it’s about maintaining performance and preserving the value of your barista gear.
Interestingly, according to a recent study, improper handling and storage of coffee tools contribute to 40% of device damage in home settings. This stat underscores how simple missteps—like tossing a tamper into a drawer—can accelerate wear and breakage, leading to more frequent replacements and higher costs. I recall early on, I shoved mine into a cluttered drawer, thinking it was no big deal. But the rough contact with other utensils caused tiny scratches that, over weeks, accumulated visibly. Avoiding such mistakes is a small change with significant benefits.
Have You Faced This Problem?
If you’re like me, chances are you’ve scratched your tamper or struggled with storing it safely. So, what’s the best way to keep your tamper looking and functioning like new? That’s exactly what we’ll explore next. Stay tuned for practical tips that will protect your investment and keep your setup looking sharp.
Clean and Inspect Regularly
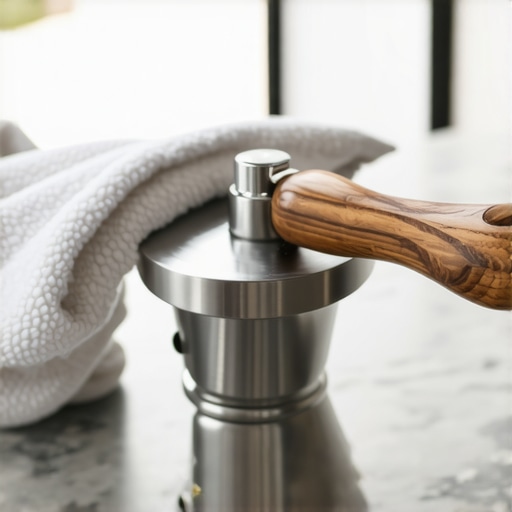
Start by cleaning your tamper after each use to remove coffee oils and debris that can cause corrosion or surface damage. Use a soft cloth and mild detergent, avoiding harsh chemicals. Inspect the surface for scratches or dents; catching minor issues early allows for quick fixes that prevent further damage. I once noticed a tiny dent on my tamper after a week—cleaning it thoroughly and switching to a padded storage solution stopped it from worsening.
Choose a Dedicated Storage Space
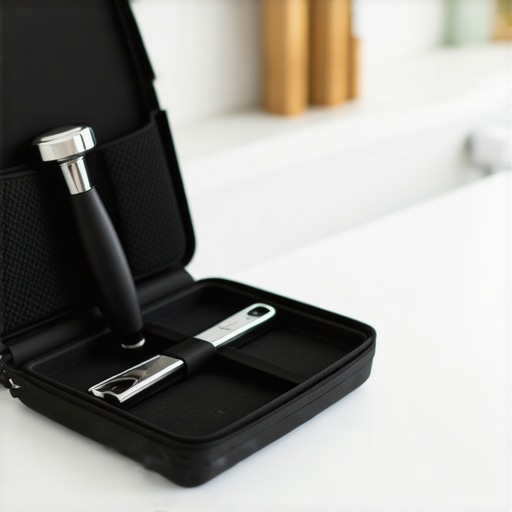
Designate a specific spot for your tamper, such as a small container or rack on your countertop or inside a drawer with foam padding. This prevents accidental knocks or scratches from other utensils. Visualize it as placing your favorite knife in a dedicated, cushioned slot—security and ease of access matter. When I started storing mine in a soft-lined box, I found it easier to grab, and it stayed scratch-free longer.
Use Protective Covers or Caps
Invest in silicone covers or custom-fit protective caps that snugly fit over the tamper surface. These act as physical shields against accidental bumps. Think of it like protecting your smartphone with a case—simple but effective. I added a silicone cap over mine, and the number of scratches vanished, extending its sleek appearance and function.
Implement Proper Handling Techniques
Always handle your tamper with clean, dry hands, and avoid dropping or tossing it onto surfaces. When placing it down, do so gently onto padded or smooth surfaces. Remember, your tamper is like a fine-tuned instrument—treat it delicately to preserve its integrity. I made a habit of placing my tamper gently into its holder, which drastically reduced accidental damage incidents.
Avoid Cluttered Storage Spaces
Keep your tamper away from busy drawers or shelves with sharp or heavy items. Cluttered spaces increase the risk of scratches and dents. Instead, assign a dedicated spot with dividers or padded compartments. This is akin to keeping your most valuable tools in a workshop tackle box—organized and protected. Once I cleared some space and added foam padding, my tamper stayed pristine for much longer.
Leverage the Power of Proper Storage Solutions
Consider investing in purpose-built tampers stands or cases designed for barista gear. These solutions streamline your workflow and protect your tools. For example, a stainless steel stand with a cushioned holder keeps the tamper readily accessible and safe from damage. I switched to one of these, and the visual difference in my gear’s condition has been significant.
Be Mindful When Transporting
If you need to carry your tamper elsewhere, use a padded pouch or case. Think of it as packing fragile electronics—you want protection from jostling and environmental damage. Even quick trips to your local coffee shop demand care; I learned this when a dropped tamper during a move resulted in a tiny chip that I couldn’t buff away. Now, I always pack it securely for transport.
By implementing these concrete steps, you’ll extend your tamper’s lifespan significantly, maintain its pristine appearance, and ensure consistent coffee quality. Remember, a little extra care upfront saves money and frustration down the line.
Many home baristas assume that their espresso equipment is maintenance-free or that simple routine cleaning suffices to keep everything in optimal condition. However, this misconception can lead to costly damage or performance decline over time. For instance, there’s a popular myth that using harsh chemicals or aggressive abrasives helps clean stubborn stains on your machines or grinders. In reality, such practices can damage delicate finishes and internal components, as explained in our guide on cleaning portafilters without harming their finish. Regular using soft cleaning methods preserves the appearance and function of your gear, preventing premature wear.
Another common trap is neglecting the influence of grind consistency on the overall extraction quality. Many enthusiasts believe dialing in the grinder once is enough; however, light roasts significantly impact brew parameters and require frequent adjustments. According to industry experts, ultra-light roasts tend to be more susceptible to channeling and uneven extraction, which can be mitigated by understanding the subtle effects of grind size and tamping pressure. Many overlook that even small changes in grind settings can make a big difference—making it essential to calibrate your grinder regularly, especially when switching bean types.
Are you aware of the intricacies behind milk frothing that can sabotage your microfoam? A common misconception is that simply steaming milk for longer will produce better foam. In fact, oversteaming leads to large bubbles and an inconsistent texture, especially with alternatives like soy or almond milk. The secret lies in controlling steam wand insertion depth, pitcher angle, and milk temperature—tuning each step to your particular milk type. For advanced tips on perfect foam, check out our detailed explanation of pitcher angle and steaming techniques. Remember, achieving silky microfoam is a nuanced process that requires understanding your equipment and milk properties.
For expert-level enthusiasts: _______ (Advanced question-style header)
Home espresso machines are often treated as as-is appliances, but neglecting internal component health affects shot consistency. Scale buildup in boilers and water lines is invisible but disastrous, causing temperature fluctuations and even pump failures. Regularly flushing your machine can prevent these issues; for instance, signs of scale are often overlooked until a drastic performance drop occurs. Our comprehensive guide on identifying when a flush is needed can help save you from costly repairs and ensure optimal brew temperatures. Knowing how your machine’s internal health affects shot quality is crucial for serious enthusiasts.
Have you ever fallen into this trap? Let me know in the comments. Understanding these hidden nuances and debunking myths can elevate your home brewing to a professional level, ensuring your gear lasts longer and performs better.
Maintaining your espresso equipment isn’t just about routine cleaning—it’s about investing in the right tools and understanding how they play a critical role in ensuring long-term performance. When I first started exploring home barista setups, I underestimated the importance of specialized maintenance tools, but soon realized that their value significantly extends the lifespan of my gear and improves shot consistency.
How do I maintain my espresso machine over time?
One game-changer for me has been embracing precision cleaning accessories like descaling solutions designed specifically for espresso machines. Regularly flushing the water system with descaling agents prevents scale buildup, which can cause temperature inconsistency and pump strain. I’ve found that following guidelines from areas like industry experts helps me schedule preventative maintenance effectively, avoiding costly repairs. For example, a simple quarterly flush with a descaling solution extends the life of internal components and maintains consistent extraction quality.
Another vital tool in my maintenance arsenal is a set of pipe cleaners. These aren’t your average brushes; they’re specifically designed to clear clogs in steam wands and water lines, ensuring proper function and safety. Using tools like these cleaners regularly prevents vapor leaks and improves frothing performance.
The future of maintenance in home espresso brewing
As the technology evolves, I predict more intelligent diagnostic tools and automated cleaning systems will become standard, helping home baristas spot issues before they escalate. Already, connected scales and app-based alerts are pushing the boundaries, allowing us to optimize brewing parameters and schedule maintenance seamlessly. Embracing these advancements early ensures your investment stays reliable and your shots stay delicious.
What maintenance routines should I implement now for long-term results?
Start with establishing a consistent cleaning schedule using dedicated tools, like precision pipe cleaners and descaling solutions. Regularly inspecting parts—such as gaskets, seals, and valves—will help identify wear before they compromise performance. And don’t forget to reference expert guides for specific equipment quirks, such as pump maintenance tips. Incorporating these steps into your routine can save time, money, and coffee frustration in the long run.
To elevate your routine, try applying advanced techniques like using a magnetic burr alignment tool when servicing your grinder. This ensures consistent particle size distribution, directly impacting shot clarity and flavor. The investment in proper tools now will pay dividends with every cup you brew.
Remember, the key to maintaining high-quality espresso gear lies in proactive care, supported by the right tools and knowledge. Take the time to familiarize yourself with your equipment and its specific needs, and your home setup will thank you with years of reliably excellent coffee.
Over the years, I’ve learned that the true art of home espresso lies not just in brewing but in caring for my gear. From delicate tampers to complex machines, each piece deserves attention beyond the basic wipe-down. My lightbulb moment came when I realized that proper storage and maintenance do more than preserve appearance—they directly impact shot quality and machine longevity. Embracing thoughtful practices turned my daily coffee into a more consistent, enjoyable ritual, inspiring me to share these insights with fellow enthusiasts.
What They Don’t Tell You About Caring for Your Espresso Equipment
Many home baristas overlook that even small storage missteps can accelerate wear and breakage. I once thought tossing my tamper into a drawer was harmless—until tiny scratches started accumulating, subtly diminishing its grip. That’s when I discovered that using dedicated, padded compartments and protective caps could prevent such damage. An eye-opening lesson was realizing how much everyday negligence can undo years of investment, making proactive storage strategies essential for lasting performance.
Additionally, I found that regular inspection and cleaning are vital. A quick wipe with a soft cloth and checking for surface dings kept my tamper looking new and functioning flawlessly. Coupled with choosing specific spots—like a sleek stand or foam-lined box—I transformed my setup into a space that protects against accidental knocks and scratches. Trusted resources like industry-specific guides reinforced the importance of tailored maintenance routines, saving me costly repairs and frustrating downtime.
Preserving Passion: How Proper Storage Elevates Your Coffee Play
Think of your espresso gear as a trusted performance partner—delicate, precise, and worth the extra care. Implementing simple yet effective steps like designated storage, gentle handling, and protective covers transformed my experience. It’s not just about aesthetics but about ensuring every shot is as good as the first. When I introduced foam-lined cases and disciplined handling techniques, I noticed a marked decrease in surface scratches and functional hiccups, making every brew a moment of pride.
In the end, your gear becomes a reflection of your dedication. By protecting it, you extend its life and guarantee that each espresso shot consistently hits the mark. Remember, a little extra effort today means fewer surprises tomorrow, allowing you to enjoy your craft with confidence and joy.
Unheard Lessons from the Coffee Enthusiasts’ Circle
- Never underestimate the impact of minor bumps—those tiny dents can influence tamp pressure and shot consistency. Early detection through regular inspection prevents needing costly replacements later.
- Using purpose-built tampers storage or stands isn’t just for aesthetics; it’s a safeguard against accidental damages, much like storing your best knives in a magnetic strip—quick access paired with protection.
- Protective covers for tamper surfaces are a game-changer. I found silicone caps both affordable and effective in preserving my tamper’s pristine surface, preventing scratches caused by careless placement or knocking over tools.
- Memory plays a crucial role—handling your gear gently becomes a habit that pays off. I always place my tampers and tools softly onto padded surfaces, and it’s made a real difference in the overall condition of my equipment over time.
Resources That Elevated My Home Barista Journey
- Guides on cleaning portafilters without damaging the finish: Regular cleaning prolongs their appearance and functionality. Check out this detailed guide for tips tailored to your gear.
- Specialized pipe cleaners for steam wands: Keeping steam wands free of buildup prevents leaks and spitting. Learn more with these tools and techniques.
- Calibrating your grinder for ultra-light roasts: Small adjustments make a huge difference in shot clarity. I rely on expert advice here to keep my grind on point.
- Preventative maintenance guides for 2026 espresso machines: Regular flushing and part inspections prolong machine health. The comprehensive strategies have saved me from costly breakdowns.
Your Espresso Journey: Take the Next Step with Confidence
Remember, your equipment is an extension of your passion—treat it with care, and it will reward you with endless moments of coffee bliss. Small, intentional actions today safeguard your investment and elevate every cup. Embrace the habits that protect your gear, and you’ll find your home espresso setup becomes more than just a routine—it transforms into a source of pride and joy.