How to Fix a Wobbly Tamper That Is Ruining Your Leveling
Ever poured a shot of espresso only to find your tamp wobbling or rocking on the puck? Frustrating, right? I remember the first time I watched my meticulously prepared espresso flicker and sputter because my tamper was basically doing a little dance on the coffee bed. It was an eye-opener—literally and figuratively—because I realized that a wobbly tamper could ruin the entire shot, no matter how perfectly I ground or brewed.
If you’ve been battling uneven extraction, inconsistent shots, or that unsettling wobble during tamping, don’t worry. Today, we’re going to fix that wobbly tamper once and for all. I guarantee that once you get this right, your espresso game will level up noticeably.
Why Your Wobbly Tamper Is Sabotaging Your Coffee Quality
The root of the problem often lies in the alignment between your tamper, the coffee basket, and the grinder. A wobble during tamping isn’t just a minor annoyance; it’s an indicator that your setup isn’t optimized. When your tamper wobbles, it creates uneven pressure on the coffee grounds, leading to channeling and under-extraction in one spot while over-extracting in another. Over time, this results in a bitter, sour, or weak shot that leaves you wondering if your espresso machine is malfunctioning.
A common early mistake I made was assuming that a good tamp simply meant pressing down harder. But I learned that the proper technique, combined with the right tool alignment, makes all the difference. Irregular tamping can also be caused by a loose tamping station or uneven distribution of coffee in the basket. Before you start tweaking your grind or dialing in your parameters, it’s worth inspecting the fundamental fit of your tamper!
One could spend hours chasing grind size or temperature adjustments—trust me, I’ve been there. But if your tamper is shaking like a leaf each time, it’s an entirely different issue. The good news? There’s a quick, effective way to fix this that doesn’t require expensive upgrades or complex tools.
Before diving into the how-to, if you suspect your group head or portafilter might be contributing (like having a loose group gasket), it’s smart to check out this guide on detecting issues with your machine’s sealing performance: [How to tell if your machine needs a new group gasket](https://espressotechguide.com/how-to-tell-if-your-machine-needs-a-new-group-gasket). Addressing those foundational problems can also improve the stability of your tamping process.
Now, let’s move on to how you can identify and fix your wobbly tamper to ensure your shots are always smooth and even.
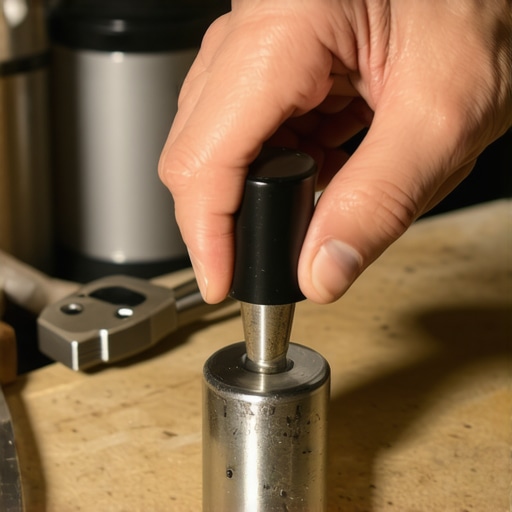
Check Your Tampers Fit Transitioning to the core fix, start by inspecting your tamper’s diameter. Place it into the coffee basket and see if it sits evenly. A loose fit causes wobbling, so ensuring your tamper matches the basket size perfectly is crucial. If there’s slack, consider upgrading to a precision-tamped tool or adjusting your existing tamper with a Teflon sleeve to achieve a snug fit. Remember, a tight fit prevents rocking and ensures even pressure during tamping.Confirm Flatness of Your Tamper and Basket
Next, verify both surfaces are completely flat. Place the tamper on a glass surface and observe for any rocking. Repeat with the basket. If either shows unevenness, carefully sand down the high spots or replace the damaged part. I once used a fine-grit sandpaper on my tamper to smooth out tiny imperfections, which immediately stabilized my tamping process and improved shot consistency.
Align Your Grinder and Portafilter Effectively
Once your tools fit perfectly, look at the entire espresso assembly. An unaligned grinder chute or loose portafilter can transfer instability. Secure the portafilter head by replacing worn gaskets—this helps lock it firmly in place, avoiding unnecessary movement during tamping. For more, see this guide on sealing your portafilter properly: How to tell if your machine needs a new group gasket. Also, ensure your grinder chute isn’t clogged or misaligned, which can cause uneven grounds distribution and affect tamp stability.
Stabilize Your Tamping Station
Place your espresso setup on a stable, level surface. If your workstation wobbles, use a damp cloth under the machine or invest in a rubber mat. For an added layer of stability, consider tightening the screws on your tamping station or the espresso machine’s base. A firm foundation minimizes movement, reducing wobbling during tamping. I fixed my wobble by switching to a thicker rubber mat, which provided enough grip and eliminated instability during tamping—immediate improvement in shot quality.
Apply Consistent Tamping Pressure
Now that your setup is stable, focus on how you tamp. Use a calibrated tamper with a flat surface—if yours isn’t, refurbish or replace it. Grip the tamper handle firmly and press straight down with consistent force—about 30 pounds is ideal. Practice this motion until it becomes second nature, ensuring a level, stable tamp each time. Remember, pressing harder won’t improve extraction; consistency does. I used a kitchen scale to calibrate my tamping pressure, which helped me develop a repeatable technique and saw immediate improvements in shot flavor and drip uniformity.
Test and Fine-Tune Your Technique
Finally, after completing these adjustments, test your setup by tamping a shot. Observe the tamp for wobbling or tilting. Confirm the puck’s evenness—if all looks good, proceed to brew. If wobbling persists, recheck each component—tighten loose parts, reseat the tamper, or try a different basket or tamper. Remember, small adjustments can make a big difference. Once perfected, you’ll notice your espresso pouring with a rich crema, a sign your tamping is solid, and your overall setup is optimized.When it comes to home espresso setups, there’s a lot of misinformation floating around—some rooted in tradition, others in marketing hype. Let’s dig deeper into the nuances and debunk some common myths that can trip up even seasoned enthusiasts.
Believing the Bigger Grinder is the Better Grinder
Many assume that a larger grinder with bulky burrs automatically produces superior espresso. However, size isn’t everything. What truly matters is burr quality, grind consistency, and calibration. An oversized grinder with poorly aligned burrs can create uneven particles, leading to inconsistent shots. Research shows that burr alignment and material quality significantly influence extraction; see this guide on why your grinder burrs need to settle after use. Instead of chasing larger equipment, focus on precision and regular maintenance.
Beware of Over-Complicating Your Milk Frothing Process
There’s a misconception that advanced milk frothers with multiple settings yield better microfoam. While features can help, many users falter by not understanding proper steaming techniques. For instance, using soy milk on high-temperature settings without cleaning your frother can cause sputtering and inconsistent foam. Plus, the myth that only expensive frothers produce silky microfoam ignores the fact that technique trumps equipment. Check out this simple fix for failed frothing on soy milk to improve your results without splurging.
The Hidden Trap: Relying on Factory Settings Without Calibration
Most home baristas accept their machine’s factory calibration as gospel. But even premium machines often need fine-tuning. The datum is that calibrated settings, like PIDs, markedly impact consistency. For example, a poorly calibrated boiler can cause temperature swings, leading to sour or bitter shots—see this article on why your boiler scale could be hurting your brewing. Regular calibration, informed by expert advice, ensures stable temperature and optimal flavor. Skipping this step is a common mistake that can undermine your entire setup.
Are Milk Frothers Compatible with Non-Dairy Alternatives? Here’s Why It Matters
Many assume all milk frothers perform equally well across different milk types. But, in reality, non-dairy options like almond or oat milk vary significantly in how they foam. Some electric frothers fail on soy or almond milk due to formulation differences, leading to large bubbles or spattering. Understanding these nuances—like the impact of fat and protein content—can save you time. Check out this link for a simple fix to common soy frothing issues. Knowing your equipment’s compatibility helps you achieve consistently good microfoam, no matter your choice of milk.
Keeping Your Barista Setup in Peak Condition
Maintaining your coffee gear isn’t just about prolonging its lifespan; it’s about ensuring every shot delivers consistent quality. I personally swear by a few specialized tools that make routine maintenance straightforward and effective. For instance, a dedicated burr cleaning brush like the Kaffeeklatsch espresso grinder brush helps me remove fine grounds lodged deep within the burrs—something that a generic brush can’t match.
Another invaluable tool is a portafilter gauge, which I use monthly to check for seal leaks or worn gaskets. Regularly inspecting the gasket condition can prevent pressure leaks and ensure your shots aren’t compromised. If you notice any deterioration, don’t wait until your machine leaks or loses pressure—address it promptly. In fact, checking the gasket’s health is crucial; you can learn how to do this effectively in this guide on detecting gasket failures.
For the more technical side, I recommend using a calibrated pressure tester for the steam wand. Over time, mineral deposits or wear can reduce steam pressure, affecting microfoam quality. Regular testing like this can save you from unexpected freestyle steaming failures.
Looking ahead, the trend is shifting toward smart maintenance tools equipped with IoT capabilities. Imagine your espresso machine alerting you when a component needs replacing or advising on descaling schedules via an app—saving time and preventing costly repairs.
Wondering how to keep your grinder’s performance consistent? The secret is in the regular cleaning of the chute. A quick 5-second routine with a brush or compressed air not only keeps your grind uniform but also prolongs burr life.
How do I maintain my espresso gear over time?
To keep your equipment running smoothly, establish a routine cleaning schedule based on usage. For grinders, daily brushings and fortnightly deep cleanings prevent clogging and preserve burr sharpness. For machines, descaling at least every three months and replacing gaskets annually will maintain optimal pressure and temperature stability. Seasonal inspections of water lines and seals help catch minor issues before they escalate into costly repairs. Remember, investing in quality tools for maintenance pays off by reducing downtime and elevating shot consistency. For instance, using a specialized descaling solution ensures mineral buildup doesn’t choke your boiler, which you can read about in this detailed guide.
Encouraging long-term excellence, I recommend trying the advanced habit of calibrating your grinder’s zero point every few months, especially if you’re experimenting with light roasts. This simple step can significantly improve particle size consistency, leading to more predictable extractions. If you’re unsure how to do this, check out this article on grinder zero calibration techniques. With the right tools and routine, your home setup can rival professional standards, turning every brew into an artful experience.
The Most Unexpected Lessons from a Wobbly Tamper
One of the most eye-opening experiences in my barista journey was realizing how a simple wobble in tamping could undermine my entire espresso game. I learned that consistent, stable tamping isn’t just about technique—it’s about understanding the subtle nuances of your tools and setup. That realization pushed me to pay closer attention to fit, flatness, and stability, transforming my shots from inconsistent to café-quality.
Another revelation was discovering that tiny adjustments, like bedding down a loose gasket or leveling a tilted tamper, could drastically improve extraction. These small but impactful fixes taught me that mastery often lies in the details—details that are often overlooked but are vital for those seeking espresso perfection.
Most importantly, I understood that patience and curiosity are your best allies. Every wobble, every uneven shot, is an opportunity to learn more about your gear and your technique—turning challenges into stepping stones toward excellence.
My Secret Tools for Long-Term Espresso Excellence
Over the years, I’ve curated a toolkit that keeps my setup at peak performance. A precision tamper with a flat, smooth base ensures even pressure, and I trust my grinder chute brush to prevent grounds build-up, which can compromise tamp stability. Regular gasket inspections, guided by insights from detection tips, help me avoid pressure leaks that cause wobbly shots.
For aligning components, I swear by a tiny magnet trick that keeps my dosing funnel secure, and I routinely test my boiler’s temperature stability with a calibrated gauge—because consistency in heat means consistent shots. These tools, combined with regular cleaning routines, make all the difference in elevating my home espresso experience.
Your Next Step Toward Espresso Certainty
Now, it’s your turn to take control. Remember, creating a stable tamp isn’t about high-tech gadgets or expensive setups—it’s about nurturing an understanding of your equipment and cultivating patience. Every small tweak and attentive habit compounds over time, resulting in shots that not only taste better but also boost your confidence as a home barista.
Get out there, experiment with your setup, and embrace the journey of brewing mastery. The espresso world is filled with endless learning opportunities, and each perfect shot is a step closer to that barista-level experience you desire. Keep pushing your boundaries, and you’ll be surprised at how quickly your skills sharpen and your favorite beans shine.