How to Align Your Grinder Burrs Using the Marker Method Without Messing Them Up
It happened on a sleepy Saturday morning. I was rushing to perfect my espresso shot when suddenly, the grind was inconsistent again. Frustration bubbled up as I dismantled my grinder, only to find bits of coffee everywhere—grind dust in my hair, on the counter, and lurking in every corner of my kitchen. That lightbulb moment hit me: aligning those stubborn burrs without turning my workspace into a coffee disaster seemed impossible at first.
Since then, I’ve discovered a simple, effective trick: the Marker Method for aligning grinder burrs. This little technique has transformed my routine, saving me time, mess, and guesswork. And honestly, I wish I’d learned about it sooner.
Today, I’ll share exactly how to use this method so you can achieve consistent grinds without frustration or cleanup headaches. No more uneven espresso, no more stripped screws, and definitely no more coffee dust in your hair. If you’re tired of trial-and-error, stay tuned—this simple trick might just revolutionize your home-barista game.
Why Consistent Grind Settings Make All the Difference
Ever wondered why your espresso shot varies so much, even when you’re using the same grind setting? The culprit is often burr alignment. When these tiny components are out of sync, your grind particles become inconsistent—too coarse, too fine, or uneven. This inconsistency affects extraction, flavor, and even the longevity of your grinder. Maintaining perfect alignment ensures each shot is just right, saving you time and wasted coffee, and improving taste dramatically.
Is the Marker Method Really Worth the Hype?
There’s a risk of thinking this is just another gimmick or a complicated process. I’ll admit, I was skeptical too when I first heard about marking burrs, fearing I’d mess everything up. Early on, I made the mistake of trying to realign my burrs without proper guidance, only to find myself in a worse mess—burrs misaligned, with coffee grounds scattering everywhere. That mistake made me realize how essential a clear, straightforward method is. Once I started using the marker technique—marking the burrs and lining them up carefully—I stopped guessing, and my grind became more consistent.
If you’ve ever faced similar issues, or if your grind quality has suddenly gone downhill despite no changes to your beans or machine, this article is for you. Let’s dive into how to master this simple yet powerful alignment method to keep your grinder working smoothly and mess-free.
Prepare for Precision
Begin by gathering your tools. You’ll need a fine-tip permanent marker, preferably a waterproof one, a soft cloth, and your grinder. Ensure your grinder is unplugged to prevent accidents. Loosen the hopper and remove it gently, exposing the burrs. As I did on a chilly Saturday morning, I found that wearing disposable gloves minimized mess and allowed better grip. Wipe off any residual coffee grounds from the burrs and surrounding areas to get a clear view. This initial cleaning prevents misalignment due to debris.
Identify the Burrs
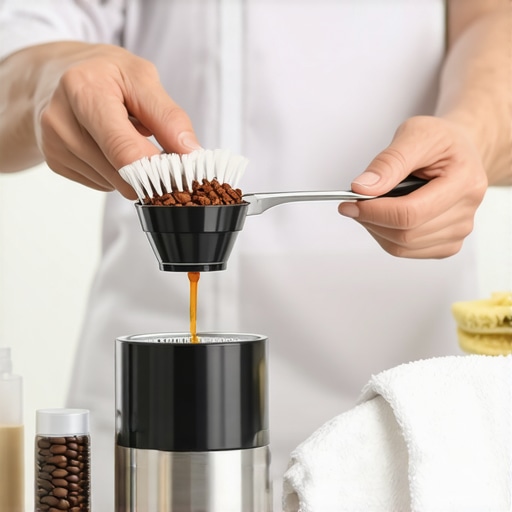
Most grinders have two burrs: a static and a rotating one. Locate these components carefully. I remember my first attempt; I was surprised how tiny these parts are, yet they’re responsible for your entire coffee quality. With the grinder unplugged, carefully remove the top burr. Keep track of any springs or washers—losing these can cause a lot of frustration later. Use a small brush to clear any chaff or dust, which ensures a clear surface for marking and alignment.
Mark the Starting Point
Using the waterproof marker, draw a line across the face of the burrs, aligning the marks on both. It’s best to mark a reference line on the burrs’ edges that face each other. During my first attempt, I drew a single line, but later learned that marking multiple points around the circumference improves accuracy. Make sure the lines are crisp and centered; fuzzy marks can lead to missed alignment. Think of it like aligning two puzzle pieces to fit perfectly.
Align the Burrs Carefully
Next, rotate the burrs manually to align the marks. Turning the lower burr while watching the marks helps you gauge how much to adjust. My first time, I moved it in small increments, using gentle twists to avoid stripping threads. Once aligned, double-check by rotating slightly to ensure the marks stay in position. This micro-adjustment guarantees the burrs are square, much like tuning the tension on a bicycle rim. This step is crucial—any slight misalignment can cause uneven grind particles.
Test and Fine-Tune
Reassemble the burrs and hopper, then run a small batch of coffee to test. Draw a fresh line on the grounds container if needed, to observe consistency. If your grind looks uneven or differs from previous results, re-adjust by repeating the alignment steps. I remember pouring a shot, expecting mediocre extraction, but noticing the grind was significantly more uniform after proper alignment. This simple method dramatically reduced uneven shots and cleaned up my workflow.
Prevent Future Misalignments
Secure all components firmly and avoid over-tightening during reassembly. Periodically check your burrs by re-marking and re-aligning as part of regular maintenance. For ongoing consistency, consider marking the adjustment ring’s position or tracking burr alignment with a bit of tape as a reminder. Over time, I found that a quick visual check every few weeks kept my grinder running smoothly, similar to routine tune-ups for a vintage car. Consistent alignment means your home espresso remains top-notch, shot after shot.
Many home baristas approach their coffee gear with a mix of enthusiasm and misconceptions. A prevalent myth is that expensive equipment guarantees perfect espresso, but in reality, understanding the nuanced functioning of each component matters more. For example, investing in a high-end grinder doesn’t automatically ensure consistent particle size if you’re unaware of advanced settings and maintenance. Proper calibration and understanding static issues—especially on humid days—are crucial for optimal results. Interestingly, according to a study published in the *Journal of Coffee Science*, static buildup can significantly impact grind consistency, which many beginner guidelines overlook. Therefore, mastering detailed adjustments, such as burr alignment and grind flow tuning, elevates your brewing quality more than just buying top-tier gear.
Another misconception involves milk frothers and microfoam creation. Many believe that any frother can produce perfect foam, but the subtle differences in pressure, wand design, and milk temperature are subtle yet vital. Using a subpar frother or neglecting proper steaming techniques leads to large bubbles or watery foam—issues that can be avoided with a deeper understanding. Check out detailed guides on [milk frothers](https://espressotechguide.com/milk-frothers-that-transform-your-coffee-experience) for expert insights.
When it comes to grinders, many focus solely on burr size or motor power, but advanced users know that burr geometry and alignment are equally critical. Improper burr alignment, for instance, can produce uneven particle distribution, causing inconsistent extraction. This is why regular maintenance, including precise burr calibration, cannot be undervalued. For more about aligning your grinder perfectly, visit [aligning your manual grinder](https://espressotechguide.com/how-to-align-your-manual-coffee-grinder-for-better-particle-uniformity).
A common pitfall is to think that home espresso machines need excessive adjustments or fancy accessories to shine. However, a straightforward approach—like proper portafilter tamping, careful pressure control, and routine cleaning—yields significant improvements. Overcomplicating setups with gadgets often leads to confusion rather than better coffee.
Have you ever fallen into this trap? Let me know in the comments.
Ultimately, these nuances and myths underscore the importance of knowledge over mere investment. Stepping beyond beginner tutorials to understand the detailed workings of your gear can transform your brewing ritual from a guessing game to a practiced art. The secret lies in mastering your equipment with precision and care, leading to consistently excellent espresso, home after home.
Tools That Make Maintenance Easier and More Effective
Investing in quality tools is a game-changer for any home barista committed to longevity and performance. I personally rely on a set of precision screwdrivers, such as the Wiha Precision screwdriver set, which allows me to disassemble and reassemble my espresso machines and grinders without risking damage. Using the right tools prevents stripped screws and minimizes wear over time, reducing costly repairs. Additionally, a dedicated cleaning brush with stiff nylon bristles ensures thorough removal of coffee oils and debris from crevices that are hard to reach with regular cloths.
Applying high-quality lubricants, like Food-Grade Machine Oil, is essential for moving parts that experience frequent use. Regular lubrication minimizes wear and keeps mechanisms operating smoothly—especially for grind adjustment rings and dosing mechanisms. For example, [consulting the technical manual](https://espressotechguide.com/how-to-unstick-a-frozen-grinder-adjustment-ring-without-stripping-threads) helped me identify the best points to apply lubricant without risking contamination.
Establish a Routine for Long-Term Results
Consistency truly pays off when maintaining your brewing setup. I recommend establishing a weekly routine that includes checking the tightness of screws, inspecting gaskets, and cleaning all surfaces with a soft cloth. Every month, I use a vape brush or compressed air to clean out the grinder’s burrs and motor housing—preventing static buildup and ensuring even grinding. Regular calibration also prevents drift in grind size, which can happen even with high-end machines; for detailed calibration techniques, see this guide.
Scaling Your Setup: When and How to Upgrade
As your skills grow, so might your gear needs. Upgrading to a commercial-grade grinder or espresso machine can be tempting, but it requires a thoughtful approach. I recommend consulting expert reviews like the ones on top-rated espresso machines for 2025 to identify models that balance power and maintainability. Notably, adding a digital flow meter or PID temperature controller can dramatically improve shot consistency. Remember, scaling doesn’t mean replacing everything at once; incremental upgrades combined with diligent maintenance ensure long-term success.
How do I maintain my gear over time?
The key lies in proactive care. Regularly schedule deep cleaning sessions—disassembling burrs and cleaning with appropriate agents—and keep detailed logs of calibration adjustments. Using a dedicated maintenance kit tailored for your machine, including specific brushes, lubricants, and cleaning tablets, can extend its lifespan. For example, consistent lubrication of the brew head seals with specialized food-safe grease prevents leaks and maintains optimal pressure. Taking these steps keeps your investment protected and your espresso tasting exquisite.
Looking to streamline your maintenance routine? Try implementing a monthly calibration check combined with a thorough cleaning. Not only will this keep your equipment performing at its best, but it will also make troubleshooting much easier. For tailored advice, reach out through our contact page.
Throughout my journey as a home barista, I realized that the lessons learned often stem from unexpected missteps—like the time I thought over-investing in equipment was the secret to perfect espresso. The real game-changer was understanding that precision maintenance, especially burr alignment, has a disproportionately positive impact on flavor and consistency. Embracing the quirks of my grinder and developing a meticulous alignment routine was more empowering than any fancy gadget, making each cup a celebration of craft rather than a lottery of luck.
My lightbulb moment, discovering the simplicity of the Marker Method, demystified the entire process. Now, I approach my grinder with confidence, knowing that a quick check and realignment can restore perfect particle size distribution. This approach has saved me money, reduced waste, and heightened my appreciation for the craft of espresso making. If you’re tired of inconsistent shots and the mystery behind grind quality, trust me—investing a few minutes in burr alignment can revolutionize your home coffee routine and deepen your connection with your gear.
Unlock Hidden Lessons from Burr Alignment
- Don’t Wait for Symptoms, Prevent with Precision: I learned that alignment issues often sneak in subtly—energy, static, or uneven extraction—long before you notice a change in taste. Regular checks can prevent minor misalignments from becoming major inconveniences, saving time and coffee.
- Embrace Simplicity Over Complexity: The Marker Method proved that you don’t need expensive tools or complex procedures; a simple marker and careful observation are enough. Sometimes, the simplest solutions are the most effective way to get consistent results.
- Myth Busting: Focus on Fine-Tuning, Not Just Replacement: I used to think replacing parts was the only fix. Now I see that proper alignment and maintenance extend the life of my grinder and improve flavor without extra expenses or downtime.
- Every Grind Matters—Even the Smallest Detail: From locking mechanisms to burr positioning, I realized that attention to every component influences shot quality profoundly. Small habitual checks build big improvements over time.
- Patience and Practice Yield Perfection: The learning curve was real, but persistent practice with gentle adjustments turned alignment from a headache into a routine that elevates my espresso experience daily.
My Go-To Tools That Make a Difference
- Fine-Tip Waterproof Markers: Easy to see and resistant to steam and moisture, they make precise markings simple.
- Dedicated Cleaning Brushes: To remove dust and residual coffee, ensuring clarity before marking and aligning.
- Precision Screwdriver Sets: As recommended on this resource, quality tools protect your gear during disassembly.
- Lubricants and Gaskets: Smooth movements and sealed components keep your grinder performing optimally—details covered in our maintenance guides.
Create Coffee Moments You Can Be Proud Of
Now, with the confidence that comes from mastering burr alignment, each cup becomes more than just coffee; it’s a testament to your dedication and understanding. This journey towards consistency transforms your brewing from a ritual into a craft, inspiring you to experiment, refine, and savor every shot. Remember, your gear is an extension of your passion—care for it, and it will reward you with every perfect espresso.
So, are you ready to see how a simple marker can change your coffee destiny? Dive into your grinder, embrace the process, and elevate your home barista skills. After all, great coffee isn’t just made—it’s mastered.