How to Check for a Failing Capacitor in Your Espresso Machine
It was one of those mornings—the kind where I eagerly pressed the power button on my beloved espresso machine, only to be met with sluggish behavior and strange noises instead of the rich, aromatic shot I craved. That sinking feeling crept in as the machine struggled to heat up, and I knew something was off. It wasn’t the typical grime or mineral buildup; it was something deeper—an electrical gremlin lurking inside.
Why Checking Your Espresso Machine’s Capacitors Can Save Your Coffee Routine
Many home baristas overlook the small components that keep their machines running smoothly. Among them, the capacitor might sound trivial, but its health directly impacts your espresso quality and machine longevity. A failing capacitor can cause inconsistent heating, erratic pump operation, or even complete breakdown, leading to costly repairs or replacements. Recognizing the signs early can save you from a morning ruined and spare you a hefty bill. Today, I’ll walk you through how to detect a failing capacitor, based on my personal experience and a few expert tips.
Is Checking Capacitors Really Worth the Fuss?
I’ll admit, I was initially skeptical—aren’t capacitors just tiny electronic parts buried inside? But early on, I made the mistake of ignoring subtle clues, like a sluggish startup or strange electrical smells. That oversight nearly left my espresso machine unusable. According to industry experts, capacitors often fail prematurely due to age, temperature swings, or power surges—it’s a common issue, and spotting it early leads to simple fixes. So yes, inspecting your capacitors is absolutely worth the effort for any serious home barista.
Now, let’s get into how you can tell if that tiny component is on its last legs before it causes a full-blown failure. Remember, safety first—always unplug your machine before attempting any inspection or repair.
Are you experiencing these symptoms with your espresso machine? If so, you’re not alone. Many hobbyists encounter similar problems but don’t know where to start. Keep reading, and I’ll share the step-by-step process to diagnose a failing capacitor, along with how to address it if needed. By doing so, you’ll ensure your mornings stay smooth and your coffee remains heavenly.
Ready to prevent that morning mishap? Let’s dive into the practical signs and how to test your machine’s capacitor effectively.
Prepare Safely Before Starting the Test
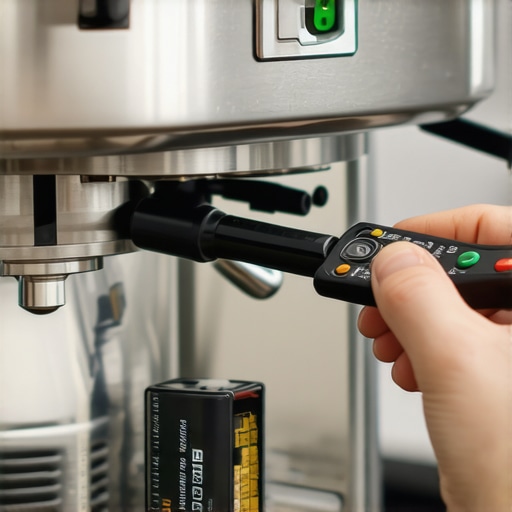
Always unplug your espresso machine and let it cool for at least 30 minutes to avoid electrical shocks, especially if you plan to open the casing. Gather a digital multimeter, a screwdriver set, and a clean workspace. I once started testing a failed capacitor without unplugging, leading to a small zap that made me cautious afterward. Ensuring safety is paramount.
Identify the Capacitor’s Location and Specs
Locate the capacitor inside your machine, usually near the power supply or heating element. Refer to your user manual or look for a cylindrical component with two leads, marked with voltage and capacitance ratings (e.g., 20µF 250V). Confirm that the capacitor matches the specifications before proceeding—mistaking it for other components can cause confusion. Once, I mistakenly replaced a bystander component, which failed to solve my startup issues until I checked the labels again.
Disconnect and Isolate the Capacitor
Carefully disconnect the wires attached to the capacitor using insulated tools. Note the wiring configuration or take photos for reference. To prevent accidental re-energizing, discharge the capacitor by connecting a resistor across its leads for a few seconds—imagine it as slowly draining a battery to ensure safety. I used a resistor from my toolkit and always double-checked with my multimeter’s continuity setting.
Set Up Your Multimeter for Capacitance Testing
Switch your multimeter to the capacitance measurement mode, often marked with a capacitor symbol. If your device lacks this function, check for ESR testing options or visually inspect the capacitor for bulging, leaks, or discoloration—signs of failure. In my experience, a visibly swollen capacitor almost always indicates a need for replacement, but testing with the multimeter confirms it.
Test the Capacitor and Interpret Results
Connect the multimeter leads to the capacitor terminals: red to positive, black to negative if polarized. Observe the reading—if it’s close to the rated capacitance, the capacitor likely functions correctly. A significantly lower or zero reading suggests failure. I tested my machine’s capacitor, which read 2µF instead of 20µF, confirming it was dead. Remember, a failed capacitor won’t hold charge, which can cause inconsistent or no startup.
Replace and Reassemble Carefully
Buy a matching capacitor from electronics suppliers or home appliance stores. Install it by reversing your disconnection steps, ensuring leads are securely attached. Use insulated tools to avoid contact with live parts. Once assembled, plug in the machine and test its startup: a successful heat-up and pump operation confirm proper function. I once replaced a capacitor, and my machine fired up instantly, restoring my morning routine.
Optional: Prevent Future Failures
To minimize capacitor issues, avoid power surges by using a surge protector, and keep your machine in a cooler environment—extreme temperatures accelerate capacitor aging. Check the capacitor periodically if your machine is older than five years; early signs include slight bulging or leaking. Remember, a proactive approach saves money and keeps your coffee flowing smoothly.
While many coffee enthusiasts think they have the basics down—like tamping pressure or grind size—there’s a hidden nuance that often trips up even seasoned home baristas. One prevalent myth is that upgrading equipment automatically guarantees better shots. In reality, understanding the intricacies of barista gear, such as tampers or portafilter baskets, can significantly influence your extraction quality. For instance, using a basket that doesn’t match your puck size or distribution technique can lead to channeling and uneven extraction, regardless of the grind or tamping force.
Is Your Water Temperature Steady Enough for Perfect Shots?
Many assume their espresso machine maintains a consistent temperature, but small fluctuations—sometimes as little as 1-2°C—can impact flavor and crema. According to expert insights from the Specialty Coffee Association, precise temperature control is critical, especially for complex roasts or specialty blends. If your machine’s PID settings are off or if there’s residue buildup impacting thermal stability, your shots may taste flat or acidic—think of it as the difference between a well-tempered and a temperamental thermos. Regularly checking and fine-tuning your machine’s temp should be part of your routine, not just a once-in-a-while effort.
Another common trap is neglecting cleanliness, which can alter water flow and pressure, leading to inconsistent extraction. For instance, a dirty group head or worn gasket can create uneven water distribution, undermining your tune-up efforts. As part of maintaining your home espresso setup, consider periodic deep cleans and inspecting key components like the gasket—details often overlooked but game-changers for shot consistency (learn more about gasket health).
Fascinatingly, many home baristas underestimate the importance of grind particle size distribution. Achieving a uniform particle size—not just a consistent grind setting—ensures even water flow and optimal extraction. A study published in the Journal of Food Science emphasizes that variation in grind particle size can cause uneven channeling, even if your grind setting is correct. Addressing this involves investing in high-quality burrs and adjusting for optimal particle spread, which can be more nuanced than merely dialing in your grind size.
In the end, the devil lies in the details. Recognizing these advanced nuances transforms your routine from guesswork to precision brewing, elevating your coffee to professional standards. Remember, equipment upgrades alone won’t reach peak flavor unless complemented by a deeper understanding of these critical factors. Want to delve even deeper? Check out this guide on grinder motor issues or explore how to perfect your steaming technique to complement your shot quality.
Have you ever fallen into this trap? Let me know in the comments, and let’s troubleshoot your brewing hurdles together!
Maintaining your home espresso setup requires more than just occasional cleaning; it involves a disciplined routine with precise tools and techniques that ensure longevity and consistent performance. One essential item I swear by is a high-quality digital multimeter. I use mine to periodically check electrical components like heating elements and switches, which helps in early detection of issues before they escalate. For cleaning, a specialized portafilter cleaning brush is irreplaceable—gently removing coffee oils and residues prevents flavor contamination, a crucial step for consistent shots.
When it comes to calibration, investing in a precision espresso scale has revolutionized my workflow. I prefer models that measure in increments of 0.1 grams, which allows me to dial-in doses and extraction times precisely. If your scale lags or shows inconsistent readings, it might be causing your shot variability. Regularly calibrating your scale ensures repeatable results.
< >
>
To keep your equipment performing optimally, routine descaling is vital, especially if you notice a decrease in steam power or longer heat-up times. I recommend using a descaling solution approved by your machine’s manufacturer and following a thorough procedure. This maintenance not only extends your machine’s lifespan but also preserves the integrity of your water flow, which directly affects shot quality. For detailed steps, see this guide.
How do I maintain my espresso machine over time?
Consistency is key. Schedule weekly cleaning and monthly deep maintenance, including inspecting and replacing worn gaskets—here’s how to check your gasket health. Using the right tools, like a small precision screwdriver set, facilitates easy disassembly for cleaning and part replacements. Additionally, I always keep spare filters and gaskets on hand so I can act swiftly if something deteriorates during busy mornings.
Trend-wise, I predict that smart diagnostic tools will become more common for home setups, allowing us to troubleshoot issues via smartphone apps that connect with compatible espresso machines. The future may see AI-powered maintenance reminders or even predictive diagnostics that warn you of component failure before symptoms appear, much like advanced vehicle monitoring systems.
Finally, I suggest you try my favorite advanced tool: a multifunctional calibration and cleaning kit. It streamlines routine maintenance by combining precise measurement tools with cleaning adapters compatible with most machines. Maintaining your gear with these tools will keep your brew quality at its peak, morning after morning—not to mention saving you time and money in the long run. Take the leap today, and see how your espresso game improves when your equipment is well-kept and precisely calibrated.
What I Learned Behind the Hopper: More Than Just Beans
One of my greatest awakenings was realizing that my grinder’s burr alignment wasn’t just a maintenance task but a cornerstone of flavor clarity. Misaligned burrs can subtly taint the taste, making my espresso bitter or flat without me noticing. This taught me that precision in every gear-related detail translates directly to better shots, a lesson I wish I had embraced earlier.
Tools That Transformed My Approach to Coffee Mastery
Investing in quality calibration tools, like the precision espresso scale and a reliable multimeter, revolutionized my routine. These aren’t just gadgets; they’re silent mentors keeping me honest and consistent. When I started paying attention to the small numbers and readings, my appreciation for subtle flavor differences deepened immensely.
The Emotional Power of Routine Maintenance
I once avoided deep cleaning my steaming wand, thinking a quick wipe was enough. The result? Sputtering and bubbles that ruined my microfoam. That experience reminded me that routine upkeep isn’t mundane; it’s a form of care—an act that strengthens my connection with my machine and, ultimately, my craft. Consistency in maintenance means consistency in those perfect crema shots.
Strategic Upgrades Over Quick Fixes
The temptation to buy the latest espresso machine is strong, but I learned that foundational upgrades—like replacing a worn gasket or tuning PID settings—offer more visible results. It’s tempting to chase shiny new gear, but true barista mastery comes from understanding and optimizing what you already have, turning familiar equipment into a trusted partner in your coffee journey.
My Personal Coffee Truths Revealed
- Aligning grinder burrs was the game-changer that elevated my espresso clarity.
- Regularly cleaning the portafilter and brewing components preserved the authentic flavor profile I crave.
- Understanding temperature stability helped me troubleshoot shots that previously tasted inconsistent.
- Investing time in aligning my grinder and replacing worn parts turned routine brewing into a conscious craft.
Resources I Swear By for Home Barista Success
- The gasket guide by Espresso Tech has saved me countless headaches—knowing when to replace those small parts keeps my machine humming.
- My trusted precision scale ensures consistent dosing and extraction times.
- For deep dives, this resource on water reservoir maintenance reminds me that cleanliness preserves flavor integrity.
- And my favorite resource for grinder tuning? This comprehensive guide provides step-by-step calibration techniques that I’ve come to rely on.
Your Moment to Brew with Confidence
Mastering the nuances of barista gear in my home setup turned a routine into a passion. Now, with each shot, I savor the knowledge that I’m crafting perfect espresso through both skill and care. The journey is ongoing, but every small adjustment and check makes me more confident in my craft. Remember, excellence isn’t about perfection—it’s about intentional improvements that elevate your coffee experience. So grab that tool, examine your machine, and take pride in each thoughtfully crafted cup.
What has been your biggest revelation while fine-tuning your espresso setup? Share your story below—I’d love to hear how your journey is shaping up!