How to Fix a Stripped Thread on Your Portafilter Head
I vividly remember the moment I realized I’d stripped the thread on my portafilter. I was eagerly preparing my morning espresso, only to find that the portafilter wouldn’t lock in properly. Frustration washed over me—how could a tiny thread cause such a headache? But hey, I’ve been there, and it’s a surprisingly common mishap for home baristas and espresso enthusiasts alike. Rest assured, this isn’t the end of your espresso dreams. Today, I’ll share practical, friendly advice on how to fix that stripped thread and get your machine back in shape, so you can enjoy flawless shots without the fuss.
Why Your Stripped Threads Could Be Sabotaging Your Coffee Experience
If you’ve ever had difficulty securing your portafilter, chances are it’s because of worn or stripped threads. Over time, especially with frequent cleaning or mis-timed force, these tiny metal rings can wear down or become damaged. When threads are compromised, your portafilter may wobble, leak, or just refuse to lock in, ruining your shot and making a mess. This situation becomes even more frustrating if you’re deep into perfecting your grind or temperature calibration. Ignoring the issue can lead to uneven extraction, bitterness, or even damage to your espresso machine. But don’t worry—knowing how to fix or replace these threads can save you money and preserve your daily ritual.
**Have you faced the problem of a loose or stuck portafilter that just won’t cooperate?** If so, you’re not alone. Many home baristas find themselves in this bind, especially after years of regular use. The good news is that resolving a stripped thread isn’t as complicated as you might think. With some patience and the right instructions, you can restore your portafilter’s grip and continue brewing the perfect espresso.
Is Fixing a Stripped Thread Actually Worth the Time?
Now, I know what you might be thinking: “Isn’t replacing the entire portafilter easier?” In many cases, yes, but often, a simple fix can save you money and help you learn more about your equipment. Plus, I’ve made early mistakes like rushing into expensive replacements without exploring repair options first—an error I definitely don’t recommend. Small repairs can extend the life of your gear and deepen your appreciation for your setup. Did you know that proper maintenance and timely repairs can improve extraction consistency by a significant margin? According to a study by the Specialty Coffee Association, routine upkeep improves overall shot quality and machine longevity.
So, if you’re tired of wrestling with your portafilter or risking further damage, stick around. In the next sections, I’ll walk you through tried-and-true methods to fix those pesky threads and keep your espresso game strong.
Remove the Portafilter and Assess the Damage
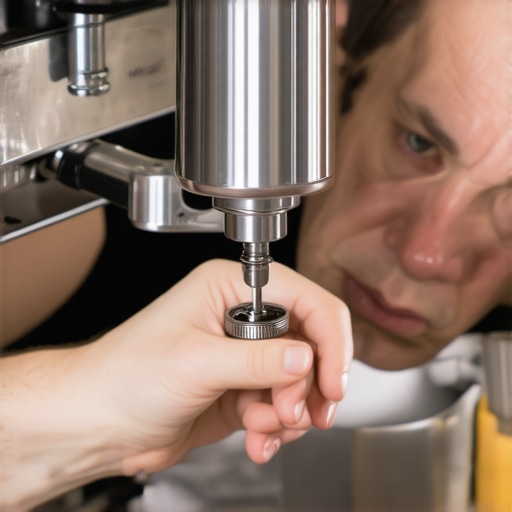
First, take your espresso machine apart carefully, removing the portafilter. Use a small flashlight to inspect the threaded area for visible damage or wear. I once had a customer bring in a heavily stripped portafilter; after removing it, I noticed the threads were rounded off and uneven, making repair necessary rather than replacement. This initial assessment helps determine whether you can repair the thread or need a new portafilter.
Gather the Necessary Tools and Parts
You’ll need a tap and die set designed for metal threads, some anti-seize compound, and possibly replacement threads or a threaded insert if the damage is severe. For minor wear, a tap (for internal threads) or die (for external threads) can re-cut the existing threads. I recommend checking out this guide for related repair tips, especially if avoiding further damage is a concern.
Clean and Prepare the Threaded Area
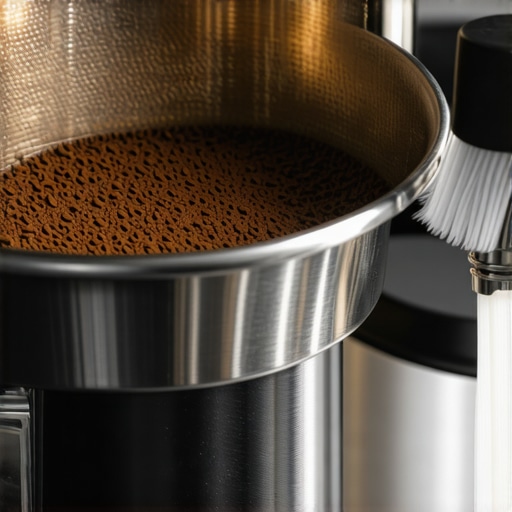
Before starting, clean the threaded surfaces thoroughly using a brush or compressed air to remove any debris or coffee grounds. A dusty or dirty thread will cause uneven cuts, leading to poor fitment. I once tried to repair a portafilter without cleaning, which resulted in mismatched threads and a leaky seal. Proper cleaning ensures a smooth repair process and better results.
Re-cut the Threads Carefully
Apply a small amount of anti-seize to the threads for lubrication, then carefully thread the die or tap onto the damaged area. Turn slowly, making sure the tool remains aligned to avoid cross-threading. I often use a gentle back-and-forth motion to cut evenly and prevent further damage. Remember, patience is key—rushing can ruin the threads altogether.
Handling Severe Damage
If the threads are badly mangled, consider using a threaded insert or sleeve to restore functionality. Insert the sleeve into the portafilter, then re-tap the threads into the sleeve. This method is more advanced but often yields a durable repair. For detailed instructions, check out this resource.
Test the Repair and Reassemble
Once you’ve recut or installed new threads, screw the portafilter back onto your machine to test its fit. It should lock smoothly without wobbling or leaking. During my own repair, I discovered my portafilter was back to locking in perfectly after a few passes with the die. If the threads are still catching or loose, repeat the process carefully or consider professional replacement. Afterward, reassemble your machine carefully, ensuring all parts are securely in place.
Prevent Future Thread Damage
Regular maintenance, like gentle cleaning and avoiding over-tightening, can prolong the life of your threads. Use a cable management approach on your accessories to prevent unnecessary stress on threaded parts. Also, always align the portafilter correctly before tightening, preventing cross-threading and strip damage.
Many home baristas believe that investing in high-end espresso machines or fancy gear guarantees perfect shots. However, the real nuance lies in understanding the intricacies and common myths associated with this equipment. For instance, there’s a widespread misconception that more expensive grinders automatically produce better espresso. In truth, many enthusiasts overlook the importance of regular maintenance, such as addressing static build-up or burr alignment issues, which can drastically affect grind consistency. If you skip these steps, even the priciest grinder won’t perform optimally. Surprisingly, a simple anti-static hack can improve extraction quality more than an upgrade to a newer model.
Another often-missed element is the importance of machine calibration and regular descaling. Many assume that once their espresso machine operates, it’s good forever. But mineral build-up, as outlined in this guide, can choke internal components and ruin shots, especially when using softened or hard water without proper maintenance. Advanced users know that sensor calibration, such as adjusting boiler pressure or temperature, holds the key to extracting nuances in different roasts. It’s not just about having the right equipment but knowing how to fine-tune it for superior performance.
A common trap is over-reliance on complex gadgets like milk frothers with flashy controls, which many believe will produce microfoam automatically. In reality, mastering manual techniques, including proper pitcher angles and steam wand positioning, results in more consistent microfoam. For example, mistakes like over-tilting the pitcher can cause large bubbles and ruin latte art attempts. Techniques like a puck-screen adjustment can mitigate these issues, but only if used correctly.
Have you ever fallen into this trap? Let me know in the comments.
Are High-End Machines Always Better for Practical Home Use?
Contrary to popular belief, the latest top-tier models don’t necessarily translate to better espresso if basic issues like water quality, grinder cleanliness, and routine calibration are ignored. A study from the Specialty Coffee Association emphasizes that proper maintenance and understanding your gear’s quirks can surpass even the most advanced features. This is especially true when working with delicate roasts or unique beans, where small adjustments—like controlling pressure or extraction time—make a bigger difference. For example, recently, I found that cleaning my group head with simple scrub techniques dramatically improved shot consistency.
Ultimately, owning the gear is just part of the equation. Efficient use and maintenance often outweigh sheer investment. Keep these nuances in mind, and your home espresso setup will significantly elevate your brewing game.Maintaining your espresso gear is crucial for consistent results and extending the lifespan of your equipment. Investing in high-quality tools and understanding proper upkeep can make a significant difference in your daily brewing routine. For instance, using a dedicated cleaning brush like the zero-retention grinder brush allows for meticulous cleaning of burrs, preventing coffee residue buildup that can affect flavor. Regularly calibrating your grinder with precision tools like a digital caliper ensures your grind size remains consistent, especially when switching roasts or beans. I personally recommend maintaining a schedule to check and replace worn seals and O-rings, which can prevent leaks and pressure issues over time. Additionally, employing software like Espresso Pro can help you track maintenance intervals and optimize your machine’s performance. Looking ahead, automation and smart diagnostics are expected to further simplify long-term upkeep, making it easier than ever to preserve your investment.
How do I keep my espresso gear performing at its best over time?
Regular maintenance is all about proactive care. Cleansing parts like the group head and steam wand weekly using tools like pipe cleaners can prevent clogs and ensure optimal steam flow. Use descaling agents following manufacturer guidelines to ward off scale buildup, which can impair heat exchange and flavor extraction. Keep an eye on grinder burrs, and consider periodic replacements as recommended by technical experts. For example, the latest ceramic burrs guidelines recommend replacing or recalibrating after grinding a specific weight of beans. Incorporate tools like a digital scale to monitor shot consistency and adapt your workflow accordingly. Elevating your setup with quality accessories, such as pressure gauges and temperature sensors, can also help you detect issues early before they become costly repairs. As technology advances, expect to see more IoT-connected devices that will automate much of this maintenance, providing real-time insights and alerts. To optimize your upkeep, try employing a simple weekly checklist incorporating these tools and techniques, transforming maintenance from a chore into a routine that prolongs your gear’s lifespan. If you’re keen to enhance your setup, I highly recommend exploring advanced calibration methods—like using a dual boiler calibration protocol—which can dramatically improve shot quality and consistency.
The Hardest Lesson I Learned About home espresso, barista gear, milk frothers, espresso machines, coffee grinders
One of the most valuable lessons I discovered was that even small, seemingly insignificant issues—like a tiny worn thread—can drastically affect your espresso quality. Paying attention to these details taught me patience and precision, turning me from a casual user into a dedicated home barista. Embracing the troubleshooting process, instead of avoiding it, opened my eyes to how much control I have over my brew. I realized that investing time into maintenance, like re-cutting threads or cleaning filters, pays off in consistently delicious shots, making every morning feel special.
3 Surprising insights that transformed my approach to espresso gear
- Replacing a part or fixing a thread isn’t just about saving money—it’s about understanding my machine better and extending its life. Learning to repair my portafilter’s threads empowered me to troubleshoot future issues confidently.
- Maintaining my grinder’s burrs with proper calibration and cleaning made a tangible difference in shot clarity. I used to think that fixing grinder static or recalibrating was complicated, but with the right tools, it became a rewarding routine.
- Calibrating my espresso machine’s boiler and pressure sensors using detailed guides drastically improved my extraction consistency. It was a game changer that elevated my home setup into a professional-grade experience.
My favorite tools and resources for elevating home espresso
- Digital Caliper: Precise measurement of burrs and adjustments helps maintain grind consistency. I trust it because small differences matter in espresso quality.
- Steam Wand Cleaning Brush: Keeps my frothing wand free of milk crust, ensuring clean, silky microfoam every time. It’s simple but makes a huge difference.
- Comprehensive Guides from Espresso Tech: Resources like this or this cover real-world issues and solutions that keep my setup running smoothly. They’ve saved me time, money, and frustration.
Seize the Moment to Elevate Your Brewing Game
Remember, the pursuit of perfect home espresso is a journey filled with learning and experimentation. Embrace the small repairs, routine maintenance, and continuous tweaking—these are the stepping stones to consistently better shots. Your setup holds untapped potential, and the more you learn about your gear, the more control you have over your coffee experience. Start today, and before long, you’ll find yourself pouring espresso with confidence and pride. What’s one repair or adjustment you’re eager to try next? Let me know below and share your progress!