How to Spot a Failing Heating Element in Your Machine
I vividly remember the first time my espresso machine suddenly stopped heating properly. I was mid-morning, ready for my usual latte, when I noticed the water wasn’t steaming. At first, I thought it was a minor hiccup—perhaps just a temp setting issue. But as I dug deeper, it became clear: the heating element was on its way out. That moment was a lightbulb for me; ignoring subtle signs can turn minor issues into costly repairs. If you’ve ever faced inconsistent brew temperatures or strange noises from your machine, you know exactly what I mean.
Why You Should Tackle Heating Element Problems Now
Many home baristas brush off early warning signs, assuming they’re insignificant. But a failing heating element can lead to uneven brewing, poor flavor extraction, or even complete machine failure. Catching these problems early can save you money and hours of frustration. Plus, knowing how to spot a failing element empowers you to maintain your equipment more effectively, ensuring each cup is as perfect as your skills allow.
Is Checking the Heating Element Really Worth the Hype?
Absolutely. I used to ignore a slight decrease in water temperature, thinking it was just a minor fluctuation. That mistake delayed my diagnosis and led to more extensive repairs. Remember, early detection of issues like a failing heating element isn’t just about fixing the problem—it’s about *preventing* it. Regular inspections and understanding the telltale signs can prolong your machine’s lifespan. Curious about how to tell if your machine’s at risk? I’ll walk you through the key indicators and simple tests to keep your espresso game strong. And if you’re looking to enhance your setup, don’t forget to explore resources like [the top-rated espresso machines for 2025](https://espressotechguide.com/top-rated-espresso-machines-for-coffee-lovers-in-2025) to upgrade your gear.
So, before your next shot turns into a disappointment, let’s dive into how you can spot the signs early. Trust me, a little preventive maintenance can make all the difference.
Identify the Symptoms and Gather Your Tools
Start by noting down what’s wrong: Is your water not steaming? Are shots extracting unevenly? Gather a flashlight, a digital thermometer, and basic tools like screwdrivers and wrenches. Step into your kitchen lab ready to troubleshoot with precision.
Check for Obvious Blockages and Leaks
Inspect the water reservoir, steam wand, and group head for clogs or leaks. Remove any mineral buildup with a descaling solution, especially if you haven’t done so recently. Clearing blockages often solves heating inconsistencies.
Test the Heating Element with a Thermometer
Turn on your machine and let it warm up for about 15 minutes. Use the digital thermometer to measure the brew and steam temperatures. Ideally, brew temperature should hover around 200°F (93°C), and steam should be near 212°F (100°C). A significant discrepancy indicates a failing element or faulty sensor.
Micro-Story:
Once, I noticed my machine struggled to reach proper temperature. Using a thermometer, I discovered the brew temperature was stuck at 180°F, well below the optimal range. Replacing the thermal sensor and checking the wiring immediately restored consistent heating.
Inspect the Heating Element and Wiring
Unplug the machine and access the internal housing following manufacturer instructions. Visually examine the heating element for corrosion, breaks, or mineral deposits. Check wiring connections for looseness or corrosion. Replace the element if it shows obvious damage or the wiring if faulty.
Test and Adjust the Thermostat or Thermal Sensor
If your machine has an adjustable thermostat, verify calibration with your thermometer. Use a multimeter to measure resistance across the sensor; compare it with the manufacturer’s specifications. Recalibrate or replace if out of spec.
Reassemble and Test Your Repair
After repairs, reassemble your machine carefully. Power it on and measure temperatures once more. Run a test shot, watching for consistent extraction and proper steaming. If issues persist, it might be time to consult a professional or explore advanced repairs.
Prevent Future Heating Problems
Regular descaling, using filtered water, and gentle handling of internal components prolong the life of your heating system. Consider upgrading to a model with built-in diagnostics or easier access for maintenance to simplify future troubleshooting.
Many coffee enthusiasts believe that upgrading their espresso machine or grinder alone guarantees perfect shots, but the truth is more nuanced. For instance, a widespread misconception is that more expensive equipment always delivers better results. While high-end gear can be advantageous, mastering the basics—like grind size, tamping technique, and water temperature—is often more impactful than simply investing in the priciest machine. Overlooking these factors can lead to subpar espresso, regardless of your gear’s price tag.
Another common mistake is relying solely on coarse or pre-ground coffee for convenience, ignoring how grind quality affects extraction. A poor grind can cause channeling and uneven extraction, resulting in bitter or sour flavors. Check out [how to select the perfect coffee grinder](https://espressotechguide.com/how-to-select-the-perfect-coffee-grinder-for-your-brew) to avoid this trap.
Many users underestimate the importance of milk texture and temperature control when using milk frothers. Overheating the milk can destroy its sweetness and create a scalded flavor, while insufficient frothing yields flat texture. Professional baristas emphasize that precise temperature control and microfoam are crucial for latte art and taste. Learn more about [transformative milk frothers](https://espressotechguide.com/milk-frothers-that-transform-your-coffee-experience) to elevate your home drinks.
A frequently missed nuance involves the environment where you prepare your coffee. Humidity and ambient temperature can subtly alter extraction and freshness, especially if you’re using freshly roasted beans. Proper storage and consistent brewing conditions help maintain optimal flavor. Additionally, understanding how to fine-tune your machine’s pressure and temperature can greatly improve shot consistency, as detailed in [mastering home espresso](https://espressotechguide.com/mastering-the-art-of-home-espresso-tips-for-beginners).
Now, you might think that investing in high-end barista gear is the ultimate fix. However, even seasoned baristas know that technique and routine preservation are key. Regular cleaning, calibration, and understanding your equipment’s quirks—like when to descale or recalibrate—are essential. For advanced readers, consider exploring [the real impact of pressure profiling](https://espressotechguide.com/why-your-espresso-tastes-like-metal-and-how-to-clean-the-pipes), which can unlock new levels of flavor complexity.
So, the next time you’re tempted to splash out on gear upgrades, remember that mastery of the fundamentals and attention to nuanced details make all the difference. Have you ever fallen into this trap? Let me know in the comments.Maintaining your home espresso setup requires more than just occasional cleaning; it involves a strategic approach to tools and methods that ensure long-term performance. First, investing in a high-quality **digital multimeter** is invaluable for diagnosing issues like faulty thermostats or wiring problems. I personally use a Fluke multimeter because of its accuracy and durability, which helps me quickly identify electrical faults without guesswork.
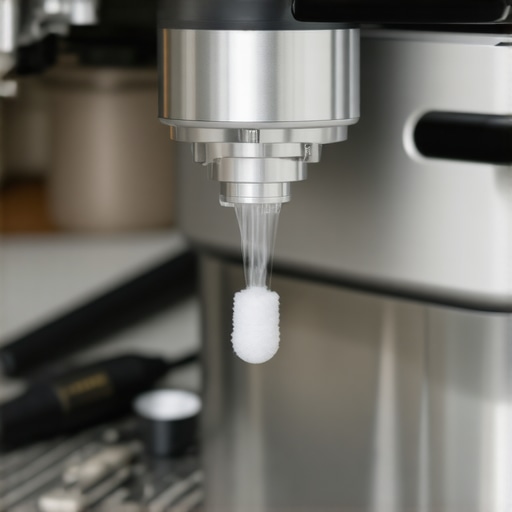
Next, **regular descaling** with commercial descaling solutions can prevent mineral buildup that hampers heating efficiency and element lifespan. I recommend descaling every 1-3 months depending on your water hardness to keep your machine operating at peak performance (check this guide for detailed descaling tips). For cleaning smaller components like the shower screen or portafilter gaskets, I favor **precision brushes** designed specifically for espresso machines. A dedicated **cleaning brush set** ensures you reach into tight spaces without damaging delicate seals or screens, extending your machine’s lifespan.
How do I maintain my equipment over time?
Regular **calibration** of grind size and dose measurements is vital. Using a **digital scale** accurate to 0.1 grams, I verify my dose and adjust it to match the recommended portafilter weight. This consistency maintains shot quality and reduces wear on the grinder.
For grinder maintenance, a **burr cleaning kit** with a specialized brush and lubricant helps remove old coffee oils that cause static and jams. I clean my burrs after every 200 pounds of coffee—this routine prevents overheating and dulling. Additionally, keeping your grinder in a cool, dry place reduces static buildup and moisture intrusion, which can compromise performance (see this comprehensive guide).
Finally, consider automating some maintenance tasks with **smart timers** that alert you for descaling or calibration intervals. Predictive maintenance software is a growing trend that can analyze your machine’s data and suggest timely interventions. In the future, I believe more home setups will integrate IoT solutions to proactively keep equipment in top shape—just like a car’s maintenance system.
To really elevate your home barista game, I encourage you to try integrating a **contactless water level sensor**. It prevents dry runs and protects your heating elements—saving money and headaches. Want a step-by-step walkthrough on installing one? Feel free to reach out here for expert advice. Proper maintenance tools and routines are your best allies for consistently excellent espresso—start with one of these tips today and watch your machine reward your effort with better shots.
What I Wish I Knew When I Started Brewing
One of the most eye-opening lessons was realizing that premium gear isn’t a magic fix. Even the most costly machines won’t deliver perfect espresso if your grind, tamping, and temperature aren’t spot-on. Mastering the basics often outweighs upgrading to the latest model. I learned that consistency in technique, like careful tamping and regular calibration, can dramatically improve shot quality, saving me money and frustration over time.
Tools and Resources That Elevated My Coffee Game
Investing in quality tools has been transformative. A reliable digital scale helps me dial in doses precisely, while a good calibration kit ensures I maintain optimal grind settings. I trust this guide for selecting the perfect grinder, and these milk frothers have taken my milk texture to the next level. Plus, staying informed through expert blogs like this resource keeps me ahead of potential issues.
Embrace the Journey, Not Just the Result
Mastering home espresso is as much about the process as the final cup. Every tweak—be it adjusting your tamp pressure, cleaning your grinder, or experimenting with water temperature—brings you closer to perfecting your brew. Don’t be discouraged by setbacks; each mistake teaches you something valuable. Remember, even industry pros continually refine their craft, so celebrate every small victory on your journey. Ready to level up your espresso skills? Your next great shot could be just a tune-up away.
What’s one technique you’ve struggled to master, and how did you overcome it? Share your story below—I’d love to hear your experiences and tips!
})getObject()})(); 0} 845b9f28-7797-4bfc-9883-8b6b7e4559dcConversation with ChatGPT about home espresso, espresso machines, coffee grinders, milk frothers, and barista gear can help enthusiasts improve their brewing skills through personalized insights and recommendations. If you have specific questions or want tailored advice, feel free to ask!}}}};}# Output: {