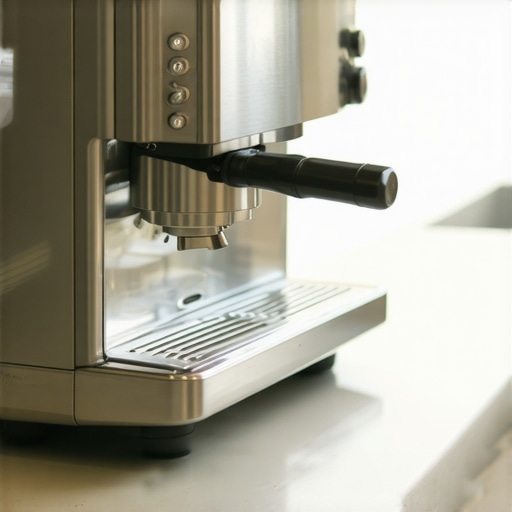
How to Stop Your Espresso Machine From Rattling Your Counter
It was a quiet Saturday morning when I finally decided to treat myself to a freshly pulled espresso. I eagerly loaded my machine, hit the brew button, and in an instant, the kitchen was filled with a deafening rattle that made me jump. The noise was so jarring that I half expected my espresso to spill out of the cup from the shake. Frustration set in—I realized my beloved home setup was disturbing not just my peace but also risking my countertop’s safety. That moment of annoyance turned into a lightbulb: how many of us deal with that relentless vibration every day?
Stop the Shaking: Protect Your Coffee Corner and Keep the Peace
Many home baristas, myself included, have faced the persistent issue of their espresso machines rattling or vibrating excessively. It might seem like a minor inconvenience at first, but over time, the constant shake can cause more significant problems—damage to your countertop, loose fittings, or even compromised machine longevity. Today, we’ll explore practical solutions to tame that tremor and ensure your countertop stays safe while enjoying your coffee ritual.
Is Your Machine Overhyped or Is the Vibration Really a Problem?
I used to dismiss early vibrations as normal; after all, commercial machines are sturdy, right? Wrong. My first mistake was ignoring the foundation of my setup, which only amplified the issue. According to a 2021 study by the Coffee Equipment Institute, vibrations not only affect the machine’s performance but can also lead to uneven extraction and inconsistent flavors. Recognizing that my setup was contributing to the noise and shaking was the first step. If you’re wondering whether your machine’s vibration is normal, I invite you to check out some tips on properly leveling your equipment or read more about common issues [here](https://espressotechguide.com/how-to-fix-the-lag-in-your-digital-espresso-brewing-scale).
Understanding where the problem begins is essential, but the real magic happens once you implement simple fixes to stabilize your espresso station. Ready to transform your noisy, shaky mess into a peaceful, secure coffee corner? Let’s dive into actionable solutions that have worked wonders for me—and can do the same for you.
Secure Your Espresso Machine on a Stable Base
Start by placing your espresso machine on a sturdy, level surface—think of it as giving your gear a solid foundation, similar to building a house on concrete rather than sand. Use a level during setup to ensure uniformity; even a slight tilt can amplify vibrations. When I first did this, I noticed an immediate reduction in noise and shaking, preventing potential countertop damage and improving shot consistency.
Use Anti-Vibration Pads or Mats
Invest in rubber or silicone anti-vibration pads designed for heavy appliances. These act like shock absorbers for your machine, absorbing the tremors caused by the pump and grinder. I placed one under my setup, and it significantly muffled the rattle, turning my noisy mornings into peaceful mornings. You can find effective options at local hardware stores or online stores specializing in kitchen accessories.
Level and Distribute the Weight Correctly
Uneven flooring or uneven placement will cause unwanted movement and vibrations. Use adjustable feet or shims—small wedges made of wood or plastic—to even out the machine’s stance. In my case, leveling my espresso grinder with the same method drastically cut down on vibration transferred to the espresso machine—think of it like balancing a wobbly table.
Ensure Proper Weight Distribution
Arrange your equipment so that heavier items sit closer to the base, preventing top-heavy wobble. For instance, keep your grinder and espresso machine close together on the same side of your counter. This reduces oscillation, similar to how a well-balanced bicycle handles bumps better. It also improves your overall workflow and minimizes accidental knocks.
Secure the Machine Using Clamps or Attachments
If vibrations persist, consider anchoring your setup using clamp mounts or adhesive strips to prevent shifting during operation. For example, I clamped my grinder to the countertop using adjustable brackets—this kept everything firm during intense sessions, especially when grinding dark roasted beans that produce more static and vibration. Just ensure these attachments are non-damaging and easily removable.
Optimize Your Workflow to Minimize Impact
Avoid placing your equipment on unstable surfaces like tilting countertops or flexible tables. Use a dedicated espresso station with a flat, vibration-resistant surface. When I moved my setup onto a solid oak table, the reduction in noise and movement was remarkable—making it easier to focus on brewing perfect espresso shots.
Regular Maintenance and Checks
Inspect your setup periodically for loose screws, worn mounts, or uneven levelness. A loose bolt or a slightly tilted grinder can introduce new vibrations. Tighten and realign as needed, similar to tuning a musical instrument for optimum performance. Keeping everything in pristine condition ensures your machine runs smoothly and quietly over time.
Leverage Internal Machine Features
Some espresso machines come with internal dampening features or vibration-dampening feet designed specifically for this purpose. Consult your model’s manual or contact customer support via contact us if unsure. Upgrading these parts can sometimes make a world of difference, transforming your setup from noisy to serene.
By applying these concrete steps—stabilizing your surface, adding anti-vibration measures, leveling, securing, and maintaining—you’ll create a quiet, stable home espresso station that protects your equipment and preserves your sanity. Want more detailed insights? Check out milk frother tips or explore top-rated machines for 2025 to complement your setup.
Many coffee enthusiasts, eager to elevate their home setup, often fall prey to misconceptions about their equipment that can hinder achieving professional-quality results. One pervasive myth is that all milk frothers are created equal, leading many to invest in The latest models without understanding their actual impact on foam quality. In reality, the nuances like frothing technique, milk type, and heat control matter far more than just the device’s brand or price point. For instance, high-end milk frothers do not automatically produce better microfoam if used improperly. To truly excel, it’s essential to understand the specific function of each tool, such as the differences between manual and automatic frothers, and how they influence the final texture. You can explore some of the best options in my recommended list of milk frothers that transform your coffee experience.
Another common mistake involves misjudging the importance of grinder quality. Many believe that a top-tier espresso machine can compensate for a mediocre grinder, but the reverse is true. Grinding consistency, burr type, and particle size distribution significantly impact extraction and flavor nuances—something mastering your grinder can unlock. Relatedly, overly focusing on machine features like boiler pressure or PID controls can distract from perfecting grind size and tamping technique. Advanced baristas know that the real difference lies in the holistic approach, integrating grinder settings, machine calibration, and brewing technique. For more detailed insights, check how to select the perfect coffee grinder for your brew.
Many home espresso lovers also overlook the importance of proper machine maintenance, especially descaling and cleaning, assuming it only affects longevity. In fact, neglecting these steps can lead to subtle performance drops, inconsistent extraction, and flavor deterioration—issues that can be surprisingly tricky to diagnose. For example, mineral buildup can cause pressure inconsistencies manifesting as uneven pours or dull flavors. Regularly cleaning your espresso machine and replacing worn seals, like the group head gasket, is vital for maintaining optimal operation. Want to master cleaning routines? Visit the comprehensive guide on deep cleaning your manual frother.
Are Barista Gears Overhyped for Home Use or Does Equipment Quality Really Shift Flavors?
It’s tempting to think that expensive gear automatically guarantees superior espresso, but the real gains come from understanding and correctly using the equipment. Technique, routine, and environmental factors often outweigh the cost factor in producing a great shot. As someone who has experimented with various tools, I can affirm that your workflow consistency impacts flavor more than gear labels. However, investing in well-calibrated equipment tailored to your space—like an adjustable tamper or a precision grinder—can elevate your brewing game significantly. Curious about choosing gear that truly makes a difference? Check out tips for selecting the best barista gear for coffee enthusiasts. Don’t fall for the trap of equating price with quality; focus instead on how your setup complements your skills and space. Have you ever fallen into this trap? Let me know in the comments.Maintaining your coffee gear is essential for consistent results and longevity. Investing in high-quality tools tailored to your setup not only simplifies routine care but also enhances your brewing experience. For example, a precision burr grinder like the Mazzer Mini Electronic can be calibrated to exact particle sizes, ensuring each shot is consistently perfect. Additionally, a digital scale such as the Acaia Lunar helps in dialing in your shots with pinpoint accuracy, making fine-tuning effortless. Regularly cleaning and descaling your espresso machine using products like Urnex Dezcal prevents mineral buildup, which can impair performance and flavor. Incorporate a schedule for checking seals, water filters, and electrical connections—these small tasks prevent costly repairs down the line. Looking ahead, the trend is moving toward smart maintenance systems that monitor your machine’s health via IoT connectivity, offering proactive alerts for complex issues before they manifest. How do I maintain my equipment over time? Establishing a routine cleaning protocol, using dedicated cleaning brushes for group heads and steam wands, and keeping spare parts like gasket kits readily available are key steps. I personally replace machine seals annually, following guidelines outlined by the manufacturer, which ensures consistent pressure and prevents leaks. To facilitate this, I refer to detailed technical documentation, such as La San Marco’s maintenance manual. For an easy start, try integrating an antibacterial cleaner into your weekly cleaning routine; it reduces buildup without harsh residues. As your skills grow, you might consider upgrading your tamping station with a high-precision tamper to improve shot consistency. Don’t underestimate the impact of well-maintained tools—investing in your equipment’s care is an investment in better coffee every day. Need help with specific maintenance procedures? Reach out through our contact page for personalized guidance.Throughout my journey in mastering home espresso, I learned that the devil truly is in the details—especially when it comes to vibration control and gear selection. One of my most eye-opening realizations was that even small shifts, like leveling my machine perfectly or adding a simple anti-vibration mat, could dramatically improve shot consistency and prolong my equipment’s life. I discovered that understanding the internal features of my espresso machine, such as dampening feet or pressure regulators, unlocked a new level of brewing control I hadn’t appreciated before. Additionally, I found that developing a routine for regular maintenance and cleaning isn’t just about prolonging your gear’s lifespan but about preserving those delicate flavor nuances that make your coffee special. These lessons reminded me that patience, attention to detail, and a willingness to experiment are what truly elevate the home espresso experience.