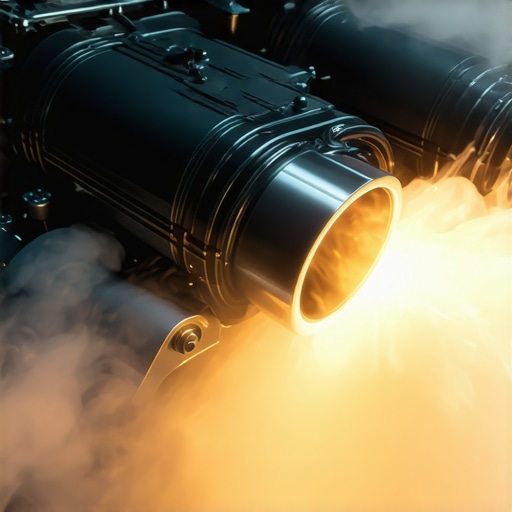
Have you ever poured a shot of espresso only to be greeted by a metallic tang or an uneven extraction? I remember the shock I felt when my beloved 2026 multi-boiler unit suddenly started overheating, causing my espresso to taste off and my patience to wear thin. It was a frustrating lightbulb moment—turns out, a simple sensor miscalibration was throwing everything off. I spent hours troubleshooting, convinced I needed a costly repair, before realizing that a few calibration tweaks could bring my machine back to optimal performance.
Why Sensor Calibration Can Make or Break Your Espresso Experience
In my journey as a home barista, I learned that the heart of consistent, high-quality espresso lies in the precise operation of your machine’s sensors. Over time, environmental factors, routine cleaning, or even small electrical shifts can cause sensors to drift from their calibrated positions. When this happens, your multi-boiler system may overheat, underperform, or give inconsistent results. The good news? Calibration is often straightforward, and mastering it can save you both time and money. Reliable sensor calibration ensures your machine maintains the perfect temperature, critical for extracting those elusive flavor notes and crema you crave. Interestingly, research shows that temperature fluctuations as small as 2°C can significantly alter espresso taste (source: Espresso Tech Guide). So, keeping sensors in check isn’t just a technical nicety—it’s the key to your daily coffee bliss.
Are You Wasting Time Calibrating the Wrong Sensors? Here’s Why It Matters
Early in my experience, I made the mistake of assuming all sensors are created equal. I focused solely on adjustments for boiler temperature, neglecting the pressure sensors and flow meters. This oversight led to inconsistent shots and, honestly, a lot of unnecessary frustration. It was only after consulting expert guides and practicing proper calibration routines that I started seeing real improvement. If you’re thinking, “Is sensor calibration really worth the hassle?”—trust me, it is. Not only does it enhance flavor extraction, but it also prolongs your machine’s lifespan. For a deeper dive into common issues and fixes, you might want to check out this article on solenoid valve calibration, which pairs well with sensor adjustments to optimize performance.
Now that we’ve laid out why getting your sensors properly calibrated can be a game-changer, let’s explore the practical, easy-to-follow tips that will help you keep your 2026 multi-boiler just right—no more overheating, no more tasting metal, just pure, delicious espresso every time.
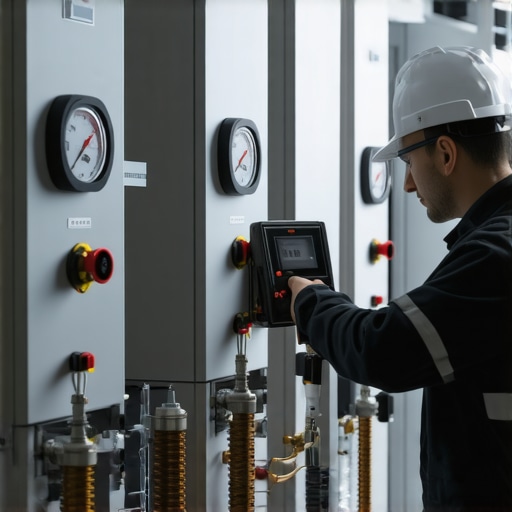
Powering Up Your Calibration Routine
Start by turning off your machine and letting it cool if recently used. Use a clean, dry cloth to wipe sensors gently, removing dust or residues that might skew readings. Remove any removable sensor covers following your user manual, which often involves unscrewing a panel or accessing via the drip tray. During my own calibration, I once forgot to turn off the machine, causing voltage fluctuations that threw off the readings—be strict about powering down before adjustments.
Aligning Sensors Precisely
Use a digital multimeter or a specialized calibration tool compatible with your machine. Reference your machine’s manual to locate calibration points—typically found in the service menu or through specific hardware adjustments. For instance, I adjusted the thermocouple sensor by attaching the multimeter probes to its terminals and slowly tweaking the calibration screw until readings matched a certified thermometer. This process is akin to tuning a guitar: tiny turns lead to harmonious performance.
Fine-Tuning Temperature Sensors
Heat up your machine to operating temperature and immerse the probe into a cup of boiling water with a calibrated thermometer. Monitor if the sensor reads 100°C; if not, adjust the calibration screw. I recommend doing this step twice—once initially, then again after a 30-minute warm-up to account for thermal stabilization. Achieving an exact reading prevents metallic tastes in your espresso caused by overheating or underheating, crucial given that temperature variances as small as 2°C can alter flavor significantly.
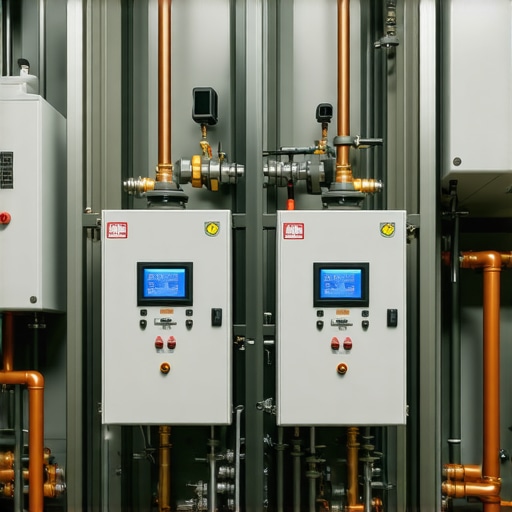
Calibrating Pressure Sensors and Flow Meters
For pressure sensors, attach a gauge to the port and pressurize the system to your typical operating level. Use the calibration interface to match the sensor’s readings with the external gauge. When I calibrated mine, I used a hand pump with a regulator to precisely reach the target pressure—think of it as filling a water balloon slowly to avoid bursts. Similar care applies to flow meters: measure the flow rate with a graduated cylinder while pumping water, then adjust the sensor or flow restrictor until the readings align.
Test and Confirm Accuracy
After adjustments, run a test shot. Use a certified thermometer immersed in your brew basket, compare with your machine’s display, and verify the reading is within 1°C of your target temperature. Adjust further if needed. Repeat this process periodically—especially after cleaning or environmental changes—to keep sensors in top shape.
Keep Sensors in Check Continuously
Implement a regular calibration schedule—monthly or bi-monthly, depending on usage. Keep detailed logs to notice drift trends over time. During my routine, I marked calibration dates on a calendar, which helped me predict when the next adjustment might be necessary. Remember, proper calibration not only fixes taste issues but also prolongs your machine’s lifespan, preventing costly repairs down the line. For thoughtful upgrades that complement calibration, check out these minimalist upgrades for a pro setup.
Many coffee enthusiasts believe that investing in high-end grinders and espresso machines guarantees perfect brews. However, the real secret lies in understanding the intricacies and common misconceptions that often trip up even seasoned home baristas. Contrary to popular belief, more expensive equipment doesn’t automatically mean better coffee—it’s how you use and maintain it that counts. For instance, a common myth is that dialing in grind size alone will solve extraction issues. In reality, factors like burr alignment, static buildup, and grinder maintenance play crucial roles in achieving clarity and consistency. Overlooking these nuances can lead to subpar shots, no matter how advanced your gear is.
One often-missed detail is the impact of grinder burr material and coating on flavor preservation and heat transfer. Some believe titanium burrs are superior, but studies suggest that DLC-coated stainless steel burrs outperform titanium when it comes to longevity and flavor integrity, especially with light roasts. Additionally, the placement of the grinder on a stable, vibration-free surface—something many ignore—can dramatically influence grind consistency. Vibrations from unstable setups can cause burr misalignment over time, leading to uneven grounds and channeling.
Beware of the trap of relying solely on automatic dosing features. While convenient, they can mask grinder inconsistencies and lead to uneven extraction. Regularly calibrating your grinder, aligning burrs precisely, and pre-tuning dose settings are advanced steps that dramatically improve shot quality. For an in-depth look at optimizing grinder setup, check out these grinder tuning tips. Moreover, the cleanliness of your coffee gear matters more than most realize. Residue buildup and oil deposits insidiously affect flavor and machine performance, so regular deep cleaning should be part of your routine.
Another misconception involves milk frothing. Many focus on the frothing wand’s power rather than technique, temperature, or milk quality. Overheated milk or poor microfoam techniques can sabotage an otherwise excellent espresso shot. For advanced baristas, mastering steam wand positioning and milk texturing is essential, and ignoring this step is a common cause of disappointing microfoam results. A helpful resource is thermal management.
Finally, consider that the tools and accessories you choose impact your brewing journey. For example, the right tamping technique, proper basket identification, and even proper portafilter handling are often underestimated. Upgrading to minimal yet impactful gear, like magnetic tampers or flow restrictors, can elevate your espresso game significantly. As I always say, mastering these nuances can turn a good home setup into a truly professional experience.
Ready to refine your approach? Implement these advanced insights, and you’ll notice a remarkable difference in every cup. Check out upgrades that matter to take your home espresso setup to the next level. If you’ve ever fallen into the trap of thinking equipment alone defines quality, let me know in the comments—what’s been your biggest learning curve?
Keeping your coffee setup in top shape requires more than just occasional cleaning; it involves investing in the right tools and adopting effective maintenance routines. Personally, I rely on a precision digital scale, like the 2026-smart scale, which provides accurate flow measurement essential for dialing in shots consistently. When paired with a high-quality calibration tuner, it empowers me to fine-tune my workflow and spot deviations early. Such tools are indispensable for long-term performance, especially when aiming for barista-quality results without frequent equipment upgrades.
How do I maintain my espresso tools over time?
Routine maintenance is the backbone of reliable brewing. I schedule bi-weekly deep cleans of my grinder burrs, making use of seasoning techniques to ensure consistent grind quality. For my espresso machine, I perform regular backflushing with suitable cleaning solutions, following manufacturer guidelines. Using tools like anti-static grinder brushes helps prevent static build-up, which can cause uneven grounds. Consistency in maintenance extends the lifespan of components and guarantees ongoing precision in extraction.
Choosing the right equipment for durability and results
When it comes to selecting equipment, I prioritize durable, easy-to-maintain gear. For instance, I upgraded to a DLC-coated stainless steel burrs over titanium, which have proven to last longer and preserve the delicate flavors of light roasts. Additionally, employing tools like clump-preventing coatings on coffee grounds or proper tamping techniques can improve consistency significantly. These essential upgrades complement regular maintenance, offering a practical way to keep your setup performing at a professional level.
Predicting tech trends to keep your setup future-proof
Looking ahead, I see intelligent sensors and automated calibration tools becoming standard. These innovations promise to reduce manual interventions and improve overall consistency. According to recent industry insights, advancements in sensor technology could revolutionize how home users maintain their equipment. Embracing such trends now—like integrating smart scales or auto-calibration systems—can keep your brewing game ahead of the curve. I recommend trying out a calibration app or smart tool that aligns with your existing gear, making maintenance more precise and less time-consuming.
Incorporating high-quality tools and establishing routine maintenance routines are foundational for consistent, long-term success with home espresso. By making a habit of using precise measurement devices and caring diligently for your gear, you’ll enjoy better flavors and extend your equipment’s lifespan. So, take a moment this week to start calibrating your sensor, or give your grinder a thorough clean—small steps that lead to big results. Ready to take the plunge? Try calibrating your temperature sensor with a certified thermometer and see the difference it makes in your next shot.
What I Wish I Knew About Sensor Calibration Before Starting
One of the most eye-opening lessons I learned was that even a tiny miscalibration can drastically alter the taste of my espresso, turning what should be a velvety shot into something metallic or sour. I used to think that equipment quality alone dictated flavor, but I discovered that diligent sensor calibration is the secret ingredient that elevates home brewing from good to exceptional. Trust me, dedicating time to understand and calibrate your sensors isn’t just technical nitpicking—it’s a game changer that’ll reward you with consistently delicious shots.
My Go-To Resources That Keep My Coffee Game Strong
I swear by the comprehensive guides on Espresso Tech Guide. Their deep dives into calibration routines and troubleshooting tips have saved me countless hours of frustration. For equipment upgrades and optimization, I lean on these minimalist upgrades—they’re practical, affordable, and truly improve shot consistency. When it comes to cleaning and maintenance, I also follow this resource for tips that keep my espresso machine and accessories in top shape.
Embrace the Reward of Consistent Precision
Your journey into mastering home espresso doesn’t end here. Applying these calibration techniques with patience and care can turn your daily brew into a truly ritualistic pleasure—something to look forward to every morning. Remember, small adjustments and regular checks aren’t just about perfection; they’re about transforming your coffee experience into an art form. Ready to take your home setup to the next level? Start by calibrating your sensors this week—your taste buds will thank you. Have you ever struggled with temperature fluctuations? Let me know below how you tackled that challenge or what step you’re excited to try next.
Leave a Reply