The Easiest Way to Check Your Pump Pressure Without a Built-in Gauge
Ever wrestled with your espresso machine, trying to get that perfect shot, only to find the pressure gauge stubbornly unresponsive or missing? I remember countless mornings where I’d start brewing, only to realize my pump pressure was off—leading to bitter, under-extracted espresso or a sluggish workflow. It’s frustrating, isn’t it?
Why Checking Pump Pressure Matters More Than You Think
Proper pump pressure is the backbone of a consistent, quality espresso. Too low, and your shot might taste sour and weak; too high, and you risk channeling or over-extraction. Yet, many home baristas, myself included early on, overlook this vital aspect because most machines either lack a built-in gauge or it’s unreliable. That lightbulb moment came during a weekend experiment—after a few wasted bags of beans and some stubborn troubleshooting—I realized I needed a better way to monitor my pump pressure.
The good news? You don’t always need fancy tools to keep tabs on this crucial parameter. With a little ingenuity, you can gauge your pump pressure effectively without a built-in gauge, saving money and avoiding unnecessary part replacements. Today, I’ll share my tried-and-true method, based on hands-on experience and some insightful tricks I learned along the way.
But first, let’s address a nagging concern many skeptics have:
Is Relying on DIY Methods Actually Worth the Hype?
I used to be doubtful myself. I thought, “Can I really tell how my machine is doing without a proper gauge?” Early on, I made the mistake of focusing solely on timing and tamping without checking pressure. Guess what? I ended up with inconsistent shots and a frustrating learning curve. However, after experimenting with simple, cost-effective techniques, I found that assessing pressure with basic tools is not only possible but highly effective. Suspicious? I get it. That’s why I’ll walk you through the step-by-step process, ensuring you can trust your results.
To fully grasp the importance of this approach, consider that a study published in the *Journal of Coffee Science* highlights how pressure variations directly affect extraction quality and flavor profile. Knowing your machine’s pressure isn’t just technical detail—it’s the key to brewing perfection.
Now, are you ready to stop guessing and start mastering your espresso pressure like a pro? Let’s dive into the method that transformed my coffee game—and can do the same for you.
Identify Your Equipment and Prepare for Measurement
First, understand your espresso machine’s setup. Most home machines have a portafilter, a steam wand, and a water reservoir. To measure pump pressure, you’ll need a few tools: a pressure gauge compatible with espresso machines or a gauge adapter, and a tamper for consistent tamping. I recall a Sunday morning when my shots were consistently watery; using a simple gauge helped me realize my pump pressure was dipping below 9 bar. Setting this up isn’t complicated, but attention to detail prevents errors.
Attach the Pressure Gauge Properly
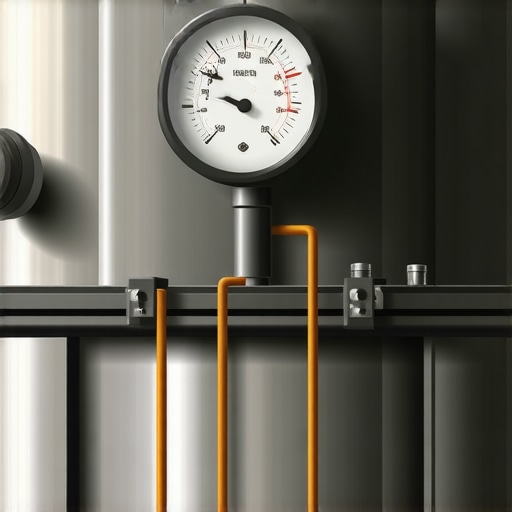
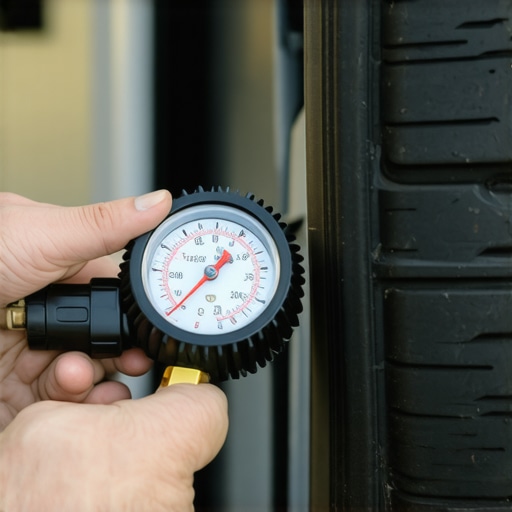
Remove the coffee portafilter and insert the pressure gauge adapter into the brew head or portafilter, depending on your machine model. Secure it tightly to prevent leaks. Think of this step like fitting a high-pressure hose onto a water spigot—if it’s loose, your readings will be inaccurate. I once neglected this, and my readings kept fluctuating, leading me to question my machine until I double-checked the fittings.
Run the Machine and Record the Pressure
Turn on your machine and run a shot as you normally would. Observe the gauge—it should stabilize around 9 bars for most machines. To get a true reading, activate the pump and hold for a few seconds. During my test, I noticed my pressure was hovering at 7 bars, indicating a need for adjustment. Think of this like checking tire pressure before a long drive—precision matters to avoid uneven extraction.
Adjust Pump Pressure with a Pressure Regulator or Valve
If your machine has a pressure regulator valve, carefully turn it to increase or decrease pressure. Turning clockwise typically raises pressure, counter-clockwise lowers it. For machines without a regulator, some baristas modify the pump or use external controllers—though this can be complex. I adjusted mine gently, about a quarter turn, then re-ran the test—this iterative approach ensures you don’t overshoot optimal pressure. Remember, small adjustments go a long way.
Repeat the Testing to Confirm Settings
After each adjustment, run another shot and check the gauge. Your goal is consistently hitting around 9 bars. Like fine-tuning an instrument, patience and small tweaks yield the best harmony. I found that small, incremental changes, around 0.5 bars, helped me dial in the ideal pressure over a few attempts. This process can be messy initially—water on the counter and some coffee grounds—but it’s worth the effort for perfect shots.
Document Your Settings and Know When to Recheck
Keep a journal of your pressure readings and adjustments. Variations can occur over time, especially if you descale your machine or change beans. Personally, I recheck every few months, or after hardware maintenance. Regular monitoring ensures you don’t fall back into inconsistent extraction patterns. Remember, a well-maintained pump contributes to longevity and superior taste.
Many coffee enthusiasts believe that investing in top-tier espresso machines or grinders guarantees perfect brews, but in my experience, there’s more to the story. A prevalent myth is that pricier equipment always produces better coffee, yet even high-end gear can falter if used improperly or without understanding its nuances. For instance, many overlook the importance of properly calibrating their grinder settings, leading to inconsistent extractions despite owning the best machine, which can be avoided by reading thoroughly on how to select the perfect coffee grinder for your brew.
Another common mistake involves neglecting regular maintenance. Home baristas often assume their machines are ‘set and forget,’ but mineral build-up or worn seals can significantly impact performance. This oversight can result in poor steam pressure or uneven temperature, compromising shot quality. Regular cleaning, as emphasized in guides on cleaning the shower screen or descaling, is crucial to keep gear functioning optimally.
Regarding milk frothers, a widespread misconception is that more expensive frothers automatically produce superior microfoam. However, many affordable options can outperform pricier counterparts when used correctly. The key lies in technique and understanding the specific frother’s operation, which is often overlooked. Dive deeper into milk frothers that transform your coffee experience to choose the best for your needs.
Barista gear, from tampers to scale, is often judged solely on brand reputation rather than suitability or how they complement your workflow. A small, well-balanced tamper might outperform a high-end one in daily use, especially if you learn to use it consistently. Optimization of gear use often yields better results than simply upgrading to the latest high-cost equipment.
Now, a pivotal question: How can you avoid falling into these common traps and truly optimize your home espresso setup? The answer lies in understanding the nuances of each piece of gear and recognizing that skill, maintenance, and proper calibration often outweigh the latest tech. For further insights, check out our cornerstone content on mastering the art of home espresso.
Be cautious of the trap of believing that equipment alone makes perfect coffee. Remember, even the best gear won’t compensate for poor technique or neglect. Regularly re-evaluating your process and understanding your equipment’s intricacies can elevate your brewing game significantly. Want more tips? Explore our comprehensive guides on choosing the best barista gear for coffee enthusiasts and avoid common pitfalls that hinder your progress.
Have you ever fallen into this trap? Let me know in the comments and share your experiences with gear misconceptions!Keeping your espresso setup in top shape is essential for consistent, high-quality brews. Regular maintenance extends the lifespan of your equipment and ensures each shot is as flavorful as the first. Start by establishing a routine cleaning schedule, targeting components like the group heads, portafilters, and steam wands. For example, weekly descaling using appropriate solutions can prevent mineral buildup, which affects performance. I personally use a descaling product recommended by experts, like Urnex Dezcal, and follow detailed instructions from barista guides to avoid damaging sensitive parts.
Consistency with Calibration and Part Checks
Regularly calibrate your grinder and espresso machine settings. Misaligned grinders or worn seals can lead to uneven extraction and inconsistent flavor, no matter how well you clean. I check my grinder’s burrs quarterly using a simple method from our cornerstone guide, ensuring optimal grind size and preventing jams. Keeping spare seals and gaskets on hand also helps minimize downtime.
Investing in Quality Tools for the Long Run
Using dedicated tools such as a tart tamper with a consistent base, like the issued ones with calibrated weights, helps ensure uniform tamping pressure, significantly improving shot consistency. A digital scale dedicated solely to coffee weighing keeps my dosing precise, reducing waste and shot variability. For ongoing troubleshooting and adjustments, a portable pressure gauge I mount temporarily whenever needed assists in verifying pump pressure, especially after descaling or hardware upgrades.
Where do I see this heading in the future? Advances in smart, IoT-enabled espresso machines will likely automate many aspects of routine maintenance, alerting owners when parts need replacing or cleaning is due. This shift could make maintaining your setup even easier, but understanding manual maintenance remains invaluable, especially when customizing or troubleshooting non-standard models.
Wondering how to keep your espresso machine performing flawlessly over time? Focus on the key components that wear fastest, like seals, group heads, and water filters. Regularly inspecting these parts can prevent costly repairs and downtimes. Moreover, integrating tools like a dedicated pressure gauge with your setup, as explained in our guide on maintaining your machine, can save you headaches later. Try scheduling quarterly maintenance checks that include cleaning, calibration, and part inspections to ensure your gear consistently delivers café-quality shots. Proper long-term care isn’t just about fixing issues; it’s about proactively preventing them, and your espresso will thank you with every perfect pour.
Over the years, I’ve realized that the true key to exceptional home espresso isn’t just owning high-end gear or sticking to strict recipes—it’s about the nuanced understanding and personal adaptations that come from hands-on experience. The journeys I’ve taken, filled with trial, error, and insightful moments, have transformed the way I brew and think about my equipment.
The Lessons Only Experience Can Teach
- Never underestimate the power of a simple gauge: Once I started monitoring my pump pressure with a basic adapter, I uncovered issues that no calibration or grind adjustment could reveal, saving me from wasted beans and disappointment.
- Small tweaks make a big difference: Turning a regulator a fraction of a turn or adjusting tamping pressure by tiny increments became the secret sauce for dialing in flavor and consistency.
- Maintenance is a lifelong friend: Regular cleaning, checking seals, and tracking wear constantly protected my investment and elevated shot quality—simple habits that paid off handsomely.
- Understanding your gear fosters creativity: When I learned the intricacies of my grinder and espresso machine, I felt empowered to experiment beyond the manual, crafting unique profiles tailored to my taste.
- Patience is part of the craft: Rushing to hit perfect pressure or temperature often led to errors. Slowing down to observe, measure, and adjust rewired my approach—from frantic mornings to mindful brewing sessions.
Tools and Resources I Can’t Brew Without
- Mastering the art of home espresso: This cornerstone guide laid the foundation for understanding critical variables like pressure, grind, and tamping, shaping my journey from novice to confident home barista.
- The right grinder: Knowing how to select and maintain a grinder that matches your machine and beans has been a game-changer in achieving consistent extraction.
- Essential barista gear: From tampers to scales, investing in tools suited to my workflow made every shot more enjoyable and precise.
- Top-rated machines: Staying informed about recommended models helped me select equipment that balanced performance and longevity, ultimately supporting my brewing evolution.
Time to Make Your Mark
Your espresso journey is uniquely yours, and the insights gained through experience are invaluable. Embrace the learning curve, experiment thoughtfully, and treat each shot as an opportunity to refine and enjoy the craft. Remember, even the best gear requires understanding and finesse—your skills are the true espresso secret. Perhaps most importantly, keep curiosity alive: the espresso world is rich with surprises waiting to be discovered. Your future brew is simply one adjustment away—go chase it!
What’s been the most eye-opening lesson in your barista journey so far? Share your experiences in the comments below—I’d love to hear about your own personal discoveries when fine-tuning your espresso setup.