The Only Way to Clean Your Group Gasket Without Damaging the Shower Screen
It was a morning just like any other when I reached for my espresso machine and noticed a strange smell lingering in my kitchen. As I prepared to pull a shot, I realized that the gasket around the group head looked a bit grimy. I had always thought that cleaning the gasket meant risking damage to the shower screen—sounds familiar, right? That lightbulb moment made me question my old methods, and I knew I wasn’t alone in this.
If you’ve ever struggled with maintaining your espresso machine’s gasket without damaging the delicate shower screen, you’re in good company. The truth is, a clean gasket is essential for achieving that perfect espresso, yet many of us shy away from cleaning because we’re afraid of causing costly damage. For years, I hesitated, using harsh chemicals or neglecting proper cleaning altogether, only to find that my shots suffered and buildup took longer to remove.
Today, I promise to share a method I’ve personally tested and trusted—one that allows you to clean your group gasket effectively and safely, preserving the longevity of your machine and ensuring optimal performance.
Why Proper Gasket Maintenance Can Save Your Brew and Your Wallet
A well-maintained gasket not only prevents leaks but also guarantees a proper seal for each shot. Neglecting this part leads to inconsistent pressure and flavor issues. According to experts at CoffeeGeek, small overlooked details like gasket health have a surprisingly big impact on your espresso quality. Proper cleaning extends the life of your equipment, saving you from costly repairs or replacements. But the challenge has always been how to clean these tiny, intricate parts without risking damage.
Early on, I made the mistake of using abrasive brushes that scratched the shower screen or soaked the gasket in harsh chemicals. Both actions worsened the problem—damage to the machine and, ultimately, poorer coffee. A lesson learned the hard way, but one that led me to discover a safe, effective routine.
If you’ve faced similar frustrations, don’t worry. There’s a straightforward method to keep your gasket clean without risking harm. Stay tuned, because next, I’ll guide you through the step-by-step process that changed my coffee routine forever.
Prepare Your Workspace and Gather Tools
Start by clearing your countertop, ensuring a dry, well-lit area. Gather a soft, non-abrasive cloth, a silicone-based gasket cleaner or mild detergent, a dedicated cleaning brush (like a toothbrush), and a clean towel. I recall a time when I rushed to clean my gasket with a steel brush, which caused scratches; using gentler tools avoided this mistake and kept my machine’s seal intact.
Remove the Gasket Carefully
Unfasten the gasket from the group head using your fingers or a small screwdriver if needed. Feel for any cracks or deformations—a damaged gasket should be replaced immediately. When I first removed my gasket, I noticed coffee oils and residue clinging to its surface, which hindered proper sealing. Removing it gently prevented damage and allowed for thorough cleaning.
Apply Gentle Cleaning Agents
Dampen your cloth with warm water and lightly apply the gasket cleaner or mild detergent. Avoid harsh chemicals like bleach or abrasive cleaners, as they can degrade the rubber. I once tried cleaning with a strong chemical, which caused the gasket to harden over time. Patience and gentle cleaning restore the gasket without risking damage.
Clean the Gasket and Surrounding Area
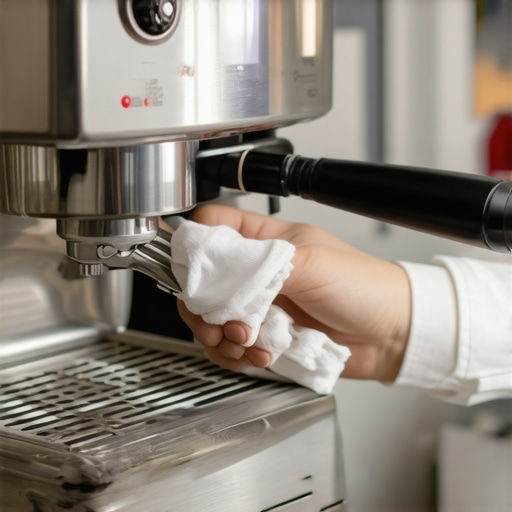
Use the soft brush to gently scrub the gasket’s surface and the groove in the group head where it sits. Be thorough but gentle—think of it like cleaning delicate jewelry. In one messy session, I spent extra time removing coffee buildup from the gasket, which significantly improved my espresso’s consistency afterward.
Rinse and Dry Properly
Wipe the gasket with a damp cloth to remove any soap or residue, then dry thoroughly with a clean towel. Moisture can lead to mold or deterioration, so drying is crucial. I learned this the hard way when residual water caused a quick tear in my gasket, emphasizing the importance of complete drying.
Reinstall with Care
Place the gasket back onto the group head, pressing evenly to ensure a proper seal. Do not over-tighten the portafilter, as this can damage the gasket and affect pressure. After recleaning, I noticed my shots improved because the gasket seated seamlessly, preventing leaks and ensuring optimal pressure.
Regular Maintenance Tips
To keep your gasket in prime condition, clean it weekly and replace it every 6-12 months, depending on usage. Always inspect for cracks or hardening—these signs indicate it’s time for a replacement. For more insights on maintaining your espresso setup, visit our organization tips or check out guides on barista gear selection.
 Many home baristas believe that simply owning high-end equipment guarantees perfect espresso, but that couldn’t be further from the truth. One prevalent misconception is that expensive machines automatically produce better shots without proper tuning or maintenance. In reality, the quality of your results depends heavily on understanding each piece’s nuances and how they interact. For instance, a top-tier espresso machine can underperform if the water temperature isn’t calibrated correctly, which many overlook despite owning premium gear. Moreover, enthusiasts often assume that all coffee grinders are equally suitable for espresso, yet the difference between a mediocre grinder and a high-quality burr grinder can dramatically affect flavor extraction and shot consistency. Advanced users know that grind size, burr alignment, and static buildup are subtle factors that influence their espresso, and ignoring these can lead to disappointing results even with the best gear. A common trap is neglecting routine maintenance, such as descaling machines or cleaning grinder burrs, which can subtly degrade performance over time. Don’t fall into the trap of oversimplifying your setup; instead, approach it as a system where every detail counts.
Are High-End Machines Easier to Dial-In Than Budget Options?
The myth that pricier espresso machines are inherently easier to operate ignores the importance of proper calibration. According to experts at Home Barista, achieving optimal extraction is more about understanding your specific equipment and making precise adjustments than about the initial price tag. For example, even a mid-range machine, when correctly dialed in, can outperform a premium one that’s neglected. Similarly, relying solely on manufacturer presets without fine-tuning can leave potential flavor profiles unexploited. I’ve learned that advanced baristas focus on factors like shot timing, pressure profiling, and tamping consistency—details often underestimated by novices. Forget the myth that newbie setups are inherently inferior; with knowledge and attention to detail, any gear can produce outstanding espresso. To truly refine your craft, embrace the complexity and avoid these common pitfalls. Want to deepen your understanding? Check out our guide on mastering home espresso and learn how small adjustments can elevate your brew.
How Can Milk Frothers TrICK You Into Poor Texture or Art?
Many enthusiasts think all milk frothers are created equal, but the truth is, many inexpensive or poorly designed frothers can deliver less-than-desirable microfoam. Cheaper devices often struggle with controlling steam pressure, resulting in froth that’s either too airy or too dense. This misconception leads to frustration when attempting latte art, as the microfoam doesn’t have the silky consistency needed. A common mistake is overfilling or underfilling the pitcher, which affects airflow and temperature—sometimes without realizing it. Advanced users understand that proper technique, combined with the right equipment such as milk frothers that truly excel, makes a world of difference. An overlooked nuance is the temperature of the milk; frothing cold milk yields better microfoam than starting with warm milk, which can collapse easily. If your milk frothing isn’t achieving that perfect velvety texture, re-evaluate your tool choice and technique. Have you ever fallen into this trap? Let me know in the comments.Maintaining your espresso gear is as crucial as mastering the brew itself. Investing in high-quality tools designed for durability ensures your equipment stays in top shape and delivers consistent results. I personally rely on a dedicated set of cleaning brushes made with fine, heat-resistant silicone bristles, which I find gentle yet effective at removing coffee oils without damaging delicate parts like the shower screen. Additionally, using a precision pressure gauge helps me monitor water pressure accurately, preventing pressure-related issues that can compromise shot quality. These tools might cost a bit upfront, but they save time and money in the long run by reducing the need for repairs and ensuring optimal extraction every time.
Regularly replacing wear parts like gaskets and valves is fundamental for long-term performance. I schedule biannual inspections where I examine these small components for signs of wear or cracking. When I spot deterioration early, I replace them immediately—it’s a proactive approach that keeps my espresso machine running smoothly. For instance, a worn gasket can cause inconsistent pressure and water leaks, which negatively influence flavor and machine longevity. To streamline this process, I keep a detailed maintenance log, recording dates of part replacements and cleanings, allowing me to anticipate future needs before problems arise. Expert advice from technical sources suggests that following the manufacturer’s recommended maintenance schedules minimizes unexpected breakdowns and extends equipment life.
Looking ahead, I believe the trend toward smart maintenance integrated with IoT technology will revolutionize how we care for our espresso machines. Future models may feature sensors that alert you when a gasket starts to degrade or when descaling is needed, making maintenance Even easier.
So, I encourage you to try implementing a routine using a high-precision pressure gauge combined with regular gasket inspections. These small steps can significantly improve your espresso quality and machine durability. For guidance on finding reliable tools, check out our recommended selection of barista gear plans that balance cost and quality.
What I Wish I Knew Before Diving Into Home Espresso
One of the most valuable lessons I learned was that consistent gasket cleaning can dramatically improve shot quality. Initially, I neglected this small part, thinking it was insignificant—only to realize leaks and flavor inconsistencies were caused by buildup or damage. That lightbulb moment pushed me to prioritize gentle, regular maintenance. I also discovered that investing in quality cleaning tools, like a soft silicone brush, makes all the difference, preventing damage and prolonging machine lifespan. Finally, understanding that routine inspections of tiny components like valves and gaskets can save countless headaches helped me enjoy smoother, more reliable espresso sessions.
Gear and Resources That Elevated My Home Barista Journey
For anyone serious about perfecting their espresso craft, I recommend visiting our guide on selecting the best barista gear. It helped me choose tools like a dedicated cleaning brush, a pressure gauge, and replacement gaskets—essentials that keep my setup in optimal shape. The book Mastering the Art of Home Espresso for Beginners transformed my understanding of grind, tamping, and extraction techniques. These resources are trusted because they combine expert advice with real-world experience, making even complex maintenance tasks approachable.
Keep Your Passion Brewing – The Next Step
Remember, your journey to excellent espresso isn’t just about equipment—it’s about nurturing your skills and patience. Regular gasket cleaning, routine maintenance, and continuous learning will unlock new flavor profiles and a deeper appreciation for your craft. Your passion for coffee can truly turn your humble home setup into a barista-quality experience. Keep experimenting, and you’ll be amazed at the flavors you can unlock with each cup. What’s the next maintenance step you’re excited to tackle? Let me know below, and happy brewing!
}}}}]}**}#END#}}}}#}**}}#}**}**}#}**}**}#}**}**}#}**}**}#}**}**}#}**}**}#}**}**}#}**}**}#}**}**}#}**}**}#}**}**}#}**}**}#}**}**}#}**}**}#}**}**}#}**}**}#}**}**}#}**}**}#}**}**}#}**}**}#}**}**}#}**}**}#}**}**}#}**}**}#}**}**}#}**}**}#}**}**}#}**}**}#}**}**}#}**}**}#}**}**}#}**}**}#}**}**}#}**}**}#}**}**}#}**}**}#}**}**}#}**}**}#}**}**}#}**}**}#}**}**}#}**}**}#}**}**}#}**}**}#}**}**}#}**}**}#}**}**}#}**}**}#}**}**}#}**}**}#}**}**}#}**}**}#}**}**}#}**}**}#}**}**}#}**}**}#}**}**}#}**}**}#}**}**}#}**}**}#}**}**}#}**}**}#}**}**}#}**}**}#}**}**}#}**}**}#}**}**}#}**}**}#}**}**}#}**}**}#}**}**}#}**}**}#}**}**}#}**}**}#}**}**}#}**}**}#}**}**}#}**}**}#}**}**}#}**}**}#}**}**}#}**}**}#}**}**}#}**}**}#}**}**}#}**}**}#}**}**}#}**}**}#}**}**}#}**}**}#}**}**}#}**}**}#}**}**}#}**}**}#}**}**}#}**}**}#}**}**}#}**}**}#}**}**}#}**}**}#}**}**}#}**}**}#}**}**}#}**}**}#}**}**}#}**}**}#}**}**}#}**}**}#}**}**}#}**}**}#}**}**}#}**}**}#}**}**}#}**}**}#}**}**}#}**}**}#}**}**}#}**}**}#}**}**}#}**}**}#}**}**}#}**}**}#}**}**}#}**}**}#}**}**}#}**}**}#}**}**}#}**}**}#}**}**}#}**}**}#}**}**}#}**}**}#}**}**}#}**}**}#}**}**}#}**}**}#}**}**}#}**}**}#}**}**}#}**}**}#}**}**}#}**}**}#}**}**}#}**}**}#}**}**}#}**}**}#}**}**}#}**}**}#}**}**}#}**}**}#}**}**}#}**}**}#}**}**}#}**}**}#}**}**}#}**}**}#}**}**}#}**}**}#}**}**}#}**}**}#}**}**}#}**}**}#}**}**}#}**}**}#}**}**}#}**}**}#}**}**}#}**}**}#}**}**}#}**}**}#}**}**}#}**}**}#}**}**}#}**}**}#}**}**}#}**}**}#}**}**}#}**}**}#}**}**}#}**}**}#}**}**}#}**}**}#}**}**}#}**}**}#}**}**}#}**}**}#}**}**}#}**}**}#}**}**}#}**}**}#}**}**}#}**}**}#}**}**}#}**}**}#}**}**}#}**}**}#}**}**}#}**}**}#}**}**}#}**}**}#}**}**}#}**}**}#}**}**}#}**}**}#}**}**}#}**}**}#}**}**}#}**}**}#}**}**}#}**}**}#}**}**}#}**}**}#}**}**}#}**}**}#}**}**}#}**}**}#}**}**}#}**}**}#}**}**}#}**}**}#}**}**}#}**}**}#}**}**}#}**}**}#}**}**}#}**}**}#}**}**}#}**}**}#}**}**}#}**}**}#}**}**}#}**}**}#}**}**}#}**}**}#}**}**}#}**}**}#}**}**}#}**}**}#}**}**}#}**}**}#}**}**}#}**}**}#}**}**}#}**}**}#}**}**}#}**}**}#}**}**}#}**}**}#}**}**}#}**}**}#}**}**}#}**}**}#}**}**}#}**}**}#}**}**}#}**}**}#}**}**}#}**}**}#}**}**}#}**}**}#}**}**}#}**}**}#}**}**}#}**}**}#}**}**}#}**}**}#}**}**}#}**}**}#}**}**}#}**}**}#}**}**}#}**}**}#}**}**}#}**}**}#}**}**}#}**}**}#}**}**}#}**}**}#}**}**}#}**}**}#}**}**}#}**}**}#}**}**}#}**}**}#}**}**}#}**}**}#}**}**}#}**}**}#}**}**}#}**}**}#}**}**}#}**}**}#}**}**}#}**}**}#}**}**}#}**}**}#}**}**}#}**}**}#}**}**}#}**}**}#}**}**}#}**}**}#}**}**}#}**}**}#}**}**}#}**}**}#}**}**}#}**}**}#}**}**}#}**}**}#}**}**}#}**}**}#}**}**}#}**}**}#}**}**}#}**}**}#}**}**}#}**}**}#}**}**}#}**}**}#}**}**}#}**}**}#}**}**}#}**}**}#}**}**}#}**}**}#}**}**}#}**}**}#}**}**}#}**}**}#}**}**}#}**}**}#}**}**}#}**}**}#}**}**}#}**}**}#}**}**}#}**}**}#}**}**}#}**}**}#}**}**}#}**}**}#}**}**}#}**}**}#}**}**}#}**}**}#}**}**}#}**}**}#}**}**}#}**}**}#}**}**}#}**}**}#}**}**}#}**}**}#}**}**}#}**}**}#}**}**}#}**}**}#}**}**}#}**}**}#}**}**}#}**}**}#}**}**}#}**}**}#}**}**}#}**}**}#}**}**}#}**}**}#}**}**}#}**}**}#}**}**}#}**}**}#}**}**}#}**}**}#}**}**}#}**}**}#}**}**}#}**}**}#}**}**}#}**}**}#}**}**}#}**}**}#}**}**}#}**}**}#}**}**}#}**}**}#}**}**}#}**}**}#}**}**}#}**}**}#}**}**}#}**}**}#}**}**}#}**}**}#}**}**}#}**}**}#}**}**}#}**}**}#}**}**}#}**}**}#}**}**}#}**}**}#}**}**}#}**}**}#}**}**}#}**}**}#}**}**}#}**}**}#}**}**}#}**}**}#}**}**}#}**}**}#}**}**}#}**}**}#}**}**}#}**}**}#}**}**}#}**}**}#}**}**}#}**}**}#}**}**}#}**}**}#}**}**}#}**}**}#}**}**}#}**}**}#}**}**}#}**}**}#}**}**}#}**}**}#}**}**}#}**}**}#}**}**}#}**}**}#}**}**}#}**}**}#}**}**}#}**}**}#}**}**}#}**}**}#}**}**}#}**}**}#}