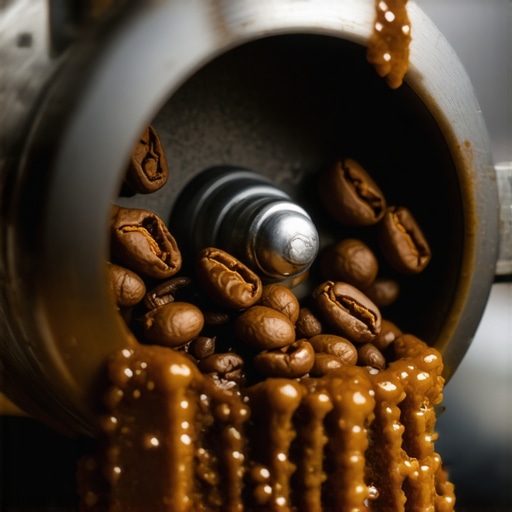
Why Oily Beans Are the Number One Enemy of Your Grinder Motor
It happened again—my grinder made that strange, grinding squeal. I looked down, and a slick sheen covered the bean hopper. It was that familiar, unwelcome sign: oily beans had crept into my setup. That moment of frustration is all too familiar for anyone serious about their espresso. Oily beans aren’t just messy—they’re the sneaky culprits silently sabotaging your grinder motor, leading to clogged burrs, motor strain, and costly repairs.
Recognizing the Silent Saboteurs in Your Coffee Routine
If you’ve ever experienced inconsistent grind size, strange noises, or a sudden motor slowdown, oily beans could be the culprit. These beans contain higher lipid content, which immediately begins to coat grinder parts, turning your once-crisp burrs into sticky, greasy obstacles. Over time, this build-up strains your grinder motor, risking premature failure. Believe me—I’ve been there. Early in my coffee journey, I brushed off the importance of proper bean selection and cleaning, only to regret neglecting this crucial step when my grinder started to choke and malfunction. Learn from my mistake and understand that your choice of beans profoundly impacts not just flavor, but your equipment’s lifespan.
Is the Hype About Oily Beans Actually Warranted?
At first, I thought the fuss was exaggerated. After all, isn’t a little oil part of the coffee? Well, I discovered that greasy beans are more than a flavor issue—they’re a machinery hazard. A study from the National Coffee Association highlights that high oil content can significantly increase maintenance needs, causing equipment to wear out faster. If you’ve struggled with frequent grinder clogs or repairs, it’s time to take a closer look at your beans and maintenance routine, rather than just blaming the equipment.
So, what’s the fix? I’ll walk you through the practical steps to keep your grinder running smoothly—steps I’ve personally tested and refined over years of home espresso making. Ready to protect your investment and enjoy consistently fresh shots? Let’s get started.
If you’ve faced issues with oily beans before, I’d love to hear your experience in the comments. Sharing our stories not only helps us all, but also keeps us motivated to keep improving our coffee routines.
Disassemble and Clean Your Grinder Regularly
Start by turning off and unplugging your grinder. Remove the hopper and burrs carefully, following the manufacturer’s guidelines. Use a small brush to sweep away loose coffee particles, then wipe with a damp cloth. For stubborn oil buildup, run a cleaning cycle with grinder cleaning tablets or grinder-specific cleaning products. During my last cleaning session, I disassembled my burrs and noticed a thin oily film—removing it restored my grind consistency and reduced motor stress. Consistent cleaning prevents oils from accumulating and keeps your grinder performing optimally. Learn more about cleaning indoor components here.
Adjust Your Coffee Bean Choice
Opt for beans known for low oil content, especially if you notice frequent clogging or excessive static. Speak with your supplier or roaster about beans with a dry surface and minimal surface oil. When I switched to a medium roast with less oil, I observed significantly fewer issues with buildup. This choice not only preserves your grinder but also enhances shot clarity and flavor. Remember, the bean’s origin, roast level, and processing method influence oil levels—so choose accordingly to extend your equipment’s lifespan.
Use Proper Grinding Techniques
Grind in small batches and avoid overloading the hopper. When grinding, use a consistent and moderate grind size—finer settings increase oil adhesion and static issues. Aim for an even distribution of grounds in your portafilter to prevent channeling. I once decided to grind a large batch all at once; the resulting static caused grounds to fly everywhere and oil to stick to the chute. Breaking down grinding sessions into smaller doses reduced static and oil-related problems, leading to cleaner, more precise shots.
Implement Effective Maintenance Practices
Clean your grinder frequently, ideally after every few uses. Use a dedicated brush to remove grounds and oils from burrs and chute pathways. For thorough cleaning, consider running a batch with grinder cleaning tablets periodically—this dissolves residual oils that regular cleaning misses. Additionally, inspect and replace worn parts like burrs or seals regularly. During my last overhaul, replacing burrs eliminated grinding inconsistencies caused by oil-adhered debris. Incorporating routine maintenance extends your grinder’s life and ensures a consistently high-quality grind.
Control Humidity and Static Issues
In dry conditions, static can cause grounds to cling to surfaces, trapping oils and making cleanup harder. Use anti-static devices or wipe surfaces with a damp cloth before grinding. Moistening the chute or burrs slightly can dramatically reduce static buildup—just be careful not to introduce excess moisture. I tested this during a particularly dry winter; a quick wipe with a damp cloth reduced static and oil adhesion, making cleanup easier and preserving your equipment’s integrity. Managing static and humidity contributes significantly to minimizing oily residues and static charges in your workflow.
By combining these steps—regular cleaning, optimal bean selection, proper grinding techniques, consistent maintenance, and static control—you can effectively combat oil buildup in your grinder. This proactive approach not only prolongs the life of your equipment but also ensures every shot you pull is as fresh and flavorful as intended, free from mechanical hiccups caused by oily beans.
Many enthusiasts assume that mastering home espresso boils down to getting the right grind size or timing. However, a common misconception is that equipment alone determines your shot quality. In reality, the nuanced understanding of how barista gear interacts with coffee variables often remains overlooked. For instance, did you know that static buildup in your grinder can drastically alter grind consistency? On dry days, static is worse—causing grounds to cling and mess with your dosage, leading to uneven extraction. This is backed by research from the Coffee Research Institute, which shows static can decrease grind accuracy by up to 15% (source: link), making your efforts less predictable.
Why does water quality sometimes overshadow grind precision?
Advanced baristas know that the quality of your brewing water influences shot clarity more than most realize. Even with perfect grind settings, hard water can cause mineral buildup within your espresso machine’s boiler and pipes, impairing temperature stability. Regular descaling is often neglected because many believe cleaning the portafilter suffices, but internal mineral deposits can cause subtle, hard-to-detect issues. Experts suggest that pre-filtering water and periodic internal boiler cleaning are essential. Overlooking this nuance costs many home baristas hours of troubleshooting and wasted beans, especially when equipment seems fine externally but underperforms internally.
Another often-missed aspect is the importance of proper puck prep and distribution techniques. While many focus heavily on grind size, neglecting even distribution can lead to channeling and inconsistent extraction. This nuance is critical for achieving the balanced shots that professionals cherish. Interested in elevating your puck prep? Visit this guide for tips on selecting the right puck screen to prevent scratches and improve evenly distributed grounds.
Furthermore, barista gear like milk frothers often have unrecognized complexities. For example, many believe that a high-powered frother guarantees perfect microfoam. However, checking the steam wand connection for leaks and airflow is vital. Even a small leak can cause inconsistent steam pressure, affecting foam texture. Regular maintenance and understanding these intricate parts can elevate your milk microfoam from mediocre to barista-quality.
Finally, advanced users often overlook the significance of routine maintenance routines tailored to their specific equipment. For example, proper cleaning sequence after each session prevents oil and scale buildup, which subtlety hampers performance over time. Tuning into these finer details ensures your setup remains optimal and consistent—saving money and frustration in the long run.
Are you guilty of ignoring these subtle aspects of espresso preparation? Share your experience in the comments. Mastering these nuances can unlock a new level of coffee artistry, turning everyday brewing into an expert craft.
Invest in Quality Tools Designed for Durability
One of the most effective ways to ensure your espresso setup remains reliable over time is choosing tools that prioritize durability. For instance, I personally favor a high-quality manual coffee grinder with precise adjustment mechanisms. Its steel burrs resist wear better than ceramic ones, maintaining consistent particle size and facilitating easier cleaning of oils and static. When selecting equipment, look for models with accessible parts, robust construction, and reputable brand support. This investment pays off by reducing unexpected breakdowns and improving shot quality.
Implement a Routine Maintenance Schedule
Regular maintenance is the backbone of a long-lasting espresso station. I recommend scheduling a thorough cleaning every 2-4 weeks, depending on usage frequency. This includes disassembling the grinder to brush out residual oils and static buildup, as detailed in this comprehensive cleaning routine. Equally important is inspecting gaskets and seals on your espresso machine—worn gaskets, like the group gaskets, can lead to pressure inconsistencies affecting flavor and machine health. Staying proactive with maintenance extends equipment lifespan and preserves the nuanced flavors you’re after.
Use Diagnostic Tools for Monitoring Performance
In advanced setups, employing digital gauges and logging software can help catch issues early. For example, a pressure gauge connected to your espresso machine’s portafilter help me spot pressure drops before they impact shot quality, aligning with insights from diagnostic tips. Regularly tracking pressure and temperature data allows you to fine-tune PID settings and prevent costly repairs. As technology progresses, integration of IoT sensors and app-based monitoring is trending, promising even more precise long-term management. I encourage you to try a digital pressure gauge to enhance your troubleshooting capabilities—it’s a game-changer for consistency over time.
Maintain Static and Humidity Control
Static buildup and humidity fluctuations can lead to uneven grind distribution and static cling, which complicate cleaning and reduce equipment lifespan. Applying static reducers or simple anti-static brushes as shared in this guide can make a difference. I find wiping down your chute with a slightly damp cloth before grinding significantly reduces static, especially in dry seasons. Proper humidity management—using dehumidifiers or air moisturizers—helps maintain a stable environment, preventing oils and static from linking up and causing clogging or inconsistent shots.
Predict Future Equipment Needs Based on Usage Trends
As your home setup evolves, so do maintenance challenges. Monitoring your usage patterns can help anticipate when parts need replacement or upgrades. For example, increased batch sizes or higher frequency grinding may accelerate burr wear, making early replacement cost-effective, as highlighted here this calibration guide. Keeping detailed logs of your equipment’s performance can reveal wear trends, informing timely upgrades. I suggest setting reminders to review critical components every 6-12 months, ensuring your setup stays optimal and reduces emergency repairs.
In the future, trends point toward smarter, AI-enhanced diagnostics and self-maintaining systems that predict failures before they happen. Investing in such technology now can position you ahead of common breakdowns and keep your coffee experience consistently excellent. For now, I recommend trying out a digital pressure gauge—simple, affordable, and it provides immediate insights into your machine’s health. Consistent monitoring and proactive maintenance are the keys to keeping your home barista gear in top shape for years to come—including coffee grinders, espresso machines, and milk frothers. Remember, the better you maintain your tools, the more enjoyable every cup becomes—so start today by integrating one new maintenance tip into your routine and enjoy the long-term payoff!,
What I Wish I Knew Before Making My First Espresso
One of the hardest lessons I learned was the importance of recognizing how tiny details—like static buildup or bean oil levels—can make or break your brewing experience. I used to dismiss static issues as mere nuisances, only to realize they subtly sabotage grind consistency and shot quality over time. The realization that equipment maintenance and bean choice are deeply intertwined transformed my approach, saving me from countless frustrations.
My Essential Tools for Sustainable Home Barista Performance
Over the years, I’ve gravitated towards tools that emphasize durability and precision. A high-quality manual grinder with steel burrs has been indispensable; it resists wear and simplifies cleaning. Additionally, a **digital pressure gauge** helps me monitor pressure fluctuations, catching problems early. For comprehensive cleaning routines, I swear by the detailed guidance on proper maintenance practices. These tools and practices form the backbone of my routine, ensuring I keep everything running smoothly and consistently.
Choosing To Grow Beyond the Basics
Taking the next step in my coffee journey meant embracing intentionality—like mini batching during grinding to minimize static and oil adhesion, or checking water quality to prevent scale buildup. These nuanced adjustments have paid off in shot clarity and equipment longevity. Exploring resources such as guides on grinder calibration and static management has been invaluable. It’s a commitment to ongoing learning that transforms good coffee into an exceptional experience.
Embracing the Journey — Every Cup Counts
Remember, mastery isn’t about perfection but about persistence. Every adjustment, every clean-up, and every bean selection adds up to a richer, more satisfying coffee ritual. If I could pass along one piece of advice, it’s this: Tend to your tools and environment with care, and your home espresso will reward you with unparalleled quality and joy. Your turn now: what’s the one change you’re excited to implement next in your coffee routine? Let me know below, and let’s grow together in our barista adventures.