Why Your Espresso Tastes Better When You Don’t Use the Drip Tray
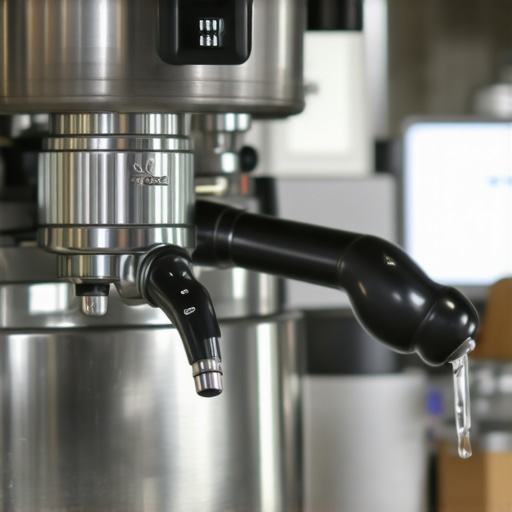
I was hunched over my kitchen counter at 6:00 AM, squinting at my scale as the pump on my machine roared to life. Every time the pressure hit its peak, my favorite ceramic cup would start a slow, rhythmic shuffle across the metal grate, vibrating its way toward the edge of the tray. I spent more time manually centering the cup than I did watching the flow. Worse yet, the coffee was splashing. By the time the liquid traveled the six-inch gap from the portafilter to the bottom of the cup, it looked like a mess, and it tasted even worse—thin, surprisingly lukewarm, and lacking that rich, syrupy mouthfeel I was chasing. That was the morning I finally pulled the drip tray out entirely and set it on the floor. It was a messy, awkward realization, but it changed my home barista game forever. I realized that the standard setup we are sold isn’t always designed for precision; it is designed for convenience. Today, I want to show you why ditching that tray (or at least bypassing it) is the easiest way to fix a wobbly extraction.
The Secret to Better Coffee Is Hiding Under Your Cup
When I first started out, I made the classic mistake of thinking that as long as I was choosing the best barista gear for coffee enthusiasts, the machine would handle the rest. I was wrong. I spent hundreds on high-end beans, but I was letting them lose all their character in the few inches between the basket and the cup. If your tray is thick or your cups are short, you are likely dealing with massive thermal loss and aeration that kills your crema. By removing the tray, you can bring your scale and cup much closer to the source. This is especially true if you find that your digital scale jumps when the pump starts, which is a common symptom of the tray vibrating against the machine’s frame.
Does messing with the tray really make a difference?
I know what you are thinking. It sounds like a lot of extra cleaning for a marginal gain. You might fear that you will end up with a puddle on your counter or that the aesthetics of your kitchen will suffer. But the reality is that pro-level extraction requires stability. According to the Specialty Coffee Association (SCA), maintaining a consistent temperature during the entire brewing process is vital for sweetness; even a small drop in the distance between the portafilter and the cup can cause the liquid to lose several degrees of heat to the ambient air. Have you ever felt like you are fighting your machine’s vibration just to get a clean weight reading? If so, you are not alone, and the solution is simpler than you think.
Stop the Scale Jiggle and the Temperature Drop
When you remove the drip tray and place your scale on the actual counter (or a solid riser), you eliminate the ‘drum effect’ of the hollow metal box. This stops your cup from doing the Macarena and prevents situations where your cup slides during a shot. It also helps if your espresso shot is spraying the back of your cup, because the reduced travel distance keeps the stream focused and intact. We are going to look at the practical ways to implement this without making a mess of your kitchen.
Stripping your machine down to its skeletal form might feel like a crime against aesthetics, but it is actually the move for better espresso without buying a new machine. When you pull that tray out, you are essentially removing a resonance chamber. Think of your drip tray like a drum; the pump is the stick, and the hollow space inside is the amplifier. By placing your scale on the counter, you decouple the weighing process from the mechanical noise of the machine. This ensures that when your scale says 36 grams, it actually means 36 grams of liquid, not 34 grams of coffee and 2 grams of vibrational ‘ghosting’ from the pump.
Ditch the Metal Box for a Solid Foundation
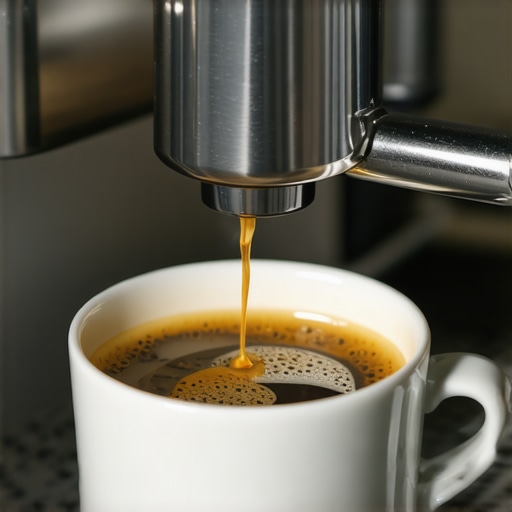
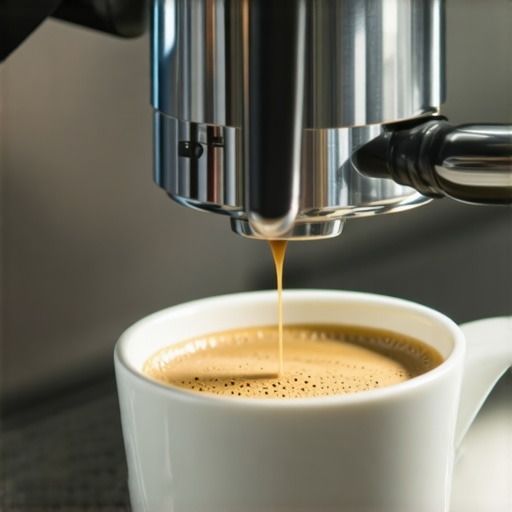
The first step is finding a way to bridge the gap. Most home espresso machines have a significant ‘lip’ or ‘overhang’ where the tray usually sits. If you simply place your scale on the counter, the distance to the portafilter becomes too large. To fix this, you need a riser. I have used everything from professional 3D-printed blocks to a simple, sturdy stack of ceramic coasters. The goal is to get your cup within two inches of the portafilter spouts. This proximity prevents the coffee from cooling down and keeps the stream from breaking apart into messy droplets. If you are struggling with a loud setup, learning how to stop your drip tray from vibrating across the counter starts with realizing the tray is the problem, not the solution.
Pick a Base That Stays Put
Stability is everything in the first ten seconds of a shot. I remember a Tuesday morning where I tried to use a loose stack of books as a riser. The vibration was so intense the whole stack slowly pirouetted toward the back of the machine, taking my scale and a half-pulled shot with it. It was a sticky, expensive lesson. Now, I use a solid silicone block. It absorbs the micro-vibrations that even the counter can’t fully dampen. If you can’t find a dedicated riser, the simple cardboard trick to quiet a vibrating machine can be adapted by wedging a thin, dense piece of corrugated cardboard between your riser and the machine frame to lock everything in place.
Monitor the Flow Without the Distractions
Once you have a rock-solid platform, you can actually see what is happening in the cup. Without the cup dancing around, you can focus on the aesthetics of the pour. This is the best time to learn how to identify under-extracted espresso by the color of the stream. When the cup is steady, you will notice the subtle transition from deep mahogany to pale blonding much earlier. This level of visual feedback is impossible when you are constantly reaching in to nudge a sliding cup back into the center of the stream.
Don’t Forget Where the Water Goes
The only real downside to this method is the exhaust. Most modern machines use a three-way solenoid valve that dumps pressure and a bit of water into the tray area once the pump stops. If your tray is gone, that water is hitting your counter. To manage this, I keep a small, low-profile ramekin tucked right behind the scale. It catches the ‘sneeze’ of the machine without taking up much space. If you find your machine is particularly messy at the end of a shot, looking into how to fix the annoying drip after your espresso shot stops can help minimize the cleanup and keep your ‘tray-less’ workflow efficient.
Most enthusiasts assume that a heavy, stainless steel machine is the pinnacle of stability. We are told that weight equals quality, but in my experience, a heavy machine with a poorly designed, hollow drip tray is just a louder, more expensive drum. The ‘heavy is better’ myth ignores the fact that internal vibration is an energy transfer problem, not a mass problem. Manufacturers often use a heavy chassis to mask the hum of cheap mounting brackets inside. When you pull that tray out, you are finally breaking the circuit of kinetic energy that causes those annoying rattles and phantom weight readings. By decoupling the cup from the machine’s frame, you are creating a laboratory-grade environment on your kitchen counter.
The Death Grip That Kills Your Gaskets
There is a common trap many hobbyists fall into: the ‘death grip’ on the portafilter. When a machine vibrates intensely, the portafilter often jiggles or creeps toward the ‘unlocked’ position. To counter this, many users crank the handle as far as it will go. This is a massive mistake. Not only does this lead to a situation where your portafilter won’t lock into the group later, but it is also the primary reason why your group head gasket is leaking after just one month. You should never use brute force to solve a resonance issue; if the machine is shaking the handle loose, it’s the vibration you need to address, not the tightness of the seal.
Why does my pressure gauge fluctuate when the tray is removed?
You might notice the needle on your machine acting a bit more ‘nervous’ once you’ve removed the tray and placed your scale on a solid riser. While the pump pressure itself hasn’t changed, removing the hollow metal tray often removes a layer of acoustic and physical dampening that was masking the pump’s true behavior. Expert barista Scott Rao has frequently noted that consistency in flow rate is the bedrock of flavor, and seeing these minor fluctuations isn’t a sign of a new problem—it is the machine finally being honest with you about its output. This transparency allows you to see if [why your espresso shot is coming out of only one spout] is actually a result of the machine being slightly off-level on its feet.
Why Your Grinder Is Still the Weakest Link
Beyond the drip tray, the hidden nuance of a professional-level home setup is the alignment of your burrs. We spend countless hours choosing the best barista gear for coffee enthusiasts, yet we often ignore the microscopic gap between the burrs. If your grinder isn’t perfectly leveled—perhaps because it is sitting on an uneven counter right next to a vibrating espresso machine—your extraction will never be truly uniform. I always recommend performing the chalk trick for checking grinder burr alignment to ensure you are getting the most out of your beans. If you’ve optimized your machine but the shots are still muddy, you should look into how to select the perfect coffee grinder for your brew to ensure your hardware matches your technique.
Even if you own one of the top rated espresso machines for coffee lovers in 2025, ignoring these small mechanical bypasses will leave you chasing your tail. You will keep buying fancy accessories like spring-loaded tampers for even shots, when the real issue was just a shaky foundation and a six-inch temperature drop. Have you ever fallen into the trap of over-tightening your gear just to keep it from rattling? Let me know in the comments below.
Maintaining a high-precision setup isn’t just about the big fixes; it’s about the micro-habits that keep your machine from sounding like a freight train. When you move to a tray-less or modified setup, you might realize that the previous vibration was actually masking deeper mechanical issues. I’ve found that learning how to stop your drip tray from rattling on every shot is only the first step in a long-term care plan. You also need to look closely at your steam wand and group head health. Personally, I’ve made it a non-negotiable rule to follow the 2-minute habit that prevents clogged steam wands because milk protein buildup is the fastest way to kill your steam pressure and ruin your morning. For the internal components, skip the cheap supermarket chemicals. I swear by the best way to descale a boiler without using harsh vinegar, as specialized citric acid solutions are much gentler on your copper pipes and delicate heating elements. Clive Coffee’s technical maintenance logs suggest that 90% of home espresso failures are related to water quality and scale buildup rather than mechanical defects, making your choice of water the most important tool in your arsenal.
How do I maintain my espresso machine’s performance over time?
Consistency comes from cleanliness, especially in the spots you can’t easily see. I use the cotton swab trick for cleaning hidden grinder crevices every weekend. It sounds obsessive, but if you’ve spent time researching how to select the perfect coffee grinder for your brew, you don’t want old, rancid oils from three weeks ago ruining your fresh light roasts. In the coming years, I expect we will see a surge in machines with integrated AI that monitors flow resistance and scale levels in real-time, essentially doing this diagnostic work for us. But for now, your best tool is your own observation. If you are just starting out, mastering the art of home espresso tips for beginners often involves overlooking the humble gasket. If yours is hard as a rock, you’ll quickly find out why your group head gasket is leaking after just one month—it’s usually because you are over-tightening the portafilter to compensate for a poor seal.
Upgrade the small parts to save the big parts
I highly recommend swapping out your factory rubber gaskets for silicone versions. Silicone stays soft and pliable regardless of the heat cycles, which prevents you from having to crank the handle and damage the group head ears. Furthermore, if you are using the tray-less method I mentioned earlier, keep an eye on your three-way solenoid. Since you are likely using a small ramekin to catch the exhaust water, ensure you are cleaning that ‘sneeze’ area daily to prevent mineral buildup on the machine’s undercarriage. This level of detail is what separates a coffee enthusiast from a true home barista. Try swapping your gasket this weekend and see if it makes your lock-in smoother and more consistent.
I was hunched over my kitchen counter at 6:00 AM, squinting at my scale as the pump on my machine roared to life. Every time the pressure hit its peak, my favorite ceramic cup would start a slow, rhythmic shuffle across the metal grate, vibrating its way toward the edge of the tray. I spent more time manually centering the cup than I did watching the flow. Worse yet, the coffee was splashing. By the time the liquid traveled the six-inch gap from the portafilter to the bottom of the cup, it looked like a mess, and it tasted even worse—thin, surprisingly lukewarm, and lacking that rich, syrupy mouthfeel I was chasing. That was the morning I finally pulled the drip tray out entirely and set it on the floor. It was a messy, awkward realization, but it changed my home barista game forever. I realized that the standard setup we are sold isn’t always designed for precision; it is designed for convenience. Today, I want to show you why ditching that tray (or at least bypassing it) is the easiest way to fix a wobbly extraction.
The Secret to Better Coffee Is Hiding Under Your Cup
When I first started out, I made the classic mistake of thinking that as long as I was choosing the best barista gear for coffee enthusiasts, the machine would handle the rest. I was wrong. I spent hundreds on high-end beans, but I was letting them lose all their character in the few inches between the basket and the cup. If your tray is thick or your cups are short, you are likely dealing with massive thermal loss and aeration that kills your crema. By removing the tray, you can bring your scale and cup much closer to the source. This is especially true if you find that your digital scale jumps when the pump starts, which is a common symptom of the tray vibrating against the machine’s frame.
Does messing with the tray really make a difference?
I know what you are thinking. It sounds like a lot of extra cleaning for a marginal gain. You might fear that you will end up with a puddle on your counter or that the aesthetics of your kitchen will suffer. But the reality is that pro-level extraction requires stability. According to the Specialty Coffee Association (SCA), maintaining a consistent temperature during the entire brewing process is vital for sweetness; even a small drop in the distance between the portafilter and the cup can cause the liquid to lose several degrees of heat to the ambient air. Have you ever felt like you are fighting your machine’s vibration just to get a clean weight reading? If so, you are not alone, and the solution is simpler than you think.
Stop the Scale Jiggle and the Temperature Drop
When you remove the drip tray and place your scale on the actual counter (or a solid riser), you eliminate the ‘drum effect’ of the hollow metal box. This stops your cup from doing the Macarena and prevents situations where your cup slides during a shot. It also helps if your espresso shot is spraying the back of your cup, because the reduced travel distance keeps the stream focused and intact. We are going to look at the practical ways to implement this without making a mess of your kitchen.
Stripping your machine down to its skeletal form might feel like a crime against aesthetics, but it is actually the move for better espresso without buying a new machine. When you pull that tray out, you are essentially removing a resonance chamber. Think of your drip tray like a drum; the pump is the stick, and the hollow space inside is the amplifier. By placing your scale on the counter, you decouple the weighing process from the mechanical noise of the machine. This ensures that when your scale says 36 grams, it actually means 36 grams of liquid, not 34 grams of coffee and 2 grams of vibrational ‘ghosting’ from the pump.
Ditch the Metal Box for a Solid Foundation
The first step is finding a way to bridge the gap. Most home espresso machines have a significant ‘lip’ or ‘overhang’ where the tray usually sits. If you simply place your scale on the counter, the distance to the portafilter becomes too large. To fix this, you need a riser. I have used everything from professional 3D-printed blocks to a simple, sturdy stack of ceramic coasters. The goal is to get your cup within two inches of the portafilter spouts. This proximity prevents the coffee from cooling down and keeps the stream from breaking apart into messy droplets. If you are struggling with a loud setup, learning how to stop your drip tray from vibrating across the counter starts with realizing the tray is the problem, not the solution.
Pick a Base That Stays Put
Stability is everything in the first ten seconds of a shot. I remember a Tuesday morning where I tried to use a loose stack of books as a riser. The vibration was so intense the whole stack slowly pirouetted toward the back of the machine, taking my scale and a half-pulled shot with it. It was a sticky, expensive lesson. Now, I use a solid silicone block. It absorbs the micro-vibrations that even the counter can’t fully dampen. If you can’t find a dedicated riser, the simple cardboard trick to quiet a vibrating machine can be adapted by wedging a thin, dense piece of corrugated cardboard between your riser and the machine frame to lock everything in place.
Monitor the Flow Without the Distractions
Once you have a rock-solid platform, you can actually see what is happening in the cup. Without the cup dancing around, you can focus on the aesthetics of the pour. This is the best time to learn how to identify under-extracted espresso by the color of the stream. When the cup is steady, you will notice the subtle transition from deep mahogany to pale blonding much earlier. This level of visual feedback is impossible when you are constantly reaching in to nudge a sliding cup back into the center of the stream.
Don’t Forget Where the Water Goes
The only real downside to this method is the exhaust. Most modern machines use a three-way solenoid valve that dumps pressure and a bit of water into the tray area once the pump stops. If your tray is gone, that water is hitting your counter. To manage this, I keep a small, low-profile ramekin tucked right behind the scale. It catches the ‘sneeze’ of the machine without taking up much space. If you find your machine is particularly messy at the end of a shot, looking into how to fix the annoying drip after your espresso shot stops can help minimize the cleanup and keep your ‘tray-less’ workflow efficient.
Most enthusiasts assume that a heavy, stainless steel machine is the pinnacle of stability. We are told that weight equals quality, but in my experience, a heavy machine with a poorly designed, hollow drip tray is just a louder, more expensive drum. The ‘heavy is better’ myth ignores the fact that internal vibration is an energy transfer problem, not a mass problem. Manufacturers often use a heavy chassis to mask the hum of cheap mounting brackets inside. When you pull that tray out, you are finally breaking the circuit of kinetic energy that causes those annoying rattles and phantom weight readings. By decoupling the cup from the machine’s frame, you are creating a laboratory-grade environment on your kitchen counter.
The Death Grip That Kills Your Gaskets
There is a common trap many hobbyists fall into: the ‘death grip’ on the portafilter. When a machine vibrates intensely, the portafilter often jiggles or creeps toward the ‘unlocked’ position. To counter this, many users crank the handle as far as it will go. This is a massive mistake. Not only does this lead to a situation where your portafilter won’t lock into the group later, but it is also the primary reason why your group head gasket is leaking after just one month. You should never use brute force to solve a resonance issue; if the machine is shaking the handle loose, it’s the vibration you need to address, not the tightness of the seal.
Why does my pressure gauge fluctuate when the tray is removed?
You might notice the needle on your machine acting a bit more ‘nervous’ once you’ve removed the tray and placed your scale on a solid riser. While the pump pressure itself hasn’t changed, removing the hollow metal tray often removes a layer of acoustic and physical dampening that was masking the pump’s true behavior. Expert barista Scott Rao has frequently noted that consistency in flow rate is the bedrock of flavor, and seeing these minor fluctuations isn’t a sign of a new problem—it is the machine finally being honest with you about its output. This transparency allows you to see if why your espresso shot is coming out of only one spout is actually a result of the machine being slightly off-level on its feet.
Why Your Grinder Is Still the Weakest Link
Beyond the drip tray, the hidden nuance of a professional-level home setup is the alignment of your burrs. We spend countless hours choosing the best barista gear for coffee enthusiasts, yet we often ignore the microscopic gap between the burrs. If your grinder isn’t perfectly leveled—perhaps because it is sitting on an uneven counter right next to a vibrating espresso machine—your extraction will never be truly uniform. I always recommend performing the chalk trick for checking grinder burr alignment to ensure you are getting the most out of your beans. If you’ve optimized your machine but the shots are still muddy, you should look into how to select the perfect coffee grinder for your brew to ensure your hardware matches your technique.
Even if you own one of the top rated espresso machines for coffee lovers in 2025, ignoring these small mechanical bypasses will leave you chasing your tail. You will keep buying fancy accessories like spring-loaded tampers for even shots, when the real issue was just a shaky foundation and a six-inch temperature drop. Have you ever fallen into the trap of over-tightening your gear just to keep it from rattling? Let me know in the comments below.
Maintaining a high-precision setup isn’t just about the big fixes; it’s about the micro-habits that keep your machine from sounding like a freight train. When you move to a tray-less or modified setup, you might realize that the previous vibration was actually masking deeper mechanical issues. I’ve found that learning how to stop your drip tray from rattling on every shot is only the first step in a long-term care plan. You also need to look closely at your steam wand and group head health. Personally, I’ve made it a non-negotiable rule to follow the 2-minute habit that prevents clogged steam wands because milk protein buildup is the fastest way to kill your steam pressure and ruin your morning. For the internal components, skip the cheap supermarket chemicals. I swear by the best way to descale a boiler without using harsh vinegar, as specialized citric acid solutions are much gentler on your copper pipes and delicate heating elements. Clive Coffee’s technical maintenance logs suggest that 90% of home espresso failures are related to water quality and scale buildup rather than mechanical defects, making your choice of water the most important tool in your arsenal.
How do I maintain my espresso machine’s performance over time?
Consistency comes from cleanliness, especially in the spots you can’t easily see. I use the cotton swab trick for cleaning hidden grinder crevices every weekend. It sounds obsessive, but if you’ve spent time researching how to select the perfect coffee grinder for your brew, you don’t want old, rancid oils from three weeks ago ruining your fresh light roasts. In the coming years, I expect we will see a surge in machines with integrated AI that monitors flow resistance and scale levels in real-time, essentially doing this diagnostic work for us. But for now, your best tool is your own observation. If you are just starting out, mastering the art of home espresso tips for beginners often involves overlooking the humble gasket. If yours is hard as a rock, you’ll quickly find out why your group head gasket is leaking after just one month—it’s usually because you are over-tightening the portafilter to compensate for a poor seal.
Upgrade the small parts to save the big parts
I highly recommend swapping out your factory rubber gaskets for silicone versions. Silicone stays soft and pliable regardless of the heat cycles, which prevents you from having to crank the handle and damage the group head ears. Furthermore, if you are using the tray-less method I mentioned earlier, keep an eye on your three-way solenoid. Since you are likely using a small ramekin to catch the exhaust water, ensure you are cleaning that ‘sneeze’ area daily to prevent mineral buildup on the machine’s undercarriage. This level of detail is what separates a coffee enthusiast from a true home barista. Try swapping your gasket this weekend and see if it makes your lock-in smoother and more consistent.
The Hard-Won Realizations of a Tray-Less Barista
Stepping away from the standard machine setup felt like breaking a rule, but the results spoke for themselves. Here are the core truths I’ve gathered from months of tray-less brewing:
- Vibration acts as “phantom weight” on your scale. If you’ve ever wondered why your digital scale jumps when the pump starts, it’s the machine talking to you, not the coffee.
- Proximity is the best thermal insulator. By cutting the distance between the basket and the cup, you preserve the volatile aromatics that usually vanish into thin air.
- Maintenance becomes visual. When the tray is gone, you catch drips and leaks instantly, making it easier to start mastering the art of home espresso tips for beginners without the guesswork.
- A “messy” setup is actually more hygienic. You’ll find yourself wiping the machine base daily rather than letting a swamp grow in a hidden drip tray.
The Toolkit That Actually Improved My Morning Routine
You don’t need a thousand-dollar upgrade to see a massive difference. If you are choosing the best barista gear for coffee enthusiasts, focus on the contact points. I personally swear by silicone group gaskets—they stop the leak without needing a death grip on the handle. I also keep a copy of ‘The World Atlas of Coffee’ by James Hoffmann on my counter; it’s the only resource that makes the chemistry feel accessible. For hardware, I look at the top rated espresso machines for coffee lovers in 2025 not for their looks, but for how easily they can be serviced. Lastly, never settle for a subpar grind; knowing how to select the perfect coffee grinder for your brew is the single biggest favor you can do for your taste buds.
#IMAGE_PLACEHOLDER_E#
Your Kitchen Is the New Laboratory
Don’t be afraid to make your machine look a little weird if it means the coffee tastes better. The journey toward a perfect home espresso is paved with small, sometimes ugly adjustments that prioritize the physics of the bean over the aesthetics of the appliance. Once you stop fighting the machine’s vibrations and start working with its true output, you’ll never go back to the “stock” way of doing things. Have you ever tried removing your tray or using a riser to get the cup closer to the portafilter? Let me know in the comments below.