How to Stop Your Drip Tray from Vibrating Across the Counter
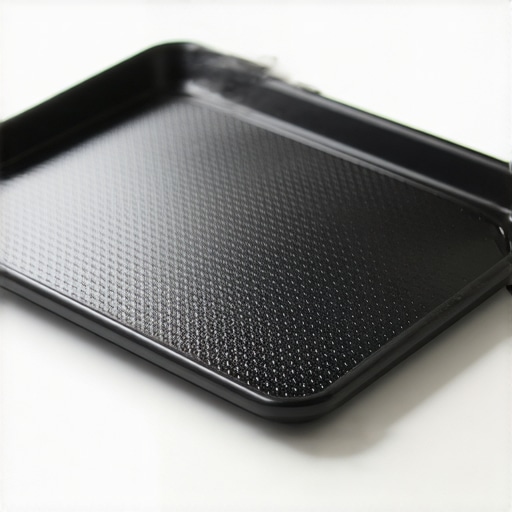
I stood there, eyes half-open, clutching my favorite ceramic mug like a holy relic while waiting for that first golden stream of espresso. I flipped the lever on my E61, and instead of the soothing hum of a pump, I got a sound like a jackhammer in a tin shed. My drip tray didn’t just rattle; it started a slow, rhythmic crawl toward the abyss of my kitchen floor. By the time the shot finished, my cup was three inches from where it started, and my nerves were shot. We spend a fortune on choosing the best barista gear, yet we often end up babysitting a sliding tray every single morning.
Why Your Espresso Machine Sounds Like a Construction Zone
It is a common plight for anyone who loves mastering the art of home espresso. Vibration is the enemy of precision. When your machine vibrates excessively, it is not just a noise issue; it actually affects the extraction. I have seen shots go completely sideways because the constant micro-shaking caused the puck to crack, leading to channeling. If you have noticed how to stop your cup from sliding during a shot is becoming a daily struggle, you are dealing with resonance. Today, I am going to show you how to anchor that tray for good without needing a degree in mechanical engineering or spending a fortune on specialized dampening mats.
Is this just a cheap machine problem?
I used to think so. I figured if I spent thousands on top-rated espresso machines, the engineers would have solved the physics of a vibrating pump. I was wrong. Even pro-sumer machines with heavy stainless steel frames can suffer from tray-creep. In my early days, I made the classic mistake of thinking more weight was the answer. I actually taped lead fishing weights to the underside of my tray. It did not stop the vibration; it just made the tray louder when it eventually hit the floor. Realizing the move for better espresso without buying a new machine often involves these small, tactile fixes was a huge lightbulb moment for me.
The Hidden Damage of a Shaky Machine
Beyond the sanity of your family members, a vibrating machine can actually cause long-term mechanical wear. According to engineering standards on mechanical resonance, constant high-frequency vibration in small appliances can lead to fastener loosening and structural fatigue over time. This is likely why you might eventually see steam leaking from the top or why your pressure gauge might suddenly get stuck at zero. Have you ever had to physically hold your cup in place while pulling a shot just to keep it from wandering off? It is a frustrating way to start the day, but we are about to fix it using how to stop your drip tray from rattling on every shot techniques that actually work.To kill the noise, you have to find where the metal is talking to the metal. Imagine your drip tray is a loose cymbal on a drum kit; every time the pump kicks in, it is going to ring. My first attempt at a fix was a disaster—I shoved a folded paper towel under the left corner. It worked for three shots until it became a soggy, moldy mess that smelled like an old basement. Instead, use thin strips of electrical tape or small adhesive silicone dots on the frame where the tray rests. This creates a tiny buffer that absorbs the energy before it turns into a rattle.
Dampen the Contact Points Without Making a Mess
The most common source of that jackhammer sound is the tray hitting the main body of the machine. If you look closely at top-rated espresso machines, they often have tiny rubber bumpers from the factory, but these wear out or fall off over months of use.
Try the Electrical Tape Buffer
Run a single strip of black electrical tape along the metal shelf where the tray sits. It is thin enough that it will not affect the fit or the aesthetic, but the rubbery texture kills the resonance. I did this on my old Rancilio, and it was the single best move for better espresso without buying a new machine I ever made. The tray felt solid, like it was part of the chassis rather than a loose limb.
Level the Playing Field
Sometimes the tray is not actually loose; the whole machine is just off-balance. If your counter is not perfectly flat, one foot might be hovering. Use the cardboard trick for leveling a grinder on an uneven counter on your espresso machine feet as well. A stable base means less overall sway, which keeps your cup from doing the tango toward the edge of the tray.
Stop Your Scale from Losing Its Mind
Vibration does more than just make noise; it messes with your extraction data. If you have ever wondered why your digital scale jumps when the pump starts, it is the vibration traveling through the tray into the load cell.
The Silicone Mat Solution
A thin silicone pad placed directly on the drip tray acts as a shock absorber for your scale. This is vital when mastering the art of home espresso because if your weight is flickering by two grams every second, you cannot time your shot accurately. I once missed a one-to-two ratio by ten grams because I was too busy trying to hold the scale steady with my pinky finger.
Check the Internal Plumbing
If the external fixes do not work, the vibration is likely coming from a hose hitting the case inside. Using the zip-tie fix for loose espresso machine tubing can secure those rattling lines. When a high-pressure hose vibrates against a stainless steel wall, it sounds like a swarm of bees. Securing those lines to the frame with a heat-resistant tie-down stops the noise at the source and prevents steam leaking from the top due to friction-worn hoses.Most enthusiasts believe that a bigger price tag equals a more forgiving machine. I used to fall for this too, thinking top-rated espresso machines were immune to the basic laws of physics. They aren’t. In fact, high-end gear often demands more precision because it reveals every flaw in your technique. One of the most common myths is that a premium grinder is perfectly aligned out of the box. I have opened brand-new, expensive units only to find the burrs were slightly off-kilter. This is where the tinfoil shim move for perfectly aligned grinders becomes your best friend. A study by the Coffee Science Foundation on particle size distribution found that even minor burr misalignment can increase ‘fines’ by up to 15%, leading to that muddy, bitter aftertaste regardless of the bean quality. If you are struggling with why your espresso shot is spraying the back of your cup, it is rarely the machine’s fault—it is usually a lack of uniformity in the grind.
Can a Paper Filter Actually Fix Your Bottomless Portafilter Sprays?
It sounds like heresy to a traditionalist, but the simple paper filter trick for better bottomless shots can change your extraction game. By placing a tiny paper disc at the bottom of the basket, you create a slight resistance that helps the puck hydrate more evenly. This stops the high-pressure jets from finding weak spots and creating those annoying sprays that ruin your morning aesthetic. It is a nuance that many skip because they want the ‘pure’ experience, but purity is worthless if your extraction is uneven. Another trap to avoid is the ‘old wives’ tale’ of cleaning burrs with rice. Please, understanding why you should never use rice to clean your high-end grinder is a lesson I learned the hard way; the starch buildup can seize the motor and dull the edges of precision steel. Instead, focus on mastering the art of home espresso through cleanliness and small, iterative adjustments. For instance, when how to select the perfect coffee grinder for your brew, look for accessibility—can you actually reach the burrs to clean them without losing your settings? Finally, do not ignore the science of milk. The reason your milk tastes sweet without adding sugar is not magic; it is the thermal breakdown of lactose into smaller, sweeter glucose and galactose molecules. If you overheat it, you destroy those sugars and end up with a flat, ‘cooked’ taste. Have you ever fallen into the trap of thinking a more expensive gadget would solve a technique problem? Let me know in the comments below.Talking about gadgets is fun, but the real work happens inside the machine where you cannot see it. I have learned that the hard way after ignoring my group head for six months, only to find my shots tasting like old gym socks. If you are serious about mastering the art of home espresso, you have to look past the shiny exterior and focus on the components that actually touch the water.
Stop Scale Before It Ruins Your Morning
The biggest silent killer of top-rated espresso machines is mineral buildup. If you have ever wondered why your E61 mushroom is covered in white crust, you are looking at the literal calcification of your investment. According to the Specialty Coffee Association’s Water Quality Handbook, the balance of calcium and total alkalinity is the thin line between a delicious extraction and a machine that needs a $500 teardown. I now use a dedicated water softening pouch in my reservoir because it is the easiest move for better espresso without buying a new machine. If you wait until you see steam leaking from the top, the internal damage might already be done.
Keep Your Grinder Cool and Precise
Maintaining your grinder is just as vital as the machine itself. Have you noticed why your grinder burrs are getting hot during a single dose lately? Heat is the enemy of flavor; it pre-cooks the oils in your beans before the water even touches them. I recommend a thorough deep clean every month. Use the best way to clean a grinder without losing your settings by marking your adjustment ring with a fine-point sharpie before disassembly. This ensures you do not spend an entire bag of expensive beans just trying to find your zero point again. Also, please avoid the temptation to use water on your burrs; the dish soap mistake that ruined your group head seal is a lesson that applies to grinders too—moisture leads to rust on high-carbon steel.
How do I maintain my home espresso setup over time?
Consistency is more about rhythm than intensity. I have adopted the 2-minute habit that prevents clogged steam wands by purging and wiping immediately after every latte. If you find why your espresso machine takes longer to heat up lately, it is likely a sign that the heating element is struggling against scale. For those using standalone milk frothers that transform your coffee experience, make sure you are cleaning the whisk assembly daily. A small buildup of milk protein can cause the motor to seize. Looking ahead, I predict we will see more machines integrated with AI-driven flow sensors that alert you to maintenance needs before the first drop of scale ever forms. I strongly encourage you to try the tinfoil shim move for perfectly aligned grinders this weekend—it is the most satisfying way to upgrade your cup for less than a penny.
The Mistakes That Taught Me More Than Manuals Ever Could
Over the years, I have realized that the sound of your machine is actually its own language. That high-pitched rattle isn’t just annoying; it’s a cry for help. I used to think that a loud pump meant the machine was “working hard,” but in reality, it was just transferring energy into friction rather than pressure. I also learned that how to stop your drip tray from rattling on every shot is more about changing the frequency than adding weight. My biggest lightbulb moment was discovering that a perfectly quiet machine isn’t just about luxury—it’s about the thermal stability that comes when everything is tightly secured. Often, the smallest vibration causes the puck to crack, which is why how to stop your cup from sliding during a shot is actually an extraction fix, not just a cosmetic one.
The Gear That Actually Earned a Spot on My Counter
When you are choosing the best barista gear, focus on the tools that solve friction. I always keep a roll of high-quality electrical tape and a sheet of 1mm silicone rubber in my drawer. These are my go-to’s for stopping tray creep. I also swear by a thin, heat-resistant silicone mat for the top of the machine; it stops the cups from clinking and pre-warms them more efficiently. For internal fixes, a pack of small zip ties is essential for the zip-tie fix for loose espresso machine tubing, which is the secret weapon for anyone who hates that internal buzzing sound. #IMAGE_PLACE_HOLDER_E#
Start Your Quietest Morning Tomorrow
You don’t need a professional technician to reclaim the peace of your kitchen. By tackling these vibrations one by one, you aren’t just fixing a noise—you are extending the life of your pump and ensuring your shots remain consistent. Every small adjustment, from the simple cardboard trick to quiet a vibrating machine to aligning your burrs, brings you one step closer to mastering the art of home espresso. Go ahead, flip that lever with confidence tomorrow and enjoy the silence. Have you ever had a cup slide completely off the tray during a shot? Let me know your most frustrating vibration story in the comments below!