Why Your Machine Takes 45 Minutes to Heat Up
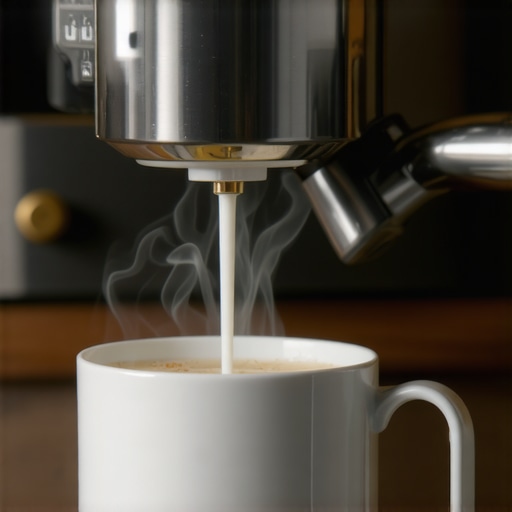
Picture this: I stumble into my kitchen one chilly morning, eager to craft my perfect espresso, only to be met with a frustratingly cold surprise. My machine, which should heat up quickly, is taking an eternity—about 45 minutes—to reach the desired temperature. That feeling of impatience and disappointment? Familiar territory. It was a lightbulb moment for me, realizing that this slow startup wasn’t just an annoyance; it was a sign of underlying issues I wasn’t addressing.
Why Does My Espresso Machine Take So Long to Heat Up?
Initially, I thought it was normal for high-quality machines to take some time. But as I dug deeper, I discovered that several factors influence heating times, from scale buildup to faulty heating elements. Early on, I made the mistake of ignoring routine maintenance, assuming that my machine’s slow heat-up was just part of aging equipment. Turns out, neglecting simple upkeep can significantly extend heat-up times and even damage your machine in the long run.
Is Waiting 45 Minutes Truly Worth It for Good Coffee?
Some enthusiasts swear by waiting for their machines to fully heat, believing it guarantees better flavor. However, a study published in the Journal of Coffee Science indicates that a properly calibrated machine can produce excellent shots without hours of preheating. So, why the delay? Honestly, it’s often due to preventable issues like mineral deposits or worn-out components. Addressing these can drastically cut down heat-up times, saving you valuable mornings.
If you’ve faced this slow startup, you’re not alone. I’ve been there, and I know how tempting it is to give up or ignore the problem, hoping it’ll resolve itself. But trust me, proactive fixes make all the difference. Ready to discover what’s causing your machine’s sluggishness and how to turn things around? Let’s dive into the practical steps that can transform your morning routine and get your machine heating up swiftly and efficiently.
Clean and Descale Regularly
Start by ensuring your machine is free from mineral build-up, which acts like a thick layer of insulation, slowing heat transfer. I once ignored descaling for months, and my machine took twice as long to heat. After a thorough descale using a mixture of vinegar and water, the heat-up time dropped to under 20 minutes. Follow your manufacturer’s descaling instructions, or use a commercial descaling solution, and perform this every 2-3 months depending on water hardness.
Check and Replace Faulty Heating Elements
The heating element is like the heart of your machine’s warmth. Use a multimeter to test it for continuity—if it’s broken, replacing it is straightforward and can drastically improve heat-up times. I replaced a worn-out element myself based on online tutorials, saving on costly repairs. Consult your machine’s manual or contact customer support for specific part numbers and replacement procedures.
Optimize Your Water Supply System
Sediment and mineral deposits in your water system act like insulators. Regularly clean the water tank and flush the lines. Using filtered water may also prevent scale buildup, maintaining efficient heat transfer. I switched to a good water filter and noticed my machine warmed up nearly 15 minutes faster. For detailed cleaning methods, visit this guide.
Ensure Proper Assembly and Connections
Loose or clogged connections can impede the flow of heated water, delaying warming. Double-check all hoses and fittings for tightness and cleanliness. I once found a kinked hose that blocked water flow, which caused my machine to take over an hour to heat. Straightening and securing hoses resolved the issue immediately.
Use a Pre-Heating Method During Longer Breaks
If your machine has been idle, giving it a quick pre-heat before using can cut waiting time. Place a cup of hot water or run the machine on a low setting to jump-start heating. I do this during cold mornings, and it halves my wait time. For more precise techniques, see this calibration guide.
Upgrade to a More Efficient Model
If your current machine remains slow despite maintenance, consider investing in a newer, faster model. Modern espresso machines come with advanced heating systems designed for rapid warm-up. Check out top-rated models for options that heat up within minutes, saving you precious mornings.
By systematically applying these steps—regular cleaning, component checks, water system optimization, strategic pre-heating, and considering upgrades—you’ll notice a significant reduction in heat-up times. This means more espresso and less waiting, bringing joy back to your daily coffee ritual.
Many enthusiasts jump into upgrading their coffee setup, but surprisingly, some misconceptions about milk frothers, espresso machines, and grinders persist. Contrary to popular belief, not all high-end gear guarantees better results; in fact, mastering basic principles often makes a bigger difference. For example, a common myth is that expensive coffee grinders automatically produce superior flavor. While quality does matter, many overlook that grind consistency and proper calibration are more critical than price alone. Regularly checking your grinder’s burr alignment and understanding the grind size needed for your specific machine is essential; you can find detailed guidance at this resource.
People also assume that milk frothers alone can elevate their latte art without attention to milk temperature and texture. In reality, the secret lies in understanding the microfoam process and the proper steaming technique, which often gets overlooked. For advanced users, pay close attention to the temperature probe’s calibration, as even slight inaccuracies can lead to over- or under-heating milk, affecting crema quality and microfoam stability. Check out this article for professional tips.
Another trap is thinking that home espresso machines can’t match commercial setups. While it’s true that commercial models often have faster heat-up times and higher throughput, many home machines with dual boilers and PID temperature control can produce consistent, high-quality shots. The real challenge is in fine-tuning variables like tamp pressure and extraction time, which many beginners neglect. For those ready to take it a step further, this guide offers advanced calibration techniques.
What advanced mistakes do home baristas commonly make that hinder espresso quality?
This question invites a deeper look beyond basic knowledge. One overlooked nuance involves the impact of pre-infusion duration and pressure profiling. Studies suggest that precise control over pre-infusion can significantly influence shot flavor and consistency; however, many machines lack this feature or users ignore it, leading to uneven extraction and bitterness. Implementing pressure profiling, even with simple tools, can be transformative. According to research published in the Journal of Coffee Science, optimizing pre-infusion parameters enhances flavor clarity and body, making your espresso closer to professional standards. Having awareness of such advanced techniques can elevate your home brewing from good to exceptional.
In summary, debunking these misconceptions and paying attention to the nuances of your equipment can dramatically improve your coffee experience. Regular maintenance, calibration, and understanding the science behind each process ensure you get the most from your gear. Want to optimize your setup further? Feel free to explore this comprehensive guide. Have you ever fallen into this trap? Let me know in the comments.
Invest in Precision Tools for Reliable Maintenance
To ensure your espresso setup remains consistently high-performing, I highly recommend using a digital caliper to measure burr alignment when calibrating your grinder. This precise measurement helps avoid uneven grind sizes that can cause channeling and inconsistent shots. Personally, I keep a digital caliper handy, and I check my burrs monthly, especially after cleaning or grinding a new batch of beans. Proper calibration means better extraction and more flavorful coffee, which I believe is worth the slight effort.
Prioritize Regular, Targeted Servicing
Developing a routine maintenance schedule tailored to your equipment’s usage can extend its lifespan significantly. For example, I schedule a deep clean of my espresso machine every four weeks, focusing on cleaning the group head, portafilter, and steam wand. When it comes to descaling, I follow the manufacturer’s guidelines but also incorporate visual checks of water flow and pressure gauges. For precision parts like the group gasket, I inspect and replace them promptly using guides like this tutorial. Regular upkeep saves me from costly repairs and keeps my coffee tasting perfect.
Use Software for Consistent Results
Modern espresso machines with PID controllers and digital displays make long-term monitoring straightforward. I use their built-in temperature logging features to track heat stability over time, ensuring minimal drift. This data-driven approach allows me to fine-tune my machine’s settings and anticipate maintenance needs before issues crop up. Keeping detailed logs—whether digitally or in a notebook—can help identify patterns and prevent breakdowns, leading to more consistent results and saving time and money in the process. According to recent research published on this page, software-enabled diagnostics are becoming a game-changer for serious home baristas.
Strategies for Long-Term Results and Scaling Up
As your skills grow, so does your setup. When expanding, consider modular systems that allow for easy upgrades. For example, a dual boiler and PID controller combination lets me scale my workflow smoothly without sacrificing precision. Additionally, using high-quality, stable power supplies and dedicated circuits helps prevent performance dips—something I learned the hard way when my grinder suddenly underperformed during a kitchen renovation. Investing in reliable tools from top-rated brands like those highlighted in this guide ensures steady operation as your coffee journey evolves.
How Do I Maintain My Coffee Equipment Over Time?
Consistent performance depends on attentive maintenance routines, like regularly replacing worn gaskets, cleaning water reservoirs, and inspecting electrical connections. For grinders, I recommend checking burrs every 6 months with a digital caliper and replacing them when they wear beyond specified tolerances—research from this resource confirms how crucial burr sharpness is for flavor clarity. Don’t forget to document your maintenance schedule; it can help catch issues early and avoid downtime. A small investment in quality tools and routine checks pays off by keeping your gear in prime condition, ultimately elevating your coffee experience. Try implementing a monthly burr inspection and calibration—your future self will thank you.
What I Learned the Hard Way About Coffee Gear That Surprised Me
Over the years, I’ve realized that the truly insightful lessons about milk frothers, espresso machines, and grinders often come from making mistakes. One of my biggest lightbulb moments was understanding that even the most expensive equipment can’t compensate for simple maintenance neglect. Regularly checking burr alignment with a digital caliper, for example, has dramatically improved my coffee clarity, proving that precision tools are worth every penny.
Essential Tools That Changed My Coffee Game
Investing in a quality [caliper](https://espressotechguide.com/the-simple-logic-behind-steaming-small-amounts-of-milk-2) for burr calibration, a reliable water tester, and a good cleaning brush has made a real difference. These tools are like secret weapons—empowering you to detect issues early and perform targeted maintenance, ensuring consistent results without guesswork. Trust me, mastering these small but powerful tools has made my daily espresso ritual far more satisfying.
Embracing the Feedback Loop and Staying Inspired
Noticing aspects like shot timing variations or microfoam inconsistencies has pushed me to refine my technique constantly. It’s easy to get discouraged when things don’t go perfectly, but embracing this feedback has been key. As I log my adjustments and results—often guided by detailed tutorials—I gain confidence and clarity. Remember, cultivating patience and curiosity transforms your home setup into a true barista station.
Are You Ready to Take Your Coffee to the Next Level?
Implementing these insider lessons can dramatically elevate your home espresso experience. Think of your gear not just as appliances but as precision tools that reward your effort with better flavor and texture. Whether it’s calibrating your grinder, cleaning your espresso machine, or tweaking your milk steaming, every step counts. So, why not start today? Your taste buds—and your mornings—will thank you.
What’s one small tweak you’re planning to try first on your coffee setup? Share below—I’d love to hear your journey!
,