The Cheap Magnetic Mirror That Fixes Your Workflow Visibility
It hit me one hectic morning—my workflow was slipping through my fingers. As I wrestled with my messy espresso station, I realized I was missing a simple tool that could’ve saved me from endless frustration: a magnetic mirror. At first, I thought, “A mirror? For coffee gear? That sounds gimmicky.” But after a few mornings of knocking over tampers and misjudging grind levels, I knew I had to find a smarter way. That’s when I discovered the power of a cheap magnetic mirror—an inexpensive fix that drastically improved my workflow visibility.
Seeing Clearly in a Cluttered Space
Many home baristas I know struggle with a common problem: trying to keep everything in sight while avoiding the chaos of a cluttered countertop. It’s especially tricky when you’re rushing to pull shots during busy mornings or trying to adjust grind settings without knocking over your scale or messily fumbling with tools. I used to spend ages repositioning equipment, stepping on loose towels, or squinting at poorly lit areas—wasting valuable time and risking errors that could compromise my espresso quality.
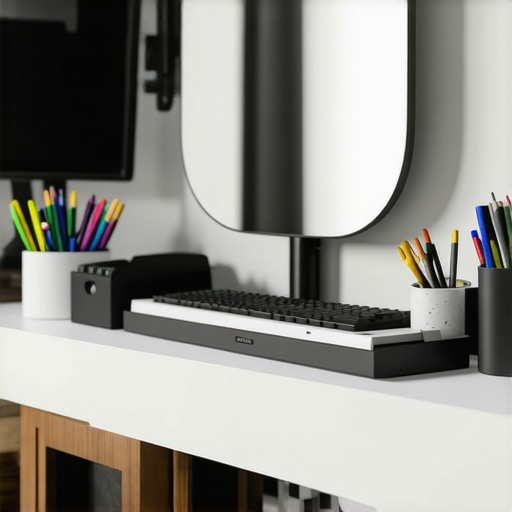
The game-changer was a **simple magnetic mirror**—a small, lightweight device that sticks to my machine and lets me see critical areas without contorting or cluttering up my workspace. I was skeptical at first—after all, how much could a mirror really help? But the results were undeniable. Quickly, I could check shot clarity, monitor milk frothing progress, and even keep an eye on the portafilter and grinder settings—all from a comfortable, ergonomic position. It made my entire workflow feel more organized and less rushed.
What makes this about more than just convenience? Well, according to coffee expert James Hoffmann, visual cues are essential for perfect espresso extraction, and better visibility leads to more consistent results. And from personal experience, I’ve avoided many common errors, like over-tamping or uneven distributions, simply because I could see what I was doing more clearly.
Have you faced the frustration of trying to keep an eye on multiple tasks at once in your setup? If so, a magnetic mirror might just be the affordable upgrade you’ve been overlooking. Plus, it’s not just for espresso—blinging your coffee station with a cheap magnetic mirror could help you streamline everything from milk steaming to grinder adjustments.
Now, let’s explore how you can implement this simple yet effective tool into your routine and take your workflow to the next level—without breaking the bank. But first, here’s a common mistake I made early on that almost cost me quality and patience, and how you can avoid it too.
Position the Mirror Strategically for Perfect Visibility
Start by attaching your magnetic mirror to a flat, non-porous surface on your espresso machine, ideally near your grinder or tamping station. Use the mirror to monitor your tamping pressure and distribution without leaning over the portafilter, reducing arm fatigue and maintaining a consistent technique. I once stuck the mirror on the side of my machine and found that I could keep an eye on shotTiming and tamping without repositioning my stance, which made a noticeable difference in shot consistency.
Adjust the Position for Different Tasks
For tamping, angle the mirror so you can see directly down to ensure even pressure application. When grinding, position it to observe grind size and doser filling, avoiding the need to crouch or eye the hopper directly—especially useful during busy mornings when speed is crucial. Consider moving the mirror to view milk steaming if your setup allows, ensuring microfoam quality without stopping to peek around the pitcher. This flexibility avoids the clutter of extra tools and items on your workspace.
Use the Mirror to Spot Common Errors
The mirror helps detect issues like uneven tamping, channeling, or milk splattering. For example, during a busy weekend, I used the mirror to verify my tamping evenness when my hands were shaky from rushing. Spotting uneven pressure early saved my shot from sourness and bitterness, saving time and wasted beans. Combining visual feedback with tactile and taste cues creates a more comprehensive approach to dialing in your shots.
Integrate the Mirror into Your Routine
Make checking your shot parameters a quick habit. Before pulling each shot, glance at the mirror to confirm grinder settings, tamping consistency, and portafilter attachment—all in one quick sweep. Over time, this syncs your movements and reduces the reliance on multiple tools, streamlining your workflow. Personally, I found that observing my workflow from a new angle—without turning my head or shifting position—cut my shot times and improved texture quality.
Combine Visual Cues with Other Techniques
While the mirror is a game-changer, don’t forget to complement it with other good practices. Refer to [how to fix a wobbling tamper](https://espressotechguide.com/how-to-fix-a-wobbly-tamper-that-is-ruining-your-leveling) regularly, and regularly check your grinder adjustment ring if grind size inconsistencies arise. Using the mirror in tandem with these methods maximizes your overall control, and leads to more predictable and professional results.
Many home espresso enthusiasts believe that owning high-end equipment guarantees perfect shots, but in reality, most errors stem from nuanced misunderstandings and overlooked details. One prevalent myth is that more expensive grinders always produce better espresso. Although quality grinders are important, improper calibration or neglecting grinder maintenance, like ignoring [grinder adjustment ring issues](https://espressotechguide.com/how-to-fix-a-grinder-adjustment-ring-that-wont-budge), can sabotage your results. This misconception leads many to overlook the importance of precise grind settings tailored to specific beans and brewing conditions.
A common mistake is focusing solely on the coffee beans and machine but neglecting the importance of proper tamping technique. Over-pressing or uneven tamping causes channeling and uneven extraction. Implementing consistent tamping pressure, and periodically verifying tamp stability, can dramatically improve shot quality. Many enthusiasts underestimate how sensitive espresso extraction is to even minor technique flaws—a reminder that mastery involves more than just hardware.
Are you aware that milk frothing is often sabotaged by simple missteps, like incorrect pitcher angles or steam wand positioning? A common error many make is aligning the wand too close or far from the milk surface, leading to splattering and large bubbles. Discovering the hidden nuances of milk steaming can elevate your microfoam to professional levels.
Let’s address an advanced question that often trips up dedicated hobbyists: How do baristas consistently dial in espresso extraction in variable home conditions? The key lies in controlling variables such as fresh water quality, ambient temperature, and equipment heat-up time. Even slight fluctuations can influence the brew. Regularly monitoring factors like brew pressure and temperature, possibly adjusting via a PID controller, ensures consistency. According to industry expert Scott Rao, understanding the delicate balance of these parameters is crucial for advanced home baristas seeking perfection.
Be cautious not to fall into the trap of neglecting routine maintenance. Many users ignore signs of wear, such as a [leaky steam wand](https://espressotechguide.com/how-to-fix-a-leaky-steam-wand-connection-without-a-plumber) or a [clogged portafilter](https://espressotechguide.com/the-messy-reason-your-bottomless-portafilter-keeps-spraying-your-counter), which impair performance and consistency. Regular cleaning and component checks are essential for achieving professional results at home.
Have you ever fallen into this trap? Let me know in the comments. Remember, mastering home espresso isn’t just about owning the gear; it’s about understanding and mastering its nuances.Keeping your home espresso setup in top shape requires more than just initial investment; it demands consistent maintenance and the right tools. Personally, I rely heavily on precision gauges and cleaning equipment that streamline daily routines and ensure durability. For instance, a high-quality grinder adjustment ring calibration tool helps me quickly fine-tune my burrs without guesswork, preventing uneven grounds and shot inconsistencies over time. Regularly monitoring machine temperatures using an accurate thermometer is equally vital, especially as heating elements age—a detail highlighted in Scott Rao’s discourse on temperature stability. Predicting future trends, I believe smart sensors integrated with machine maintenance will revolutionize home barista gear, alerting us proactively when parts need replacing. To extend your gear’s lifespan, adopt a simple routine: clean your portafilter and baskets thoroughly after each use with a dedicated brush and descaling every few months. How do I maintain my tools over time? I schedule bi-weekly checks of critical components, lubricate moving parts when necessary, and keep spare gaskets handy, referencing detailed guides like gasket replacement tips. Incorporating these practices ensures longevity and peak performance. I encourage you to try calibration of your grinder’s adjustment ring this week—small adjustments now can dramatically improve shot quality over time, making your morning routine more satisfying and efficient.
Over the years, I’ve realized that some of the most profound improvements in home espresso come from simple, often overlooked tricks. One lesson that stands out is the importance of visual feedback—something I once dismissed as trivial. Today, I’ll share a few insights I wish I had known earlier, often learned the hard way, but which have now become my secret weapons.
The Hardest Lesson I Learned About home espresso,espresso machines,barista gear,milk frothers,coffee grinders
Patience truly is a virtue. Early in my journey, I believed that more expensive tools guaranteed perfect shots. I overlooked the power of consistent technique and the value of small adjustments—like verifying tamp pressure or maintaining the freshness of beans. Using a magnetic mirror made me realize that seeing the process in action often reveals issues that tactile feedback alone can’t catch, like uneven tamping or misaligned grind size. It taught me to trust my eyes and, in turn, refine my skills without unnecessary frustration.
3 Myths About home espresso,espresso machines,barista gear,milk frothers,coffee grinders That Held Me Back
One prevalent misconception was that high-end equipment ensures flawless espresso. The truth is, even the best grinder or machine can produce subpar shots if not calibrated correctly. The mirror helped me debunk this myth by giving me a quick way to check the clarity of my shots or milk microfoam without leaning over or squinting, making me realize that technique and routine maintenance matter more than just gear quality.
What Experts Won’t Tell You About home espresso,espresso machines,barista gear,milk frothers,coffee grinders
Most industry pros emphasize routine calibration and understanding your specific setup. But what truly accelerates learning is visual feedback—like using a mirror to see the tamp’s evenness or shot color. This simple tool bridges the gap between theory and practice, allowing me to spot errors early, adapt faster, and achieve consistent results. It’s a small addition that pays huge dividends.
Action Brings Results: Start Seeing Your Espresso Clearly
If you haven’t integrated visual cues into your routine, I highly recommend giving it a try. Attach a magnetic mirror near your grinder or tamping station and observe your process from different angles—no more guesswork, only knowledge. Remember, mastering home espresso is about nuanced adjustments, patience, and the willingness to see your process more clearly.
What’s one visual check you plan to incorporate into your ritual today? Share your thoughts below—I’d love to hear how small shifts can lead to big improvements in your home coffee experience.
,