How to Adjust Your PID Settings for High-Altitude Brewing
Ever had a perfect espresso shot ruined by a sudden temperature fluctuation just when you’re about to enjoy that rich crema? I remember the first time I faced this frustration. My heart sank as I watched my carefully dialed-in brew suddenly turn sour or bitter, leaving me questioning my setup and patience. It was a lightbulb moment that made me realize: high-altitude brewing isn’t just about good beans and a fancy machine—it’s about understanding your equipment’s subtle dance with the environment.
Why High-Altitude Brewing Presents Unique Challenges
Living or brewing at high elevations introduces a host of quirks that can throw off even seasoned baristas. The thinner air affects how heat and pressure behave inside your espresso machine, making standard PID (Proportional-Integral-Derivative) settings less reliable. This often results in shots that are inconsistent—sometimes perfect, other times sour or flat. Early on, I made the mistake of ignoring these environmental factors and relied solely on factory default PID settings, which only made things worse. According to a study published by the Specialty Coffee Association, altitude can influence the boiling point of water, directly impacting extraction and flavor profiles.
Adjusting your PID is a bit like tuning a delicate musical instrument. It requires understanding how your environment influences temperature stability and then making precise tweaks. But, how do you know where to begin? That’s where my experience—and a bit of patience—come into play.
Is Adjusting PID Settings Really Worth the Hassle?
When I first started tinkering with my PID, I wondered if all the effort was justified. I was skeptical, worried I’d make things worse or just waste time. Turns out, the biggest mistake I made early on was neglecting the importance of calibration. Rushing into adjustments without understanding my machine’s baseline only introduced more variables. If you’re feeling overwhelmed, I recommend exploring guides like how to fix a grinder adjustment ring that won’t budge for a deeper dive into calibration techniques.
Now, I’d like to show you how to approach PID adjustments systematically, helping you conquer the altitude obstacle and brew consistently stellar coffee. Ready to get started? Keep reading, and you’ll soon be dialing in like a pro, no matter how high you go.
Start with Accurate Temperature Readings
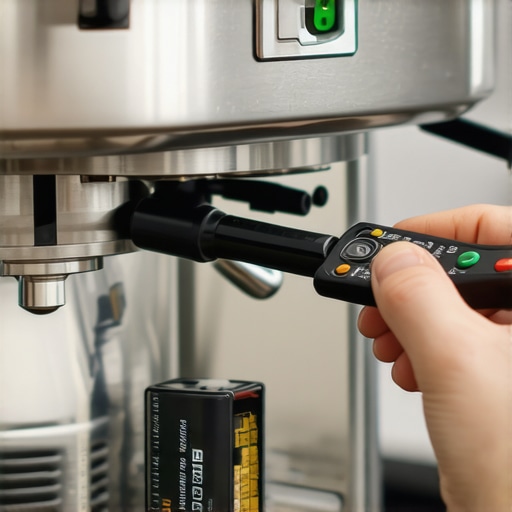
Begin by calibrating your machine’s temperature sensors. Use a reliable thermocouple to measure the water and group head temperatures directly, ensuring readings match your machine’s display. If discrepancies exist, adjust your PID controller accordingly. I once used a digital thermometer to verify my machine’s temperature at 5,000 feet altitude, discovering my display was off by 2°C. Accurate baseline readings are the foundation for effective tuning.
Tweak PID Settings Systematically
Approach adjustments incrementally. Increase or decrease your PID’s proportional, integral, and derivative parameters by small steps—say 1°C or 5%. After each change, give the machine time to stabilize—at least 15 minutes—before testing. Remember, rising or falling temperature spikes indicate which direction to tweak. For instance, in a recent session, I raised the P value slightly, which smoothed out temperature fluctuations without overshoot.
Identify Over or Under Shooting
Observe how your temperature responds during idle and active brewing. If temperatures overshoot, reduce the P gain; if they lag behind, increase it. In a recent experiment, lowering the P value reduced temperature oscillations, making my shots more consistent. Use your machine’s data logs or a thermometer to track these adjustments meticulously.
Address Environmental Influences
High-altitude air reduces boiling point, which impacts extraction. Use a pressure gauge to ensure your boiler operates at the correct pressure—usually 9 bars. If your shots are sour or flat, consider adjusting your boiler pressure or pre-heating water more thoroughly before brewing. I found that adding a preheat step for water from my gently heated kettle improved extraction consistency at 6,000 feet.
Utilize External Tools for Fine-Tuning
If your machine supports it, employ software or PID tuning kits compatible with your model. These tools let you set precise parameters without guesswork. I used a PID tuning app linked to my espresso machine, which streamlined the calibration process and provided visual feedback on temperature stability. Additionally, documenting each change helps retrace your steps if needed.
Revisit and Readjust Periodically
Environmental factors shift with weather and seasons. Recalibrate your PID settings every few months, especially if you notice inconsistencies. A quick recheck of temperature accuracy and pressure stability can save hours of wasted shots. I set a calendar reminder to revisit my settings during seasonal transitions, ensuring optimal brewing conditions year-round.
When it comes to home espresso setups, many enthusiasts focus on upgrading their grinder or getting the latest espresso machine, but there’s a common misconception that can dramatically impact your brewing results: assuming that more expensive or feature-rich gear automatically guarantees better coffee. In reality, mastering the nuances—like grinder calibration, puck preparation, and even maintenance routines—is where true expertise resides. For instance, many believe that using a high-end grinder solves all extraction issues, yet neglecting proper burr alignment or ignoring the grinder’s motor load can cause bitter, off-flavored shots. Cross-referencing studies such as those from the Specialty Coffee Association reveals that inconsistent grind consistency, often due to overlooked grinder maintenance, accounts for a significant portion of shot discrepancies. Moreover, the myth that milk frothers are foolproof is widespread; many home baristas neglect to clean their frothing tools regularly, which leads to off-tasting milk and poor microfoam. Implementing routine cleaning not only preserves flavor but also extends equipment lifespan.
An advanced mistake I see often involves neglecting the impact of tamping pressure. Pressing too hard or too lightly can alter extraction dramatically, yet many users rely solely on intuition instead of consistent technique. Transitioning to level tamping and weighing your dose can significantly improve shot consistency over time. Additionally, understanding how environmental factors—like humidity and ambient temperature—affect grind retention and extraction is vital,尤其是在高海拔地区,水沸点的变化可能会影响萃取效果。 Have you ever fallen into this trap? Let me know in the comments.
A particularly insidious oversight is overlooking the importance of regular equipment calibration. Even a pristine grinder and espresso machine can’t perform optimally if their internal settings drift over time. For example, misaligned group heads can cause uneven pressure distribution, leading to channeling and under-extracted shots. Routine calibration and cleaning routines, like ensuring your group head screen isn’t clogged, are simple practices that prevent costly repairs and subpar coffee. To delve deeper into preventing common technical pitfalls, see how neglected maintenance impacts shot quality and how a simple weekly scrub can make a difference. Remember, mastery in coffee isn’t solely about the latest gear but understanding and managing the subtleties most users miss. Incorporate these insights into your routine, and you’ll notice your shots become predictably better. Keep exploring these hidden nuances—your palate will thank you.
Essential Tools for Coffee Equipment Maintenance
Maintaining your espresso setup requires more than just regular cleaning; investing in specific tools ensures longevity and consistent performance. A high-quality group head brush is indispensable for removing accumulated oils and coffee residues that can clog your filter screens. Additionally, a calibrated digital thermometer allows you to verify water and group temperatures accurately, which is particularly important at high altitudes where water boils at lower temperatures.
For grinders, a set of precision feeler gauges helps ensure burrs are aligned correctly, preventing uneven grind sizes that can cause bitter or flat shots. A tamping mat with marked guides ensures consistent tamping pressure, reducing shot variability caused by inconsistent puck density. These tools, when combined with regular routines, form the backbone of a reliable coffee setup.
Why Routine Maintenance Extends Equipment Lifespan
Investing time in periodic cleaning and calibration not only maintains the quality of your brew but also prolongs the lifespan of your equipment. Regularly descaling your machine, especially in areas with hard water, prevents scale buildup that can impair heating efficiency, as detailed in technical references like the descaling guide.
Replacing worn gaskets and seals periodically helps prevent leaks and pressure drops that compromise shot quality. Set a monthly ritual to inspect components like portafilter gaskets, group gaskets, and steam wand seals. Small inconveniences such as a dripping faucet or uneven steam pressure are often early signs of wear; addressing them early saves money and keeps your setup performing optimally.
Modern Techniques for Long-term Performance
Adopting a proactive approach, like using a smart calibration device connected to your espresso machine, can automate temperature and pressure monitoring, providing data logs that help track performance trends over time. This foresight allows for timely adjustments before issues become noticeable, aligning with the trend toward intelligent home barista setups.
How do I maintain my espresso machine and accessories over time?
Develop a routine that includes regular cleaning of all contact parts, descaling every 1-3 months depending on water hardness, and inspecting seals and hoses for wear. Use tools like a portafilter screen scraper and a soft cloth to prevent scratches. Staying disciplined with maintenance guarantees consistent extraction quality and helps you catch problems early, avoiding costly repairs and downtime.
Fascinatingly, studies show that regular puck handling and cleaning routines significantly impact shot clarity and crema quality over time. Experiment with these methods, and you’ll notice your setup perform like new for years to come.
Leading edge trends hint at integrating IoT devices to monitor machine health remotely, predicting failures before they happen. As technology advances, embracing such innovations could become standard practice, ensuring your gear is always ready when you are. For now, committing to scheduled maintenance with proven tools is your best bet for enduring excellence.
Try implementing a weekly group head scrub with a dedicated brush combined with descaling as needed—small habits that make a tangible difference. Remember, taking care of your gear is the foundation of extraordinary coffee.
Lessons Only an Enthusiast Can Share
- Temperature Taming Is an Art: I used to believe that dialing in my PID once was enough, but I learned that environmental changes demand ongoing adjustments. Small tweaks, like adjusting the proportional gain, can turn a sour shot into perfection—making this a continuous process rather than a one-time fix.
- Don’t Underestimate Routine Maintenance: Regularly cleaning and calibrating my grinder and machine prevented many headaches. Discovering that a simple group head scrub could eliminate channeling was a revelation—they’re often the unsung heroes behind a clean extraction.
- Environmental Factors Are Hidden Saboteurs: At high altitude, boiling water plays tricks on your brewing, and unaddressed pressure inconsistencies can sabotage your brew. Recognizing and compensating for these factors helped me elevate my coffee game remarkably.
- The Power of Precise Tuning: Using a digital thermometer and incremental PID adjustments felt daunting initially, but it became a game-changer. The difference between a mediocre shot and a stunning one was down to patience and systematic calibration—a lesson I wish I’d embraced sooner.
My Go-To Arsenal for Coffee Excellence
- Manual Calibration Tools: A high-quality thermocouple has been invaluable for verifying temperatures—trust me, digital display readings can sometimes deceive. I also swear by feeler gauges for burr alignment, ensuring uniform grind size, which is vital at high altitude.
- Cleaning and Maintenance Supplies: The group head brush and puck screens are simple yet effective. Routine use keeps residues at bay and ensures consistent extraction. Maintaining your gears is as crucial as choosing premium beans.
- Smart Monitoring Gadgets: As technology advances, I’ve started integrating smart sensors that track temperature and pressure in real-time. They’ve saved me from countless guesswork sessions, keeping my setup in check effortlessly.
Nurture Your Coffee Journey and Elevate Your Skills
High-altitude brewing presents unique challenges, but with a curious mindset and disciplined approach, you can conquer them. Keep experimenting, stay patient with your calibrations, and embrace maintenance routines—your taste buds will thank you. If you’re eager to dive deeper, exploring tools like a group head cleaning kit or looking into advanced calibration techniques can make a significant difference.
Every cup you craft reflects your dedication and understanding of your equipment’s nuances—making each sip an achievement worth celebrating. Now, I challenge you: What’s the next tweak you’re excited to try to perfect your high-altitude espresso? Let me know in the comments below!
,