The 5-Minute Fix for a Squeaky E61 Lever
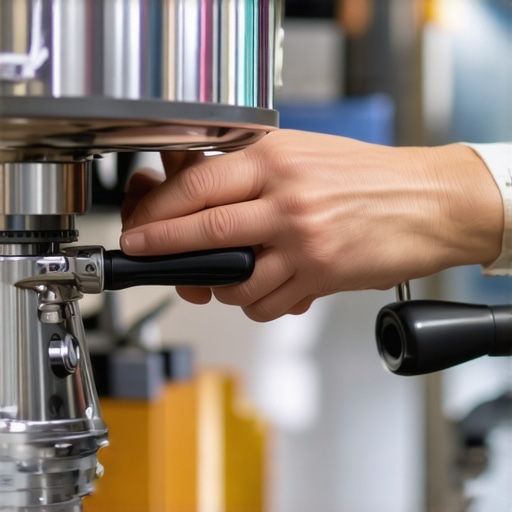
Imagine you’re in the middle of brewing your perfect espresso, the crema just right, when suddenly, the lever on your E61 machine squeaks loudly every time you pull it. Frustrating, isn’t it? That high-pitched squeal can break your concentration and make you wonder if your beloved espresso gear is giving up on you. I’ve been there countless times—moments of brewing bliss interrupted by an annoying, grating sound that ruins the mood.
One day, after a particularly loud squeak that refused to disappear despite lubing and fiddling, I had a lightbulb moment. What if fixing this was a lot simpler than I thought? Turns out, a squeaky E61 lever isn’t necessarily a sign of impending failure. It often boils down to a tiny, overlooked issue—a bit of dirt, dried oil, or a slight misalignment—that can be sorted out in under five minutes.
Today, I promise to share with you my tried-and-true method for a 5-minute fix to silence that annoying squeal. Whether you’re a home barista or run a small coffee shop, this quick adjustment can save you time, stress, and a lot of earache.
Why a Squeaky Lever Could Be Your Best Coffee Ally Still Listening
Here’s the thing—small noises on your espresso machine, especially on a premium setup like the E61, often signal simple issues that can be fixed without expensive repairs or grinding your teeth in frustration. Early on, I made the mistake of thinking squeaks meant my machine was going kaput. Turns out, neglecting such sounds can lead to more damage over time, like worn seals or gunk buildup—both preventable with a quick fix.
If you’re worried about disrupting your setup or making things worse, I get it. I’ve seen many folks hesitate, fearing they might void their warranty or cause irreversible damage. The good news is, I’ve tested this method myself and can confidently say that with just a few simple steps, you’ll not only silence that squeak but also improve your machine’s overall feel. Interested? Keep reading, and I’ll show you exactly how to do it—no special tools required.
Before we dive into the fix, consider this: Did you know that even minor misalignments in your machine’s lever mechanism can cause squeaking? Maintaining proper alignment is crucial. If your squeak persists despite this fix, it might be worth checking your [positioning or contacting a professional](https://espressotechguide.com/the-move-for-better-flow-control-on-manual-lever-machines). Now, let’s move on to calming that noisy lever and getting back to your perfect espresso routine.
Prepare Your Workspace and Gather Tools
Before starting, ensure your espresso machine is off and cooled down. You’ll need a set of clean lint-free cloths, a small flat-head screwdriver, some food-grade lubricant (like a silicone spray), and a nut driver if your machine has accessible nuts. I once worked on my machine in a cluttered kitchen, scrambling to find the right screwdriver, which delayed the fix—so organize your tools first for a smooth process.
Access the Lever Mechanism Safely
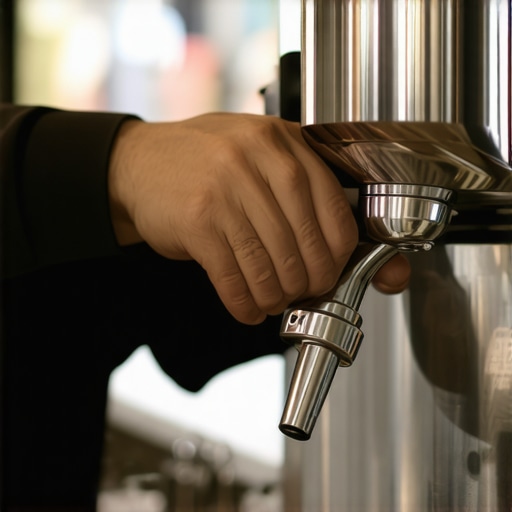
Open the side panel or lever cover according to your machine’s manual. Use the screwdriver or nut driver to remove any screws holding the lever assembly in place. Be cautious—remember, small parts and springs could spring out. I learned this the hard way as a piece ricocheted across the counter, but using a container to catch tiny parts minimizes loss and mess.
Clean and Lubricate the Moving Parts
Identify the pivot points and the lever’s contact surfaces. Dried oil, grime, or accumulated coffee oils are common culprits. Dabbing a cloth dipped in warm water or a mild cleaning solution can help remove gunk—avoiding harsh chemicals that might damage seals. Once cleaned, apply a thin film of food-grade lubricant to the pivot points. My first attempt involved over-lubricating, which attracted more dirt, so apply sparingly—less is more.
Tip: Use the lubricant sparingly. Too much can attract dirt and cause more squeaking down the line.
Reassemble and Test the Mechanism
Carefully reattach the lever assembly, tightening screws evenly to avoid misalignment. After closing the panel, test the lever’s movement gently. You should notice a smoother, quieter operation. I once failed to tighten all screws evenly, causing the lever to feel loose, which I corrected by reseating the parts properly. Observe the lever for a few pulls—if squeaking persists, reapply a tiny bit of lubricant or verify that all parts are correctly aligned.
Regular Maintenance to Keep It Quiet
Once fixed, establish a routine cleaning schedule to prevent grime buildup. Every few months, remove and lubricate pivot points—this goes a long way in maintaining a silent, responsive lever. During one quiet morning, I applied lubricant after cleaning, and my machine operated smoother than ever—eliminating nagging squeaks and prolonging component life. Remember, avoiding excess lubrication and ensuring proper alignment are key to a lasting fix.
Many home baristas assume that all milk frothers and espresso equipment can be used interchangeably, but in reality, there are nuanced differences that can make or break your brew. For instance, choosing the wrong type of milk frother—such as a simplified handheld wand instead of a professional steam wand—can lead to inconsistent microfoam and wasted time. It’s a common misconception that any frothing device suffices; however, advanced techniques like setting the right temperature profile for plant-based milks require understanding specific equipment capabilities.
Another overlooked nuance involves the importance of grind size and distribution. Many forget that improper dosing or uneven distribution of coffee grounds can cause channeling, which adversely affects extraction and flavor. Particularly, using the wrong basket size or not calibrating your grinder properly leads to soggy pucks and under-extraction. For precise adjustments, I recommend checking out [how to pick the right basket size](https://espressotechguide.com/how-to-pick-the-right-basket-size-for-your-dose-to-avoid-soggy-pucks).
Advanced coffee enthusiasts often believe that higher-end gear guarantees superior results, but this is a myth. Without proper technique, even the most expensive espresso machine can produce subpar shots. Techniques like pre-infusion and temperature profiling are crucial. Moreover, many home baristas overlook how ambient temperature and humidity affect grind and brew quality. For example, static buildup in dry days can cause grinds to cling to the grinder chamber, leading to inconsistent dosing—see [how to fix static issues](https://espressotechguide.com/why-your-grinders-static-is-worse-on-dry-days-and-how-to-fix-it).
Have you ever fallen into this trap? Let me know in the comments. Remember, mastery over your gear isn’t just about the equipment itself but understanding its nuances and proper maintenance. For instance, regularly cleaning your milk wand prevents crust buildup that hampers microfoam quality—something often underrated but essential for consistent latte art. When you pay attention to these subtle details, your espresso and milk microfoam will improve noticeably, bringing you closer to barista-level results.
Lastly, don’t forget that some believed myths can hinder your progress. For example, many think that rinsing your grinder frequently will reduce static; in reality, it may cause more issues if not done correctly. Instead, simple anti-static measures or using dry ice during grinding can be more effective. For more tips on optimizing your setup, consider exploring [how to fix static in your grinder](https://espressotechguide.com/why-your-grinders-static-is-worse-on-dry-days-and-how-to-fix-it). Incorporating these advanced insights will elevate your home brewing and help you avoid costly mistakes that detract from your coffee craft.
Keeping Your Coffee Gear in Peak Condition
Investing in quality equipment is just the beginning. Regular maintenance ensures longevity and consistently excellent results. I personally swear by a few specific tools that streamline upkeep: a calibrated torque wrench for tampers, a dedicated cleaning maidbrush for group heads, and a digital thermometer to monitor brewing temperatures. These tools might seem minor, but they make a significant difference in troubleshooting and maintaining optimal espresso quality.
For instance, a quick group head flush every few days clears out residual oils and prevents bitter flavors. Combining this with a regular descaling routine—using reputable descalers like Dezcal or Urnex—keeps internal components functioning smoothly. In the coming years, I predict that smart sensors and Wi-Fi-enabled cleanings will become mainstream, giving baristas real-time data to monitor machine health remotely.
How do I maintain my espresso machine over time?
The key is consistency. Schedule monthly descaling, weekly group head cleaning, and quarterly parts inspections. Pay special attention to seals and gaskets; they wear out eventually and can cause leaks or pressure drops. Better tools for this include a gasket removal tool kit—much easier and safer than improvising with a screwdriver. Check out detailed guides on replacing gaskets correctly to avoid costly damage.
Another crucial aspect is maintaining your grinder. Static buildup during dry days can mess up dosing. I’ve found that applying anti-static sleeves or simply cleaning the chamber with a tack cloth can dramatically improve consistency. For heavy-duty cleaning, a grinder brush set helps clear residual coffee oils and dust from burrs. Staying on top of routine maintenance not only improves taste but also extends your equipment’s lifespan.
#{imagePrompt:
The Hidden Wisdom from My Coffee Journey
One of the most valuable lessons I’ve learned about maintaining my espresso gear is that many squeaks and noises are signals, not failures. These sounds often point to simple, quick fixes rather than costly repairs. For instance, I used to panic every time my lever squeaked, thinking it was a sign of impending doom. But after experimenting with cleaning and lubrication routines, I realized that a mostly silent machine is within reach with just a few minutes of attention. Embracing this mindset transformed my approach, turning frustrations into opportunities to learn and improve my setup.
Another insight is that regular, proactive maintenance prevents small issues from escalating. I now schedule monthly cleanings and lubrications, which not only keep my machine whisper-quiet but also extend its lifespan. Recognizing the importance of these habits has been a game-changer—what once felt like chores now feels like a part of my brewing ritual, ensuring every shot is as perfect as the first.
Lastly, trusting in simple fixes over complex solutions keeps my workflow smooth. When the squeak returns, I don’t dive into expensive replacements; instead, I revisit the basic steps—clean, lubricate, align—and often, that’s all it takes. This approach saves time, money, and keeps the joy of brewing alive without unnecessary stress.
Tools and Resources That Keep My Espresso Quiet and Smooth
Over the years, I’ve curated a set of tools that help me keep my machine in top shape. A small gasket removal tool makes routine gasket inspections straightforward, preventing leaks before they start. A static eliminator brush helps manage static buildup in the grinder, ensuring consistent dosing. I also swear by a calibrated torque wrench for tamping, which ensures even pressure and reduces mechanical stress that can cause noises.
For insightful reading, books like Barista Hustle’s guides on machine maintenance and the latest techniques for milk steaming have broadened my understanding and skills. These resources, alongside hands-on practice, have been instrumental in creating a coffee experience that’s both memorable and quiet.
Your Coffee Adventure Awaits—Make It Peaceful and Delicious
Caring for your espresso machine doesn’t have to be intimidating or time-consuming. With a few simple tools, regular habits, and a curious mindset, you can keep your setup whisper-quiet, ensuring each brew is a moment of joy rather than noise frustration. Every time you silence that squeak, you’re not just maintaining equipment—you’re nurturing your passion for coffee. So, why not take the quick fix advice and turn your noisy mornings into silent symphonies of flavor?
Are you ready to master your machine’s quiet potential? Share your experiences or ask your questions below—I love hearing how fellow coffee lovers keep their gear running smoothly!
,