How to tell if your espresso machine has a scale problem
I remember the exact moment I realized my espresso machine was letting me down—my once consistently rich and velvety shots started producing bitter, inconsistent extracts. It was like pulling teeth to get that perfect crema, and I couldn’t shake the feeling that something was terribly off. After some troubleshooting, I discovered that mineral scale buildup was silently sabotaging my brewing process. That lightbulb moment made me wonder: how many of us are unknowingly battling scale issues that diminish our coffee quality?
Why Scale Problems Could Be Sneaking Into Your Espresso Routine
Most home baristas don’t realize how quickly mineral deposits can form inside their machines, especially if your water isn’t softened or filtered properly. Over time, these deposits can clog channels, impair heating elements, and create uneven pressure during extraction. The result? Coffee that tastes flat or sour, and espresso shots that lack that signature thick layer of crema we all seek. A study from the National Institutes of Health confirms that scale buildup can reduce efficiency and lead to costly repairs, sometimes even causing permanent damage to essential components. Recognizing the signs early can save you money and help maintain that pristine espresso experience you’ve worked so hard to perfect.
Will My Scale Problem Really Affect My Coffee?
Early on, I made the mistake of dismissing small signs—slightly slower heating, minor fluctuations in pressure, or a slight decrease in shot quality—thinking they were just normal wear. Turns out, ignoring these clues only worsened the problem. I’ve learned that paying attention to subtle changes and understanding how mineral deposits impact your machine is crucial. If you’ve experienced unexplained variances in crema, longer preheating times, or need to run descaling routines more frequently, then scale buildup might be the real culprit. Wondering how to tell for sure? Stay tuned—next, we’ll walk through the telltale signs and simple ways to check for scale issues. For more detailed maintenance tips, check out some of my favorite resources on cleaning the insides of your grinder without disassembly or fixing stubborn water tanks.
Start with the Basics: Assess Your Water Quality
Before diving into cleaning, test your water’s mineral content using a simple test strip kit. If levels are high, install a reverse osmosis filter or a water softener to reduce scale formation. I learned this the hard way when my espresso shots became bitter despite regular descaling routines. After testing and installing a filtration system, the consistency of my espresso improved significantly.
Perform Regular Internal Cleaning
Disassemble and Prepare
Unplug your machine and carefully disassemble accessible parts like the group head and water tank. Use protective gloves if necessary. For cleaning without disassembly, check out this guide.
Scrub with Natural Cleaners
Use a mixture of equal parts vinegar and water to scrub inside parts, focusing on the water pathways and boiler contacts. Avoid harsh chemicals that could damage seals. Rinse thoroughly to remove any residual vinegar smell. I once tried just using water, but the vinegar solution effectively loosened mineral deposits, restoring proper water flow.
Descale with Proper Solutions
Choose the Right Descaler
Select a descaling agent recommended for espresso machines—either commercial descaler or a citric acid-based solution. Follow the manufacturer’s instructions carefully. During my first descaling, I poured 50 grams of citric acid in a liter of water and ran it through the machine—this cleaned out stubborn deposits efficiently.
Run the Descaling Cycle
Fill the water reservoir with the descaling solution and run a cycle without coffee. Pay attention to flow rate and pressure gauges—if you notice irregularities, it indicates stubborn scale. Repeat as needed until the process completes smoothly. Afterward, flush the machine with fresh water by running several cycles.
Tackle Hard-to-Reach Areas
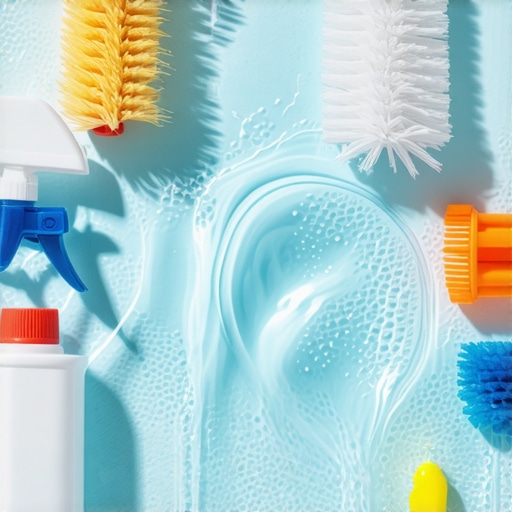
Use a soft bottle brush or a flexible pipe cleaner dipped in the descaling solution to scrub inside small channels or the shower screen. For stubborn buildup, a mixture of baking soda and water can act as a gentle abrasive. I successfully used a dental pick to remove lodged deposits near the group head, which significantly improved water spray and shot quality.
Maintain Ongoing Cleanliness
Schedule routine cleaning every 2-4 weeks, depending on water hardness. Regularly check for signs of scale such as slower heating or inconsistent pressure. Consider installing a water filter to extend intervals between descaling. Remember, consistent maintenance prevents scale from becoming a silent enemy, maintaining optimal espresso quality.
Monitor and Prevent Future Scale Formation
Using destined brewing techniques and reducing water mineralization will help keep scale at bay. Replace filters as recommended and always dry your machine after cleaning. Tiny habits like these preserve heater lifespan and ensure every shot remains top-tier. I found that a quick wipe-down after each use keeps internal components dry and reduces mineral buildup, saving me from lengthy cleaning sessions later.
Many espresso enthusiasts believe that investing in top-tier equipment automatically guarantees perfect results. However, the truth is that mastering your gear involves understanding its nuanced behaviors and limitations. For example, a common misconception is that heavier tampers always produce better shots. In reality, pressing too hard can lead to compacted puck edges, causing uneven extraction and channeling. A heavy tamper might seem like a good idea, but ergonomics and technique often matter more than weight. Always focus on consistent pressure and proper distribution to avoid this common pitfall.
Are High-End Grinders Worth the Extra Cost for Home Baristas?
This is a debate among aficionados. Many assume that with a premium grinder, flawless espresso is guaranteed. Yet, even the most expensive grinder can underperform if not maintained properly. A prevalent mistake is neglecting grinder cleanliness, leading to static buildup and uneven grind distribution. For instance, static can cause grounds to stick to the chamber, making dosing inconsistent. Applying a static fix can significantly improve your workflow. Remember, regular internal cleaning and proper calibration are key—more than the price tag. Be cautious of investing solely based on brand prestige, and prioritize understanding your machine’s specific needs. For detailed cleaning tips, check the best methods to clean your grinder without disassembly.
Keep Your Espresso Gear in Peak Condition for Lasting Performance
Maintaining your espresso setup isn’t just about occasional cleaning; it’s about adopting a disciplined approach with the right tools and routines to ensure consistent excellence. Over my years of home brewing, I’ve curated a set of indispensable tools and methods that safeguard my investment and elevate my craft. Starting with a high-quality internal grinder cleaning kit, I can effectively remove static and residual grounds without disassembly, which saves time and preserves calibration. Regular calibration with a digital caliper helps me maintain grind consistency, especially after changing burrs or adjusting for humidity variations. For descaling, I prefer a citric acid-based descaler that is gentle yet effective, following the manufacturer’s instructions precisely to prevent damage—a critical step, as pointed out by expert tech resources. Including a quality motor lubricant for moving parts prolongs the lifespan of my grinder’s motor, especially during intense use. To monitor progress, an accurate pressure gauge helps detect early signs of build-up or wear, allowing proactive intervention.
Implement a Routine and Use the Right Techniques
Establishing a schedule—perhaps weekly for cleaning, monthly for calibration—ensures your equipment performs reliably. I employ the simple cork trick to distribute grounds evenly before tamping, leading to more uniform shots and less strain on your machine. Additionally, using a portafilter alignment tool helps achieve a perfect seal, reducing channeling and inconsistent extraction. For frothing, investing in a quality milk frother with precise temperature control allows me to produce silky microfoam consistently. The key to long-term results is not just owning the best gear but understanding how to pair maintenance with technique.
Future of Home Barista Maintenance
As technology advances, I predict the integration of smart sensors into machines will revolutionize maintenance routines. Imagine a machine that monitors mineral buildup, calibration drift, and component wear in real-time, alerting you through your smartphone—similar to what industrial coffee systems are experimenting with now. For hobbyists, adopting IoT-enabled tools might seem distant, but I believe these innovations will become standard for home setups in the next 5-10 years. In the meantime, mastering manual maintenance with these recommended tools ensures you’re prepared for the future while keeping your current gear performing optimally.
How do I keep my equipment running smoothly over the years?
Consistency is key. Regularly cleaning internal components with targeted tools, calibrating your grinder, and descaling based on water quality extend your machine’s lifespan and keep your espresso flavors vibrant. Don’t forget to check out the guides on cleaning stubborn puck screens—a crucial part of ongoing care. A practical step I recommend is setting reminders for scheduled maintenance, so nothing slips through the cracks. Remember, investing a little time now prevents costly repairs and upsets down the line.
To make your routine easier, try incorporating a quick flush ritual. It takes only 30 seconds but can dramatically improve water flow and shot quality, especially after heavy use. If you haven’t already, test your water with a simple strip kit; filtering out minerals before they become a problem will save you hours of descaling later. For detailed guidance, exploring maintenance troubleshooting can provide targeted insights into your specific setup. Making these practices a habit transforms maintenance from a chore into an integral part of enjoying perfect espresso every day.
What I Wish I Knew When I Started Taming Scale’s Silent Sabotage
One of the most eye-opening lessons in my espresso journey was realizing how insidious mineral scale buildup can be, even before obvious signs show up. It taught me that proactive maintenance—like testing my water quality regularly and installing proper filtration—can save hours of cleaning and prevent machine damage. The biggest lightbulb moment? That I wasn’t just cleaning my machine to keep it looking good but to preserve its heart and soul—its ability to produce that perfect shot.
Curated Tools That Turn Maintenance Into a Ritual
Over the years, I’ve curated a toolkit that makes cleaning feel less like a chore and more like a daily ritual: a [internal grinder cleaning kit](https://espressotechguide.com/how-to-clean-the-inside-of-your-grinder-hoat-without-disassembly) to remove static without dismantling, a high-quality [citric acid-based descaler](https://espressotechguide.com/how-to-descaling-your-espresso-machine) for gentle, effective scale removal, and a reliable [pressure gauge](https://espressotechguide.com/how-to-spot-scale-build-up-in-your-heat-exchanger-machine) to monitor internal health. Trusting these resources has helped me maintain peak performance without guesswork.
Embracing Consistent Rituals for Lasting Performance
The real secret to long-term espresso excellence isn’t just owning the latest gear but knowing how to treat it right. Establishing a maintenance routine—like performing a quick [30-second flush](https://espressotechguide.com/the-30-second-flush-that-removes-rancid-oil-from-your-group-head) after each session or calibrating the grinder with a [digital caliper](https://espressotechguide.com/calibrating-your-grinders-burrs)—has transformed my workflow. Small habits, like drying internal components after each use or checking for early signs of scale, add up, ensuring consistent quality and extending the lifespan of my machine.
Lessons from Behind the Counter—Beyond the Manual
I’ve learned that even high-end equipment isn’t foolproof—regular cleaning of [puck screens](https://espressotechguide.com/why-your-puck-screen-is-stuck-to-the-shower-screen) and proper [portafilter alignment](https://espressotechguide.com/how-to-align-your-portafilter-ears-for-a-tighter-seal) are crucial to prevent channeling and ensure perfect extraction. These insights came from hands-on experience and a desire to get every ounce of flavor from my beans. Sometimes, it’s the little tweaks—like a [static fix](https://espressotechguide.com/the-static-fix-for-grinders-that-doesnt-involve-spraying-water)—that deliver the big wins in flavor consistency.
The Power of Mindful Maintenance in Espresso Craftsmanship
Understanding the importance of scale and regular upkeep has redefined how I approach my craft. It’s not just about brewing; it’s about cultivating a relationship with my equipment—listening for early signals of trouble and responding with the right tools and routines. This mindful approach keeps my espresso machine singing, shot after shot, allowing me to enjoy every moment behind the portafilter with confidence and passion.
Your Turn to Elevate Your Coffee Routine
Now that you know how scale can silently erode your espresso’s brilliance, I encourage you to adopt these practices and tools to safeguard your investment. Remember, mastery comes from consistent care and curiosity. Your perfect cup is just a routine away—are you ready to take that step?
Have you ever caught yourself ignoring early signs of scale or buildup? Share your experiences below, and let’s learn from each other’s journeys towards better coffee.
,