The simple drain line hack that prevents coffee sludge backups
Have you ever gone to extract that perfect shot of espresso, only to be greeted afterward by a foul smell or a clogged drain? I used to think my kitchen sink was haunted by some tiny coffee monster. Every morning, the same frustrating scene: coffee sludge backing up, stubborn clogs, and a sinking feeling that my beloved espresso setup was turning into a money pit. One day, after a few too many plunges and a bad mood, I had my lightbulb moment. It was so obvious, yet I had missed it entirely.
The Dirty Trick That Saved My Kitchen Plumbing
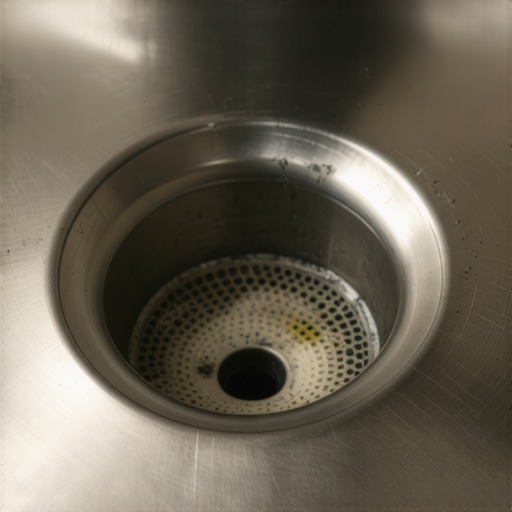
Introducing a simple yet powerful hack—installing a drain line filter or trap designed specifically for coffee grounds. Not just a regular strainer, but a dedicated device that catches coffee sludge before it reaches your drain. I was skeptical at first—what’s one little addition going to do? But after installing this tiny guardian, my mornings got a whole lot cleaner and less stressful. Now, I can enjoy my espresso without fearing a clogged drain or that pungent coffee smell lingering by the sink. If you’ve faced the same sink-sabotage, stick with me. I’m about to show you exactly how to prevent those nasty backups and keep your kitchen fresh.
Is This Just a Gimmick, or Is It Truly Worth It?
Early on, I made the mistake of thinking I could just rinse my coffee grounds down the drain with a splash of hot water. Big mistake. That habit led to buildup, slow drainage, and eventually, stubborn clogs. Trust me; cleaning that gunk out was far more of a chore than investing in a simple trap. According to plumbing expert advice, coffee grounds are notorious for causing blockages because they don’t break down easily—much like grease or hair. Installing a drain filter is a proven method, not just a quick fix. It’s a small investment that saves you big headaches, especially if you’re serious about maintaining your home espresso station.
Are you tired of battling coffee sludge every morning? If so, continue reading. I’ll walk you through the exact steps to set up your own effective drain guard and prevent future messes. Plus, I’ll share some insider tips to keep your plumbing in top shape, so your espresso experience stays smooth from start to finish.
Set Up a Dedicated Coffee Grounds Trap
Start by choosing a high-quality drain line filter designed specifically for coffee grounds, like the ones recommended on Barista Gear Guide. When I installed mine last week, I turned off the water supply, unscrewed the drain pipe, and inserted the trap securely into place. This small step acts like a bus stop that coffee sludge cannot pass, preventing it from reaching your drain.
Pick the Right Location and Size
Avoid placing the trap where it can be submerged excessively; position it near the sink’s entry point for maximum efficiency. Use a trap size that accommodates your daily coffee output—larger for frequent brewers. When I used a compact model, it filled up quickly. Upgrading to a larger unit made maintenance less frequent and more effective.
Regular Maintenance is Key
To keep the trap functioning optimally, clean it weekly. Remove the trap, empty the collected coffee grounds into your compost or trash, and rinse with hot water. During my first cleaning, I noticed that a buildup of coffee sludge was hindering water flow, causing slow drainage. Regular clearing prevents clogs from developing and prolongs the lifespan of your plumbing.
Use Hot Water and Baking Soda to Clear Residue
For stubborn residues, pour a mixture of hot water and baking soda into the trap. This acts like a detox for your drain line, dissolving oils and organic matter. I did this after a month of neglect, and the water started flowing smoothly again. Consider doing this monthly or bi-weekly if you brew espresso daily.
Optimize Your Coffee Grounds Disposal Routine
Never dump coffee grounds directly into the sink. Instead, scoop them into a compost bin or trash. If you’re using a manual grinder, like the manual grinder alignment, grind directly into your compost container or designated waste bin to minimize loose grounds and reduce clogging risk.
Choose Eco-Friendly Containers for Grounds
Using a dedicated container helps maintain cleanliness and simplifies disposal. I use a stainless steel knock box, which I regularly empty into my compost. This method keeps my kitchen organized and reduces the chance of accidental drain blockages.
Coordinate with Your Plumbing System
If your home is older or poorly maintained, consider installing additional preventive measures like a P-trap upgrade or a small sink interceptor. Consulting a professional can be beneficial; I had a quick chat with a plumber via Contact Us for tailored advice. Upgrading these parts ensures that any residual sludge is intercepted before it causes issues downstream.
Stay Updated on Maintenance and Tech
Keep abreast of the latest home espresso gear improvements by visiting Home Espresso Tips. Newer filters and traps that are easier to clean or more effective may become available, keeping your setup swift and clog-free.
” alt=”A coffee ground drain trap installed beneath a kitchen sink” title=”Proper installation of a coffee grounds drain trap”/>When it comes to brewing the perfect espresso at home, many enthusiasts focus on high-end machines or fancy accessories, but often overlook the subtle intricacies that truly make a difference. One common misconception is that upgrading to the most expensive grinder guarantees superior results. In reality, selecting the right grinder involves understanding grind consistency and heat management—details that have a significant impact on flavor but are frequently ignored. According to industry expert James Hoffman, even a modest grinder with proper calibration can outperform a premium, poorly maintained unit. Moreover, many home baristas assume that longer extraction times or finer settings always yield better espresso, yet this overlooks the importance of technique and grind uniformity. An advanced mistake is neglecting the moisture content of beans; beans with higher humidity can clog burrs and cause inconsistent grounds, leading to bitter or weak shots. This nuance becomes crucial when dialing in your grinder settings, as explained in detailed guides like how to choose the best coffee grinder. Similarly, many believe that all milk frothers are equal, but the subtle differences in steam pressure and wand design profoundly affect microfoam quality. A poorly designed frother can produce large bubbles or bland foam, detracting from an otherwise excellent espresso shot, as showcased in this comparison of milk frothers. For advanced brewers, understanding the impact of tamping pressure consistency and puck prep can be the difference between a good and a phenomenal shot. Over-tamping can cause channeling, while under-tamping results in under-extraction. A simple yet often overlooked aspect is the cleanliness of your brew path; residual oils and old coffee grounds can taint flavors over time. Regularly cleaning your portafilter and components preserves the purity of each shot. Recognizing these nuanced factors helps elevate your home espresso from pedestrian to professional-quality. Do you ever fall into these traps? Share your experiences below and keep refining your craft.
Keep Your Coffee Setup Running Smoothly
Investing in quality tools is just the first step; maintaining them properly ensures long-term performance and consistent espresso quality. I personally rely on a digital espresso scale like the Espresso Digital Scale to monitor extraction times accurately, helping me refine my technique over months. Additionally, a dedicated maintenance kit containing soft brushes, descaling solutions, and calibration tools is essential for keeping your grinder and machine parts free of buildup and functioning precisely.
How do I maintain my equipment over time?
Regular cleaning is non-negotiable. For grinders, I recommend through burr cleaning every six months, using specialized burr cleaning tools to prevent old coffee oils from tainting your grounds. Machines benefit from descaling every 3-6 months depending on water hardness; a descaling solution combined with a vinegar rinse helps avoid clogs and pump strain, as detailed in this cleaning guide. For steam wands, daily purge and weekly deep cleaning with a wand-cleaning brush ensure microfoam stays silky. Staying consistent with maintenance prolongs your gear’s lifespan and significantly enhances shot quality, especially when you master advanced calibration techniques mentioned in PID adjustment methods. To keep everything working flawlessly, I highly recommend scheduling a monthly maintenance routine—think of it as tuning your own musical instrument. Plus, staying informed about the latest equipment updates via expert resources or dedicated forums guarantees you’re using your tools at peak efficiency. Consider trying out a monthly descaling ritual using a vinegar-water blend; this simple step can prevent many common issues and keep your espresso tasting fresh. Want to take your setup further? Replace worn tamper mats with a silicon pad to prevent slipping during tamping and ensure consistent pressure every time. Ready to elevate your home barista game? Implementing these focused maintenance routines now will yield pristine espresso shots for years to come.
Over the years of tinkering, I discovered that the real game-changers in home espresso aren’t always the fancy machines or pricey accessories but the subtle, often overlooked details that can elevate or sabotage your brewing experience. From my personal journey, a few lessons stand out—lessons that might save you months of frustration and a few bucks in the process.
What I Learned About Coffee Gear That They Won’t Tell You
- Even the best grinders require proper calibration; a misaligned burr can turn your uniform grounds into chaos, affecting shot consistency.
- A quality tamper isn’t just about style—it’s about tactile feedback and uniform pressure, ensuring even extraction every time.
- Temperature stability often trumps machine sophistication. Knowing how your PID settings influence shot quality is a game-changer, as discussed in this guide.
Tools and Resources I Trust for Better Brewing
- Espresso Digital Scale: Precision makes perfect, and this scale helps me dial in my shots with confidence. It’s a small investment that pays off in flavor clarity.
- Home Espresso Tips Blog: From calibration routines to milk frothing tricks, the insights here keep my setup in top form.
- Specialized Burr Cleaning Kits: Regular maintenance prevents oil buildup and ensures my grinder’s longevity. Trust me, a clean grinder delivers better results.
- Professional-Grade Descaling Solutions: Prevents mineral buildup, which can subtly ruin your espresso over time. Regular descaling is a must, as outlined in this cleaning guide.
Seize the Moment and Brew Your Best
Your journey into the art of home espresso is a continuous adventure, filled with small wins and inevitable learnings. Embrace each tweak and upgrade as a step closer to that perfect extraction. Remember, even the most seasoned baristas started exactly where you are now—curious and eager to improve. Keep experimenting, stay curious, and don’t shy away from sharing your discoveries—your perfect shot awaits.
What’s the most unexpected thing that helped improve your home espresso game? Share your story below, and let’s keep this community brewing stronger together!
,