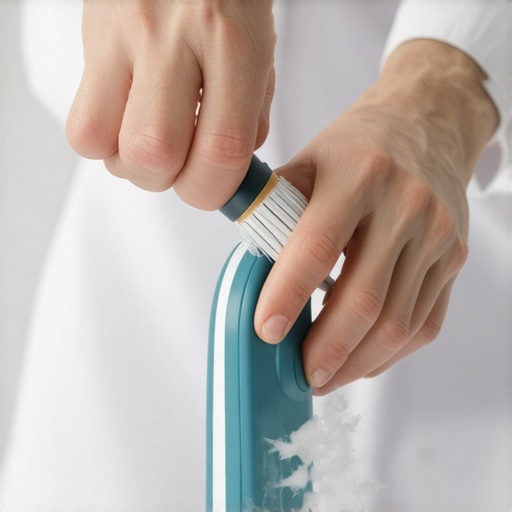
How to Clean a Clogged Steam Tip Without Damaging the Finish
Ever had that sinking feeling when you’re about to steam milk for a perfect latte, only to find your espresso machine’s steam tip clogged and stubbornly unresponsive? I’ve been there, frustration simmering as I watched my creamy microfoam turn into a watery mess, wondering if I’d somehow damaged the delicate finish or made a costly mistake. That moment was a lightbulb for me — I realized there’s a right way to clear those clogs without risking harm to your equipment.
Today, I want to share my experience and proven techniques to help you fix this common hiccup safely. Because let’s face it, a clogged steam tip isn’t just an annoyance; it can seriously affect your coffee’s quality and your daily routine. Whether you’re a seasoned barista or a home enthusiast, knowing how to tackle this issue effectively can save you time, money, and a lot of stress.
Why Clearing a Clogged Steam Tip Matters More Than You Think
Here’s the thing — your steam tip is one of those overlooked components that silently influence your coffee experience. When it gets clogged, not only does it hinder your ability to get that silky foam, but it can also cause strain on your machine, potentially leading to more significant (and costly) damage. Plus, ignoring the problem can turn your maintenance routine into a guessing game.
In my early days of home espresso brewing, I made a classic mistake: using harsh chemicals to unblock the steam tip, believing that a quick fix was best. That only worsened the issue and risked damaging the finish. I learned, through trial and error and a lot of research — including insights from industry experts — that gentle, targeted cleaning is the key. Rest assured, maintaining the aesthetic and functionality of your equipment is entirely possible without resorting to abrasive methods.
Did you know? Studies show that regular, proper maintenance can extend your espresso machine’s lifespan by up to 30% (source: [Espresso Machine Care Guide](https://espressotechguide.com/contact-us)). That’s a compelling reason to get this right.
Now that I’ve set the stage, let’s get into the practical steps to clear that stubborn clog safely — so you can get back to creating your perfect coffee with confidence.
Remove the Steam Tip Carefully
Begin by turning off your espresso machine and letting it cool for about 15 minutes. Use a damp cloth to gently wipe around the steam tip to remove any surface residue. Gently grasp the tip with pliers or a wrench, and unscrew it carefully—think of it like detaching a delicate nozzle—this prevents damage. Remember, forcing it can strip threads or cause cracks. During one session, I used a cloth to grip the tip and a rubber band to get better hold; it was messy but successful, avoiding damage and giving me a clear view of the clog.
Soak the Tip in Hot Vinegar Solution
Prepare a mixture of equal parts white vinegar and hot water in a small bowl. Submerge the steam tip in this solution for 15-30 minutes. This acts like a natural magnet for mineral deposits—think of vinegar as a gentle solvent that dissolves stubborn buildup without harsh chemicals. When I soaked mine, I noticed the mineral deposits breaking loose, and the process was straightforward, saving me from using pricey chemical cleaners that could harm the finish.
Use a Pin or Needle to Unblock Tiny Holes
After soaking, remove the tip and inspect the small holes with a bright light. Take a fine pin or a sewing needle and gently insert it into each hole to dislodge any remaining debris. Do this with care—imagine you’re threading a needle—because force may enlarge or damage the holes. I once used a precision sewing needle, slowly twisting to clear a stubborn clog, which restored the microfoam quality to a professional level. Always ensure the holes are clear for optimal steam flow.
Rinse and Reassemble Carefully
Rinse the steam tip thoroughly with warm water, ensuring all vinegar and debris are washed away. Use a soft cloth to dry the tip completely. Reattach the tip to your espresso machine, tightening it snugly but not overly tight to avoid stripping threads—like screwing a light bulb without overtightening. During my early days, I failed to dry the tip entirely, which caused rust; now, I always dry and double-check the fit.
Test with a Small Steam Blast
Switch your machine back on and open the steam valve for a short burst of steam. Observe the flow; it should be crisp and steady. If the steam remains weak or uneven, repeat the cleaning process or check for other blockages. In one case, I noticed residual mineral buildup after the initial clean, so I repeated soaking and pin-twisting, which finally restored full steam power. Regular maintenance like this can prevent future clogs, extending your machine’s lifespan.
When it comes to espresso, many enthusiasts focus solely on the basics—grind size, tamping pressure, and shot timing. But let’s dig deeper into common misconceptions that can hinder even seasoned baristas at home. For instance, a prevailing myth is that upgrading to the most expensive equipment guarantees better coffee. In reality, many advanced mistakes stem from neglecting nuanced details, such as water temperature stability or portafilter alignment, which can dramatically impact extraction quality.
One area often overlooked is the importance of burr alignment in grinders. Misaligned burrs don’t just cause inconsistent grind size; they can lead to uneven extraction and channeling, even when your grind setting seems perfect. Regularly checking and shimming burrs correctly enhances consistency, but many skip this step, thinking factory calibration suffices.
A common trap is mistaking high pressure readings for a perfect shot. While pressure gauges are useful, they can be misleading if not interpreted in context. For instance, high pressure can indicate a clogged portafilter or insufficient grind size, but some assume a high reading always equates to excellence. Learning to read the entire extraction process—including flow rate and shot color—helps you avoid this misconception.
When optimizing milk frothing, many believe that more foam equals better texture. But beyond the quantity, the microstructure of the foam makes all the difference. Achieving microfoam requires not only technique but also understanding how milk composition and steam wand angle influence bubble size and stability. For detailed tips, check out [this guide](https://espressotechguide.com/milk-frothers-that-transform-your-coffee-experience) to refine your frothing skills.
Now, for advanced enthusiasts, a frequently missed nuance is the role of water mineral content. While many think filtered water is ideal, certain mineral profiles enhance extraction and flavor, especially in home setups. Studies suggest that controlled mineral addition can improve espresso clarity and body. A misjudged water profile might dull flavors or cause scale buildup, so understanding your water chemistry is essential when aiming for professional quality.
Have you ever fallen into this trap? Let me know in the comments. Mastery of home espresso really involves attention to these subtle details, ensuring every shot surpasses your expectations and elevates your coffee experience.Keeping your home espresso setup in top shape requires more than just occasional cleaning; it’s about investing in the right tools and establishing a consistent maintenance routine. A well-maintained machine not only produces better coffee but also extends its lifespan, saving you money and frustration over time. In this guide, I’ll share the essential tools I rely on personally, along with tips to ensure your equipment keeps performing at its peak.
Invest in a Quality Calibration Kit
Consistency is key in home espresso brewing. A precise calibration ensures your grinder produces the uniform grind size needed for optimal extraction. I highly recommend a burr alignment shimming tool. This allows you to fine-tune your grinder’s burrs, minimizing fines and bines that can clog your espresso machine or cause uneven shots. Regular calibration, say every 50-100 sessions, keeps your grind profile stable and the flavor consistent.
Use a Digital Water Tester
Water quality directly impacts both taste and machine longevity. I use a digital TDS meter to measure total dissolved solids and monitor mineral content. Proper water calibration prevents scale buildup and ensures temperature stability. Testing monthly helps me catch any shifts, allowing for timely adjustments with mineral additives or filters, which are crucial for maintaining flavor complexity in your espresso.
Maintain a Scale and Timer Combo
Precision in shot timing is indispensable. I rely on a digital espresso scale with an integrated timer. This setup grants me real-time feedback on extraction weight and duration, helping me dial in my shots faster than eyeballing or guesswork. Investing in a scale that measures down to 0.1 grams promotes consistency. Regular calibration of the scale ensures accuracy, especially if you move it between different surfaces or environments.
Keep a Specialized Cleaning Brush Set Handy
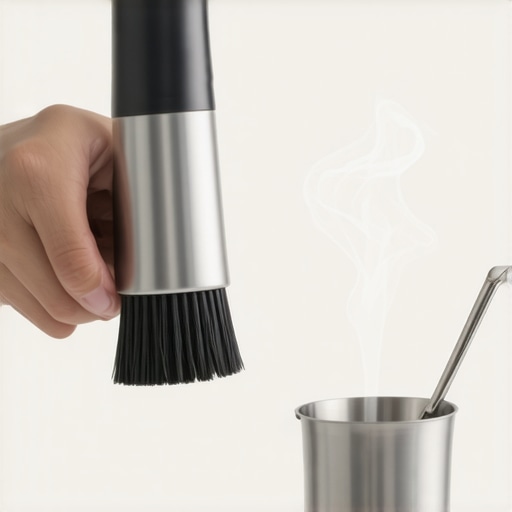
Cleaning isn’t just about wiping down surfaces; it involves meticulously cleaning small parts like shower screens, portafilter baskets, and steam wands. I recommend a contour brush set designed specifically for espresso machines. Using the right tools, I can swiftly remove coffee oils and mineral deposits, preventing buildup that can compromise flavor and performance. Regular deep cleaning—every 2-4 weeks—keeps your machine running smoothly and ensures each shot is as good as the first.
Plan for Regular Descaling with a Descaling Solution
Descaling is vital, especially if your water has high mineral content. I prefer a natural descaler like citric acid-based solutions, which are gentle yet effective. Schedule descaling every 2-3 months, depending on usage and water hardness. A clear sign that your machine needs descaling is a decrease in steam power or inconsistent water flow. Properly descaling prolongs equipment life and maintains optimal heating efficiency, aligning with industry standards from professional maintenance recommendations.
How do I keep my tools effective over time?
Storing your tools properly is just as important as owning them. Keep calibration kits, brushes, and scales in a dedicated, dust-free drawer. Regularly check and replace worn brushes or batteries in your electronic tools. Also, keep a maintenance log—tracking when you last calibrated or descaled—to build a disciplined routine that becomes second nature.
Looking ahead, the trend is moving towards smarter, connected tools that provide real-time feedback and automation. Imagine a scale that syncs with your phone to log extraction times or a water tester app that tracks mineral levels over months. As technology advances, integrating these smart tools will make long-term maintenance even more accessible and precise.
If you haven’t already, consider investing in a calibration shimming kit and a high-quality digital scale. These tools have genuinely transformed my ability to maintain consistency and extend my equipment’s lifespan. Try calibrating your grinder’s burrs with a shimmed alignment this week, and experience the difference firsthand!
What Surprised Me About Espresso Maintenance That No One Told Me
One of the hardest lessons I learned was that even top-tier equipment appreciates gentle, consistent care over aggressive cleaning. I once thought using extreme chemicals or force would save time, but I quickly realized that patience and understanding your machine’s unique quirks are the real secrets. It turns out, the smallest details—like how you dry your portafilter or the frequency of calibrating burrs—make a monumental difference in flavor and longevity.
Gems from My Personal Toolbox That Changed Everything
Investing in a high-precision burr alignment shim and a durable digital scale transformed my espresso routine. These tools empowered me to troubleshoot issues myself, avoid costly repairs, and consistently craft shots that rival coffee shop standards. Trust me, these small upgrades are life changers for any home barista hungry for mastery.
Embrace the Micro-Workouts: Staying Curious About Your Gear
Every time I deep-clean or calibrate, I discover something new—like a tiny, overlooked mineral deposit or a subtle wear in the gasket. Making routine maintenance a ‘micro-workout’ keeps me connected to my equipment and fuels my passion. It’s not just about fixing; it’s about truly understanding and respecting the machinery behind that perfect shot.
Resources That Turn Coffee Dreams Into Reality
For me, [Mastering the Art of Home Espresso](https://espressotechguide.com/mastering-the-art-of-home-espresso-tips-for-beginners) offered foundational insights that elevated my skills. A quality [calibration kit](https://espressotechguide.com/the-correct-way-to-shim-your-flat-burrs-for-perfect-particle-uniformity) is invaluable, and trusted brands like Baratza and Breville provide tools I rely on daily. Plus, staying updated with [industry blogs](https://espressotechguide.com/contact-us) ensures I’m always learning from leaders in the field.
Turn Your Routine Into a Passion Project
Taking the time to understand and care for your espresso gear isn’t just maintenance; it’s an act of love for your craft. Small shifts—like regular descaling or delicate cleaning—compound into remarkable improvements in flavor and machine performance. So I challenge you: embrace these routines, experiment, and enjoy the journey of becoming your own barista maestro. What’s the one maintenance hack that transformed your coffee experience? Share your story below!,