The Best Way to Texture Almond Milk Without it Separating
Have you ever steamed almond milk, only to find it frothed perfectly at first, but then suddenly split into a watery mess? I used to get frustrated, pouring my carefully prepared milk into my espresso, only to watch the silky foam devolve into a layer of curdled-looking liquid. It was like investing time and care into the perfect cup, only to have everything fall apart at the last second. I know I’m not alone in this struggle — it’s a common headache among home baristas and coffee enthusiasts alike.
Why Texture Matters When Frothing Almond Milk
Almond milk has become a popular dairy-free alternative, especially for those of us watching our lactose intake or seeking plant-based options. But unlike traditional cow’s milk, it tends to be more fragile during steaming. If you’ve ever experienced that embarrassing separation, you know it can ruin your morning routine. Achieving a rich, creamy foam without the separation can make all the difference between a good coffee moment and a disappointing one.
The worst part? I used to think the secret was just picking the right brand or temperature. Turns out, the real culprit lies in the way the milk is textured. If not done correctly, almond milk whips into a foam that quickly breaks apart, leaving you with a watery puddle rather than the velvety top layer you’re aiming for. But don’t worry — I’ve found a straightforward method that has worked wonders for me, and I’ll share my tips so you can make your almond milk froth stay stable, nice, and smooth every time.
Are You Still Skeptical That It’s Worth the Effort?
Trust me, I was there too. I used to think that texture problems were just part of almond milk’s nature, and I’d give up after a few failed attempts. My early mistake? I’d heat the milk too quickly or didn’t pay attention to the pitcher’s angle, which led to uneven steaming. A study from research published in the Food Science & Nutrition journal found that temperature and agitation during steaming greatly influence foam stability. That tidbit made me realize that even small tweaks could dramatically improve my results.
Now, I guide myself through a simple process that prevents separation and creates microfoam that lasts. Ready to ditch the frustration and start making café-quality almond milk drinks at home? Let’s dive into the how-tos and get your texture perfect every time.
.
Choose the Right Almond Milk
Select brands known for smooth, barista-style textures. Look for varieties labeled “barista” or “for steaming,” which often have added stabilizers to improve foam stability. Personally, I found that experimenting with different brands like Califia Farms or Alpro made a noticeable difference in the final microfoam quality and longevity.
Preheat Your Milk Pitcher and Milk
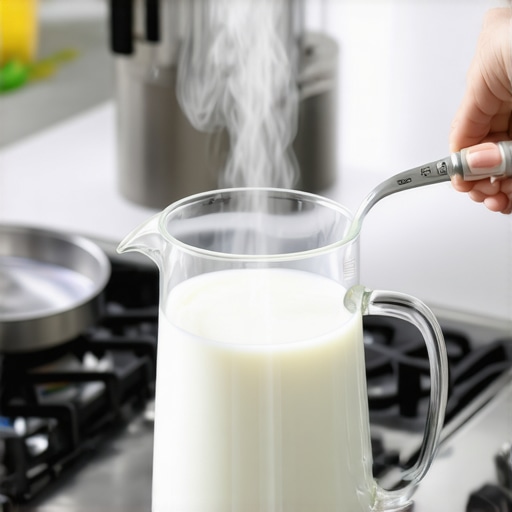
Warm your milk pitcher and almond milk to around 130°F (54°C) before steaming. Using cold milk causes more agitation and increases the risk of separation. I once skipped this step, and my foam quickly dispersed. Preheating creates a more stable environment for microbubbles to form and cling together, resulting in a velvety texture that lasts.
Use a Proper Frothing Technique
Position the Wand Correctly
Maintain the steam wand just below the surface of the milk, creating a gentle vortex. Imagine stirring a pot with a spoon—keep the wand near the surface to introduce air, then submerge deeper to heat evenly. During my first attempt, I accidentally immersed the wand too deep, leading to uneven heating and poor microfoam. Proper positioning ensures consistent air incorporation and microstructure formation.
Manage the Steaming Temperature
Stop steaming once the milk reaches approximately 130-135°F (54-57°C). Use a thermometer or learn to gauge the temperature by touch on the pitcher. I used to rely solely on feel, but after monitoring with a thermometer, I avoided overheating, which can cause separation. Consistent temperature control keeps the protein structure stable, preventing curdling or separation.
Control the Steam Pressure and Pitcher Angle
Maintain steady steam pressure and angle the pitcher slightly to create a whirlpool motion. This helps microbubbles merge into a uniform foam. I practiced by gently rolling the pitcher in my hand, and over time, I reduced spattering and ensured a smoother microfoam. Steady pressure and positioning are crucial for developmental stability of your almond milk foam.
Post-Steaming Techniques
Once heated, tap the pitcher on a flat surface, then swirl to remove large bubbles and integrate the foam. Let the milk rest for a few seconds to stabilize, then draw your latte art or pour into your espresso. During one messy session, I skipped swirling, and the foam was inconsistent. This step guarantees a smooth, glossy finish with microbubbles uniformly distributed.
Test and Tweak Your Process
Keep notes on brands, temperatures, and techniques that produce the best results. Adjust based on feedback—if foam separates quickly, try a different almond milk or tweak your steaming angle. This iterative approach has helped me develop a reliable routine and avoid common pitfalls like watery or curdled foam.
Why Most People Get Coffee Gear Wrong in Their Home Setups
Many home baristas believe that investing in high-end equipment automatically guarantees perfect espresso and froth. However, this isn’t always the case. A prevalent myth is that the best espresso machines, grinders, or milk frothers alone will deliver café-quality results without understanding the nuances of proper technique. In reality, even the most advanced gear can be misused or set up incorrectly, leading to subpar drinks despite the expensive investments. For example, a common mistake is relying solely on grind size adjustments without considering dose precision or tamping consistency, which critically affect extraction quality. Check out this guide for insights on choosing the right grinder, as unsuitable settings or poor maintenance often cause uneven extraction and bitterness.
Is Your Home Espresso Really the Best You Can Do?
Another misunderstandings revolves around the role of some gear features that seem crucial but have minimal impact if not used correctly. For instance, many believe that having a vibratory pump is inferior to a rotary pump, but studies show that with proper pressure profiling and calibration, both can produce excellent results. The key lies in understanding the underlying mechanics and mastering your workflow, not just the equipment’s specs. Furthermore, some enthusiasts trap themselves into endless upgrades trying to chase a better shot, while neglecting routine maintenance — like regularly descaling or cleaning your equipment — which can drastically improve flavor and hygiene. Regular upkeep is often overlooked, yet it forms the foundation of consistent quality.
Interestingly, some think that manual grinders are outdated or inferior to electric ones. Actually, manual grinders, if properly adjusted and maintained, can offer excellent grind consistency and retention, especially for small doses. They also help develop a more tactile understanding of grind settings, leading to better dialing in. For advanced users looking to optimize their equipment, understanding phenomena like static buildup in grinders or pressure fluctuations during extraction can be game-changers. For instance, static can cause uneven doses and channeling, but techniques like lightly humidifying your beans or using anti-static tools can mitigate these issues. For deeper insights into grinder maintenance and advanced troubleshooting, don’t hesitate to explore this resource.
What About Mastering the Micro-Details That Make a Difference?
Many seasoned enthusiasts challenge the idea that equipment is the primary bottleneck, emphasizing instead that mastering micro-details—such as distribution, tamping pressure, and shot timing—is crucial. Slight variations in tamp pressure or uneven coffee bed aeration can cause significant differences in flavor, regardless of the machine quality. Achieving consistent pressure and distribution involves understanding the physics of fluid flow and how it interacts with coffee pucks. Using calibration tools like a pressure gauge or timer can elevate your barista skills. Advanced users often employ techniques like pre-infusion or pressure profiling to extract complex flavors; mastering these requires understanding both your equipment and the coffee’s physical properties, backed by research from experts like these studies. So, don’t overlook the micro-interventions that can turn a good shot into a spectacular one.
Have you ever fallen into this trap? Let me know in the comments. Remember, even the most sophisticated setup is only as good as the knowledge and technique behind its use. Ensuring you grasp these finer points can dramatically improve your home coffee experience.
Keep Your Equipment in Top Shape
Investing in quality coffee gear is just the beginning. Regular maintenance is essential to keep your espresso machine, grinder, and milk frothers performing at their best. For example, descaling your espresso machine every 1-3 months prevents mineral buildup that can cause pressure issues or uneven extraction. I personally use a detailed internal cleaning routine to prevent blockages that compromise flavor and steam quality. Consistent upkeep not only extends the life of your equipment but ensures every shot remains consistently excellent.
Tools That Make Maintenance Easier
Having the right tools streamlines your maintenance process. A calibrated brush set designed for grinder burrs helps remove stubborn coffee oils and static buildup, which can affect grind consistency, as discussed in this guide. A digital temperature gun is invaluable for verifying boiler and brew group temperatures, enabling precise adjustments. Investing in a simple vacuum pump kit aids in cleaning out hard-to-reach water lines, ensuring your machine stays sanitary over years of use. Regularly inspecting gaskets, seals, and hoses prevents leaks and performance drops; schedule checks every six months.
Routine Checks to Sustain Quality
Implementing a weekly routine to review calibration, such as weighing beans and shots, can identify subtle performance drifts early. Keeping a log helps track when you last de-scaled, cleaned, or replaced parts, preventing costly repairs or flavor degradation. For instance, slipping on a steam wand maintenance routine keeps microfoam stable and prevents water leaking into milk. Consistent monitoring is especially important as your setup evolves, or if you notice a sudden change in shot quality.
How do I maintain my gear over time?
Prolonging your equipment’s lifespan involves not just regular cleaning but also understanding the specific needs of each component. For example, the gasket replacement schedule can prevent uneven extraction, while keeping your grinder’s burrs sharp ensures consistent grind size. Creating a maintenance calendar with reminders helps you stay on track and avoid unexpected breakdowns. Remember, neglecting routine care can lead to bigger issues down the line, which might cost more to repair or replace. A well-maintained setup not only improves flavor but also enhances your overall experience, turning everyday brewing into an enjoyable ritual.
Looking ahead, the trend points toward smarter, IoT-enabled devices that alert you when maintenance is needed. As these innovations become more affordable, integrating sensor-based diagnostics will make long-term upkeep even more manageable. For now, I recommend starting with a dedicated maintenance checklist and dedicating a few minutes weekly — it pays off in better coffee and fewer surprises. Try my tip of setting a recurring reminder for descale intervals — you’ll notice the difference in shot consistency and machine longevity over time. If you’re curious about specific maintenance routines or need personalized advice, feel free to reach out. Your gear is an investment; treat it with care, and it will reward you with fantastic coffee every day.
Overcoming the challenge of achieving perfectly stable almond milk foam has been a game-changer in my home barista journey. I realized that small adjustments, like preheating my milk and mastering the steaming angle, transformed my results. The key was understanding that almond milk’s fragility requires more attention to technique rather than just gear or brands. Making these micro-adjustments consistently has allowed me to craft lattes with silky microfoam that lasts, impressing friends and elevating my daily ritual.
Lessons the Coffee Industry Won’t Reveal About Frothing Almond Milk
- Patience Pays Off: Rushing the steaming process causes more separation. Slowing down and paying attention to temperature stability led me to better texture and longevity in my foam.
- Small Technique Tweaks Matter More Than Pricey Gear: Even with an entry-level steamer, careful positioning and temperature control produced microfoam comparable to expensive setups. It’s about the subtle art of steaming, not the equipment alone.
- Understanding Composition is Critical: Choosing almond milk with stabilizers and knowing the best brands, such as Califia Farms or Alpro, significantly reduces foam separation issues. The science of milk stabilizers works wonders when paired with proper technique.
- Consistent Routine Trumps Upgrades: Regularly calibrating your tools, like using a thermometer and swirling your milk, ensures consistent results. I learned that routine maintenance and process refinement are the true secrets to stability.
- Micro-Details Are Your Best Friends: Practicing gentle vortex motion and avoiding overheating prevents separation. Little habits like tapping and swirling the pitcher after steaming improved my microfoam’s durability and appearance.
My Trusted Tools for Perfect Almond Milk Frothing
- Barista-grade steam wands: Investing in a reliable steam wand makes a difference, especially when paired with proper technique. I find that a wand with adjustable steam pressure gives better control.
- Precision thermometers: Monitoring temperature ensures you don’t overheat and cause separation. It’s an inexpensive upgrade that adds consistency.
- Quality milk frothers: Manual or electric, choosing a device that allows gentle agitation helps create microfoam that lasts longer.
- Proper cleaning and maintenance tools: Keeping your equipment in top shape ensures optimal performance, especially for delicate almond milk steaming.
Your Next Leap in Home Barista Skills Starts Now
Remember, the magic of great almond milk foam isn’t just in high-end gear but in your mastery of the technique and understanding your ingredients. With patience, attention to detail, and the right tools, you can elevate your home coffee experience to something truly special. Trust in your growing skills, experiment with small adjustments, and soon, each froth will be a testament to your dedication.
Are you ready to refine your frothing routine and unlock smooth, stable almond milk microfoam every time? Share your experiences or questions below — I love hearing about your coffee adventures!