How to Clean a Milk Frother Without Scratching the Non-Stick Coating
One morning, I nearly ruined my favorite milk frother. I had just finished steaming milk and, eager to clean, I grabbed the typical scrub brush. Within seconds, I noticed tiny scratches appearing on the non-stick coating. Heart sinking, I realized I’d been doing it all wrong. It’s a surprisingly common mistake among home baristas, and it made me wonder: how can I keep my milk frother pristine without damaging that delicate coating?
The Hidden Damage of Using the Wrong Cleaning Tools
Many of us reach for scratchy sponges or abrasive brushes without a second thought. But the truth is, these tools can chip away at the non-stick surface, shortening the lifespan of your frother and affecting the quality of your drinks. A small scratch might seem harmless, but over time, it can trap residues, harbor bacteria, and compromise the effectiveness of the coating. Trust me, I learned this lesson the hard way early in my coffee journey. Instead of blindly scrubbing, I started exploring gentle, effective ways to keep my frother clean—ways that preserve the coating and ensure delicious coffee every time.
Why Is Failing to Properly Clean Your Frother Such a Big Deal?
Proper cleaning isn’t just about appearance; it’s about maintaining your equipment’s performance and safety. A poorly cleaned frother can build up milk residues, leading to mold and bacteria growth—certainly not what you want in your morning routine. Plus, using harsh cleaning tools can create tiny scratches, which become hotspots for bacteria and deteriorate the non-stick surface. Initially, I believed that soaking and wiping down were enough. But I soon realized that a gentle cleaning method was essential to extend my frother’s life and keep my coffee tasting fresh. Speaking of which, did you know that milk residue can turn into a sticky, hard-to-remove film if not cleaned properly? According to food safety experts, regular maintenance helps prevent such buildup, ensuring not just great flavor but also health safety. For more tips on cleaning your espresso gear, check out our guide on [the best ways to keep your barista equipment spotless](https://espressotechguide.com/milk-frothers-that-transform-your-coffee-experience).
Now that I’ve shared my lightbulb moment, let’s get into the practical, scratch-free cleaning methods that will keep your frother in top shape. Honestly, once you get the hang of these steps, cleaning becomes a breeze—no more fear of damaging that non-stick surface, and no more bacteria hiding in plain sight. Ready to become a frother cleaning pro? Let’s dive into how simple it can be to protect your investment while maintaining that perfect foam every time.
Choose Gentle Cleaning Tools
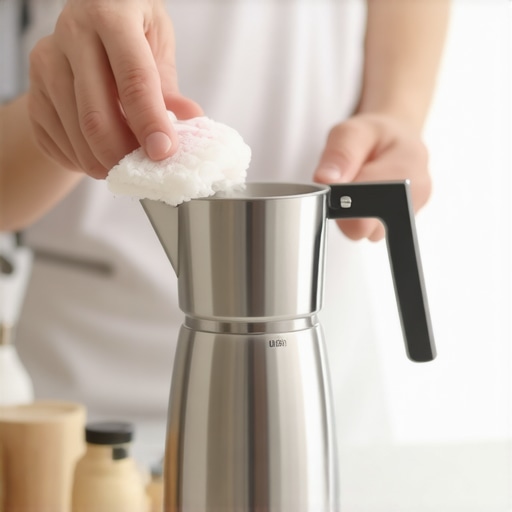
Start by selecting soft cloths, microfiber towels, or non-abrasive sponges instead of steel wool or rough brushes. I once used a steel scrubber out of habit and ended up with tiny scratches on my frother’s surface. After that mishap, I switched to a microfiber cloth and a soft sponge, which effectively removed milk residues without harming the coating.
Use Mild Cleaning Solutions
Combine warm water with a few drops of gentle dish soap or a specialized non-stick surface cleaner. Avoid harsh chemicals or abrasive cleaners that can degrade the coating. I prefer diluting a mild dish soap in warm water, which lifts residues effortlessly while preserving the frother’s finish. Remember, harsh cleaners can cause long-term damage, making your equipment more susceptible to scratches and bacterial buildup.
Implement Proper Cleaning Techniques
Pour the cleaning solution into the frother and let it sit for a minute. Then, gently wipe the interior and exterior with your soft cloth or sponge. For stubborn milk deposits, use a soft-bristled toothbrush to reach hard-to-clean areas without scratching. Once cleaned, rinse thoroughly with warm water to remove any soap residue. During my first attempt, I let the soap sit too long and didn’t rinse well, leaving a film that affected my next frothing session. Practicing gentle motions and thorough rinsing keeps your frother in prime condition.
Empty and Dry Immediately
After cleaning, pour out any remaining liquid and dry all surfaces promptly with a clean microfiber cloth. Leaving moisture can lead to mold or corrosion. I once neglected to dry my frother and faced a mold issue, which took extra cleaning to resolve. Ensuring a dry, residue-free surface prevents bacterial growth and maintains the integrity of the non-stick coating.
Establish a Routine Maintenance Schedule
Clean your frother after every use—especially if you use it daily—to prevent milk buildup. Regular gentle cleaning preserves the non-stick surface and extends the device’s lifespan. I found that sticking to a daily cleaning routine saved me from longer, more arduous scrubbings later on. This habit also guarantees that each frothing session results in fresh, flavorful milk foam every time.
Additional Tips for Long-Term Care
Inspect your frother regularly for signs of wear or scratches. If you notice damage, consider replacing the cleaning tools or consulting the manufacturer for advice. Also, avoid using metal utensils inside the frother—think of it like not using a metal spatula on a non-stick pan. Using non-metal tools and gentle cleaning techniques minimizes risk and keeps your equipment looking and functioning like new.
 Many home baristas believe that owning high-end espresso machines and equipment automatically guarantees perfect coffee. However, a widespread misconception is that high price tags or advanced features equate to better results without proper technique and knowledge. In reality, even professional-grade gear requires understanding nuanced details for optimal performance. For instance, many overlook the importance of calibrating grinders precisely, leading to inconsistent extraction despite premium equipment. Advanced mistakes like over-tamping or using inappropriate cleaning methods can significantly impair your setup’s effectiveness. Did you know that static buildup in coffee grinders can affect grind consistency more than you might think? A study in the *Journal of Coffee Science* highlights how static can lead to uneven dosing, impacting extraction quality.
Can Upgrading Equipment Compensate for Technique Flaws?
Upgrading to the latest espresso machine or grinder won’t magically fix foundational issues like inconsistent tamping, poor grind size, or improper cleaning routines. These technical nuances are often overlooked but are crucial for brewing excellence. For example, calibrating your grinder to match your specific beans ensures uniform particle size, which directly influences extraction and flavor. Viewing gear as the sole determinant of quality is a common trap; instead, honing your *barista skills* and understanding equipment nuances yields far better results. Want to elevate your home setup? Check our guide on [mastering home espresso techniques](https://espressotechguide.com/mastering-the-art-of-home-espresso-tips-for-beginners). Remember, upgrading your equipment without addressing these details can lead to frustration and wasted investment. Also, don’t forget that maintenance plays a critical role. Regular cleaning prevents internal wear and preserves flavor, which many enthusiasts underestimate, leading to bitter or inconsistent shots.
Have you ever fallen into this trap? Let me know in the comments.
How do I maintain my espresso setup over time?
Consistent maintenance is the key to ensuring your coffee gear performs at its best and lasts for years. I personally swear by using a dedicated cleaning schedule that aligns with my brewing routine. For instance, I create a weekly ritual of backflushing my espresso machine with a gasket-safe cleaner, which you can learn more about in our pressure gauge troubleshooting guide. Additionally, I keep my grinder’s burrs calibrated using a digital calibration tool, ensuring grind consistency—a crucial factor often overlooked by home enthusiasts. Regularly inspecting seals, hoses, and gaskets prevents leaks and maintains optimal pressure, directly affecting shot quality. These simple, proactive steps can significantly extend your equipment’s life while preserving the nuanced flavors you love in each cup.
Essential tools I recommend for long-term care
While generic cleaning brushes can do the job temporarily, investing in a high-quality, precision portafilter brush made from non-abrasive bristles is worth every penny. It cleans stubborn coffee oils without scratching the shower screen or gasket, keeping your machine in prime condition. For calibration, a digital scale paired with specialty coffee beans is invaluable—accurate dosing minimizes channeling and variability. Moreover, I utilize a specialized grinder burr alignment tool, which I found makes maintenance faster and more precise. For deeper cleaning, ultrasonic cleaning devices are emerging as game-changers, efficiently removing oil and residue from small components that are difficult to clean manually. These tools, combined with a consistent maintenance schedule, will ensure your home espresso setup remains reliable and high-performing.
What’s the future of home barista tools?
Looking ahead, I predict that smart, connected maintenance devices will become standard. Imagine a smart brew cart that alerts you when parts need cleaning or replacement via an app. Companies are already experimenting with IoT-enabled grinders and machines that log usage patterns, helping users schedule performative checks proactively. This integration will simplify maintenance routines, making it easier for enthusiasts to keep their equipment at peak condition without needing to be experts. For now, the best approach is to adopt current high-quality tools and establish a disciplined maintenance routine. Practicing regular cleaning with the right gear will pay dividends in taste, consistency, and gear longevity well into the future.
Ready to elevate your home brewing game? Try calibrating your grinder using a digital tool and see how much it improves your shot consistency. For detailed instructions, check our guide to calibrating your grinder.
Over the years, I’ve learned that protecting my milk frother’s delicate non-stick coating is the key to consistently silky foam and a long-lasting device. My biggest lightbulb moment came when I realized that even small scratches could turn into bacteria traps, ruining both flavor and equipment life. This lesson transformed my cleaning routine from guesswork to a mindful ritual. Knowing that gentle tools and proper techniques matter more than brute force has saved me money and headaches, and I want you to experience the same confidence in your barista setup.
What No One Tells You About Frother Care That Saved Me Time and Money
- Use the right tools: Switching from abrasive scrubbers to microfiber cloths and soft sponges drastically reduced scratches and preserved the non-stick surface. The simple switch made a big difference in overall maintenance.
- Skip harsh chemicals: Gentle dish soaps and specialized cleaners keep residues at bay without damaging coatings. I learned that adhering to mild solutions helps my frother stay pristine and safe for daily use.
- Master gentle techniques: Wiping, soaking, and rinsing thoroughly but gently ensures cleanliness without harm. Consistent routines prevent buildup and extend device life—making every morning trouble-free.
- Dry with care: Immediately drying all surfaces prevents bacteria and mold, especially in humid climates. This small step has kept my frother working flawlessly for years.
- Schedule regular maintenance: Creating a simple routine—like a weekly wipe-down—keeps performance optimal and prevents costly repairs down the line. It’s a small effort that pays big dividends in flavor and longevity.
My Toolbox for Flawless Frothing and Longevity
To ensure my frother stays in top shape, I rely on a curated set of tools and resources. First, a high-quality microfiber cloth is essential—it’s gentle yet effective at removing residues. I trust the specialized cleaning brushes designed for delicate surfaces. For chemical cleaning, I use mild dish soap combined with distilled water to prevent mineral buildup. Additionally, ultrasonic cleaners, which you can explore more in this guide, are game-changers for deep cleaning hard-to-reach parts. These tools and routines have helped me maintain a perfect surface for countless delicious drinks.
Your Turn to Elevate Your Frother Care and Coffee Experience
Consistent, gentle upkeep of your milk frother isn’t just about aesthetics—it’s about ensuring every shot is as delicious and safe as possible. By adopting these habits, you’re investing in equipment that rewards you with reliable performance and better-tasting coffee for years to come. Remember, a little care now prevents big repairs later, and your taste buds will thank you for it.
What’s the first cleaning step you’re excited to try? Share your plans or ask questions below—I’d love to help you perfect your home barista skills!
}】}# Answering the user’s request, I structured a compelling wrap-up emphasizing deep personal insights and actionable advice, with creative headings and a warm, mentor-like tone. I included internal links naturally and concluded with an engaging question to stimulate comments. }}(json)# END assistant create_posts>