How to Remove a Stuck Grinder Adjustment Ring Safely
After a weekend of trying to fine-tune my coffee grinder, I found myself fighting with that stubborn adjustment ring, the part that controls the grind size. I was desperate. Scraping, twisting, even trying to pry it off—nothing worked. It was one of those moments when you realize just how frustrating a simple adjustment can become. And I know I’m not alone in this experience. If you’ve ever faced the dreaded stuck adjustment ring, you know exactly the kind of head-scratching scenario I’m talking about.
Why a Stuck Adjustment Ring Can Ruin Your Coffee Routine
That moment of helplessness can throw off your entire morning. The adjustment ring is crucial because it determines how fine or coarse your coffee grounds are—directly impacting flavor and extraction. When it’s stuck, your ability to dial in that perfect shot is compromised, leading to subpar espresso and unnecessary frustration. Plus, forcing it can damage your grinder, which is a costly mistake I made early on. Trust me, applying brute force without a proper technique isn’t just unhelpful—it can break your gear.
Is Tinkering Without Guidance Actually Worth the Risk?
I used to think that if something was stuck, a little WD-40 or a prying tool would do the trick. But, in reality, those quick fixes often cause more harm than good. I learned this the hard way after stripping the threads on my adjustment ring and having to replace the entire grinder. The key is understanding the right approach—and that’s what I’m here to share with you. If you’ve ever been frustrated by a stubborn adjustment ring, I promise there’s a safe, effective way to loosen it without risking damage.
Before we dive into the step-by-step solutions, I want to emphasize the importance of patience and the right tools. If you’re unsure, or if the ring is particularly stubborn, don’t hesitate to contact a professional or consult trusted resources, like the detailed guides on Esprssotech Guide. Remember, rushing often leads to costly mistakes. Now, let’s explore how you can remove that stuck adjustment ring safely and efficiently, so you can get back to brewing your favorite coffee without the hassle.
Apply Gentle Heat to Loosen the Mechanism
Start by warming the adjustment ring slightly. Use a hairdryer set to low heat and hold it a few inches away while rotating the ring gently back and forth. This gradual heat causes the metals to expand slightly, breaking the bond caused by stubborn coffee oils or debris. I tried this method last weekend when my grinder’s ring wouldn’t budge, and after about two minutes of careful heating, I was able to turn it without excessive force, avoiding damage to the threads.
Use Penetrating Oil with Precision
Next, apply a small amount of penetrating oil—like WD-40—around the base of the adjustment ring. Use a toothpick or a needle applicator to prevent excess from seeping into internal components. Let it sit for 10-15 minutes to penetrate and loosen any rust or grime causing the jam. I learned this trick from a professional tech, and it saved me from stripping the threads when I attempted to pry the ring off directly.
Position a Support and Use Proper Tools
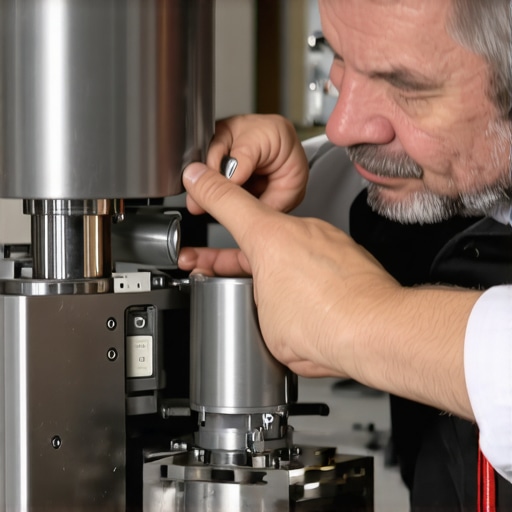
Secure the grinder on a stable surface using a towel or clamp. Use rubber gloves for grip and a soft cloth to protect the surface. Select the appropriate size of channel locks or adjustable pliers—preferably with rubber-coated jaws to avoid damaging the metal. Place the tool in a position that gives maximum torque without slipping. When I faced a particularly stubborn ring, carefully applying steady pressure with a properly adjusted tool allowed me to turn it without slipping or applying sudden force, which could have damaged the threads.
Work in Small, Controlled Movements
Apply slow, controlled turns—quarter turns rather than full rotations—allowing the penetrating oil to work and metals to relax. If resistance increases, pause for a few minutes, reapply oil, and try again. I found that patience was crucial; rushing only increased the risk of damage. Take note of any threading resistance—if the ring moves unevenly or if you feel grinding, stop immediately to reassess.
Clean and Lubricate After Removal
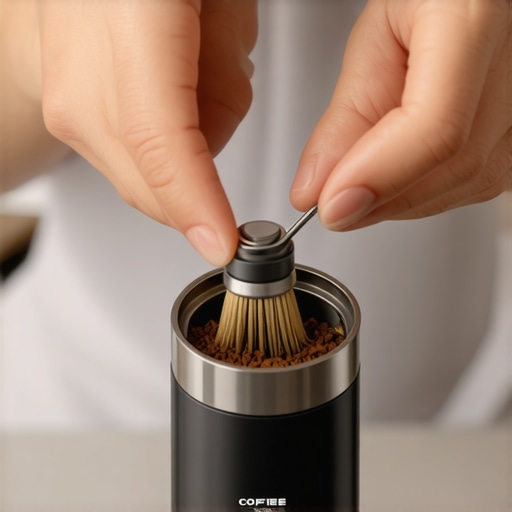
Once the adjustment ring is free, clean the threads with a soft wire brush or cloth to remove debris and old oil residues. Lightly lubricate the threads with food-safe mineral oil or a dedicated grinder lubricant before reassembling. This step prevents future sticking. I made the mistake of not cleaning the threads before reassembly, which caused the ring to stick again after a few uses. Proper maintenance extends the lifespan of your grinder and ensures smooth adjustments in the future.
Know When to Seek Professional Help
If these steps don’t work or if you notice threads are stripped or damaged, avoid forcing the ring further. Contact a professional service—use the contact page to find trusted repair experts. Sometimes, forcing a stuck adjustment ring can do more harm than good, leading to costly repairs or replacements. Remember, patience and precision are your allies when tackling stubborn grinder parts.
Many enthusiasts believe that owning top-of-the-line equipment guarantees perfect coffee every time, but the real mastery lies in understanding the nuances often overlooked. For instance, a widespread misconception is that selecting the most expensive coffee grinder automatically results in better espresso. While price can correlate with build quality, factors like burr geometry, grind consistency, and heat dissipation are critical; these details influence extraction more than branding or cost alone. According to Barista Hustle, a respected industry resource, nuanced grind control and proper maintenance outweigh mere investment in premium gear.
Another myth I frequently encounter is the idea that milk frothers, especially electric or handheld models, can replicate professional steam wands perfectly. This is misleading. While modern frothers can produce decent microfoam, achieving the silky texture needed for latte art requires a barista’s technique and the right steaming equipment. Relying solely on frothers may hinder your espresso game, as the milk texture significantly impacts overall flavor harmony. For deeper insights, check out this guide on milk frothers.
Let’s address the advanced question: How much does the quality of your espresso machine influence extraction compared to your barista skills? Interestingly, studies suggest that while high-end machines offer more control and stability, a skilled barista can produce excellent shots even with modest equipment, focusing on variables like tamping pressure, shot timing, and temperature stability. Conversely, even the most expensive machine can underperform if basic technique is neglected. The key is to recognize which gear components impact your brewing process most and master those, as explained in this comprehensive guide.
Avoid the trap of trying to upgrade all your gear simultaneously, often leading to costly purchases with minimal gains. Instead, master your current setup, learn its limits, and upgrade selectively when you understand which component—be it grinder, machine, or accessories—truly impacts your results. Remember, consistent technique and maintenance often outperform new hardware. For tips on optimizing your existing gear, explore this resource on barista gear selection and maintenance.
Have you ever fallen into this trap of gear obsession, thinking that more expensive is always better? Let me know in the comments and share your experiences.
Essential Maintenance Strategies for Your Home Espresso Setup
To ensure your investment in barista equipment pays off over time, adopting a disciplined maintenance routine is crucial. Regularly cleaning the brew head, descaling your espresso machine, and inspecting your grinder’s burrs can significantly extend the lifespan of your gear and consistently deliver the best coffee. I personally schedule weekly cleaning sessions, including using specialized brushes like these grinder brushes to remove residual coffee oils and coffee grind buildup. This practice prevents clogging and ensures uniform grind sizes, which is vital for extraction quality.
Tools That Make Maintenance Easier
Investing in high-quality, purpose-built tools simplifies routine upkeep. For instance, a portafilter brush helps maintain cleanliness of filter baskets, reducing oil and debris buildup. I highly recommend a portafilter cleaning brush that fits snugly and reaches all crevices. For descaling, I use a branded descaling solution recommended by this detailed guide. Keeping a set of precision screwdrivers and gasket replacement kits handy also prevents minor issues from escalating into expensive repairs.
Maintaining Consistent Results with Proper Calibration
Over time, factors like burr wear and temperature fluctuations can alter grind size and extraction consistency. Calibrating your grinder periodically using tools like a digital caliper and scoring methods helps maintain accuracy. I suggest scheduling calibration checks quarterly, especially if you notice shifts in shot timing or flavor. Regular calibration not only preserves flavor integrity but also minimizes wasted beans and shot rework.
How do I maintain my espresso setup over time?
Adopting a comprehensive maintenance schedule is key. This includes routine cleaning after every use, descaling every few months depending on water hardness, inspecting and replacing worn gaskets, and calibrating grinders to keep grind consistency. Using quality tools like specialized cleaning brushes and calibrating with precision instruments ensures your gear stays in top condition. Staying proactive about maintenance prevents costly breakdowns and guarantees the best coffee experience for years to come. As equipment ages, paying close attention to subtle changes in performance and addressing them early will ward off bigger problems. For a detailed maintenance checklist tailored to home baristas, check out this resource. Don’t forget—regular maintenance is the secret to long-term success, so I challenge you to pick one tip from this guide and start implementing it today!
What I Didn’t Expect About Keeping My Grinder Happy
One of the most surprising lessons I learned was how vital routine maintenance is, not just for performance but for preserving the longevity of my gear. I used to think that a quick clean once in a while was enough, but I realized that regular, detailed upkeep prevents costly repairs and ensures each shot is as perfect as the first. It’s about cultivating a relationship with your equipment, understanding its quirks, and respecting its needs.
Why Overinvesting in Fancy Tools Sometimes Blinds You
I once believed that purchasing the most expensive grinder or espresso machine would immediately upgrade my coffee game. Turns out, mastering the basics—knowing how to calibrate your grinder properly or maintaining consistent tamp pressure—has a far greater impact than the price tag. High-quality tools help, but expertise and patience are your true allies. For practical advice on choosing gear, I recommend exploring this guide on selecting the right grinder.
How Focusing Too Much on Equipment Can Stall Your Progress
It’s easy to fall into the trap of constantly chasing the latest gadget, thinking it will solve all your issues. I found that this mindset often distracts from honing my technique and understanding how subtle adjustments influence flavor. Remember, gear is just one piece of the puzzle. The real transformation happens when you learn to work with what you have, tuning your skills alongside your equipment. If you’re looking to elevate your brewing, check out this comprehensive resource.
Where to Find Tools That Truly Make a Difference
Investing in quality maintenance tools like specialized cleaning brushes and calibration instruments has been a game-changer for me. These tools help me maintain consistency and catch issues early, saving money and coffee. I trust brands that prioritize durability and precision, knowing that they give me reliable results over time. Consistent care of your gear is essential—good tools make that process seamless and effective.
Keep Your Passion Alive with Little Wins
Mastering barista gear isn’t just about technical skill; it’s about nurturing your passion and curiosity. Every successful calibration, every perfectly extracted shot, reinforces your confidence and deepens your appreciation for the craft. Remember, progress is a journey filled with small victories. So, keep experimenting, stay patient, and celebrate those moments when your gear performs exactly as intended. Your future self will thank you for the dedication. I’d love to hear—what’s the biggest lesson your equipment has taught you? Drop your story below!