Why Your Flat Burrs are Leaving Chunks in Your Espresso
I remember the exact moment I realized my beloved flat burr grinder was sabotaging my morning espresso ritual. I was eagerly preparing for my first shot of the day, only to get a mouthful of weirdly coarse chunks rather than that smooth, silky crema I craved. It was frustrating—and honestly, a bit embarrassing. Who knew that a seemingly minor issue with burrs could mess up the entire experience?
How Do Flat Burrs Cause Chunky Espressos?
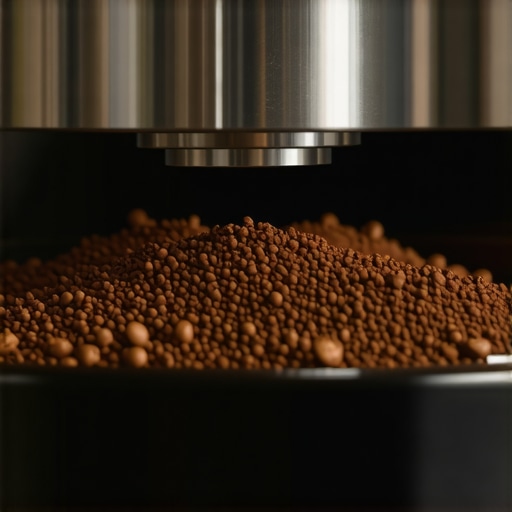
Flat burrs are designed for precision and consistency, but when they start leaving behind larger particles or chunks, it’s usually a sign something’s off. These chunks are typically the result of dull or misaligned burrs, clogs, or buildup of coffee oils that create barriers in the grinding process. The chunks don’t just ruin the texture; they can also lead to uneven extraction, making your espresso taste bitter or sour, instead of perfectly balanced.
This problem is quite common among home baristas. I’ve seen many enthusiasts struggle with inconsistent shots because their burrs aren’t functioning optimally. The good news? It’s a fixable issue, and I’ll walk you through it.
The Key Promise for Today
By the end of this post, you’ll understand exactly why your flat burrs are leaving chunks, and most importantly, how to solve the problem. From proper cleaning routines to potential part replacements, I’ll share practical tips that will transform your brewing experience and bring back that smooth, velvety espresso you love.
Are You Wasting Time on the Wrong Belts?
Early in my home espresso journey, I made a critical mistake—assuming that simply buying a more expensive grinder would solve all my issues. Turns out, even high-end grinders need regular maintenance. Neglecting to clean and calibrate your burrs is like ignoring the oil change on your car—eventually, it catches up with you. If you’re tired of wasting coffee or getting inconsistent results, it might be time to inspect your burrs more closely.
And yes, this is a common mistake I see with new coffee enthusiasts. Checking your grinder’s burrs and cleaning them regularly can prevent the buildup that causes those pesky chunks. If you’re unsure how to do that, I recommend starting with a routine clean. You can find comprehensive steps in this guide.
So, have you faced these chunk issues before? If so, don’t worry—help is here. Let’s dive into the practical steps to get your flat burrs grinding smoothly again.
Clean Your Burrs with Precision
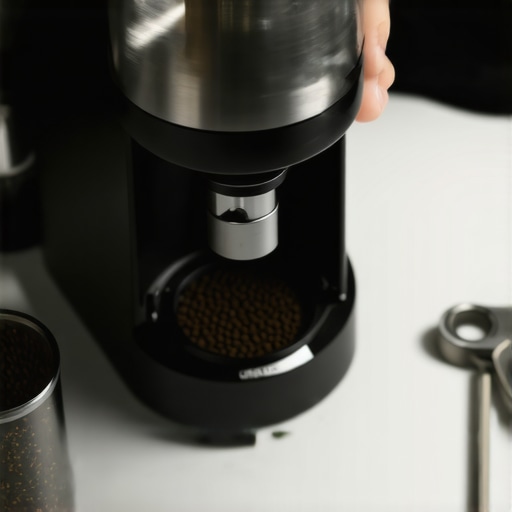
Start by unplugging your grinder and removing the hopper. Use a soft brush or a dedicated grinder cleaning brush to sweep away loose coffee grounds and oils from the burrs. For stubborn buildup, employ a vacuum or compressed air to blow out debris. I once cleaned my grinder this way, and immediately noticed fewer chunks in my grind—resulting in a smoother espresso shot.
Disassemble and Inspect the Burrs
Carefully unscrew the burrs following your grinder’s manual. Examine them for dullness, misalignment, or damage. If they appear dull or chipped, replacing them can drastically improve grind consistency. While doing this, check for any lodged coffee particles or oils that could cause blockages, and clear them thoroughly.
Realign the Burrs for Uniform Grinding
Misaligned burrs can produce uneven particles, leading to chunks. Reinstall the burrs according to manufacturer instructions, ensuring they sit flush and aligned. Some grinders have adjustment screws—use a screwdriver to set them properly, matching the calibration recommended in your manual. Proper alignment has helped me cut down on coarse fragments and achieve a velvety espresso texture.
Calibrate Your Grinder Settings
Adjust your grind size to slightly coarser or finer, depending on the test shots. Grind a small amount onto a napkin or filter, then examine the particle size. The goal is a uniform grind without large chunks. I keep a small notebook of settings for different beans, which simplifies achieving an optimal grind regularly.
Perform a Test Grind and Observe
Run a test shot, then closely observe the grind. Large chunks or uneven particles indicate further adjustment or cleaning is needed. If after cleaning and alignment chunks persist, consider replacing worn burrs with newer models, which restore sharpness and precision. Remember, a dull burr set is a common culprit behind chunky grinds, so investing in quality replacement parts can be worthwhile.
Implement Routine Maintenance
Establish a cleaning schedule—at least once a month for most grinders. Regularly remove and clean burrs, check for wear, and recalibrate as needed. This proactive approach prevents buildup that causes chunks and keeps your grinder performing at its best. Good maintenance habits have significantly improved the consistency of my espresso shots and flavor clarity.
By following these targeted steps—thorough cleaning, proper disassembly, alignment, calibration, and routine upkeep—you’ll drastically reduce, if not eliminate, those unwanted chunks. Your espresso will flow more smoothly, taste richer, and look inviting with its rich crema. For further personalized assistance, consider reaching out through our contact page.
For coffee aficionados, understanding the nuances of barista equipment can seem overwhelming, and misconceptions only add to the confusion. A common myth is that expensive espresso machines always produce better shots; however, many home enthusiasts overlook calibration, maintenance, and proper technique, which matter just as much. For example, even high-end machines like those featured in top-rated espresso machines can underperform if not correctly maintained or calibrated. Another widespread mistake involves the belief that any grinder will do when in fact, the selection and calibration of your coffee grinder make a significant difference. Choosing a grinder based solely on price can result in inconsistent particle sizes and poor extraction. Accurate calibration and routine cleaning routines, as discussed in calibrating your grinder, help prevent issues like clumping or uneven grind, which are often misunderstood as machine faults.
Advanced users know that milk frothers are often oversimplified in marketing—some believe all frothers create equal microfoam, but the truth is, the type of steam wand or frothing method can drastically influence the texture, especially with alternative milks. The myth that one-size-fits-all extends to home espresso setups too; actual optimal results depend heavily on proper technique, correct pressure, and temperature control, not just gear.
A critical warning here is the trap of disregarding routine maintenance. Many coffee lovers ignore essential steps like cleaning shower screens, replacing worn gaskets, or descaling, which can lead to inconsistent shots or equipment failure over time. For instance, neglecting a buildup of coffee oils can clog nozzles or scale, reducing performance, as explained in water quality and scale prevention. This oversight often causes beginners to blame their gear instead of realizing that maintenance can dramatically extend the lifespan and improve the quality of their machine.
Let’s tackle a common question that many serious enthusiasts might ask: “How do I tell if my grinder’s burrs are truly dull, or if I’m just using the wrong grind size?” The answer lies in understanding the signs of dull burrs—such as increased fines, uneven extraction, or static buildup—that can be confirmed through simple tests like the paper towel method for evaluating burr sharpness. Dull burrs often force you to grind finer, which can cause clogging and inconsistent shots. According to industry experts, investing in high-quality burrs and replacing them when dull is a crucial step toward achieving optimal shot clarity and flavor, as discussed in this guide.
The takeaway? Your gear is only as good as your knowledge and maintenance routine. Don’t fall for the myths that gear alone makes perfect coffee—consistency, calibration, and cleaning are your secret weapons. Have you ever fallen into this trap? Let me know in the comments or reach out through our contact page to share your experiences or ask questions.
To keep your coffee gear performing at its peak, regular maintenance is non-negotiable. I personally rely on a combination of meticulous cleaning routines and the right tools to ensure longevity and consistent results. For instance, I use a dedicated grinder brush to remove coffee oils from burrs daily, preventing buildup that can cause inconsistent grind particles and chunky espresso texture. This simple step has saved me from costly replacements and taste issues.
Investing in quality calibration tools like a digital scale and a stopwatch allows precise adjustments to your espresso machine’s pressure and temperature settings. These tools help maintain optimal extraction parameters over time, ensuring each shot remains balanced regardless of bean freshness or humidity shifts. Regular calibration, combined with routine descaling using safe descaling agents, extends your equipment’s life and preserves flavor clarity.
How do I maintain my espresso machine over time?
Long-term upkeep involves more than just cleaning. It requires systematic checks of critical components such as seals, gaskets, and water filters to prevent leaks and pressure drops that could impair functionality. I recommend setting monthly reminders to inspect these parts and replace if signs of wear appear. For advanced maintenance, disassembling and inspecting internal components like the pump or boiler could reveal potential issues before they become severe—consider consulting resources such as this detailed guide.
Additionally, using tools like a calibration kit for volumetric controls ensures your espresso dose remains consistent, which is vital for long-term flavor stability. Remember, the key to durability isn’t just high-quality gear but diligent upkeep.
When it comes to grinders, I recommend the best practices for maintenance. Regularly cleaning burrs and adjusting grind settings according to seasonality or bean type prevent clogs and uneven particles that can produce clumpy shots.
Embracing these maintenance routines might seem tedious initially, but they become second nature with time. This proactive approach ensures your equipment continually delivers the best possible espresso, shot after shot. Looking ahead, as technology advances, expect automation features like self-cleaning systems or sensor-based calibrations that will make this process even more seamless. For now, stay vigilant and committed—your coffee deserves it.
If you want to dive deeper or troubleshoot specific issues, don’t hesitate to reach out for expert advice. And for an advanced tip, try implementing a weekly descaling routine combined with inspection of your water filtration system. This dual approach can significantly improve machine longevity and taste consistency over time.
The Hardest Lesson I Learned About Barista Gear, Espresso Machines, Home Espresso, Milk Frothers, Coffee Grinders
One of the most impactful lessons I’ve encountered was realizing that even the most expensive grinder can’t compensate for neglect or miscalibration. I used to believe that a high-end machine would effortlessly deliver perfect shots, but I learned that routine maintenance and attention to detail are what truly matter. Recognizing that dull or misaligned burrs are silent saboteurs of flavor taught me to prioritize regular checks and cleaning routines, ultimately elevating my coffee experience.
3 Myths About Barista Gear, Espresso Machines, Home Espresso, Milk Frothers, Coffee Grinders That Held Me Back
Believing that all milk frothers are created equal, or that a more expensive espresso machine guarantees better shots, slowed my progress. I discovered that proper calibration, technique, and understanding each tool’s unique strengths make all the difference. Dispelling these myths allowed me to optimize my setup, achieve velvety microfoam, and craft espresso that rivals cafes. Learning to work with my gear rather than rely solely on high price points was a game-changer.
What Experts Won’t Tell You About Barista Gear, Espresso Machines, Home Espresso, Milk Frothers, Coffee Grinders
Many seasoned baristas keep a secret: consistent results depend more on diligent maintenance and calibration than on flashy equipment. For example, replacing dull burrs or cleaning your steamer wand regularly can dramatically improve flavor and texture. These insider tips turned my routine into a science, allowing me to troubleshoot issues confidently and enjoy barista-quality coffee at home. Sometimes, the simplest habits have the biggest impact on your brew.
My Essential Toolkit for Testing and Maintaining Flat Burrs
Over time, I curated a set of tools that revolutionized my maintenance routine. A quality burr cleaning brush, a digital caliper for alignment, and a trusted replacement burr set are vital for keeping my grinder performing optimally. These tools aren’t just investments; they’re essential allies in maintaining that silky grind every morning. Building this toolkit empowered me to perform quick, effective fixes without professional service, saving time and money.
Where to Go from Here
If you’re serious about elevating your home espresso game, I urge you to explore more in-depth guides on mastering your brewing routine or investing in quality tools like top barista gear. Continuous learning and maintenance will unlock new levels of flavor, precision, and consistency, making each cup an occasion to savor. Remember, your journey in perfecting espresso is ongoing—embrace it with patience and curiosity.