The Simple Cork Trick for Ground Coffee Distribution
It was a quiet Sunday morning when I finally cracked during my usual home espresso routine. I had just ground fresh beans, tamped with what I thought was confidence, and pulled my shot. But it tasted flat, bitter, and uninspiring. Frustration bubbled up as I realized I had wasted good beans on a flawed process. That lightbulb moment hit me—my ground coffee wasn’t distributing evenly in the basket, causing inconsistent extraction. I had overlooked a simple yet crucial step that could transform my coffee game.
Struggling with uneven grounds? You’re not alone
Many home baristas face this silent enemy—clumpy, uneven coffee grounds that lead to weak, sour, or over-extracted shots. It’s a common gripe that can wreck your morning brew without warning. Over the years, I experimented with numerous techniques to fix it, but nothing truly stuck until I discovered what I now call the “Simple Cork Trick.” This method is straightforward, inexpensive, and surprisingly effective at ensuring grounds are evenly distributed, providing a consistent base for perfect espresso extraction.
Is the hype worth it? My early mistake that almost made me give up
First, I was skeptical. It sounded too simple, too good to be true. I remember trying a ton of complicated distribution tools, wasting time, and making my workflow messier. My biggest mistake was dismissing small, everyday techniques—like tamping harder or fiddling with grinder settings—as the solution. Trust me, I’ve been there. If you’re tired of inconsistent shots and want a reliable, easy fix, stay tuned. This trick changed everything for me, and I believe it can do the same for you. For more tips on choosing your barista gear, check out this guide on selecting top-quality equipment. Now, let’s dive into the simple secrets behind the cork trick and how it can elevate your home espresso experience.
Prepare Your Workspace and Equipment
First, clear your countertop and gather your espresso machine, grinder, tamper, and a clean container for residual coffee. Ensure the grinder is clean and calibrated to your preferred setting, which you can verify by visiting this guide. A tidy workspace minimizes distractions and allows for a focused process.
Use the Proper Grind Size
Set your grinder to a consistent setting suitable for espresso—usually a fine grind. I recall a time when I was using a medium setting, which caused uneven extraction. After dialing in the grind, do a few test shots to confirm the flavor profile and adjust as needed. Proper grind size is fundamental, and consistent calibration is key for sugar-smooth extraction.
Distribute Grounds Uniformly
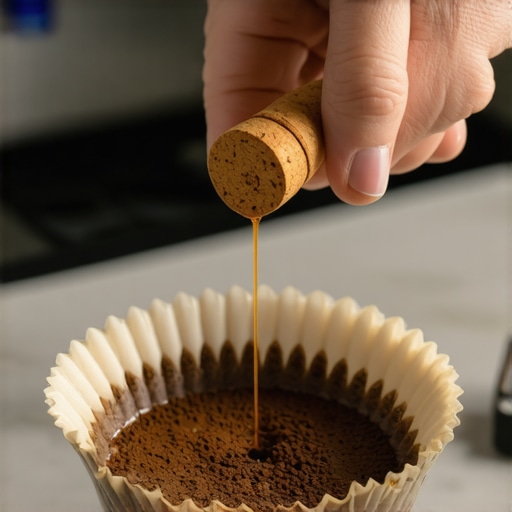
Once you’ve filled the portafilter, tap it gently on the countertop to settle the grounds. Follow this with the cork trick: press a clean, round, soft object—like a cork—firmly into the coffee bed and rotate it a few times. This creates even pressure, breaking clumps and leveling the surface. This step was a game-changer when I first applied it during a messy morning session—reducing channeling and improving shot quality noticeably.
Master the Tamping Technique
Use a flat, high-quality tamper—preferably a good aluminium or stainless steel one—and apply firm, even pressure directly downward. Aim for about 30 pounds of force—think of pressing your thumb into a ball of dough. Keep the tamper level to avoid uneven compaction, which causes inconsistent water flow. After tamping, give the portafilter a gentle twist to smooth out the surface.
Ensure Proper Distribution and Leveling
Before tamping, visually inspect the grounds for clumps or uneven areas. If you notice a lumpy or uneven surface, re-distribute the grounds manually or with the cork trick again. This helps prevent water from finding the easiest path—channeling—that leads to weak or bitter shots. During one errant attempt, I left the grounds uneven and ended up with a sour shot—the fix was re-distributing and tamping evenly.
Apply the Cork Trick Accurately
Insert a clean, dry cork into the portafilter and press down firmly, then rotate a quarter turn. Its soft surface helps break clumps and push grounds into a uniform layer. Doing this quickly, in one confident motion, makes a noticeable difference. Practice this a few times, and you’ll find it becomes second nature, saving time and frustration.
Finalize with a Light Tap and Final Leveling
After tamping and corking, give the portafilter a gentle tap on the tamping mat to settle the grounds further. Use your finger or a leveling tool to verify the flatness of the surface. If uneven, re-tamp or re-level, because a flat, even bed ensures uniform water flow and extraction quality. I once skipped this step, resulting in a shot with uneven flavors—always double-check the surface.
Prepare for Extraction
Place the portafilter into the espresso machine, lock it securely, and start your shot. Observe the flow; a steady, honey-like stream indicates proper distribution and tamping. If you see sputtering or uneven flow, stop and re-extract, adjusting your distribution or tamping techniques accordingly. Regularly revisiting these steps drastically improves your espresso consistency.
When it comes to crafting stellar espresso at home, many enthusiasts invest heavily in high-end machines and accessories, believing they’ve unlocked the secrets to professional-quality coffee. However, even seasoned home baristas often fall into common traps or miss nuanced details that can drastically affect their brew quality. Let’s explore some prevalent misconceptions and advanced pitfalls, so you can elevate your home coffee game with confidence.
Why the Brand of Your Espresso Machine is Not Always the Key to Better Shots
Contrary to popular belief, choosing the most expensive or well-known espresso machine doesn’t guarantee superior results. Many assume that brand reputation equals quality, but in reality, the nuances lie in proper maintenance, calibration, and understanding your specific model’s quirks. A well-maintained, correctly-tuned, entry-level machine can outperform a high-end unit that’s neglected or misused. To get the most from your gear, focus on routine cleaning, checking seals and gaskets, and learning the ins and outs of your machine’s behavior. For comprehensive advice, see how to optimize your [top-rated espresso machines](https://espressotechguide.com/top-rated-espresso-machines-for-coffee-lovers-in-2025).
Milk Frothers: Don’t Fall for the One-Size-Fits-All Myth
Many home baristas purchase cheap, generic milk frothers assuming they can create barista-quality microfoam effortlessly. The truth is, not all frothers are created equal, and some can even be counterproductive. For instance, induction-based or very high-speed frothers often struggle with small milk quantities, resulting in uneven or watery foam. The key nuance is understanding the ideal method for your milk type and desired microfoam texture. Investing in a good-quality frother, or learning how to steam milk properly with your espresso machine, can make a significant difference. For tips tailored to your setup, explore how [milk frothers can transform your coffee](https://espressotechguide.com/milk-frothers-that-transform-your-coffee-experience).
Common Grinder Mistakes That Sabotage Your Espresso
When it comes to grinders, many underestimate the importance of burr alignment, cleanliness, and grind consistency, especially in home settings. A widespread mistake is relying on a burr grinder without periodically checking for dullness or misalignment. Dull burrs produce uneven grind sizes, resulting in over- or under-extraction. Additionally, grinders can accumulate coffee oils and dust that clog the mechanism, reducing performance. Regularly calibrate your grinder, clean it with appropriate tools, and consider the [correct burr alignment](https://espressotechguide.com/how-to-align-your-burrs-for-better-flavor-clarity) to ensure optimum grind quality. Remember, a grinder is only as good as your maintenance practices. 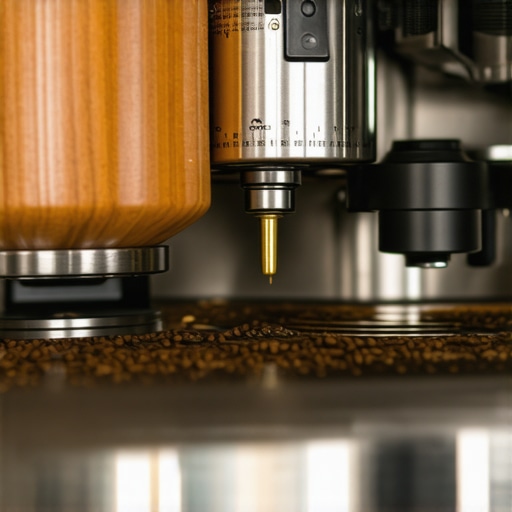
Balancing Power and Precision in Home Espresso
Advanced enthusiasts often overlook the importance of controlling extraction variables like flow rate, pressure, and temperature. While a powerful boiler and pump are appealing, mastering their control is essential to prevent common mistakes like channeling or over-extraction. Using tools such as shot timers and pressure gauges can help refine your technique. Moreover, understanding the subtle art of pre-infusion and flow profiling enables you to craft shots that truly rival commercial setups. For deeper insights, check how to [balance shot time for better flavor](https://espressotechguide.com/how-to-balance-your-shot-time-for-better-flavor).
Have you ever fallen into this trap? Let me know in the comments. Mastering your gear’s nuances unlocks the full potential of your coffee—don’t settle for surface-level fixes when the real improvements are just beneath the surface.
How do I keep my espresso setup running smoothly over time?
Maintaining your home espresso gear is crucial for consistent excellence. I personally rely on a combination of dedicated cleaning tools like specialized grinder brushes and precision calibration routines, ensuring each component performs at its peak. Regular descaling using a mixture of white vinegar or commercial descaling solutions helps prevent mineral buildup, especially if you have hard water. An often-overlooked step is inspecting rubber gaskets and seals every six months—replacing them when signs of wear appear—so you avoid leaks that compromise shot quality. Over time, investing in a telescope or laser level ensures your machine sits perfectly flat, which is paramount for even extraction.
Looking ahead, I predict that smarter, IoT-enabled maintenance tools will become standard, providing real-time alerts for descale needs or component wear—making maintenance even more hands-off. Meanwhile, keeping a routine log of your cleaning and calibration sessions simplifies troubleshooting. For comprehensive guidance, check out this detailed article on essential tools for coffee enthusiasts.
Which tools are truly worth the investment?
Among personal favorites are a high-quality tamper with a firm grip, a precision leveling tool to ensure even tamping, and a clean, fine brush designed specifically for grinder burrs. The difference these make isn’t just theoretical—improper tamping can cause channeling, which ruins shot consistency, while a dirty burr can introduce off-flavors. For example, I’ve found that regularly cleaning with a natural cleaning solution extends grinder life and preserves flavor clarity.
Stay ahead by scheduling quarterly maintenance checks—this proactive approach reduces unexpected downtimes and keeps your espresso experience on point. Be sure to explore this in-depth maintenance guide for step-by-step routines and recommended products.
What about software or tech upgrades?
While manual maintenance is king, integrating software upgrades or firmware updates runs the risk of improving your machine’s performance and diagnostic capabilities. For each component, refer to the manufacturer’s latest firmware updates—some models allow remote updates that can improve temperature stability or shot consistency. Additionally, emerging apps can help log your brew parameters, enabling you to fine-tune over time. I personally use recommended software that syncs with my espresso machine to monitor health metrics. In the next few years, I foresee the rise of AI-driven maintenance alerts tailored to your specific habits, minimizing guesswork and extending your gear’s lifespan.
To keep your machine leveraging these advancements, stay informed about firmware releases and consider investing in a reliable pressure gauge for real-time flow monitoring. For advanced tuning tips, don’t miss the comprehensive insights at this resource. Try integrating a calibration routine with a digital scale and see how fine-tuning your grind and tamp can yield dramatically better shots—it’s a game changer for home baristas aiming for perfection.
What I Wish I Knew When I Started Tuning My Espresso Setup
One of the most eye-opening lessons I learned was that even the best equipment can’t compensate for inconsistency in ground distribution and tamping. Small adjustments, like the cork trick, drastically improved my shot clarity and flavor profile. The moment I realized that precision in these seemingly minor steps unlocks whole new levels of espresso quality was a game changer.
Another insight came from understanding that continuous maintenance and calibration matter as much as initial setup. Regularly cleaning burrs, inspecting seals, and adjusting grind settings kept my machine performing optimally, saving me from costly repairs and flavor sabotage. It’s the routine that really cements consistency in my home brewing.
I also discovered that pushing for deeper knowledge about every component—like knowing when a gasket needs replacing or how to interpret pressure gauges—empowers you to troubleshoot and enhance your setup instead of guessing blindly. This kind of detailed awareness transforms your home barista journey from trial-and-error to mastery.
Tools and Resources That Elevated My Coffee Game
My essential toolkit for espresso mastery includes a high-quality flat tamper, my favorite leveling tool—because even pressure makes a difference—and a reliable grinder treatment kit to keep burrs sharp. I trust these because they’ve proven their worth in producing consistent, delicious shots over time. For in-depth insights, I often reference this guide to ensure my tools stay in top shape.
Fetching knowledge from seasoned baristas and advanced home brewers through this resource helped me refine my technique and overcome plateaus. Also, exploring latest machine reviews ensures I stay updated with the best gear emerging in the market.
Embrace the Journey: Elevate Your Home Espresso Passion
Your next great espresso shot is just a few tweaks away. With patience, curiosity, and the right tools, you can transform your home setup into a professional-grade station of coffee craftsmanship. Don’t be afraid to experiment and learn—every misstep brings you closer to barista-level mastery. Keep pushing your boundaries and savor the process of perfecting your craft.
What’s the most unexpected lesson you’ve learned while working on your espresso skills? Share below—I’d love to hear your stories and tips on overcoming common challenges and achieving that elusive perfect shot!