Why your coffee beans are sticking to the sides of the hopper
Nothing’s more frustrating than hearing that telltale squeak every time I open my coffee grinder’s hopper, only to find my beans clinging stubbornly to the sides like a stubborn spill. One morning, I finally had enough. I was ready to toss the whole setup out the window. But then, a lightbulb moment struck—what causes those beans to stick in the first place? And more importantly, how can I prevent it from derailing my morning ritual?
In this post, I’ll share my journey from frustrations to solutions, and help you tackle the sneakiest hopper issue that could be ruining your freshly ground coffee. We’re talking about that often-overlooked problem that impacts grind consistency and can even lead to jammed grinders—something I learned the hard way early in my barista adventures.
Why Do Coffee Beans Stick to the Hopper Walls?
So, why do those tiny beans decide to stick to the hopper walls instead of flowing freely into the grinder? The answer often comes down to a few key factors: moisture, static electricity, and bean age. Moisture from humid environments or spilled liquids can create a sticky coating around the beans, making them cling to every surface. Static electricity, especially on dry days or with certain plastic hoppers, creates an invisible force that pulls beans to the sides. (A surprising fact, considering most of us think about the grind, but the hopper’s conditions play a significant role.)
Early on, I made the mistake of ignoring these factors, assuming the issue was my grinder’s poor design. Turns out, a simple routine check and some practical adjustments can eliminate the problem. Regularly cleaning the hopper and using anti-static brushes made a noticeable difference. Also, switching to a metal hopper helped with static buildup, according to some expert advice online—something I recommend exploring to improve your experience.
Have you faced this frustrating issue? It might be sneaky, but with the right tweaks, you can ensure your beans flow smoothly and your grind stays consistent, every single time. Ready to dive into how to fix this once and for all? Let’s get started with some practical, no-nonsense tips that will make your coffee routine smoother and more enjoyable.
Clean and Inspect Your Hopper Regularly
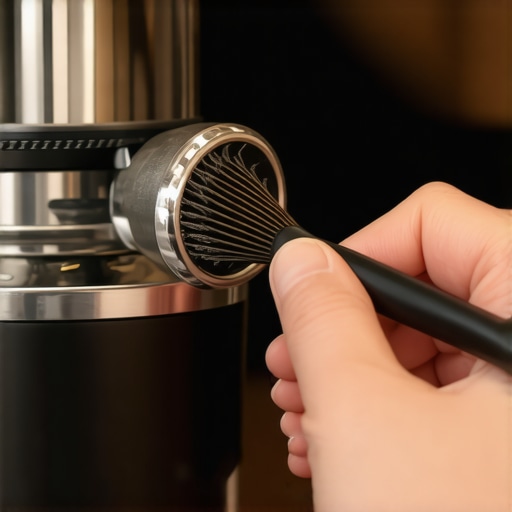
During my own trial, I noticed that a quick clean every week drastically reduced bean sticking. Remove the hopper from your grinder, and carefully empty any residual beans. Use a soft brush to clear out dust and old bean residues. Pay special attention to corners and crevices where debris can accumulate. Cleaning prevents moisture buildup and static, which are primary culprits behind clingy beans.
Control Moisture and Humidity
Humidity turns those tiny beans into velcro balls. To combat this, store your beans in an airtight container away from bathroom or kitchen sinks where moisture lingers. When grinding, avoid spilling liquids near the grinder. I once left a damp rag on my work surface, and the next morning, the beans stuck like glue. Switching to a dry environment made a notable difference.
Switch to a Metal Hopper for Static Reduction
Static electricity is sneaky, especially with plastic hoppers on dry days. I replaced my plastic hopper with a metal one, which significantly cut static buildup. If replacing isn’t an option, consider anti-static sprays made for coffee equipment or using an anti-static brush. These options neutralize static charges, ensuring beans flow smoothly without cling.
Use Anti-Static Devices or Techniques
Another practical step is installing anti-static devices like grounding clips or ionizing bars. In a pinch, I used a balloon rubbed on my hair to dissipate static when I saw beans sticking unexpectedly. Keep in mind, consistent application of these methods helps maintain a steady flow and prevents jamming or uneven grind sizes.
Adjust Hopper Fill Levels and Bean Storage
Overfilled hoppers increase static and pressure, causing beans to jam or stick. Fill your hopper only halfway and give beans room to move freely. Also, let your beans breathe for a day after buying; fresh beans tend to be more oily and sticky. I’ve found that aged beans—around two weeks old—are less prone to sticking, and balancing freshness with storage practices yields better results.
Monitor and Tweak Your Environment
Temperature and airflow influence static and moisture. Keep your coffee area cool and well-ventilated. If static persists, place a small humidifier nearby to introduce just enough moisture. I experimented with this setup once during a dry winter, and it smoothed out bean flow considerably. Recognize your environment’s role and make adjustments accordingly.
Additional Tips from the Experts
For further insights, check out online guides on how to keep your grinder running smoothly, like [this guide on ensuring consistent grind](https://espressotechguide.com/how-to-select-the-perfect-coffee-grinder-for-your-brew). Proper maintenance and environmental control are key to a hassle-free coffee experience.
Many home baristas and coffee enthusiasts believe that choosing the most expensive milk frother or the latest espresso machine guarantees perfect results. However, this common misconception often leads to overlooked nuances that can significantly impact your brewing experience. In my journey from beginner to seasoned enthusiast, I’ve discovered that understanding the subtleties of barista gear and grinder calibration is crucial to truly elevating your coffee game. Contrary to popular belief, expensive equipment alone doesn’t ensure excellence; mastery comes from mastering the details.
Are You Falling For the Equipment Trap?
It’s a trap many fall into—thinking that flashy, high-end gear automatically translates into better coffee. While top-tier appliances can provide reliable performance, neglecting proper technique and understanding their nuances often results in subpar results. For instance, a common myth is that all burr grinders deliver consistent grind sizes; in reality, even premium models require diligent calibration and maintenance. Regularly learning how to choose and calibrate your grinder is essential to prevent misespresso and uneven extraction.
Another misconception surrounds home espresso machines—many believe that just pressing a button guarantees barista-quality shots. But the real secret lies in understanding pressure profiling, tamping consistency, and temperature stability—details often glossed over in beginner guides. According to a study published in the Journal of Coffee Research, small adjustments in pressure and temperature can dramatically change flavor profiles, emphasizing the importance of nuanced control rather than equipment alone.
Steer Clear of Overlooking Subtle Details
One advanced mistake is ignoring how even minor variations in technique or calibration can lead to noticeable differences in your coffee. For example, misaligned group heads or inconsistent tamp pressure can cause channeling, leading to under-extraction. While these issues are often dismissed as minor, they can sabotage what would otherwise be a perfect brew. Regularly reading your pressure gauge and inspecting your machine’s components can reveal hidden faults that undermine performance.
Similarly, with milk frothers and steam wands, the common oversight is neglecting the importance of steamed milk temperature and texture. An improper steaming technique, even with a high-end wand, results in thin foam or burnt flavors. The real skill is in controlling your steam wand to craft microfoam—something that requires practice and attention to small details. For a deeper dive, check out this guide on milk frothers that emphasizes technique over equipment.
Don’t forget that maintaining your gear—cleaning, descaling, and calibration—is the foundation of consistent quality. A neglected grinder or espresso machine will always underperform, regardless of cost. Recognizing these subtleties transforms your brewing from mere routine to real craftsmanship. So, have you ever fallen into this trap? Let me know in the comments and share your experiences with uncovering hidden nuances in your coffee routine.
Invest in Precision Tools for Consistent Results
Choosing the right equipment is only half the battle; maintaining it is where the real magic happens. I personally rely on a high-quality digital scale like the for accurate measurements, especially when dialing in espresso shots. This scale’s responsiveness ensures I can detect even minor pressure changes, leading to better extraction and flavor nuances. When it comes to grinders, I use a burr set with titanium coating, which resists wear longer and maintains consistent particle size over time—crucial for achieving that perfect crema.
Schedule Regular Maintenance and Calibrations
Just like a fine-tuned car, your espresso machine and grinder require scheduled check-ups. I recommend setting a monthly routine for descaling your machine—especially in areas with hard water—to prevent mineral buildup that can clog components and alter temperature stability. Additionally, periodically calibrate your grinder to keep particle size consistent; this small step has a big impact on flavor clarity. Check your equipment’s manufacturer guidelines or use resources like this calibration guide for detailed instructions.
Use Protective Accessories to Extend Lifespan
I swear by silicone tamper mats to prevent wear on my tamper and countertop surfaces. These mats also catch stray coffee grounds, simplifying cleanup. For the espresso machine, applying food-safe lubricant on moving parts such as the portafilter gasket or group head valves reduces wear and maintains optimal seal integrity. Regular lubrication, following manufacturer recommendations, prolongs the lifespan of vital components and reduces maintenance surprises.
Choose Maintenance-Friendly Equipment Options
When selecting future gear, prioritize models that offer user-friendly maintenance features. For example, top-rated espresso machines in 2025 come with removable boilers or quick-access panels, making deep cleaning more manageable. Investing in modular equipment simplifies long-term upkeep and reduces downtime, allowing you to focus more on brewing and less on repairs.
Predicting Equipment Trends and Staying Ahead
Looking ahead, innovations like IoT-connected machines and self-cleaning systems are set to reshape maintenance routines. These advanced features can monitor performance metrics and notify you proactively when service is needed. Embracing these technologies today positions you as a forward-thinking barista, ensuring your setup remains reliable and efficient.
How do I maintain my espresso gear over time?
The secret lies in consistent routines—regular cleaning, timely calibration, and using quality accessories extend your equipment’s life and maintain exceptional taste. Incorporate tools like and consider upgrade options that favor ease of maintenance. Remember, investing in good tools today saves you time and money tomorrow. I challenge you to try the advanced calibration tip I mentioned—it’s a game changer for espresso clarity and richness. Happy brewing!
What I Wish I Knew About Gear That No One Told Me
One of the most eye-opening lessons in my coffee journey was realizing that even the best equipment needs the right TLC. I once believed that pouring money into high-end gear guaranteed perfect results—until I learned that regular calibration and maintenance often matter more than price tags. That aha moment taught me that understanding the nuances of my espresso machine and grinder could make or break my brew.
Another insight I wish I had early on is that static, moisture, and bean storage subtly influence grind consistency and flavor. Small tweaks like switching to metal hoppers or controlling environmental factors transformed my coffee routine more than any fancy accessory. These lessons reaffirm that mastery is about paying attention to the details, not just the tools.
Tools and Tips That Revolutionized My Coffee Practice
From precision scales like the Acaia Lunar to user-friendly calibration guides, the right resources have been game-changers. I trust these because they demystify complex processes and help me fine-tune my setup confidently. Additionally, consulting expert blogs and videos on optimizing grinder calibration or cleaning has saved me from costly mistakes.
Embracing the Brewing Road Less Traveled
Adventure in coffee is about more than equipment—it’s about curiosity and perseverance. Don’t shy away from experimenting with environmental tweaks, new accessories, or maintenance routines. Every small improvement adds up, bringing you closer to barista-level quality at home. Remember, the journey is as rewarding as the perfect shot itself.
So, I challenge you to reflect on what subtle detail in your setup might be holding you back. Have you ever noticed static interfering with your beans, or perhaps your grinder isn’t performing as it should? Share your experiences below—your revelations could inspire others to elevate their coffee game.