Why Your Espresso Puck Sticks to the Shower Screen
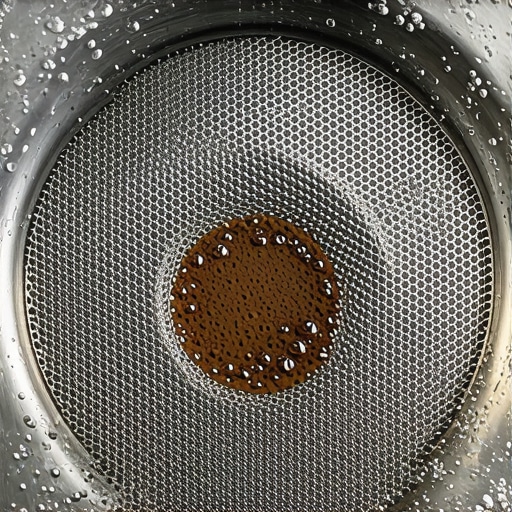
I’m standing in my kitchen, bleary-eyed at 7 AM, just trying to survive until my first caffeine hit. I go through the whole ritual: weighing the beans, grinding them to a fine powder, and tamping with the precision of a diamond cutter. The shot pulls beautifully, a dark, syrupy stream of liquid gold. But then comes the moment of truth. I unlock the portafilter, expecting that satisfying thud into the knockbox. Instead, the basket is empty. The puck is gone. I look up, and there it is—a hot, wet disk of coffee glued firmly to the group head like a piece of industrial-strength Velcro. It’s messy, it’s frustrating, and honestly, it’s a visceral kind of failure that only a home barista truly understands. I’ve spent more mornings than I’d like to admit scraping grounds off my machine with a butter knife while my espresso gets cold.
The Tiny Gap Between Success and a Messy Group Head
In my early days of [mastering the art of home espresso](https://espressotechguide.com/mastering-the-art-of-home-espresso-tips-for-beginners), I made a classic rookie mistake: I thought more coffee always meant more flavor. I would cram 20 grams into a 18-gram basket, thinking I was a genius. What I was actually doing was creating a pressurized glue trap. If you don’t leave enough ‘headspace’—that crucial air gap between the top of your coffee and the metal screen—the grounds have nowhere to go when they expand. When water hits coffee, the coffee swells. According to research from the Specialty Coffee Association (SCA), roasted coffee can contain up to 2% CO2 by weight, which causes significant swelling during the initial infusion phase. If that expansion is blocked by the screen, the puck becomes physically wedged against the group head. If you have noticed that your [shower screen is getting clogged so fast](https://espressotechguide.com/why-your-group-head-shower-screen-is-getting-clogged-so-fast), it is almost certainly because the puck is spending way too much quality time pressed against the metal during the brewing process.
Will this eventually ruin my expensive machine?
It is the question every coffee lover asks when they first see a ‘ghost puck’ clinging to their gear. While it won’t necessarily cause a catastrophic mechanical failure, it is definitely a sign that your workflow needs a tweak. The real danger is the buildup of rancid coffee oils that bake onto the screen, ruining the flavor of every subsequent shot. This is often why I tell people that learning [how to select the perfect coffee grinder](https://espressotechguide.com/how-to-select-the-perfect-coffee-grinder-for-your-brew) is more important than the machine itself; a consistent grind prevents the muddy, sticky texture that makes pucks more likely to adhere.
The Annoying Suction Power Pulling Your Coffee Upwards
Most modern espresso machines use a three-way solenoid valve to dry out the puck after a shot. It’s a brilliant bit of engineering that vents pressure and excess water into the drip tray. However, if your coffee bed is too close to the screen, that valve acts like a high-powered vacuum cleaner the second you turn off the pump. It creates a sudden suction that yanks the entire puck out of the basket and sticks it to the screen. It took me months of frustration to realize I just needed to back off my dose by a half-gram. Have you ever found yourself digging a wet coffee puck out of your group head before you’ve even had your first sip of the day? It’s a total mood-killer, but I promise we can fix it without needing a degree in physics.
Give your coffee some room to breathe
When we talk about headspace, we’re talking about the safety zone between the top of your dry coffee puck and the shower screen. Think of it like a sponge in a Tupperware container. If you fill the container to the brim with a dry sponge and then add water, that sponge is going to expand and press against the lid with immense force. Your coffee does the same thing. To fix this, you need to find the Goldilocks zone for your specific basket. If you overfill it, the expansion has nowhere to go but up and into the crevices of your machine.
The simple coin trick that stops the sticking
The most reliable way to diagnose an overfilled basket is the nickel test. Dose and tamp your coffee as usual, then place a clean nickel or a similar-sized coin on top of the puck. Lock the portafilter into the group head, then immediately remove it without pulling a shot. If the coin is pressed deep into the coffee or if you see an indent from the shower screen screw, you have zero headspace. You need to drop your dose by 0.5 to 1 gram. I remember the first time I tried this on my old machine; I was shocked to see the coin practically buried. Once I reduced my dose, the ghost puck vanished instantly.
Why your tamping style matters more than you think
It isn’t just about how much coffee you use, but how you pack it. If your tamp is slanted, water will find the path of least resistance, leading to uneven expansion. This unevenness is a prime candidate for why your espresso shot is extracting from only the edges of the basket. When the pressure drops at the end of the shot, a poorly compressed puck is more likely to fall apart and cling to the screen. A level, consistent tamp ensures the puck stays structurally sound during the entire extraction.
Master the art of the level press
Using choosing the best barista gear for coffee enthusiasts like a leveled tamper can be a game-changer for your workflow. You want a flat, even surface that resists that three-way solenoid suction. If you’re struggling with distribution, the move for better espresso distribution without fancy tools involves simply tapping the side of the portafilter with your palm before tamping to settle the grounds. This removes air pockets that cause the puck to destabilize and stick when the pump stops.
Clean gear is the ultimate sticky-puck repellent
If you haven’t backflushed your machine recently, coffee oils are acting like a biological adhesive on your screen. These oils get tacky when heated, creating a surface that coffee grounds love to grab onto. This is often why your group head shower screen is getting clogged so fast. I make it a habit to do a water-only backflush at the end of every session. It takes thirty seconds but saves me ten minutes of scrubbing later. Also, make sure you know how to check if your portafilter gasket is actually sealed, as a leaky gasket can mess with the pressure release and leave the puck soggy and much more likely to adhere to the group head.
Wait before you brew that ultra-fresh bag
Everyone tells you that freshness is king, but there is a massive trap here that most home baristas fall into. If you use beans that were roasted yesterday, you are fighting a losing battle with CO2. This excess gas creates an unstable puck structure that is far more likely to expand aggressively and stick to your group head. In fact, research from Barista Hustle suggests that most espresso roasts don’t hit their peak extraction potential until 7 to 14 days after roasting. If you try to force it too early, you might find why your freshly roasted beans are making your espresso taste like grass rather than the chocolatey notes you were promised. Giving your beans time to degas ensures a more predictable expansion and a cleaner release from the screen.
Forget the 9-bar pressure obsession
One of the most persistent myths in mastering the art of home espresso is that you must hit exactly 9 bars of pressure. While it is a standard, many modern baristas are finding that lower pressures—around 6 or 7 bars—actually lead to more forgiving extractions and less ‘glue-like’ pucks. High pressure compresses the coffee so tightly that the water can’t flow evenly, leading to localized ‘hot spots’ where the puck welds itself to the metal. If you are constantly struggling with a stuck puck despite a perfect dose, try coarsening your grind slightly and aiming for a lower peak pressure. You might be surprised by the clarity of flavor and the ease of cleanup.
Why does your shot timing change when you haven’t touched the dial?
This is the ‘oops’ factor that drives enthusiasts crazy. You dial in perfectly on Saturday, but on Sunday, the same settings produce a messy, sticking shot. It isn’t your machine acting up; it is likely retention and humidity. Old coffee sitting in your grinder’s chute from the day before is drier and less cohesive than the fresh stuff you just ground. This is why your coffee grinder retains more grounds than it should, and those stale leftovers act like a sponge, soaking up the fresh oils and making the entire puck more prone to sticking. Always purge a few grams before your first shot of the day to clear out the ‘zombie’ grounds.
The milk pitcher mistake you’re probably making
While we are talking about workflow, don’t let your milk prep sabotage your speed. A common mistake is using a massive 20oz pitcher for a small 6oz cappuccino. This makes it nearly impossible to create the proper vortex, leading to ‘dry’ foam that separates and sticks to the wand. Learning the best way to handle large milk pitchers for small drinks is essential, but honestly, matching the pitcher size to the drink volume is the real pro move. It prevents that burnt-milk smell and keeps your steam wand from becoming a crusty mess while you’re busy scraping a stuck puck out of the group head. It’s all about maintaining a clean rhythm. Have you ever fallen into this trap? Let me know in the comments.
The puck screen is my secret weapon for a clean machine
If you’re tired of the mess, the single best addition I’ve made to my workflow is the stainless steel puck screen. It’s a tiny, laser-etched disc of mesh that sits directly on top of your coffee bed after you’ve tamped. In my experience, this is the ultimate solution to the ghost puck problem. It acts as a physical barrier, meaning the coffee grounds never actually touch the shower screen. When I first integrated this into my routine using choosing the best barista gear for coffee enthusiasts, my cleanup time dropped to zero. You just tap the portafilter, and the puck—screen and all—falls out in one clean piece. Beyond cleanliness, it helps distribute water more evenly across the surface, which is a huge help in mastering the art of home espresso without needing to upgrade your entire machine.
How do I maintain my espresso setup over time?
Maintenance isn’t just about the occasional backflush; it’s about preventative care for your long-term investment. Every few months, I take the time to perform a deep dive into the group head. If you’ve ever struggled with a screw that won’t budge, you’ll appreciate the trick to removing a stuck shower screen without stripping the screw, which usually involves a short burst of steam to loosen the dried oils. I also make it a point to check the flexibility of my seals. Knowing how to check if your portafilter gasket is actually sealed can save you from a kitchen full of hot spray. A hard, brittle gasket is the enemy of pressure, and replacing it once a year keeps your shots consistent and your machine quiet.
Don’t let your burrs stay green for too long
When people buy a new grinder, they often expect perfection on day one. However, most professional-grade burrs require a ‘break-in’ period. I always recommend learning how to properly season new steel burrs for better consistency by running a few kilograms of cheap, old beans through the system before you try to dial in your expensive specialty roasts. This smooths out the microscopic manufacturing imperfections. John Buckman, the founder of Decent Espresso, has noted in his technical community deep-dives that even a 0.2mm difference in puck height or a slightly unseasoned burr set can drastically shift the extraction profile, leading to those frustrating daily variations. If you’ve ever wondered why your espresso shot volume varies even with the same dose, your burrs might still be ‘settling in’ to their new home.
The future of the home barista experience
I’ve been watching the industry closely, and the trend is moving toward data-driven brewing. We are seeing top-rated espresso machines for coffee lovers in 2025 that include built-in gravimetric scales and real-time flow profiling. The days of guessing why a shot failed are ending. Soon, your machine will likely tell you exactly how much headspace you have before you even lock in the handle. But until we all have AI-powered robots making our lattes, these manual tweaks are what make the hobby so rewarding. If you want to see an immediate change in your coffee quality, I strongly encourage you to try the nickel test I mentioned earlier. It’s the fastest way to bridge the gap between a messy kitchen and a cafe-quality shot. Go grab a 58.5mm puck screen and see the difference for yourself today.
The Three Hard Truths About the Messy Reality of Espresso
After years spent [mastering the art of home espresso tips for beginners](https://espressotechguide.com/mastering-the-art-of-home-espresso-tips-for-beginners), I’ve realized that a ‘ghost puck’ is really just the machine’s way of telling you that you’re crowding it. First, headspace is non-negotiable; if you don’t give the coffee room to expand, it will weld itself to the screen every single time. Second, remember that [why your espresso shot volume varies even with the same dose](https://espressotechguide.com/why-your-espresso-shot-volume-varies-even-with-the-same-dose) is often linked to how much coffee is left behind on the group head, which ruins your recipe and your flavor profile. Finally, don’t be afraid to deviate from ‘standard’ settings; sometimes a coarser grind or a slightly lower dose is the only way to ensure a clean release without sacrificing quality.
The Essential Toolkit for a Clog-Free Workflow
I didn’t solve my sticky puck issues by buying a more expensive machine; I solved them by [choosing the best barista gear for coffee enthusiasts](https://espressotechguide.com/choosing-the-best-barista-gear-for-coffee-enthusiasts) that actually addressed the physics of the shot. My setup now always includes a precision-machined 58.5mm puck screen, which keeps the group head pristine. I also rely heavily on knowing [how to select the perfect coffee grinder for your brew](https://espressotechguide.com/how-to-select-the-perfect-coffee-grinder-for-your-brew), because a grinder that produces too many ‘fines’ creates a mud-like texture that acts as an adhesive. If you are looking to upgrade your setup soon, keep an eye on the [top-rated espresso machines for coffee lovers in 2025](https://espressotechguide.com/top-rated-espresso-machines-for-coffee-lovers-in-2025) for new models that feature improved solenoid valve timing for better pressure release.
Pull Your Best Shot Ever Starting Tomorrow
Espresso is a hobby of millimeters and seconds, and the frustration of a stuck puck is just a sign that you are finally paying attention to the details. Don’t let a messy group head discourage you from [mastering the art of home espresso tips for beginners](https://espressotechguide.com/mastering-the-art-of-home-espresso-tips-for-beginners). With a simple adjustment to your dose, a quick nickel test, and a consistently clean shower screen, you will be back to pulling syrupy, delicious shots that fall right out of the portafilter into the knockbox. Have you ever had a puck stick so hard you actually had to use a butter knife to pry it off? Let me know your most frustrating cleanup stories in the comments below!