The Best Way to Purge Your Steam Wand Without Burning Your Hand
It was 7:15 AM on a Tuesday, and I was already running late. I reached for my machine, ready to texture some milk, and did that quick, mindless safety purge. Big mistake. A rogue jet of 212-degree steam caught the edge of my thumb because I was holding the wand at a lazy, arrogant angle. I dropped the pitcher, and my kitchen immediately smelled like burnt skin and wasted beans. It’s a painful rite of passage for many home baristas, but honestly, it shouldn’t be. We are here to make delicious lattes, not schedule appointments with a burn specialist. Learning mastering the art of home espresso means mastering the safety of the gear first. Today, I am going to show you the exact grip and timing I use to keep my hands safe while keeping my equipment pristine.
Stop Cooking Your Knuckles Every Morning
When I first started my journey, I thought I was too ‘pro’ for a thick cloth. I used a thin, dry kitchen towel—or worse, nothing at all—and just pointed the wand toward the drip tray. I quickly realized that the reason your steam wand is leaking water into your milk often starts with a poor purge routine that allows condensation to build up. Purging isn’t just about clearing out old milk; it’s about clearing the ‘dead water’ that sits in the wand between drinks. If you don’t clear it, your microfoam becomes watery. But if you clear it carelessly, you’re asking for a steam burn. I made the mistake of thinking speed was better than technique. It wasn’t. Now, I always advocate for a structured approach that prioritizes your skin.
Does a dedicated cloth actually make a difference?
You might think any old rag will do, but that is a dangerous game. A thin cloth allows heat to transfer almost instantly, and a wet cloth can actually create a ‘steam bridge’ that cooks your palm faster than a dry one. According to the Specialty Coffee Association (SCA), milk proteins can begin to bake onto a steam wand in as little as a few seconds if not purged and wiped immediately, making this a time-sensitive chore. To do this right, you need to learn how to stop using a wet cloth on your steam wand and switch to a layered, damp microfiber specifically designed for high temperatures. Have you ever had a close call with a steam wand, or are you still nursing a ‘barista thumb’ from this morning’s latte? Let me know, because once we fix your grip, we can finally focus on milk frothers that transform your coffee experience without the fear of a trip to the ER.
Master the Shielded Claw Grip for Better Safety
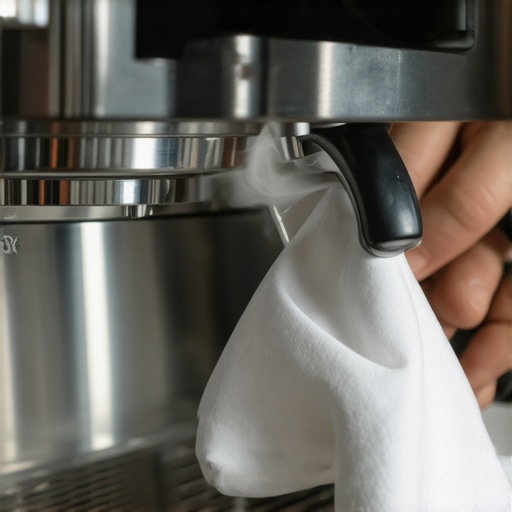
To stop the cycle of ‘barista thumb’ and painful steam nicks, you need to rethink how you interact with the wand. Start by visualizing the steam wand as a loaded garden hose. When you first crack that valve, you aren’t just getting steam; you are getting a pressurized burst of boiling water. To handle this, I use a technique I call the ‘Shielded Claw.’ Fold your dedicated barista cloth into a thick square—at least four layers deep. Instead of grabbing the wand directly, wrap the cloth loosely around the tip while keeping your fingers tucked behind the ‘spine’ of the wand arm. This way, if the steam deflects off the drip tray or the pitcher, your knuckles are shielded by the metal arm itself. I remember a frantic Monday when I skipped the fold and used a single layer of fabric. The heat soaked through the thin cotton instantly, and I reflexively jerked my hand away, which caused the wand to spray 212-degree water directly onto my forearm. It was a messy, painful lesson in physics that took my focus off the coffee for the rest of the day. Selecting the right accessories is half the battle, so if you are still using a t-shirt scrap, consider choosing the best barista gear for coffee enthusiasts to find a cloth that actually offers thermal protection.
Stop Using Your Towel as a Thermal Bridge
Many beginners make the mistake of using a soaking wet rag. Water conducts heat far better than air or dry fabric. When that steam hits a wet cloth, it creates a ‘thermal bridge’ that delivers the heat straight to your palm in a fraction of a second. Keep your cloth damp enough to wipe away milk, but never dripping. If you find yourself struggling with a wand that seems weak even when the pressure is up, it might not be your technique; check how to fix a steam wand that has lost its power to ensure your boiler is performing as it should. 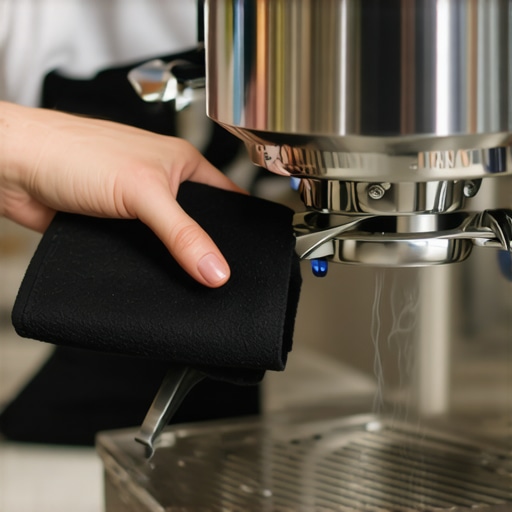
Clear the Dead Water Without the Splashback
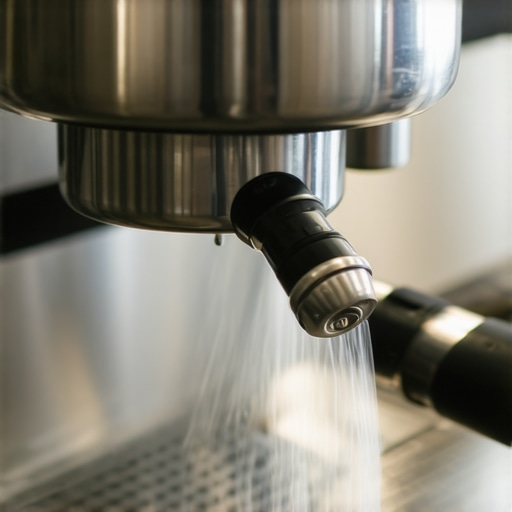
Once you have your grip secured, focus on the angle of the purge. Aim the tip directly into the center of the drip tray hole or a dedicated knock box. This minimizes ‘splashback’—that annoying phenomenon where the steam hits a flat plastic surface and bounces a fine, scalding mist back onto your hand. When you are working on the secret to perfecting your milk texture on a single boiler, timing is your best friend. Open the valve for exactly 1.5 to 2 seconds. Any longer and you are just wasting precious steam pressure; any shorter and you might leave condensation in the line, which results in the easy fix for a wand that only blows air instead of the consistent, dry steam needed for latte art.
The Clean-Purge-Wipe Rhythm
After you finish steaming, the ‘Clean-Purge-Wipe’ sequence should become muscle memory. If you wait even ten seconds, the milk proteins begin to bake onto the steel. This is often the reason your milk smells like its burning before the temp is right during your next drink—you are essentially cooking yesterday’s leftovers into your fresh microfoam. Purge the wand immediately after removing the pitcher to blow out any milk that was sucked back into the tip, then wipe it down with your folded cloth. This keeps the internals clear and your coffee tasting like coffee, not scorched dairy.
Beyond just the physical grip, there is a technical nuance to steam quality that most home baristas ignore: the thermal mass of the wand assembly itself. You will often hear people say that ‘steam is steam,’ but in my experience, the temperature of the metal wand before you even start steaming matters just as much as the boiler pressure. If the metal of the wand is cold, that first burst of steam hits the inner wall and immediately condenses back into liquid water. This is why the reason your steam wand is leaking water into your milk isn’t always a failing gasket; it is frequently a failure to ‘pre-heat’ the assembly with a deliberate, three-second initial purge. However, do not fall into the trap of over-purging. I have seen enthusiasts purge for ten seconds or more, thinking they are being thorough, when they are actually just killing their boiler’s recovery time and inviting the move for better temperature stability on budget machines to become a frustrating necessity rather than a helpful trick.
Why Distilled Water is Secretly Killing Your Boiler Sensors
One of the most common ‘advanced’ mistakes I see involves water chemistry. In an effort to keep their machines pristine and scale-free, many beginners switch to pure distilled water. This is a massive ‘Oops’ factor that can lead to expensive repairs. The truth about using distilled water in your machine is that most modern boiler sensors rely on the conductivity of minerals to detect water levels. Without those ions, your machine might think it is empty when it is full, or worse, keep the pump running until the boiler overflows. According to the Specialty Coffee Association (SCA) water standards, a specific range of 75-250 mg/L of Total Dissolved Solids (TDS) is required not just for the extraction of flavor, but for the mechanical health of the probe system. If you have been using ‘pure’ water, you need to learn how to tell if your water hardness is damaging your boiler by measuring the actual mineral content of your reservoir.
Stop Trusting the No-Burn Label Too Much
Another dangerous myth is the absolute safety of ‘No-Burn’ steam wands. These wands feature an internal Teflon tube that keeps the outer stainless steel cooler to the touch, but this creates a false sense of security. The tip of the wand—where the steam actually exits—is almost always solid metal and remains incredibly hot. I have seen experienced baristas take a nasty burn because they grabbed the tip while thinking the ‘no-burn’ label applied to the whole arm. This loss of focus often happens when other parts of the workflow go wrong. For example, why your grinders static gets worse in winter can lead to a messy countertop, causing you to rush your milk prep and forget basic safety protocols. Slow down and treat every wand as if it is live.
How can you tell if your boiler is actually starving for steam?
If you find that your pressure gauge looks perfect but the wand ‘gasps’ or loses power after only three seconds of steaming, you might be dealing with a vacuum lock or a scale-clogged tip. This is a different issue than the easy fix for a wand that only blows air, which is usually a simple blockage. A ‘starving’ boiler means the steam is being produced but cannot escape the tank fast enough to maintain the vortex. Have you ever fallen into this trap? Let me know in the comments. We often blame our frothing technique when our gear is actually crying for a descaling session or a better power source. Respect the pressure, understand your water, and your latte art will follow suit without the burnt fingers.
Once you have mastered the steam wand, the next hurdle is purely mechanical. I used to think a quick brush-out of my hopper was enough, but I was wrong. I started noticing my shots getting muddy and inconsistent, and I realized I was neglecting the internals. I was already doing the move that saves your grinder from unnecessary wear by only adjusting the dial while the motor was running, but I wasn’t checking my burr alignment. According to the technical service documentation for the Mazzer Super Jolly, even a 0.03mm deviation in burr parallelism can lead to a significant increase in ‘fines’—those microscopic particles that over-extract and turn your coffee bitter. Learning the right way to align your flat burrs for better shots changed everything for me. It is not just about the sharpness of the steel; it is about the geometry of the grind. If you aren’t sure where your equipment stands, you need to learn how to tell if your espresso grinder burrs are dull before you go spending hundreds on a new unit. 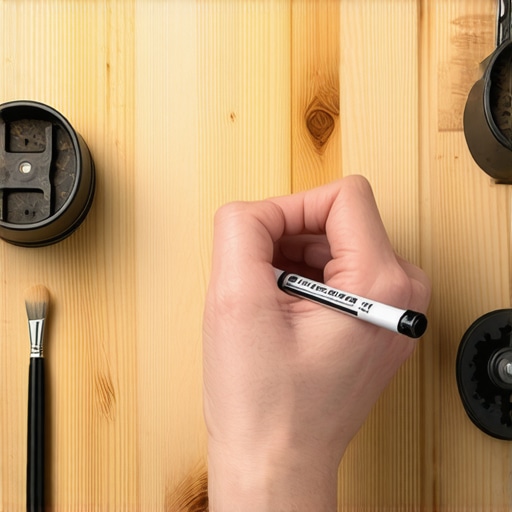
The Invisible Enemy Hiding Inside Your Group Head
Then there is the machine itself. I have seen beautiful prosumer units die early deaths because their owners treated cleaning like a monthly suggestion rather than a daily requirement. You absolutely must understand why your machine needs a backflush every single week with a high-quality oxygen-based detergent. Without it, coffee oils turn into a rancid, sticky varnish inside the three-way solenoid valve. This is usually why your shots start tasting like charred wood even when you use the best beans. I once helped a friend who complained of sour shots, only to find a thick layer of old sludge behind his shower screen. We cleaned it, and it was like the machine could breathe again. If you are working in tight quarters, knowing how to set up a dedicated coffee station in a narrow hallway can help you keep your cleaning supplies within arm’s reach so you actually use them.
How do I maintain my espresso setup for the next decade?
Longevity comes down to water and friction. Use a dedicated scale inhibitor in your reservoir and never skip the chemical backflush. I predict that in the next few years, we will see more consumer-grade machines incorporating flow-rate sensors that automatically alert you the moment a scale buildup begins to restrict the group head. For now, we have to rely on our own discipline. My challenge to you: This weekend, take your grinder apart and perform a ‘marker test’ on your burrs to see if they are truly parallel. You might find that a simple shim of aluminum foil is the only thing standing between you and the best espresso of your life.
The Hard Truths About Maintaining a Pro-Level Setup
Reflecting on my years of morning rituals, I have realized that the most dangerous phase for any barista is when they become ‘comfortable’ enough to ignore the basics. I spent months fighting my machine’s consistency because I made the mistake of using distilled water in your boiler, assuming purity was better than chemistry. My biggest lightbulb moment was discovering that expensive gear cannot fix poor habits. For instance, the move for better espresso distribution without fancy tools taught me more about coffee than any $200 distributor ever could. Respect the physics of the steam wand, follow your cleaning rhythm, and never rush a purge—your skin and your palate are far too valuable to risk for thirty seconds of saved time.
The Essential Toolkit I Carry Every Single Day
To keep my station running like a professional lab, I rely on a few non-negotiable items. I always keep a dedicated stack of heavy-duty microfiber cloths that stay dry until the moment they touch the wand. I also recommend keeping a simple water hardness test kit nearby; knowing your mineral levels is the only way to prevent the silent death of your boiler. When you are how to select the perfect coffee grinder for your brew, prioritize units that allow for easy access to the burrs for that regular alignment check we discussed. Finally, focus on choosing the best barista gear for coffee enthusiasts that offers real thermal protection rather than just looking good on an Instagram feed.
#IMAGE_PLACEHOLDER_E#
Your Best Shot is Closer Than You Think
The path to the perfect latte is paved with small, disciplined actions. Every time you shield your knuckles during a purge or perform a weekly backflush, you are perfecting your craft. This home espresso journey is meant to be a joy, not a chore or a hazard. Do not be intimidated by the technical side of your machine; embrace it as a way to connect more deeply with the coffee you love. Keep practicing, stay curious about your water chemistry, and most importantly, keep those knuckles clear of the steam. Have you ever had a ‘close call’ with your steam wand or found a surprising maintenance issue hiding inside your machine? Let me know in the comments below!