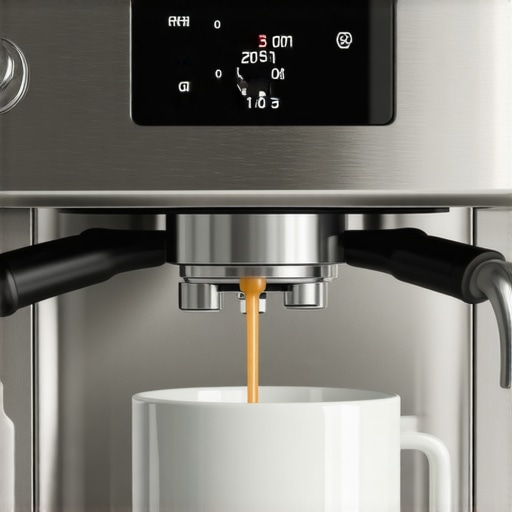
The move for better temperature stability on budget machines
I still remember the morning I almost threw my first budget espresso machine out the kitchen window. It was a cold Tuesday, I was running late, and the shot I’d just pulled tasted like a battery-acid-soaked lemon. I had the perfect coffee grinder for my setup and high-quality beans, but the results were consistently inconsistent. One minute the water was lukewarm, and the next, it was screaming hot steam that scorched the life out of the roast. That soul-crushing frustration is exactly why so many of us eventually dive into the rabbit hole of temperature stability mods and “temp surfing” techniques. We just want a decent cup of coffee without needing a mortgage to pay for the machine.
The Battle Against the Temperature Rollercoaster
When you’re working with a smaller boiler, you’re essentially trying to keep a tiny amount of water at a precise heat while cold water rushes in to replace it the second you flip the switch. It’s a thermal nightmare. Most top-rated espresso machines for beginners struggle with this because they lack the massive brass boilers and heavy group heads found in commercial gear. If you’ve noticed that your second shot of the morning tastes completely different from the first, you aren’t losing your mind—your machine’s temperature is just swinging like a pendulum. It’s a common hurdle when mastering the art of home espresso, and honestly, it’s the biggest barrier between a hobbyist and a true home barista.
I made a massive mistake early on by trusting the “ready” light on my machine with blind faith. I thought as soon as that little orange glow appeared, I was good to go. I was dead wrong. That light only tells you the heating element has reached its cutoff point, not that the group head, the portafilter, or the internal plumbing is actually hot enough to maintain stability during the flow. This leads to “thermal shock,” where the water loses ten degrees the moment it touches the cold metal of your basket. Learning the benefit of pre-warming your portafilter head was my first real “lightbulb moment” that changed my morning routine forever.
Can a budget machine actually produce cafe-quality results?
A lot of coffee snobs will tell you that unless you drop three thousand dollars on a dual-boiler machine with a PID controller, you’re just wasting your time. I’m here to tell you they’re wrong, and frankly, they’re being a bit elitist. You can absolutely achieve those thick, syrupy “god shots” on a budget, but you have to work with your machine’s quirks instead of against them. Today, we’re going to look at the specific moves that bridge the gap between a sour, thin mess and a balanced extraction. According to research by the Specialty Coffee Association, temperature fluctuations of even a few degrees can drastically alter the extraction of volatile compounds, meaning that stability isn’t just a luxury—it’s the foundation of flavor. Have you ever found yourself standing in front of your machine, stopwatch in hand, wondering why your shots change flavor every five minutes even though you haven’t touched the dial? Let me know in the comments if you’ve felt that “budget machine” burnout. In the next section, we’re going to dive into the actual mechanics of stabilizing that heat so you can finally stop guessing and start brewing with confidence.
To stop pulling sour, underwhelming shots, you need to turn your machine into a thermal fortress. Think of your machine’s group head like a cast-iron skillet; if you throw a steak on it before it’s properly hot, you get a gray, rubbery mess instead of a perfect sear. The same happens to your coffee. Even if the internal boiler is ‘ready,’ the cold metal of the group head acts as a heat thief, aggressively stealing energy from the water the second you start the pump. This is a primary reason why your machine’s water temperature fluctuates every few minutes—it is constantly trying to compensate for that initial massive loss of heat to its own components.
Turn Your Cold Metal Into a Thermal Fortress
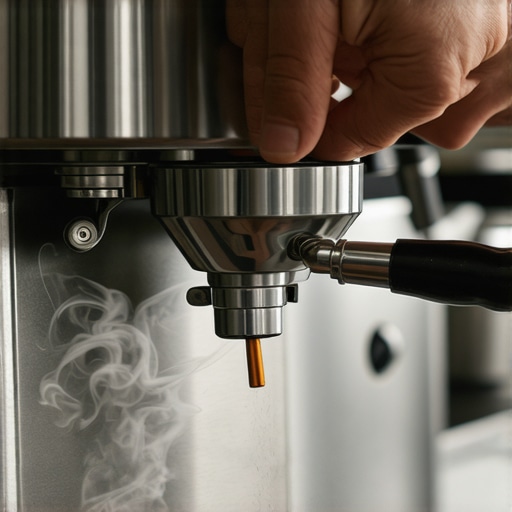
I spent three months wondering why my shots were watery and thin until I realized I was locking a fridge-cold portafilter into the machine. Now, I run a ‘blind’ shot—letting hot water flow through the empty basket for five seconds—and let it sit for at least two minutes before I even touch my coffee grinder. It’s a simple move, but it’s the difference between a vinegary mess and a shot with actual body. When you prioritize the benefit of pre-warming your portafilter head, you are ensuring the water hitting the coffee grounds stays within the ‘sweet spot’ of 195°F to 205°F throughout the entire 30-second extraction.
Why your portafilter must be hot to the touch
If you can comfortably hold the metal part of your portafilter in your palm, it isn’t ready. It should feel uncomfortably warm. This thermal mass acts as a stabilizer. On one particularly humid Saturday, I tried to rush the process for a guest. I skipped the pre-heat, and the shot was so sour it actually made my guest’s eyes water. I felt like a fraud. I realized then that choosing the best barista gear for coffee enthusiasts doesn’t mean anything if you don’t respect the laws of thermodynamics. Since then, my machine stays on for a full 20 minutes before the first bean is ground.
Hack the Deadband with Temperature Surfing
Most budget machines use a simple bimetallic thermostat with a wide ‘deadband’—a range of temperature where the heater is totally idle. It might heat up to 205°F, click off, and then not turn back on until the water drops to 185°F. To fix this, you have to ‘surf’ the cycle. I wait for the ‘ready’ light to turn off (meaning the heater is currently active), wait ten seconds for the water to reach its peak heat, and then pull my shot immediately. This technique is essential for mastering the art of home espresso because it allows you to hit the coffee with the hottest water possible before the cold replacement water ruins the party.
Don’t let the steam wand kill your pressure
Another quirk of small machines is the shared heating circuit. Have you ever noticed the reason your pump pressure drops when you engage the steam wand? On budget setups, the pump can’t always maintain a steady 9 bars of pressure if the steam valve is even slightly cracked or if the boiler is over-recovering. I always purge my steam wand into a separate pitcher for three seconds before I pull my shot. This releases any ‘false’ steam pressure and forces the pump to focus entirely on the group head. This little trick keeps the flow steady and prevents that dreaded ‘channeling’ where water blasts through the edges of your puck.
Keep the internals pristine to avoid thermal gaps
Finally, scale buildup is the silent killer of temperature stability. Think of scale like a winter coat for your heating element; it prevents the heat from reaching the water efficiently. This is exactly why your machine needs a backflush every single week and a regular descaling routine. When the path is clear, the heat transfer is instantaneous. I once neglected my machine for six months and noticed my ‘ready’ light was taking twice as long to turn on. After a deep clean, the machine felt brand new, and the shots regained that syrupy, caramelized sweetness I thought I’d lost forever.
Let’s dig deeper into the gear trap, because this is where most home baristas lose their way (and their savings). I used to think that my mediocre shots were a hardware problem. I convinced myself that if I just bought a heavier tamper or a precision basket, my extraction issues would vanish. But here is a contrarian truth: high-end gear often requires more skill, not less. When you use a precision basket, for instance, the tolerances are so tight that any minor flaw in your distribution is magnified ten times. If you haven’t mastered the move for better espresso distribution without fancy tools, that $30 basket will actually make your coffee taste worse by inducing channeling you never had before.
Stop Blaming the Machine for Thin Milk
One of the biggest myths in the coffee community is that you need a commercial-grade boiler to get silky microfoam. I see people constantly upgrading their steam wand tips to versions with four holes, thinking more ‘firepower’ is the answer. However, if you are working on a single-boiler setup, you are likely just draining your steam pressure too fast. This is exactly the reason your steam wand only makes thin hot milk; the boiler can’t keep up with the flow, and you lose that crucial rolling motion in the pitcher. According to research by the Specialty Coffee Association (SCA), the velocity of the steam is often more important than the volume for creating stable microfoam in smaller pitchers.
Does a 4-hole steam tip actually make better foam?
For most home enthusiasts, the answer is a resounding no. A two-hole tip allows you to maintain pressure longer, giving you more time to find the ‘vortex’ before the water turns into a spluttery mess. I’ve found that the secret to perfecting your milk texture on a single boiler is actually working with less air, not more power. Have you ever fallen into the ‘upgrade trap’ only to find your results got less consistent? Let me know in the comments—I’d love to hear which piece of gear gave you the most grief.
#IMAGE_PLACE_HOLDER_C#
The Grind Trap That Stalls Your Workflow
Another ‘oops’ factor that catches even seasoned hobbyists is the dark roast dilemma. There is a common belief that dark, oily beans are easier to grind because they are more brittle. In my experience, it’s the exact opposite for your equipment’s health. Those surface oils act like a biological adhesive inside your burr chamber. This is often why your coffee grinder is stalling with dark roast beans; the oils collect fine particles and create a ‘cake’ that eventually stops the motor. If you aren’t using a pipe cleaner or a dedicated brush, you’re just waiting for a mechanical failure.
I also see a lot of people sticking with the flimsy tools that came in the box. While I advocate for technique over gear, there are limits. For example, why your plastic tamper is making your espresso sour comes down to uneven pressure; you simply cannot get a level bed of coffee with a hollow plastic tool that flexes under your palm. You don’t need a three-hundred-dollar self-leveling tamper, but you do need something solid enough to respect the physics of the puck. When you stop looking for ‘magic’ gear and start focusing on the nuances of how your current tools interact, that is when you finally graduate from a coffee drinker to a true home barista. Always remember to check how to tell if your espresso grinder burrs are dull before you start blaming your beans for a muddy flavor profile.
If you think your espresso machine is a ‘set it and forget it’ appliance, I have some bad news for your bank account. After spending years in the trenches of home brewing, I’ve realized that the difference between a machine that lasts three years and one that lasts fifteen isn’t the brand—it’s the water. Most people assume that if the water tastes fine, it’s fine for the boiler. This is a dangerous mistake. You need to learn the easy way to test your machines water hardness at home before the minerals turn your internal copper pipes into a clogged mess. According to technical documentation from La Marzocco, approximately 70% of all professional espresso machine failures are caused by poor water quality, specifically calcium buildup and chloride-induced corrosion.
Stop the calcium before it stops your pump
I personally use a mix of distilled water and specific minerals (often called ‘Third Wave Water’) to ensure my machine never sees a grain of scale. It sounds like overkill until you have to pay a technician $400 to descaling a dual boiler. If you aren’t ready to play chemist, at least use an in-tank softening pouch. It’s the move that saves your grinder from unnecessary wear and keeps your pump from laboring against a restricted flow. I’ve seen so many enthusiasts ignore this until they hear their pump making a high-pitched whine, which is usually the sound of a very expensive part dying a slow death.
How do I maintain my espresso machine over the long haul?
Your weekly routine should be non-negotiable. I spent a whole year wondering why my lattes had a funky, metallic aftertaste until I learned how to clean the inside of your steam wand pipe. Milk protein builds up inside the tip and the wand itself, creating a literal petri dish of old dairy. It’s gross, and it ruins the flavor of even the best beans. I now make it a habit to soak my wand in a dedicated milk cleaner every Sunday. It keeps the steam velocity high and ensures my microfoam stays sweet and creamy rather than smelling like a burnt dairy farm. This is especially vital because why your steam wand tips keep getting blocked by milk residue is usually a result of poor purging habits after every single drink.
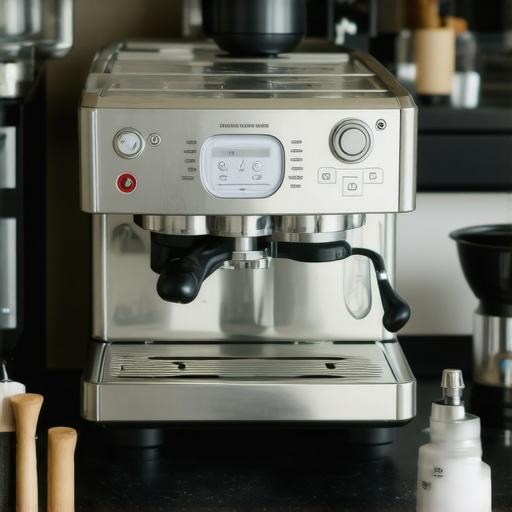
Beyond the internal plumbing, your workflow area dictates your consistency. A cluttered station leads to rushed shots. I’ve found that learning how to organize your barista tools in a single drawer or using a dedicated station can shave minutes off your morning routine. I also highly recommend looking into how to pick a coffee mat that doesn’t absorb odors; coffee oils go rancid quickly, and a smelly mat can actually affect your sensory experience while you’re trying to dial in a delicate light roast. It’s the small, tactile details that separate a messy hobby from a refined craft.
Clear the chutes to save your motor
Your grinder needs just as much love as the espresso machine. We often focus on the burrs, but the ‘choke point’ is almost always the discharge chute. I use a simple pipe cleaner to clear out the impacted grounds every few days. If you don’t want to open the casing, you can learn how to clean the grinder chute without taking it apart using a vacuum and a small brush. This prevents ‘retention,’ where yesterday’s stale grounds end up in today’s fresh basket. I predict that in the next few years, we will see a massive shift toward ‘smart’ grinders that alert you to torque changes caused by buildup, but for now, your manual intervention is the only thing keeping those burrs spinning true.
If you take away nothing else from my ramblings, remember this: your gear is an investment in your daily happiness. Don’t let a $5 part like a gasket or a dirty screen ruin a $1,000 machine. My challenge to you this week is to grab a pipe cleaner and clear out your grinder’s chute—you’ll be shocked at how much cleaner your next shot tastes.
What I Learned After Five Years of Failed Shots
Reflecting on my journey, the biggest shift wasn’t buying a more expensive machine; it was respecting the physics of extraction. I used to think a slightly oily bean was just a flavor choice, but I quickly learned why your coffee grinder is stalling with dark roast beans—the hardware actually has a physical limit that requires consistent maintenance. I also realized that consistency isn’t just about the beans. It’s about the move that saves your grinder from unnecessary wear, which is as simple as cleaning out the discharge chute weekly. Lastly, I stopped chasing the “perfect” shot and started chasing a perfect routine. When you automate your cleaning habits, the flavor often takes care of itself.
The Tools That Actually Earned Their Spot
If you’re looking to build or upgrade your setup, I always recommend starting with one of the top-rated espresso machines that fits your specific counter space and budget. Don’t forget that your milk preparation is just as vital; I’ve seen milk frothers that transform your coffee experience from ‘okay’ to ‘cafe-quality’ with just a few technical adjustments. To keep everything running smoothly, I highly suggest learning how to organize your barista tools in a single drawer so you aren’t hunting for your tamper while your shot is getting cold. These small efficiency gains make the hobby sustainable for the long haul.
Your Journey to the Perfect Morning Cup
Becoming a home barista is a marathon, not a sprint. Every sour shot is just data telling you how to improve your next one. Whether you are troubleshooting why your machine’s water temperature fluctuates every few minutes or finally mastering the silky texture of microfoam, remember that the ultimate goal is a drink you actually enjoy. Take the time to savor the process, and don’t be afraid to experiment with your home espresso setup. What was the one move that finally fixed your espresso shots? Share your breakthrough in the comments below!