Why your plastic tamper is making your espresso sour
I remember the morning I almost threw my favorite espresso machine out the kitchen window. I had just spent a small fortune on high-altitude beans, spent time dialing in my coffee grinder, and waited 20 minutes for everything to pre-heat. I pulled the shot, and it looked like liquid gold. But then I took a sip. It was sharp, acidic, and so sour it made my teeth ache. For weeks, I blamed the beans, the water temperature, and even my own technique. Then, I looked down at the flimsy, 2-ounce piece of black plastic that came in the box with my machine. That ‘free’ tamper wasn’t just a budget tool; it was actively ruining my mornings by creating an uneven mess inside my portafilter. Today, we are going to fix that puck prep once and for all so you can finally taste the sweetness your beans are hiding. Have you ever felt like you followed every rule of mastering home espresso only to end up with a cup of hot lemon juice?
Your Plastic Tamper is Creating Secret Channels for Water
When you use a lightweight plastic tamper, you simply cannot apply the consistent, level pressure required to seal the coffee puck against the basket walls. Because these tools are often slightly smaller than the actual basket diameter, they leave a ‘halo’ of loose grounds around the edges. Water is lazy; it will always take the path of least resistance. This leads to a nasty phenomenon where your espresso extracts only from the edges, leaving the center of the puck dry and under-extracted. According to coffee science experts at Barista Hustle, even a minor tilt or lack of edge-to-edge coverage during tamping causes ‘channeling,’ where high-pressure water blasts through gaps, resulting in that dreaded sour, under-extracted flavor profile. I made the mistake of thinking my ‘calibrated’ arm could make up for a bad tool, but physics always wins.
Can a Simple Metal Weight Really Change the Taste?
You might be skeptical that spending money on proper barista gear like a heavy stainless steel tamper is just ‘gear snobbery.’ I thought the same until I felt the difference. A real tamper provides the heft and precise fit needed to ensure the resistance is uniform across the entire surface of the coffee. Without that uniformity, the water moves too fast through certain sections, failing to pull out the sugars and oils that balance out the natural acidity of the bean. If you are struggling with consistency, it might be time to look at how to choose between a flat and a rippled tamper base to see which one fits your specific style better. The jump from plastic to steel is the single most underrated upgrade you can make for under fifty dollars.Before you even touch that heavy metal tamper, you need to address the mountain of grounds sitting in your basket. Imagine trying to pave a road; if you just dump a pile of asphalt and run a steamroller over it, you will end up with a lumpy, unstable surface. The same happens in your portafilter. I used to just grind and smash, but that led to catastrophic channeling. One Tuesday morning, I didn’t bother leveling the grounds, thinking the tamper would do the work for me. The moment I engaged the pump, a jet of scalding coffee shot sideways from my bottomless portafilter, missing my cup entirely and painting my favorite white shirt brown. That mess was a literal wake-up call regarding why your bottomless portafilter only sprays on one side. You need a perfectly flat surface before the real pressure begins. 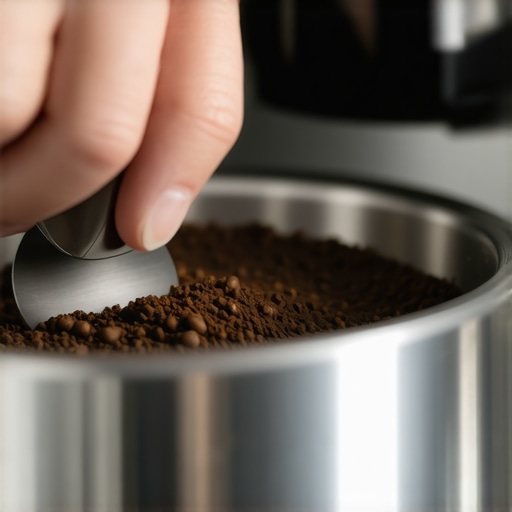
Flatten the Pile Before You Push
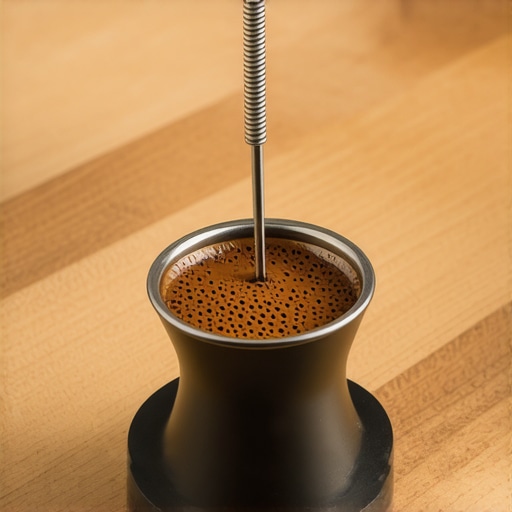
A simple tap on the side of the portafilter with your palm can settle the grounds, but many enthusiasts prefer a more methodical approach to break up clumps. Clumps are essentially tiny air pockets in disguise. If your grinder is acting up or the humidity is high, you might notice why your coffee grounds are clumping like little rocks, which makes tamping for an even extraction nearly impossible. Use a dedicated tool or even a thin needle to rake through the coffee, ensuring the density is even from the bottom to the top. This is the move for better espresso distribution without fancy tools that prevents those ‘soft spots’ where high-pressure water loves to break through.
Keep Your Elbow High and Your Wrist Straight
Most people hold a tamper like a doorknob, which is a recipe for a tilted puck. This grip forces your wrist into an awkward bend, making it nearly impossible to apply perfectly vertical pressure. Instead, think of your arm as a mechanical piston. You want your forearm to be directly above the tamper, creating a straight line from elbow to the basket. This is the best angle for tamping to avoid wrist strain and ensures the coffee is compressed into a level disc. If your puck is even slightly slanted, the water will rush to the shallow side, leaving you with a cup that is both bitter and sour at the same time.
Stop Chasing the 30-Pound Pressure Myth
You have likely heard that you need exactly 30 pounds of pressure to pull a good shot. In reality, once the air is squeezed out of the puck, more pressure does not significantly change the density. It is like squishing a kitchen sponge; once it is flat against the counter, pushing harder with your whole body weight does not make it ‘flatter.’ Focus on the ‘bottoming out’ sensation. When the grounds stop moving and the tamper resists further travel, you are done. Over-tamping often leads to a physical struggle that ruins your consistency and can even lead to the simple way to fix a gritty texture in your espresso by preventing fine particles from migrating too deep. If you find the flavor is still off despite a solid tamp, you might need to investigate why your espresso shot tastes salty and how to fix it. Consistent, level pressure is your goal, not a gym workout. This precision is a vital step in mastering the art of home espresso and finding the sweet spot of your roast profile.Even if you master the tamp, there is a massive trap waiting for you: thermal theft. I used to wonder why my first shot of the day tasted like a battery, even with a perfect puck. It turns out, a cold portafilter acts like a heat sink, sucking the energy out of your brew water before it even hits the coffee. This is where the benefit of pre-warming your portafilter head becomes a non-negotiable part of your workflow. If that metal is not piping hot, your 200°F water is hitting the grounds at 180°F, and you are back in ‘sour lemon’ territory.
The Dial-In Myth That Keeps You Frustrated
Most beginners think that once they find the ‘sweet spot’ on their grinder, they can leave it there until the bag is empty. This is a common misconception that leads to endless morning frustration. Coffee is organic; it is constantly losing CO2 and absorbing moisture from the air. According to research published in the journal Scientific Reports, the moisture content and temperature of your beans drastically alter how they shatter under the burrs, which in turn changes the resistance of the puck. This is why your shot extraction time changes every single day. You might wake up on a humid Tuesday and find your 30-second shot is now a 20-second gusher. Professional baristas do not just set the dial; they ‘chase the grind.’
Why Does Your Extraction Time Shift When No One Touched the Dial?
It usually comes down to a combination of ‘fines migration’ and bean age. As beans age, they become more brittle and porous. This creates more ‘fines’—microscopic dust particles—that can migrate to the bottom of the basket and clog the flow. If you are using a brand-new grinder, you might also be fighting against unseasoned burrs. Knowing how to properly season new steel burrs for better consistency is the secret to stopping those erratic shots. You need to run several pounds of beans through a new set of burrs to smooth out the factory-fresh edges of the metal.
Stop Scrubbing Your Equipment to Death
In our quest for a clean cup, we often do more harm than good by over-cleaning. I once spent an hour deep-cleaning my E61 group head with harsh detergents, only to find the lever felt ‘crunchy’ and stiff afterward. I had stripped away the vital food-grade grease required for the internal valves to move smoothly. Learning how to properly lubricate your e61 group head cam is just as important as the cleaning itself. Without that lubrication, the metal-on-metal friction will eventually lead to a mechanical failure or a why your espresso tastes burnt even with light roast beans because of heat friction. If you are still getting inconsistent results, start by finding your baseline. Every grinder has a slightly different ‘zero,’ and mastering the trick to finding the true zero point on your grinder ensures that your settings are actually repeatable. This helps minimize the frustration of why the first shot of the day is always a throwaway. Have you ever fallen into the trap of over-cleaning or chasing a grind setting that would not sit still? Let me know in the comments.I have seen beautiful top-rated espresso machines for coffee lovers in 2025 turn into expensive paperweights in less than two years simply because the owner ignored the chemistry happening inside the copper. We spend so much time worrying about the roast profile that we forget the machine’s plumbing is a delicate ecosystem. If you aren’t careful, your equipment will start fighting you.
Don’t Let Hard Water Kill Your Investment
Scale is the silent killer of every home espresso setup. It builds up on the heating element like a limestone cave, slowly insulating the metal and forcing your machine to work overtime to reach temperature. Jim Schulman, a renowned expert in espresso tech and author of the ‘Insanely Detailed Water FAQ’ on Home-Barista, notes that even a thin layer of scale can drastically reduce the thermal efficiency of your boiler. This is why you must learn the easy way to test your machines water hardness at home before you even pull your first shot. If your water is too hard, you are essentially feeding your machine slow-acting poison. I’ve made it a rule to never use tap water without a dedicated softening system, and why you should never leave water in your reservoir overnight becomes obvious once you see the biofilm that grows in standing water.
How do I maintain my espresso setup over time?
The secret is a religious maintenance schedule that treats the machine like a high-performance car. Beyond just wiping the wand, why your machine needs a backflush every single week cannot be overstated; it clears the old, rancid oils from the three-way solenoid valve that otherwise impart a metallic, fishy taste to every cup. I predict that within the next five years, we will see smart machines with integrated ion-exchange sensors that lock the pump if the water quality drops below a certain threshold—a fail-safe for the distracted home barista. 
Stop the Static Nightmare Before It Starts
Your grinder is the other half of the battle. If you find your kitchen counter covered in brown dust, you need to master how to stop static from ruining your grinding workflow. Static isn’t just a mess; it’s a sign of friction that can lead to heat buildup and inconsistent dosing. I also suggest learning how to tell if your espresso grinder burrs are dull by feeling the edges of the metal; if they feel smooth like a river stone rather than sharp like a knife, your coffee is being crushed rather than cut, leading to that muddy, hollow flavor profile. Making the move that saves your grinder from unnecessary wear by always starting the motor before adding beans is a small habit that adds years to your burr life. If you notice your why your espresso scale is jumping numbers while the shot is pulling, check for vibrations or steam leaks hitting the sensors. My advanced tip for you today? Grab a simple pipe cleaner and follow the guide on how to clean your grinders discharge chute with a pipe cleaner. Clearing out that retained ‘old’ coffee will instantly brighten your next morning’s double shot.
Hard-Won Truths from My Countertop Disasters
After years of pulling shots, the most important thing I have learned is that espresso is a game of variables, many of which happen before you even touch the machine. First, stop treating water like an afterthought. I wasted months wondering why my shots were dull before I learned the easy way to test your machines water hardness at home; hard water does not just kill flavor, it kills boilers. Second, ‘freshly roasted’ isn’t always ready. If you use beans right out of the roaster, you will likely encounter why your freshly roasted beans are making your espresso taste like grass—they simply need time to degas for the sweetness to emerge. Lastly, maintenance is not a chore for the weekend; it is a daily habit. Understanding why your machine needs a backflush every single week is often the difference between a clean, bright shot and one that tastes like rancid oils from a month ago.
The Gear That Actually Earned a Spot on My Counter
I have tried every gadget on the market, but only a few have survived the ‘countertop clutter’ purge. A high-quality grinder remains the heart of the setup, so I always recommend reviewing how to select the perfect coffee grinder for your brew before investing in flashy accessories. For those who enjoy a morning latte, milk frothers that transform your coffee experience can make your home station feel like a high-end cafe without the professional price tag. When you are ready to refine your technique, choosing the best barista gear for coffee enthusiasts should focus on tools that solve specific physics problems, like edge-to-edge tamping or heat retention.
Stop Chasing Perfection and Start Sipping
It is easy to get lost in the data—the extraction times, the grams in, and the precisely measured yields—but do not forget why you started this journey in the first place. The real goal of mastering the art of home espresso is to enjoy a moment of craft and a truly exceptional cup of coffee. Every ‘bad’ shot is just data that leads you to your next great one. Go pull a shot, adjust one single variable, and see how the flavor shifts. Have you ever struggled with getting a perfectly level tamp every single time? Let me know in the comments below. #IMAGE_PLACEHOLDER_E#