Why Your Machine’s Water Temperature Fluctuates Every Few Minutes
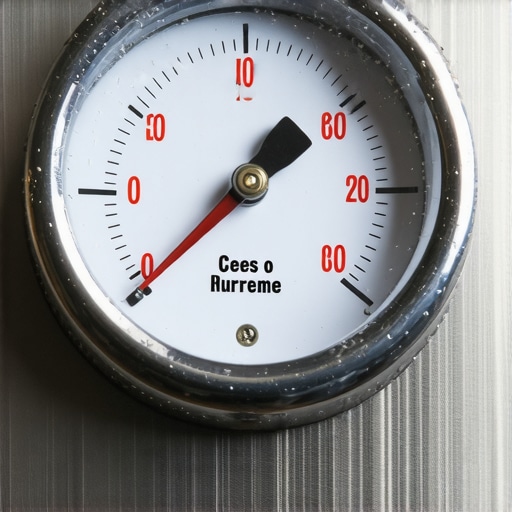
I remember staring at my machine at 6 AM, my eyes barely open, watching the digital display on my PID jump from 200°F down to 184°F, then scream back up to 210°F within seconds. It was like watching a heart rate monitor for someone running a marathon, and it was absolutely soul-crushing because I knew my expensive beans were about to be ruined. I had my favorite beans ready, but my machine was essentially throwing a temper tantrum. If you have ever pulled a shot that tasted like sour batteries because the temperature dipped mid-pull, you know the frustration. We are going to end that thermal roller coaster today by pinning down exactly why your machine is acting like a mood-swinging teenager.
Your Morning Routine Deserves Better Than Thermal Chaos
I used to think that a few degrees here or there didn’t matter, but I was dead wrong. Whether you are using one of the top-rated espresso machines for coffee lovers in 2025 or a trusty old hand-me-down, temperature stability is the literal heartbeat of your coffee. I once spent a small fortune on a new vibration pump because I thought the lack of pressure was causing my issues, only to realize the real culprit was a thermal sensor that had given up on life. It was a classic rookie mistake that cost me a week of bad coffee and a lot of unnecessary stress. Today, we are focusing on why that needle or digital readout won’t stay still and how you can get back to those syrupy, sweet extractions. Have you noticed your machine clicking more often than usual or seen the temperature drop the moment you touch the brew lever?
Does a tiny temperature swing really change the flavor?
Absolutely. The Speciality Coffee Association (SCA) notes that the sweet spot for espresso extraction is a narrow window between 195°F and 205°F. If your machine drifts outside this range, you aren’t just making coffee; you are conducting a chemistry experiment gone wrong. Even a five-degree dip can leave you with a thin, acidic mess that no amount of milk can save. I learned this the hard way when I neglected to fix a broken boiler temperature sensor that was sending mixed signals to my heating element. I kept blaming my grind size, but no amount of tinkering with my barista gear could fix a boiler that didn’t know how hot it was.
The Usual Suspects Behind Thermal Instability
When your machine starts cycling every few minutes, it is often trying to compensate for something it can’t quite control. One of the most common reasons for these frequent fluctuations is scale buildup inside the boiler or on the heating element itself. Think of scale like a thick, calcium blanket wrapped around your heater; it makes the machine work twice as hard to reach the target temp, leading to overshooting and rapid cooling. If you’ve recently tried a descaling ritual and things have gotten worse, you might need to recover from a failed descaling process where a loose chunk of lime is now blocking a sensor. Another hidden culprit is a leaking valve. If your machine is discharging too much water into the drip tray, it means cold water is constantly entering the boiler to refill it, causing the temperature to plummet every time the pump kicks in for a second. Identifying which of these components is failing is the first step toward that perfectly consistent cup.
Scrub the Scale Before It Suffocates Your Boiler
I remember a particularly stubborn E61 machine I owned that would hit the target temperature, then drop 15 degrees the second I started my timer. I opened the boiler to find what looked like a coral reef growing inside. If you find yourself in a similar mess, you need to recover from a failed descaling process carefully to ensure no loose debris is clogging your valves. Think of scale like a ceramic insulator; the heating element gets red hot, but the heat cannot jump through the ‘rock’ layer into the water efficiently. This lag causes the sensor to think the water is still cold long after the element should have turned off, leading to massive overshooting. When I finally cleared that ‘reef,’ my recovery time between shots dropped from five minutes to less than ninety seconds. Keeping your internals clean is the most basic part of mastering the art of home espresso and ensures your machine isn’t fighting itself just to stay warm.
Stop the Seesaw by Calibrating Your Pressure Stat
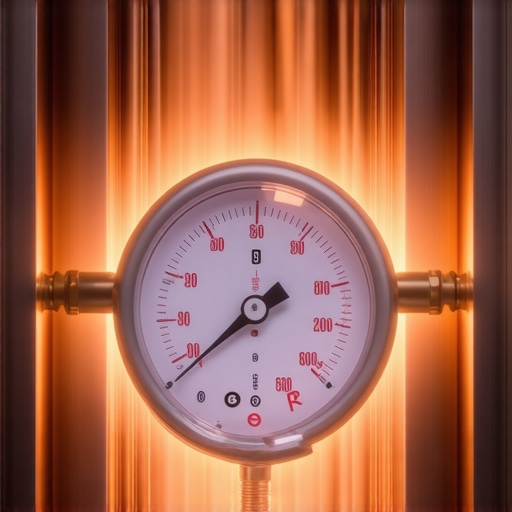
Next, let’s look at the brain of the operation. If your machine uses an older mechanical pressure stat, it functions like a simple light switch. When pressure (and thus temperature) drops, it flips on; when it hits the ceiling, it flips off. Over time, these copper contacts can arc and stick together. I once had a machine that wouldn’t shut off until the safety valve popped—a terrifying steam-filled kitchen was my reward for ignoring a weird clicking sound. You can often fix a stuck pressure stat in an older machine by gently cleaning the contacts or adjusting the deadband, which is the technical term for the ‘gap’ between the on and off points. If that deadband is too wide, your temperature will swing wildly while the machine waits to kick back in. It is like a thermostat in a house that lets it get down to 60°F before it finally blasts the heat up to 80°F.
Why Your Group Head Temperature is Stealing Your Flavor
Another silent killer of thermal stability is a cold group head. Even if your boiler temperature is pin-point accurate, a massive, cold hunk of brass will suck the heat right out of your water the moment you pull the lever. This is why the benefit of pre-warming your portafilter head cannot be overstated. I used to rush my morning routine, pulling shots just five minutes after turning the machine on. The result was always a sour, under-extracted mess because the water lost 10 degrees just traveling from the boiler to the coffee puck. Finally, perform a periodic sanity check on your water delivery system. If you check your espresso machines group head flow rate and find it is inconsistent, your thermosyphon might be stalled. This prevents hot water from naturally circulating through the group head while the machine sits idle, leaving the front of your machine far cooler than the boiler itself. It is the espresso equivalent of having a furnace that works perfectly, but all the air vents in your house are taped shut.The biggest trap home baristas fall into is what I call the PID Fallacy. We have been conditioned to believe that if a machine has a digital controller, the temperature at the coffee puck is a constant. In reality, a PID only monitors the water at the sensor’s specific location, which is usually tucked deep inside the boiler. Espresso expert Jim Schulman has extensively documented the concept of the thermal offset—the significant temperature drop that occurs as water travels from the boiler through the group head. If you haven’t calibrated that offset, your display might read a perfect 200°F, but the water hitting your beans could be a dismal 192°F. This is why choosing the best barista gear for coffee enthusiasts isn’t just about buying the most expensive screen; it is about understanding the thermal mass of your specific machine.
Can a dirty sensor actually lie to your machine’s computer?
Yes, and it is a common headache for those in hard-water areas. This is the ‘Oops’ factor that kills many high-end setups. When minerals coat the thermal probe, they act as an insulator. The water might be flash-boiling, but the sensor, struggling to read through the calcium crust, tells the heating element to stay on. This leads to those wild swings where your espresso suddenly tastes like ash because the machine is overshooting by ten degrees. If you suspect your machine is acting erratically, you might need to fix a broken boiler temperature sensor or at least pull the probe for a descaling soak.
Why Your Grinder Might Be the Real Thermal Saboteur
The contrarian truth is that your machine isn’t the only thing generating heat. Most people ignore the friction heat from their burrs. If you are using an entry-level grinder for back-to-back shots, the burrs can heat the grounds to over 110°F before they even touch the water. This shifts the extraction profile completely. Knowing how to select the perfect coffee grinder for your brew involves looking for low-RPM motors or high-quality steel that dissipates heat. Similarly, if your shots are inconsistent, check for wear; learning how to tell if your espresso grinder burrs are dull is crucial because dull burrs produce more friction and ‘fines’ that cause micro-channelling. This makes you think your boiler temperature is the problem when it is actually your particle distribution. If you have ever wondered why your espresso shot volume varies even with the same dose, look at your machine’s recovery time between shots. If the group head hasn’t reached thermal equilibrium, the water density changes, affecting how the pump pushes water through the puck. Finally, for those struggling with milk, remember that maxing out your steam pressure isn’t always the answer. Learning the secret to silky microfoam on a single boiler machine requires balancing the heating cycle to avoid ‘wet’ steam that dilutes your latte. Have you ever fallen into the trap of chasing a number on a screen while ignoring the actual taste in the cup? Let me know in the comments.
If you have sorted your grinder’s heat, you are halfway there, but the real longevity of your setup lives in the parts you rarely see. I have seen machines that look pristine on the outside but are absolute graveyards of calcification and dried-out rubber on the inside. Keeping your equipment in top shape isn’t just about aesthetics; it is about protecting the precision of your brew.
The Boring Ritual That Saves Your Boiler
I used to ignore the faint squeaking of my brew lever until it literally seized mid-shot during a dinner party. Now, I make it a point to how to properly lubricate your e61 group head cam every few months. It is not just about the smooth feel; it is about preventing the brass-on-brass friction that eventually leads to a total rebuild. While you are at it, do not wait for a puddle on your counter to how to check if your portafilter gasket is actually sealed. A dried-out gasket forces you to over-tighten the handle, which eventually warps the group head lugs—a mistake that costs hundreds to fix. According to technical bulletins from La Marzocco, switching to silicone gaskets can extend the service interval significantly compared to traditional rubber, as they do not bake onto the metal under high heat.
How do I keep my gear running for a decade?
Consistency isn’t just about your tamping technique; it is about the environment inside the machine. You need to the easy way to test your machines water hardness at home because your local tap water is the single biggest threat to your investment. I’ve started using a dedicated service log—just a simple notebook where I track every backflush and descale. It sounds like overkill until you realize you cannot remember if you cleaned the shower screen three weeks or three months ago. Looking ahead, I suspect we will see more ‘smart’ machines with built-in conductivity sensors that alert your phone the second scale begins to form, but for now, your best tool is a simple water test kit and a calendar. Mastering the art of home espresso requires this level of discipline.
Grease the Gears Before They Grind to a Halt
Your grinder needs more than just a quick brush-off. I personally use a specialized vacuum and pipe cleaners to how to clean your grinders discharge chute with a pipe cleaner to prevent old, rancid oils from tainting fresh beans. If you have just upgraded your setup, remember how to properly season new steel burrs for better consistency. New burrs are often ‘sharp’ in a way that produces inconsistent fines; running a few pounds of cheap beans through them stabilizes the edges. This is the move that saves your grinder from unnecessary wear and ensures your expensive specialty roast actually tastes the way the roaster intended. To truly master your workflow, I challenge you this weekend to pull your shower screen and soak it in backflush detergent—you will be horrified by the sludge hiding there, and your Monday morning latte will thank you. Keep an eye on your internals, or you might find yourself needing to how to spot a failing solenoid valve before it floods your kitchen sooner than you think.
The Hard Truth About Those Digital Numbers
After years of chasing the dragon of perfect thermal stability, I realized that the screen on my machine was often lying to me. First, never trust a PID to tell you when the group head is fully saturated; it only knows the water temperature deep inside the boiler. I’ve found that even if the screen says 200°F, you often need another ten minutes for the heavy brass components to reach thermal equilibrium. Second, the ‘deadband’ on a mechanical pressure stat is your worst enemy—if that gap is wider than a few degrees, your consistency will vanish. Lastly, mastering the art of home espresso is more about your patience than your programming. You have to learn the specific ‘heartbeat’ of your machine’s heating cycles before you even touch a bean.
Gear That Actually Fixed My Workflow
I don’t believe in buying every gadget on the market, but three specific choices changed my results forever. I finally used a Scace thermofilter to calibrate my boiler offset once and for all—it is the only way to know the true temperature at the puck. I also swapped every standard rubber seal for silicone alternatives because they do not get brittle under high heat, which makes it much easier to how to check if your portafilter gasket is actually sealed without using excessive force. Most importantly, I keep a high-quality water test kit on my counter. You should the easy way to test your machines water hardness at home every few months, especially if your local municipality changes its water source. These aren’t just accessories; they are essential for choosing the best barista gear for coffee enthusiasts that lasts a lifetime.
Stop Overthinking and Start Sipping
It is incredibly easy to get lost in the technical weeds, but remember that the goal is always a delicious drink. Don’t let a fluctuating needle or a clicking pressure stat ruin your morning ritual. Every ‘sour’ or ‘bitter’ shot is just data that helps you understand your espresso machines a little better. Take the time to clean your sensors, check your gaskets, and listen to the rhythm of your machine. Once you tame the thermal dragon, the sweet, syrupy flavor you’ve been chasing will follow naturally. Have you ever noticed your espresso tasting wildly different at noon compared to 7 AM? Let me know your theories in the comments below!