How to Set Up a Coffee Station in a Small Kitchen
I still remember the morning my kitchen staged a minor mutiny. I was half-awake, groping in the dark for my favorite mug, when my elbow caught the edge of a stray portafilter. Down it went, clanging against the tile, followed closely by a cascade of coffee grounds that settled into every hard-to-reach crevice of my tiny countertop. My espresso machine occupied half the prep area, the grinder was squeezed next to the microwave, and a forest of milk frothers and knock boxes left exactly zero room to slice a piece of toast. It was a chaotic, frustrating mess. I realized right then that my morning ritual shouldn’t feel like a high-stakes game of Tetris.
Your Countertop Deserves Better Than Clutter
The good news is you do not need a sprawling kitchen island to brew a cafe-quality shot. You just need a smarter strategy. If you are tired of moving three different appliances just to prep dinner, we are going to fix that today. I will show you how to streamline your setup, reclaim your workspace, and build a highly functional brewing hub in the smallest of spaces. Whether you are working with a tiny studio apartment corner or a cramped galley kitchen, you can curate an efficient workflow by investing in the right compact top-rated espresso machines and organizing your gear with intent.
Is a dedicated coffee bar actually worth the precious counter space?
I used to think a dedicated station was a luxury reserved for giant suburban kitchens. That belief led me to my biggest rookie mistake: scattering my gear across three different cabinets. Every single morning, I had to retrieve the beans from the pantry, grab the scale from a drawer, and haul out the grinder from the cupboard. Not only did this add ten minutes to my routine, but it also increased the chances of making a mess. According to a kitchen design study by the National Kitchen & Bath Association, optimizing your work triangle and grouping task-specific tools together can save up to 30% of your physical movement in the kitchen. When you consolidate your barista gear into one dedicated zone, you actually free up the rest of your kitchen for daily cooking.
Have you ever found yourself juggling five different accessories just to pull a single shot of espresso in the morning? Tell me about your current kitchen setup in the comments below! Let’s get into how we can turn that cramped corner into your favorite spot in the house.
Map Your Workflow to Match Your Brewing Instincts
An efficient home coffee setup functions like a well-oiled assembly line. To prevent your morning routine from devolving into a chaotic mess, you need to map your layout from left to right, or right to left, mimicking the exact journey your coffee beans take. Think of your workspace as three distinct zones: the prep zone, the brewing zone, and the cleanup zone. Your coffee grinders should sit directly next to your machine so you can move the portafilter seamlessly from the cradle to the group head without dripping water or spilling dry grounds across the counter gap.
I learned this lesson the hard way. I once set up my grinder on the far left of my counter and my espresso machine on the far right, with a drying rack in the middle. I spent two weeks sweeping up a line of lost coffee grounds every single morning. The moment I consolidated them side-by-side, my prep time dropped by half, and my cleanup became almost nonexistent. If you find your workspace constantly vibrates during use, you can learn how to position your grinder to minimize countertop countertop vibration, keeping your cups and scales from sliding around while you brew.
Keep Your Accessories Upright and Contained
Small spaces demand vertical organization. Do not let your tamping mats, distribution tools, and puck screens float around freely. Use a small wooden organizer block to keep your barista gear upright and within arm’s reach. When you are working fast, a wet portafilter can ruin your puck preparation if you are not careful. If you struggle with excess moisture, learn the best way to dry your portafilter quickly so your dry grounds do not stick to the basket walls. Additionally, always make sure you are using a dedicated knock box with a weighted base. If yours is sliding all over the place, check out how to secure your knock box so it does not slide around during heavy use.
Mastering the Milk Station in Tight Corners
When you are steaming milk, speed and thermal management are everything. Your pitcher, milk, and cloth need to be ready to go the moment your shot finishes pulling. The steam wand on your espresso machine is a powerful tool, but in a tight kitchen, a stray blast of steam can easily damage overhead wooden cabinets or warp paint. Position your machine with at least a few inches of clearance from your walls to allow the heat to dissipate naturally.
Keep Your Steam Path Clean and Safe
Many home brewers neglect their steam wand maintenance because they fear getting burned, which leads to dried milk buildup. Always practice the best way to purge your steam wand without burning your hand immediately after every single use. If you prefer automated setups or use separate milk frothers, save cabinet space by opting for models with detachable whisks, and read up on how to clean an automatic milk frother without taking it apart to save valuable cleanup time in the morning. Grouping your milk prep tools together ensures your milk stays cold until the exact moment you are ready to steam.
When we talk about squeezing professional-grade gear into tight spaces, most espresso hobbyists focus entirely on the physical footprint of their machines. But after years of tweaking small-scale setups, I have realized that the industry-wide obsession with ultra-fine adjustments often misses the real bottleneck. Everyone tells you to buy the most expensive flat burr grinder and focus purely on micro-adjustments, but in my experience, physical workflow limitations and unexpected physics variables will ruin your extraction long before your burr geometry does. We need to look past the marketing hype of flashy gadgets and focus on how our gear actually behaves when crammed into a tight corner.
Why does your perfect grind setting suddenly drift during a busy morning?
The biggest trap that advanced home baristas fall into is ignoring thermodynamic drift and static electricity buildup. In a cramped kitchen, heat rises quickly from your espresso machine boiler and warms up everything around it, including your nearby coffee grinder. As your grinder gets warmer, the internal metal components expand slightly. This micro-expansion alters your burr gap. A study by the Specialty Coffee Association notes that ambient humidity and temperature changes directly impact grind consistency and particle distribution. When you couple this with dry indoor air, you will find that your expensive grinder is producing static heavy messes and inconsistent shot times, even if you haven’t touched the adjustment dial.
To combat this, avoid the temptation to pre-dose your beans into a hopper that sits directly in the path of your espresso machine’s rising steam. Keep your beans sealed away until the very last second. Additionally, if you are using specialized puck preparation accessories to fix your distribution, you might be doing more harm than good; sometimes, over-manipulating your coffee bed means your WDT tool is actually causing more channeling by creating uneven density pockets at the bottom of the basket.
The hidden fluid dynamics of steaming in small spaces
Another common nuance is how milk frothing dynamics change when you are working with limited physical clearance. When you lack the space to angle your pitcher properly, you end up introducing air too quickly or holding the pitcher at an awkward tilt. This is particularly problematic when preparing smaller, delicate drinks where precision is everything. If you are struggling with a crowded prep area, mastering the best way to pour milk for a small macchiato can keep you from splashing foam all over your clean workspace. Furthermore, if you notice that your milk is simply boiling instead of creating that silky paint-like texture, you are likely dealing with steam velocity issues. You can easily diagnose this by understanding the reason your milk is bubbling instead of foaming, which usually traces back to a partially clogged steam tip or incorrect initial wand depth.
Have you ever fallen into this trap of over-complicating your routine with endless gadgets, only to find that basic environmental factors were throwing off your shots? Let me know in the comments below! If you want to keep perfecting your setup, take a look at our guide on mastering the art of home espresso to refine your hands-on technique.
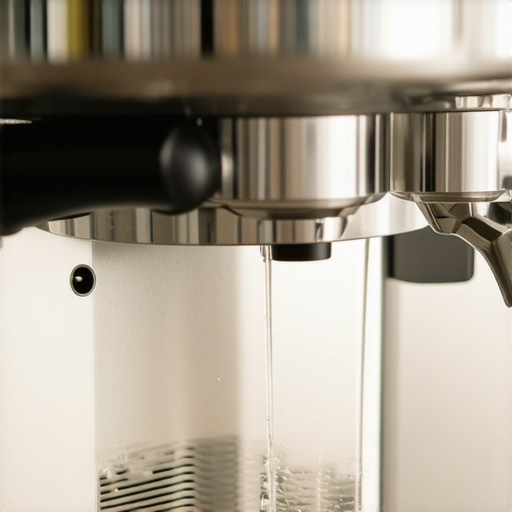
Once you have dialed in your workflow and optimized your physical counter space, the real challenge begins: keeping this high-performance setup running smoothly day after day. Just like a professional cafe, a home espresso station is only as good as its maintenance schedule. Over the years, I have developed a zero-friction maintenance habit that takes less than three minutes a day but saves hundreds of dollars in professional repairs. If you neglect these tiny tasks, you will quickly find that your machine begins acting up, leading to issues where your group head is leaking coffee over the rim because of accumulated coffee oils and expanding gaskets.
How do I maintain my home espresso setup over time?
The secret to longevity is preventing buildup before it hardens. I personally use a simple three-step daily routine: purge, wipe, and backflush with water. After my last shot of the morning, I immediately scrub the shower screen with a group brush to dislodge stray grounds. If you notice water channeling or spraying unevenly even after a quick brush, you may need to learn how to replace a group gasket without scratching the chrome to restore that perfect, airtight seal. For the grinder, instead of relying on complex deep-cleans every weekend, I use a specialized blower bulb to clear out retention daily. This prevents stale, oxidized oils from ruining the flavor of my fresh beans the next morning.
For the tools themselves, I highly recommend keeping a dedicated microfiber cloth exclusively for your steam wand and another for your portafilter. Mixing these up is a recipe for sour-smelling gear. If you are using a grinder with conical burrs, the maintenance is slightly different than flat burrs. I recommend reading up on the mess-free way to clean a conical burr grinder to keep your particle distribution pristine without throwing off your physical alignment dials.
The future of compact home espresso technology
Looking ahead, the home espresso landscape is shifting rapidly toward smart, thermal-on-demand heating systems and decoupled, modular components. According to the engineering documentation from Scace Device Laboratory, traditional heavy brass boilers are increasingly being challenged by highly efficient thermocoils that offer microsecond temperature adjustments. This means future setups will require a fraction of the counter space and consume up to 50% less energy. We will likely see grinders and espresso machines communicate wirelessly to auto-adjust grind size based on real-time flow rate feedback, making hands-free volumetric profiling the standard even in tiny studio apartments.
My challenge for you today is to try one advanced maintenance tip: tomorrow morning, immediately after pulling your shot, perform a hot-water backflush and inspect your shower screen. You might be surprised by how much residue is hiding there. If you are still setting up your kitchen bar, dive into our comprehensive guide on choosing the best barista gear to ensure you are buying durable, easy-to-clean tools from the very start.
What Experts Won’t Tell You About Cramped Espresso Setups
Over the years of tweaking tight workspaces, I have realized that some of the most common advice regarding home brewing is actually counterproductive when you are short on space. Here are a the biggest eye-openers I learned the hard way:
- The Multi-Tool Trap: Having a separate gadget for every single step of your puck prep feels professional, but it creates immense physical clutter. If you are constantly knocking over your scale or brush, you are actually introducing inconsistency into your morning workflow.
- The Fallacy of the Constant Dial-In: Many enthusiasts obsess over micro-adjustments. However, in small, warm kitchens, your machine’s boiler heat alters the surrounding air. If you ignore this thermal drift, the trick to keeping your grinder adjustment dial from wandering is often as simple as shielding your grinder from the direct radiant heat of your machine.
- Over-Engineered Maintenance: You do not need to pull apart your entire machine every weekend. A simple, consistent routine of backflushing and wiping is far safer for your gaskets and chrome than constant disassembly.
My Blueprint for an Uncluttered Brewing Workspace
To keep my small-scale coffee bar running efficiently without taking over my entire kitchen, I rely on a highly curated selection of tools and reference guides that prioritize durability and physical footprint:
- Modular Storage Blocks: Instead of wide, flat tamping mats, I use vertical wooden organizer blocks. This keeps my portafilters, brushes, and baskets upright and off the counter.
- High-Efficiency Microfiber Cloths: Keep separate, dedicated cloths for the steam wand and the drip tray. To prevent sour, damp odors in small spaces, master the best move for keeping your barista rags smelling fresh so your station stays sanitary.
- The Specialty Coffee Association (SCA) Guidelines: I always refer back to their water quality and extraction standards. Knowing the baseline physics of extraction prevents you from buying unnecessary gadgets to fix issues that are actually caused by bad water chemistry.
- A Weighted, Secure Knock Box: A sliding knock box is a recipe for spilled grounds. I recommend upgrading to a heavy metal or silicone-wrapped base to keep things stable.
Transform Your Morning Ritual Today
Creating a beautiful, functional home espresso station in a tiny kitchen is not about compromising on quality; it is about embracing intentional design. By arranging your workspace logically, reducing unnecessary clutter, and sticking to a simple daily maintenance routine, you can brew cafe-quality shots without sacrificing your sanity or your countertop. With the right top-rated espresso machines and a smart layout, even the smallest corner of your home can become your absolute favorite spot to start the day. It is time to reclaim your kitchen workspace and enjoy the craft of brewing.
Have you ever struggled to keep your grinder from making a static-heavy mess all over your small counter? Let me know your setup challenges in the comments below!