Why Your Expensive Grinder Is Producing Static-Heavy Messes
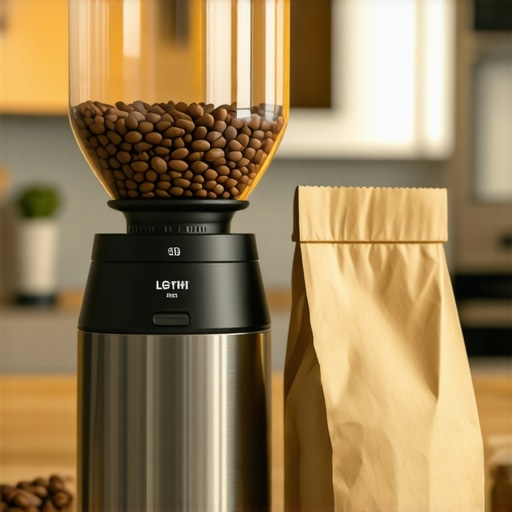
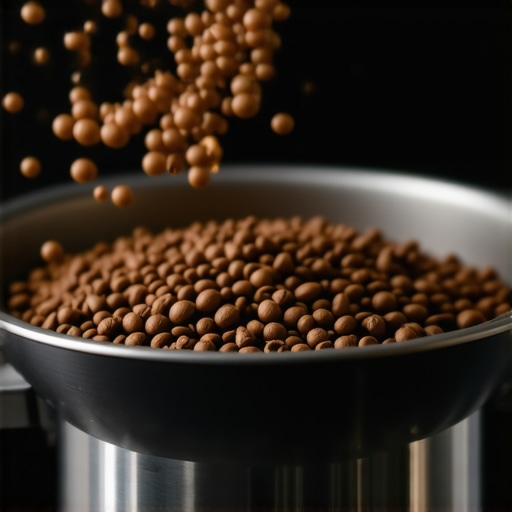
You just unboxed it. A gorgeous, heavy, premium machine that cost more than your first car payment. You filled the hopper with fresh, fragrant beans, pressed the button, and prepared for barista-level bliss. Instead, you got a miniature lightning storm. Ground coffee didn’t fall gently into your cup; it exploded outward, clinging to the sides of the chute, coat-tailing onto your hands, and blanketing your pristine countertop in a fine, stubborn layer of dark dust. I know that sinking feeling in your chest because I sat on my kitchen floor five years ago, staring at a brand-new $600 machine, sweeping up what felt like half a bag of expensive single-origin beans. It turns out that high-end engineering cannot override the laws of physics. Choosing the perfect coffee grinder is supposed to elevate your daily ritual, not turn your kitchen counter into a disaster zone. Today, we are going to demystify why these ultra-premium machines seem to suffer from static cling even worse than their cheap counterparts, and how you can tame the beast for a completely clean workflow. After all, nobody should have to sweep before they have had their morning caffeine. Why your grinder’s static gets worse in winter is a question that plagues thousands of home baristas, and the solution is simpler than you think.
The Frustrating Irony of Premium Burr Design
When we upgrade to high-end barista gear, we expect flawless performance. We expect speed, precision, and consistency. But those razor-sharp, massive steel burrs spinning at incredible velocities actually generate immense friction. When dry coffee beans smash through these metallic chambers, they exchange electrons at a rapid rate. This triboelectric effect is the same phenomenon that makes a balloon stick to your hair. According to research by the Institute of Physics, the moisture content within the cellular structure of the coffee bean plays a massive role in how electrical charges accumulate during mechanical fracturing. Because premium grinders are built with tight tolerances and all-metal pathways, they lack the plastic components that sometimes damp these charges. Early on, I made the mistake of trying to grind ultra-dry, dark-roasted beans on a freezing January morning without prepping them, resulting in a cloud of chaff that took me twenty minutes to clean up. If you do not learn how to calm a grinder that sprays chaff everywhere, you will end up wasting precious coffee and growing increasingly resentful of your beautiful machine. Let me ask you: have you ever stood over your sink, trying to scrub micro-grounds off your hands, wondering if you bought a lemon? Let me know in the comments below, because you are definitely not alone.
Is Your High-End Machine Actually Defective?
Let’s address the anxiety keeping you up at night: no, your expensive burrs are likely not broken. In fact, tighter tolerances and faster grinding speeds often exacerbate static because the coffee particles are squeezed through narrower chutes with greater force. It is a byproduct of high performance. Instead of boxing up your machine to ship it back, we need to focus on environmental variables like humidity and bean density. If you are tired of dealing with messy counter cleanups, you can easily implement a few quick workflow tweaks, such as the Ross Droplet Technique, to neutralize the charge before the burrs even touch the beans.
Mastering the Wet-Droplet Technique to Ground Your Grinder
To stop the static storm in your kitchen, you must treat your beans before they enter the grinding chamber. This process relies on a simple scientific principle: moisture conducts and neutralizes electrostatic charges. Introducing a microscopic amount of water to the beans acts like a lightning rod, safely discharging the static energy before it can cause the ground coffee to explode outward. I remember my first attempt with this method on a cold December morning; I used a soaking wet finger, dumped the dripping wet beans into my hopper, and ended up with a thick, cement-like paste that completely choked my burrs. The trick is extreme moderation.
The Two-Step Mist Method for Absolute Precision
The standard, mess-free way to execute the Ross Droplet Technique (RDT) requires nothing more than a tiny glass spray bottle. First, weigh out your single dose of coffee beans in a small metal dosing cup. Next, hold the spray bottle about six inches above the cup and mist the beans exactly once. Shake the cup vigorously to distribute the moisture evenly across all the bean surfaces. If you do not have a spray bottle, lightly dampening the handle of a spoon and using it to stir your dry beans achieves the exact same result without risking water pooling at the bottom of your hopper. This simple habit keeps your workspace immaculate and prevents you from having to search for the trick for getting ground coffee out of tight corners later on.
Why Your Dosing Cup Material Matters
Many home baristas do not realize that the vessel receiving the ground coffee plays a major role in static accumulation. Standard plastic catching cups act like magnets for flyaway grounds because plastic holds static electricity far longer than metal. Swapping your plastic collection cup for a food-grade stainless steel cup or a specialized aluminum dosing cup can instantly reduce cling. When I switched to a heavy, anodized metal dosing cup, the ground coffee slid out effortlessly with zero retention, saving me the daily headache of tapping the chute like a woodpecker. Investing in high-quality barista gear built from conductive materials naturally dampens the static charge as the coffee lands.
Upgrading Your Grinder Workflow for Better Consistency
Beyond moistening your beans, how you physically handle the grinder matters. If you are using a single-dosing workflow, always utilize a silicone bellows to push out the final remaining particles. This air pressure clears the exit chute of any clinging debris before static can cement it to the walls. However, if you are struggling with a larger setup, understanding why your shots taste different on a full hopper will help you balance freshness and grind consistency. For those who love crafting milk-based drinks alongside their espresso, maintaining your equipment is key, so make sure to check out milk frothers that transform your coffee experience to match the premium quality of your freshly ground, static-free espresso shots. Achieving a clean kitchen is not about fighting physics; it is about working with it.
When we invest in premium barista gear, we often buy into the myth of plug-and-play perfection. The community tells you that spending more cash guarantees a superior extraction with zero hassle. However, my journey with high-end espresso machines taught me that expensive gear is actually more sensitive, more volatile, and far less forgiving than entry-level setups. If you expect a $3,000 machine to fix bad habits, you are in for a bitter awakening.
Why Do Expensive Espresso Upgrades Frequently Yield Worse Shots?
Many home enthusiasts believe that upgrading their machine instantly solves channelization and sourness. In reality, commercial-grade rotary pumps and ultra-rigid group heads expose prep errors mercilessly. Standard consumer machines have built-in pre-infusion dampeners or vibratory pumps that ramp up pressure slowly, cushioning the puck. When you step up to a professional system, the immediate, aggressive application of nine bars of pressure will shatter an uneven coffee puck. If your distribution technique is flawed, you will suffer from severe channeling. For instance, using certain tools incorrectly can ruin your extraction, which is why your WDT tool is actually causing more channeling rather than fixing it. A study published by the Association for Specialty Coffee highlights that water will always find the path of least resistance; hence, the more precise the machinery, the more flawless your puck preparation must be.
The same contrarian truth applies to milk texturing. Beginners often rush to buy commercial-style steam wands, only to find themselves with a pitcher full of soapy, dry foam. If you are struggling with your texture, it is highly likely you are falling victim to simple preparation errors. This is the exact same reason why your automatic milk frother makes too many big bubbles instead of silky, sweet microfoam. The power of a prosumer steam boiler requires rapid hand-eye coordination that takes months to master, proving that more power does not equal better results without the technique to back it up.
Another common trap is the obsession with absolute purity in water selection. I have seen countless home baristas ruin their expensive boilers because they believed distilled water was the safest choice. In reality, water completely stripped of minerals will actively leach metals from your copper heating elements. To understand the chemistry behind this destructive process, you should read about the truth about using distilled water in your machine before you fill your reservoir again. Have you ever fallen into this trap of buying high-end gear only to find your espresso tasted worse initially? Let me know in the comments below, and let us demystify these advanced machine quirks together!
Once you navigate the initial learning curve of high-end espresso extractions, your primary challenge shifts from technique to machine maintenance. High-performance kitchen hardware requires active ownership. If you ignore the mechanical realities of these complex systems, a minor issue can quickly escalate into an expensive repair bill or ruin your morning ritual entirely.
How do I maintain my home espresso setup over time?
Consistency in your cup is a direct reflection of your maintenance routine. To keep your system running like the day you unboxed it, you must establish daily, weekly, and quarterly habits. For daily care, always wipe down the steam wand immediately after texturing milk and purge the group head before and after every shot to prevent coffee oils from baking onto the shower screen. If you neglect this, you will eventually find yourself searching for how to replace a group gasket without scratching the chrome when the dried-up seal finally cracks under pressure.
On a weekly basis, I highly recommend a backflushing routine with a dedicated espresso machine detergent. This chemical wash breaks down stubborn lipids that regular water cannot flush away. I also pull my grinder’s outer burr assembly once a month to vacuum the grinding chamber. If you are worried about losing your perfect grind setting during this process, mastering how to swap your grinder burrs without losing your settings will save you from wasting half a bag of coffee when recalibrating.
As the specialty coffee landscape evolves, I predict we will see a massive shift toward predictive maintenance technology built directly into home espresso equipment. Future machines will likely use integrated water-conductivity sensors and flow-rate algorithms to alert you exactly when scale is building up, rather than relying on guesswork. According to the technical documentation by La Marzocco Home, preventative water management is the single most critical factor in extending the lifespan of a dual-boiler espresso machine. Monitoring your water hardness directly prevents mineral scaling on your heating elements, which is the leading cause of component failure.
My challenge to you today is to upgrade your workflow with one simple, advanced habit: the next time you finish a shot, take exactly ten seconds to inspect your dry portafilter. Use the best way to dry your portafilter quickly to ensure no moisture disrupts your next distribution, and see how much your consistency improves over the next week.
When we invest in premium barista gear, we often buy into the myth of plug-and-play perfection. The community tells you that spending more cash guarantees a superior extraction with zero hassle. However, my journey with high-end espresso machines taught me that expensive gear is actually more sensitive, more volatile, and far less forgiving than entry-level setups. If you expect a $3,000 machine to fix bad habits, you are in for a bitter awakening.
Why Do Expensive Espresso Upgrades Frequently Yield Worse Shots?
Many home enthusiasts believe that upgrading their machine instantly solves channelization and sourness. In reality, commercial-grade rotary pumps and ultra-rigid group heads expose prep errors mercilessly. Standard consumer machines have built-in pre-infusion dampeners or vibratory pumps that ramp up pressure slowly, cushioning the puck. When you step up to a professional system, the immediate, aggressive application of nine bars of pressure will shatter an uneven coffee puck. If your distribution technique is flawed, you will suffer from severe channeling. For instance, using certain tools incorrectly can ruin your extraction, which is why your WDT tool is actually causing more channeling rather than fixing it. A study published by the Association for Specialty Coffee highlights that water will always find the path of least resistance; hence, the more precise the machinery, the more flawless your puck preparation must be.
The same contrarian truth applies to milk texturing. Beginners often rush to buy commercial-style steam wands, only to find themselves with a pitcher full of soapy, dry foam. If you are struggling with your texture, it is highly likely you are falling victim to simple preparation errors. This is the exact same reason why your automatic milk frother makes too many big bubbles instead of silky, sweet microfoam. The power of a prosumer steam boiler requires rapid hand-eye coordination that takes months to master, proving that more power does not equal better results without the technique to back it up.
Another common trap is the obsession with absolute purity in water selection. I have seen countless home baristas ruin their expensive boilers because they believed distilled water was the safest choice. In reality, water completely stripped of minerals will actively leach metals from your copper heating elements. To understand the chemistry behind this destructive process, you should read about the truth about using distilled water in your machine before you fill your reservoir again. Have you ever fallen into this trap of buying high-end gear only to find your espresso tasted worse initially? Let me know in the comments below, and let us demystify these advanced machine quirks together!
Once you navigate the initial learning curve of high-end espresso extractions, your primary challenge shifts from technique to machine maintenance. High-performance kitchen hardware requires active ownership. If you ignore the mechanical realities of these complex systems, a minor issue can quickly escalate into an expensive repair bill or ruin your morning ritual entirely.
How do I maintain my home espresso setup over time?
Consistency in your cup is a direct reflection of your maintenance routine. To keep your system running like the day you unboxed it, you must establish daily, weekly, and quarterly habits. For daily care, always wipe down the steam wand immediately after texturing milk and purge the group head before and after every shot to prevent coffee oils from baking onto the shower screen. If you neglect this, you will eventually find yourself searching for how to replace a group gasket without scratching the chrome when the dried-up seal finally cracks under pressure.
On a weekly basis, I highly recommend a backflushing routine with a dedicated espresso machine detergent. This chemical wash breaks down stubborn lipids that regular water cannot flush away. I also pull my grinder’s outer burr assembly once a month to vacuum the grinding chamber. If you are worried about losing your perfect grind setting during this process, mastering how to swap your grinder burrs without losing your settings will save you from wasting half a bag of coffee when recalibrating.
As the specialty coffee landscape evolves, I predict we will see a massive shift toward predictive maintenance technology built directly into home espresso equipment. Future machines will likely use integrated water-conductivity sensors and flow-rate algorithms to alert you exactly when scale is building up, rather than relying on guesswork. According to the technical documentation by La Marzocco Home, preventative water management is the single most critical factor in extending the lifespan of a dual-boiler espresso machine. Monitoring your water hardness directly prevents mineral scaling on your heating elements, which is the leading cause of component failure.
My challenge to you today is to upgrade your workflow with one simple, advanced habit: the next time you finish a shot, take exactly ten seconds to inspect your dry portafilter. Use the best way to dry your portafilter quickly to ensure no moisture disrupts your next distribution, and see how much your consistency improves over the next week.
The Hardest Lesson I Learned About Premium Coffee Gear
When I first upgraded my setup, I assumed that high prices purchased peace of mind. Instead, I learned that professional-grade equipment demands professional-grade discipline. Here are the core insights that completely reframed my home barista routine:
- Expensive burrs require seasoning: Brand-new, razor-sharp steel burrs actually produce more static and less consistent particle distribution during their first 5 to 10 kilograms of coffee. You must break them in before judging their true potential.
- Precision tools expose human error: A precision basket with laser-cut holes does not make extraction easier; it makes channeling far more obvious. If your puck prep is sloppy, high-end baskets will ruin your shot faster than standard ones.
- Micro-modifications save your sanity: Simple habits, like executing the Ross Droplet Technique or replacing plastic containers with metal ones, make a vastly bigger daily difference than spending thousands on auxiliary machinery.
The Dedicated Barista Toolkit
To master the variables of extraction and maintenance without the headaches, these are the essential resources and diagnostic steps I personally rely on to keep my morning ritual flawless:
- The Ross Droplet Spray Bottle: A simple 10ml glass atomizer filled with filtered water to neutralize static before the first bean hits the burrs.
- Scale and Conductivity Test Kits: A cheap liquid hardness test kit is your boiler’s best friend. Knowing your exact mineral count keeps scale at bay.
- Silicone Over Metal Group Gaskets: Upgrading from stock rubber gaskets to food-grade silicone ensures your portafilter seals perfectly without hardening or cracking over time.
- Water Chemistry Guides: For those seeking the ultimate extraction, learning about custom mineral recipes transforms your espresso and protects your heating elements.
Step Safely into the World of Advanced Espresso
Transitioning from a basic coffee setup to highly specialized barista gear can feel like learning a completely new language. It is easy to get discouraged when a premium grinder or a beautiful prosumer machine does not deliver instant cafe-quality results. Remember that every master barista once stood where you are now, staring at a counter covered in loose grounds and a bitter, sour shot of espresso. If you treat your gear as a partner in physics rather than an automated appliance, you will quickly develop the muscle memory to brew flawless cups every single morning. The craft is in your hands, not just in the metal on your counter.
Have you ever struggled with explosive static electricity or frustratingly sour extractions after upgrading your coffee grinder? Let me know in the comments below!