Why Your Single Origin Beans Taste Like Vinegar
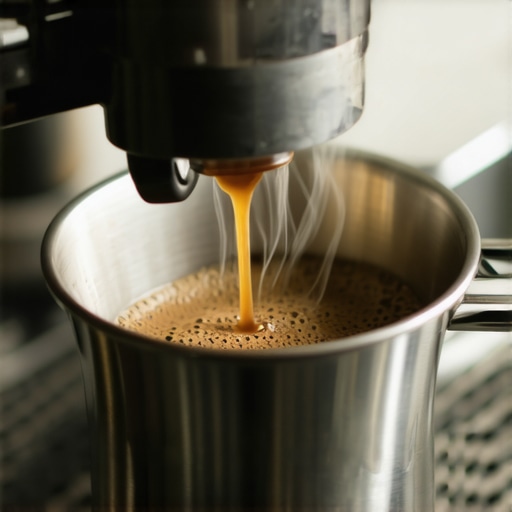
I still remember the morning I unboxed my first bag of high-end, light-roast Ethiopian Yirgacheffe. The bag promised notes of delicate jasmine, sweet blueberry, and a crisp, clean finish. I carefully weighed the beans, heated my water, and pulled what looked like a picture-perfect shot on my home machine. I took a big, expectant gulp. Instead of a floral paradise, my tongue was assaulted by a sharp, sour shock. It tasted less like specialty coffee and more like warm white vinegar. My face puckered, and I poured the entire cup down the sink in sheer frustration.
The Sour Reality of High-End Beans
For weeks, I assumed I had bought a bad batch of coffee. I even wondered if my cleaning habits were to blame, thinking back to the time I read about why your espresso tastes like vinegar after cleaning. But as I kept experimenting with different single origin bags, that aggressive sourness kept returning. I realized the problem wasn’t the coffee beans themselves, but how I was extracting them. When you pay a premium for single origin coffees, you are paying for delicate, volatile flavor compounds that require precise brewing conditions. If your setup is just a fraction of a millimeter or a couple of degrees off, those bright, complex fruit acids quickly devolve into a cup of hot salad dressing.
Are single origin coffees actually worth all this headache?
It is easy to feel like throwing in the towel and reverting back to dark, oily Italian roasts that always taste the same. However, once you learn how to balance these delicate extractions, the flavor profile is unmatched. Early on, my biggest mistake was using a subpar grinder that produced inconsistent particle sizes. I was trying to brew light roasts with uneven grinds, which led to massive under-extraction. According to a coffee extraction study by the Specialty Coffee Association, water will always find the path of least resistance, meaning inconsistent grinds guarantee that a large portion of your coffee stays under-extracted and intensely sour.
To fix this, I had to completely re-evaluate my equipment and technique. I learned how to adjust my grind size, temperature, and yield to tame those aggressive acids. If you want to stop wasting expensive coffee, you have to understand how your gear behaves. For instance, learning how to select the perfect coffee grinder for your brew is the single most important step in eliminating sourness. Have you ever pulled a shot of specialty coffee that tasted so sour it made your eyes water? Drop a comment below and let me know. In the next section, we are going to dive into the exact variables you need to change today to turn that sour vinegar into sweet, balanced nectar.
Taming a stubborn, light-roast single origin coffee is like trying to ride a unicycle on a tightrope. It requires constant micro-adjustments, but once you find the sweet spot, the ride is incredibly smooth. To turn that sour vinegar into a balanced extraction, you need to systematically manipulate three core variables: temperature, brewing ratio, and grind consistency. Let us look at how you can execute these adjustments step-by-step to completely transform your morning espresso game.
Boost Your Brew Temperature to Melt Away the Sourness
Lightly roasted beans are dense, tough little seeds. They have not been exposed to the high heat of a dark roast, which means their organic structures are still incredibly tight and hard to dissolve. When you use standard brewing temperatures, water simply slides over these dense compounds, extracting only the highly soluble, sour fruit acids and leaving the sweet, heavy sugars behind. I experienced this firsthand when trying to pull a tricky Rwandan bean. My machine was set to its default 200°F (93°C), and every shot tasted like hot lime juice. The second I raised my boiler temperature to 204°F (95.5°C), the sourness instantly softened into a beautiful, sweet cherry note.
If your setup allows PID temperature control, bump it up. Higher temperatures act like a key that unlocks those stubborn, deeper sugars. For those using more basic setups, you can implement the move for better temperature stability on entry-level units to make sure your brew water does not lose its heat mid-pull. If your water is too cool, you simply cannot extract enough sweetness to balance the natural acidity of light roasts.
Stretch Your Ratio Beyond the Traditional Double Shot
Many home baristas are fiercely loyal to the classic 1:2 ratio—putting 18 grams of ground coffee in and pulling 36 grams of liquid out. However, with light roasts, this ratio is a trap. Because light roasts are so stubborn to extract, a short 1:2 ratio almost always leaves the coffee under-extracted and sour. You need to use more water to pull out those late-extracting sweet compounds. Try stretching your extraction yield to a 1:2.2 or even a 1:2.5 ratio. This means pushing your 18-gram dose out to 40 or 45 grams of liquid espresso.
Vary your extraction yield to find the sweet spot
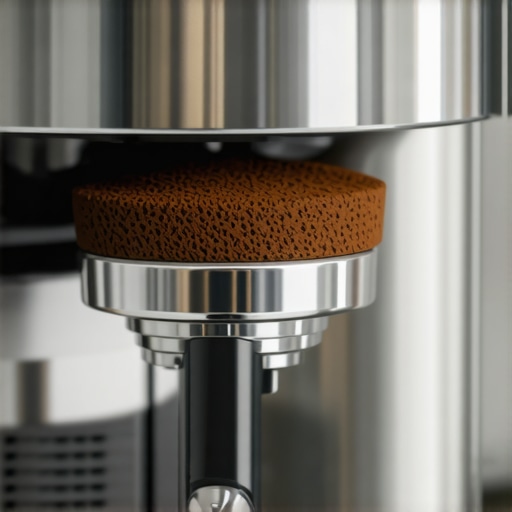
By increasing the yield, you are giving the water more opportunity to dissolve the complex sugars that balance out the sharp acids. Beware, though: as you push more water through the coffee bed, you run the risk of channeling, where water blasts a single hole through your puck. To prevent this, focus on impeccable prep work. I once rushed my puck preparation on a stretched shot and ended up with a channel so bad it sprayed coffee across my kitchen wall. Taking an extra ten seconds to distribute your grounds evenly will save your counters and your taste buds. Keep a close eye on your extraction behavior; if you notice why your shots start running fast after two seconds, it is a clear sign that channeling is ruining your yield and bringing back that sourness.
Eliminate Grinder Inconsistencies That Cause Uneven Extraction
Even if your temperature is scorching and your ratio is perfect, an inconsistent grind will ruin your shot. When your burrs produce a mix of giant boulders and microscopic dust (fines), the water will rush around the boulders—leaving them under-extracted and sour—while over-extracting the dust. This creates a confusing cup that is simultaneously bitter and sour. Upgrading to high-quality barista gear is critical here, but even the best grinders need careful maintenance. For example, if you notice your dial moving on its own, utilizing the trick to keeping your grinder adjustment dial from wandering is essential for maintaining a consistent grind profile day after day.
When we dive deeper into the rabbit hole of high-end home espresso, we run into a wall of conventional wisdom that actually holds us back. Most enthusiasts spend their first few months reading forum threads and watching tutorials that preach absolute, rigid rules. They tell you to buy the most expensive machine, buy a precision tamper, and never deviate from the standard parameters. But after years of dialing in temperamental light roasts, I have realized that much of this standard advice is actually a trap designed for dark roasts, and it completely falls apart when applied to modern specialty coffee.
The Big Pressure Myth That is Ruining Your Shots
Everyone in the coffee community seems to agree that 9 bars of pressure is the holy grail of espresso extraction. But here is my contrarian view: for dense, light-roast single origins, 9 bars is often far too high and actually guarantees a channeling disaster. When your pump blasts a delicate puck with 9 bars of force, the water aggressively compresses the coffee bed, causing micro-fractures. Instead of a sweet, even extraction, you get water rushing through those tiny cracks, leaving you with that dreaded sour-vinegar taste. In my experience, dropping your pressure down to 6 or 7 bars works infinitely better because it gentles the flow, allowing for a slower, more uniform extraction of those stubborn sugars.
Why does my expensive distribution tool still result in sour channeling?
Many passionate baristas fall into the trap of over-manipulating their coffee bed. You buy the fancy spin-distributors and the latest needles, thinking they will solve your extraction problems. In reality, a study published by the Specialty Coffee Association highlighted that over-handling dry grounds often causes physical separation of different particle sizes within the basket. This means your expensive accessories might actually be segregation tools that create pockets of fine dust and pockets of larger boulders. If you are not careful, you might find that why your WDT tool is actually causing more channeling is the very reason your light roasts taste so aggressively unbalanced.
Another silent killer is the tools we use to compress our coffee. The industry has pushed us toward self-leveling, spring-loaded gear, but there is a hidden flaw here. If your tamper does not fit your basket perfectly, you are leaving a ring of uncompressed coffee around the outer edge. The water will bypass the center entirely, resulting in massive under-extraction. Understanding why your tamper size actually matters for perimeter extractions is a game-changer for anyone trying to master delicate single origins. Have you ever fallen into this trap and blamed your beans instead of your tamper? Let me know in the comments below.
Once you look past the pressure myths and step-by-step puck preparation, you realize that consistency is not just a daily practice; it is a long-term engineering challenge. Many coffee enthusiasts spend thousands of dollars on high-end hardware only to watch their shots slowly degrade over six months. The culprits are almost never the beans themselves. Instead, it is the slow, invisible drift of your equipment out of calibration and the buildup of mineral scale and coffee oils that quietly sabotage your extraction chemistry.
Your Precision Gear Demands Systematic Calibration
To keep pulling exceptional shots of light-roast single origin coffees, you have to treat your espresso bar like a laboratory. I learned this the hard way when my expensive flat-burr grinder began producing muddy, slow-flowing shots regardless of how coarse I turned the dial. The issue was not the motor or the design; it was burr misalignment. Over time, the subtle vibrations of daily grinding can shift your burrs by micro-meters. If you want to maintain peak performance, you need to learn how to swap your grinder burrs without losing your settings so you can periodically clean and realign them with precision.
Similarly, your grinder’s physical environment plays a massive role in how coffee behaves. In dry winter months, static electricity makes freshly ground coffee stick to every surface, leading to massive retention and uneven dosing. Understanding why your grinders static gets worse in winter allows you to combat this with simple techniques like the Ross Droplet Technique (RDT)—spritzing your beans with a tiny droplet of water before grinding to neutralize static charges completely.
How do I maintain my home espresso setup over time?
Consistent long-term maintenance is the dividing line between a frustrating hobby and a flawless daily ritual. Scale buildup inside your boiler acts as an insulator, causing your brew temperature to fluctuate wildly mid-shot. I recommend checking your local water hardness using a titration kit. If you find your water is too hard, you must formulate a custom water recipe or use specialized softening pouches in your reservoir. Neglecting this does not just ruin your light roasts; it can lead to catastrophic hardware failure where you run the real reason your espresso machine is tripping the breaker because of a shorted heating element covered in scale.
Beyond the internal boilers, you must pay attention to the mechanical wear of daily use. Your portafilter gasket, which seals the pressurized water inside the basket, loses its elasticity over time due to constant heat exposure. When this happens, water will begin to bypass the coffee puck entirely, leading to messy leaks and weak, under-extracted shots. Replacing this gasket annually is a simple, cheap insurance policy that preserves your machine’s pressure profile. For beginners and advanced users alike, establishing the best routine for a weekend deep clean ensures that stale coffee oils are chemically backflushed out of your 3-way solenoid valve before they can rancidify and ruin your next premium single origin extraction.
The Future of Home Espresso is Real-Time Flow Profiling
As we look to the future of the specialty coffee movement, the industry is moving rapidly away from static pressure targets toward real-time flow profiling. According to technical documentation published by the espresso engineering experts at Specialty Coffee Association, the viscosity of a shot changes dramatically as soluble solids are washed away during the extraction. Machines equipped with smart flow-control valves or software-driven pressure profiling allow you to mimic the declining pressure profiles of classic lever machines, keeping the flow rate stable even as the puck erodes. This technology makes pulling finicky light roasts incredibly forgiving, and it is quickly trickling down from commercial machines to entry-level home setups. My advice? Do not wait for a new machine. Go ahead and try dropping your pump pressure to 6 bars on your current machine today—you will be amazed at how much sweeter and cleaner your shots taste.
Taming a stubborn, light-roast single origin coffee is like trying to ride a unicycle on a tightrope. It requires constant micro-adjustments, but once you find the sweet spot, the ride is incredibly smooth. To turn that sour vinegar into a balanced extraction, you need to systematically manipulate three core variables: temperature, brewing ratio, and grind consistency. Let us look at how you can execute these adjustments step-by-step to completely transform your morning espresso game.
Boost Your Brew Temperature to Melt Away the Sourness
Lightly roasted beans are dense, tough little seeds. They have not been exposed to the high heat of a dark roast, which means their organic structures are still incredibly tight and hard to dissolve. When you use standard brewing temperatures, water simply slides over these dense compounds, extracting only the highly soluble, sour fruit acids and leaving the sweet, heavy sugars behind. I experienced this firsthand when trying to pull a tricky Rwandan bean. My machine was set to its default 200°F (93°C), and every shot tasted like hot lime juice. The second I raised my boiler temperature to 204°F (95.5°C), the sourness instantly softened into a beautiful, sweet cherry note.
If your setup allows PID temperature control, bump it up. Higher temperatures act like a key that unlocks those stubborn, deeper sugars. For those using more basic setups, you can implement the move for better temperature stability on entry-level units to make sure your brew water does not lose its heat mid-pull. If your water is too cool, you simply cannot extract enough sweetness to balance the natural acidity of light roasts.
Stretch Your Ratio Beyond the Traditional Double Shot
Many home baristas are fiercely loyal to the classic 1:2 ratio—putting 18 grams of ground coffee in and pulling 36 grams of liquid out. However, with light roasts, this ratio is a trap. Because light roasts are so stubborn to extract, a short 1:2 ratio almost always leaves the coffee under-extracted and sour. You need to use more water to pull out those late-extracting sweet compounds. Try stretching your extraction yield to a 1:2.2 or even a 1:2.5 ratio. This means pushing your 18-gram dose out to 40 or 45 grams of liquid espresso.
Vary your extraction yield to find the sweet spot
By increasing the yield, you are giving the water more opportunity to dissolve the complex sugars that balance out the sharp acids. Beware, though: as you push more water through the coffee bed, you run the risk of channeling, where water blasts a single hole through your puck. To prevent this, focus on impeccable prep work. I once rushed my puck preparation on a stretched shot and ended up with a channel so bad it sprayed coffee across my kitchen wall. Taking an extra ten seconds to distribute your grounds evenly will save your counters and your taste buds. Keep a close eye on your extraction behavior; if you notice why your shots start running fast after two seconds, it is a clear sign that channeling is ruining your yield and bringing back that sourness.
Eliminate Grinder Inconsistencies That Cause Uneven Extraction
Even if your temperature is scorching and your ratio is perfect, an inconsistent grind will ruin your shot. When your burrs produce a mix of giant boulders and microscopic dust (fines), the water will rush around the boulders—leaving them under-extracted and sour—while over-extracting the dust. This creates a confusing cup that is simultaneously bitter and sour. Upgrading to high-quality barista gear is critical here, but even the best grinders need careful maintenance. For example, if you notice your dial moving on its own, utilizing the trick to keeping your grinder adjustment dial from wandering is essential for maintaining a consistent grind profile day after day.
When we dive deeper into the rabbit hole of high-end home espresso, we run into a wall of conventional wisdom that actually holds us back. Most enthusiasts spend their first few months reading forum threads and watching tutorials that preach absolute, rigid rules. They tell you to buy the most expensive machine, buy a precision tamper, and never deviate from the standard parameters. But after years of dialing in temperamental light roasts, I have realized that much of this standard advice is actually a trap designed for dark roasts, and it completely falls apart when applied to modern specialty coffee.
The Big Pressure Myth That is Ruining Your Shots
Everyone in the coffee community seems to agree that 9 bars of pressure is the holy grail of espresso extraction. But here is my contrarian view: for dense, light-roast single origins, 9 bars is often far too high and actually guarantees a channeling disaster. When your pump blasts a delicate puck with 9 bars of force, the water aggressively compresses the coffee bed, causing micro-fractures. Instead of a sweet, even extraction, you get water rushing through those tiny cracks, leaving you with that dreaded sour-vinegar taste. In my experience, dropping your pressure down to 6 or 7 bars works infinitely better because it gentles the flow, allowing for a slower, more uniform extraction of those stubborn sugars.
Why does my expensive distribution tool still result in sour channeling?
Many passionate baristas fall into the trap of over-manipulating their coffee bed. You buy the fancy spin-distributors and the latest needles, thinking they will solve your extraction problems. In reality, a study published by the Specialty Coffee Association highlighted that over-handling dry grounds often causes physical separation of different particle sizes within the basket. This means your expensive accessories might actually be segregation tools that create pockets of fine dust and pockets of larger boulders. If you are not careful, you might find that why your WDT tool is actually causing more channeling is the very reason your light roasts taste so aggressively unbalanced.
Another silent killer is the tools we use to compress our coffee. The industry has pushed us toward self-leveling, spring-loaded gear, but there is a hidden flaw here. If your tamper does not fit your basket perfectly, you are leaving a ring of uncompressed coffee around the outer edge. The water will bypass the center entirely, resulting in massive under-extraction. Understanding why your tamper size actually matters for perimeter extractions is a game-changer for anyone trying to master delicate single origins.
Once you look past the pressure myths and step-by-step puck preparation, you realize that consistency is not just a daily practice; it is a long-term engineering challenge. Many coffee enthusiasts spend thousands of dollars on high-end hardware only to watch their shots slowly degrade over six months. The culprits are almost never the beans themselves. Instead, it is the slow, invisible drift of your equipment out of calibration and the buildup of mineral scale and coffee oils that quietly sabotage your extraction chemistry.
Your Precision Gear Demands Systematic Calibration
To keep pulling exceptional shots of light-roast single origin coffees, you have to treat your espresso bar like a laboratory. I learned this the hard way when my expensive flat-burr grinder began producing muddy, slow-flowing shots regardless of how coarse I turned the dial. The issue was not the motor or the design; it was burr misalignment. Over time, the subtle vibrations of daily grinding can shift your burrs by micro-meters. If you want to maintain peak performance, you need to learn how to swap your grinder burrs without losing your settings so you can periodically clean and realign them with precision.
Similarly, your grinder's physical environment plays a massive role in how coffee behaves. In dry winter months, static electricity makes freshly ground coffee stick to every surface, leading to massive retention and uneven dosing. Understanding why your grinders static gets worse in winter allows you to combat this with simple techniques like the Ross Droplet Technique (RDT)—spritzing your beans with a tiny droplet of water before grinding to neutralize static charges completely.
How do I maintain my home espresso setup over time?
Consistent long-term maintenance is the dividing line between a frustrating hobby and a flawless daily ritual. Scale buildup inside your boiler acts as an insulator, causing your brew temperature to fluctuate wildly mid-shot. I recommend checking your local water hardness using a titration kit. If you find your water is too hard, you must formulate a custom water recipe or use specialized softening pouches in your reservoir. Neglecting this does not just ruin your light roasts; it can lead to catastrophic hardware failure where you run the real reason your espresso machine is tripping the breaker because of a shorted heating element covered in scale.
Beyond the internal boilers, you must pay attention to the mechanical wear of daily use. Your portafilter gasket, which seals the pressurized water inside the basket, loses its elasticity over time due to constant heat exposure. When this happens, water will begin to bypass the coffee puck entirely, leading to messy leaks and weak, under-extracted shots. Replacing this gasket annually is a simple, cheap insurance policy that preserves your machine's pressure profile. For beginners and advanced users alike, establishing the best routine for a weekend deep clean ensures that stale coffee oils are chemically backflushed out of your 3-way solenoid valve before they can rancidify and ruin your next premium single origin extraction.
The Future of Home Espresso is Real-Time Flow Profiling
As we look to the future of the specialty coffee movement, the industry is moving rapidly away from static pressure targets toward real-time flow profiling. According to technical documentation published by the espresso engineering experts, the viscosity of a shot changes dramatically as soluble solids are washed away during the extraction. Machines equipped with smart flow-control valves or software-driven pressure profiling allow you to mimic the declining pressure profiles of classic lever machines, keeping the flow rate stable even as the puck erodes. This technology makes pulling finicky light roasts incredibly forgiving, and it is quickly trickling down from commercial machines to entry-level home setups. My advice? Do not wait for a new machine. Go ahead and try dropping your pump pressure to 6 bars on your current machine today—you will be amazed at how much sweeter and cleaner your shots taste.
The Harsh Epiphanies of My Coffee-Brewing Journey
Looking back at my stack of empty, expensive single-origin coffee bags, I realized that many of my biggest extraction headaches were completely self-inflicted. First, buying a high-end machine is pointless if you try to pair it with a budget grinder. Your grinder is the brain of your setup, while the espresso machine is just the muscle. Second, trying to emulate dark-roast recipes with modern, light-roast beans is a recipe for sour disappointment. Lastly, chasing aesthetic bottomless portafilter shots often encourages you to grind too fine, which actually increases the risk of micro-channeling.
My Essential Equipment Toolkit for Pulling Light Roasts
If you want to stop guessing and start measuring, these are the tools I rely on every single morning:
- Precision Flat-Burr Grinders: To achieve the uniform particle distribution required for light roasts, check out my guide on how to select the perfect coffee grinder for your brew.
- Accurate Barista Accessories: Elevate your puck preparation and workflow by exploring the right barista gear for consistency.
- Temperature-Stable Systems: To avoid temperature drops mid-pull, you can find the best match for your kitchen among these top rated espresso machines for coffee lovers in 2025.
Embrace the Trial and Error of Your Coffee Journey
Mastering the art of home espresso is not about achieving instant perfection; it is about learning to love the process of trial, error, and gradual refinement. Each bean, from high-altitude Ethiopian micro-lots to rich Central American varieties, tells a unique story that only your technique can unlock. Be patient with your setup, trust your taste buds over online forum rules, and keep dialing in those parameters. Have you ever struggled with a light roast that tasted stubbornly sour no matter how fine you ground it? Let me know in the comments below!