The Reason Your Latte Art Hearts Are Always Off-Center
It is 6:45 AM. You have pulled a gorgeous, syrupy shot of espresso. The microfoam in your pitcher looks like wet paint—absolutely flawless. You bend over the cup, tilt, pour, shake your wrist with practiced precision, and pull through. You lift the cup, expecting a symmetrical masterpiece to show off on your feed, only to find a sad, warped heart hugging the far left rim of the ceramic. If this sounds painfully familiar, you are not alone. For months, my morning routine ended in the exact same frustration, staring down at off-center blobs that looked more like abstract splatters than elegant café art.
The Stealthy Mistakes Throwing Your Symmetry Out of Whack
When I first started trying to master home espresso, I assumed my crooked designs were a mechanical issue with my hands. I bought expensive barista gear, blamed my pouring speed, and even thought my milk frother was pulling to one side. But the truth is much simpler. The primary culprit behind off-center latte art is your body alignment and how you hold the cup. If you want to know the exact physics of how fluid dynamics affect your pour, why your latte art always ends up at the edge of the cup comes down to the angle of your wrist and the tilt of the cup relative to your pitcher nose.
Is expensive gear actually required for perfect symmetry?
Many home baristas fall into the trap of believing that a commercial-grade setup is the only way to achieve picture-perfect designs. I made the mistake of thinking my budget machine was holding me back, but even with entry-level milk frothers, you can get the texture right. According to a fluid dynamics study published in the Physics of Fluids journal, the behavior of a jet entering a shallow liquid layer is highly sensitive to the entry angle, meaning even a tiny two-degree tilt of your cup will completely redirect where the foam lands. Today, we are going to fix that tilt once and for all. Have you spent weeks trying to figure out why your hearts keep drifting to the edge of the mug? Leave a comment below and let me know—I bet we can solve it together.
The Perfect Alignment Blueprint for Your Daily Pour
To stop your designs from drifting, you must treat your body like a tripod. The biggest mistake I made for months was holding my cup at a comfortable, lazy angle while standing slightly twisted relative to my espresso machine. One morning, frustrated by yet another lopsided leaf, I tucked my elbows tightly against my ribs, squared my shoulders completely to the counter, and forced my eyes directly over the center of the mug. The result was messy—I spilled a bit of milk on my knuckles—but the design landed dead center. By locking your elbows, you eliminate lateral wrist play, forcing the pitcher to travel along a perfectly straight line.
Mastering the Angle of Attack
Think of your milk stream as a water slide. If the slide is too flat, the rider stalls; if it is too steep, they crash. When starting your pour, you want to tilt your cup at a steep 45-degree angle. This creates a deep pool of espresso for the milk to slip under. If you start pouring onto a flat surface, the milk will instantly bounce back up and create a cloudy, unstructured mess. As the cup fills, slowly tilt it back to a level position while bringing the pitcher tip as close to the liquid surface as possible. This transition must be fluid, like a slow-motion teeter-totter.
Eliminating the Common Wobble and Grip Issues
Your hand grip on the pitcher handle dictates the symmetry of your design. Many people grip the pitcher like a hammer, which naturally forces the wrist to turn inward. Instead, hold the handle gently with your thumb and index finger near the top rim, using your remaining fingers to stabilize the base. This pencil-style grip gives you micro-control over the flow. If you find your milk texture is still too thick or inconsistent despite a solid grip, you might need to reconsider your equipment. Exploring some of the milk frothers that transform your coffee experience can help you achieve that velvety, wet-paint microfoam texture necessary for detailed patterns.
How Your Machine and Grinder Set the Stage
You cannot paint a masterpiece on a canvas that is constantly shifting. The foundation of your latte art is actually your espresso crema, which relies heavily on your extraction. If your extraction is uneven, your crema will be thin and watery, refusing to hold the foam. This is why investing time in understanding how to prep your puck is vital. Using high-quality barista gear, such as a calibrated tamper or a distribution tool, ensures a level bed of coffee. Furthermore, if you are struggling with a shot that runs too fast or lacks body, learning how to select the perfect coffee grinder for your brew is the ultimate game-changer for producing thick, stable crema that acts as the perfect canvas for your design.
When you start to dive deeper into the science of extraction, you realize that the most common advice shared online often misses the mark. In my early days, I spent hours reading forums where self-proclaimed experts insisted that upgrading to a five-thousand-dollar commercial setup was the only way to achieve cafe-quality microfoam and flawless symmetry. This is a massive misconception. In my experience, throwing money at more advanced hardware before mastering the subtle physical variables of your routine actually makes your coffee worse, as high-end gear is far less forgiving of poor technique.
The Critical variables that high-end equipment won’t solve
Everyone says that upgrading your espresso machine is the ultimate shortcut to better drinks, but the truth is that your grinder and your prep work carry ninety percent of the weight. If you are struggling with channeling or watery shots, even the most expensive rotary pump machine will produce sour, disappointing results. The real culprit is often microscopic and invisible to the naked eye. For instance, many home baristas unknowingly struggle with clumped grounds or static electricity, which leads to uneven water flow during extraction. If you are using a premium grinder but still getting inconsistent shots, you might be dealing with a subtle hardware issue like static build-up. Understanding why your expensive grinder is producing static heavy messes is essential to fixing your distribution before you pull your next shot.
Why does your latte art canvas fall apart mid-pour?
A common myth is that any fresh crema will support a complex pattern. However, the physical structure of your crema depends on a delicate balance of carbon dioxide gases and lipids. According to a study on foam stability by the International Dairy Journal, the protein structure of your milk must bind perfectly with the lipid-rich emulsified oils of the espresso. If your extraction is too fast, the crema is thin and lacks the viscosity to hold the microfoam on the surface. Instead of sitting on top, your beautiful milk pattern simply sinks straight to the bottom of the cup. This is why having an uneven bed of coffee ruins your canvas. If you find your flow is lopsided during extraction, checking for channel paths is vital. You should investigate why your espresso shot is extracting faster on the left side to ensure a perfectly level extraction that yields a dense, uniform crema.
The wet distribution trap and other subtle mistakes
One of the most common “oops” factors I see intermediate baristas commit involves their distribution and tamping workflow. You bought the expensive needle distribution tools and a heavy stainless steel tamper, but you are still getting channeling. Why? You might be introducing moisture where it doesn’t belong. Many enthusiasts wipe their portafilter basket with a damp towel right before grinding, or use a tool that still has a droplet of water on it from a quick rinse. This creates localized wet spots in the dry coffee bed, causing the water to rush through those specific channels under high pressure. Understanding the problem with using a wet tamper on dry grounds is a major eye-opener for anyone trying to eliminate random, frustrating channel paths. Keep your prep area completely dry.
Have you ever fallen into this trap of blaming your machine instead of looking at these tiny variables in your workflow? Let me know in the comments below—I would love to hear your experiences and help you troubleshoot your morning routine!
Once you have diagnosed the physical alignment of your pour and cleared the hurdle of static-heavy coffee grounds, the battle for consistent, symmetrical latte art moves to the maintenance of your workstation. Over the years, I have realized that home baristas spend thousands of hours practicing their milk pouring technique but completely neglect the very tools that make that pour possible. A sticky grinder adjustment collar, a worn-out group gasket, or even a microscopic layer of old coffee oils on your steam tip will silently degrade your milk texture and crema quality. If you want to keep your pours looking like they belong in a specialty cafe, you have to establish a strict routine of proactive care.
How do I maintain my home espresso setup for consistent performance?
To prevent your microfoam and extraction from drifting over time, you must treat your cleaning schedule as an extension of your barista technique. I personally use a stiff nylon brush daily to clear stray grinds from the grinder chute, but the real secret to preserving your machinery is performing a deep clean every weekend. If you neglect your group head, old coffee oils build up and create a bitter, uneven extraction that ruins the delicate flavor of your espresso. For my own setup, I rely on a systematic approach. You can easily master this routine by following the best routine for a weekend deep clean, which keeps my machine pulling clean, sweet shots week after week.
As you establish your routine, pay close attention to the rubber parts under your group head. The constant heat and pressure of brewing will eventually harden these components, leading to annoying leaks during extraction. I highly recommend learning how to inspect your group gasket for cracks and hardening before a major failure happens mid-pour. In the future, I predict we will see smart espresso machines equipped with built-in pressure sensors that alert you when a gasket is losing its seal or when your boiler pressure is fluctuating. Until those smart systems become the standard, we have to rely on manual inspections and the right diagnostic tools.
The Tools That Made the Biggest Difference for Me
If you want to step up your precision, stop guessing your grind retention. Many home grinders trap up to two grams of stale coffee inside the burr chamber, which mixes with your fresh beans and ruins your extraction flow. I personally use a small silicone bellows on my hopper to force out those trapped grinds before every shot. Additionally, if you struggle with your portafilter sliding around on the counter while you prep your puck, investing in a high-quality tamping stand is incredibly helpful. For a long time, I debated whether a cheap plastic holder would suffice, but exploring the truth about plastic vs metal coffee tamping stands convinced me to upgrade to a heavy steel block. This single upgrade stabilized my puck prep and immediately cut down on lopsided extractions.
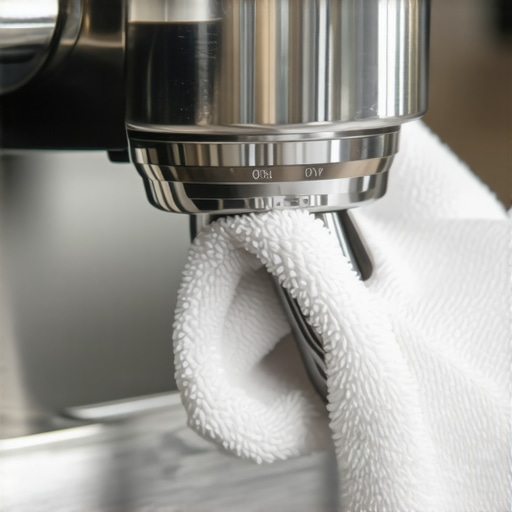
I highly encourage you to try one specific tip from today: tomorrow morning, completely dry your portafilter basket with a dedicated microfiber cloth before grinding, and keep your distribution tools bone dry. It is a tiny, zero-cost adjustment that will instantly stabilize your extraction canvas.
When I look back on my early years of trial and error, I realize that the journey to beautiful latte art is not a straight line. It is a series of small, incremental adjustments to your physical posture, your workspace preparation, and your daily maintenance. Once you stop treating espresso preparation like a random guessing game and start viewing it as a repeatable physical discipline, your results will change almost overnight.
The Hardest Lessons I Learned on My Journey to Symmetrical Pours
Reflecting on hundreds of crooked hearts and spilled milk, these are the core truths that transformed my morning routine from frustrating to flawless:
- The Pitcher Nose is Your Sightline: If your pitcher snout is even slightly off-line with your nose, your hand will automatically overcorrect, pulling your design to the side. Always align the pitcher spout directly with your nose before you tip.
- Dryness is a Non-negotiable: No matter how much money you spend, keeping your prep tools bone dry is critical. I wasted weeks of great coffee simply because I didn’t realize the problem with using a wet tamper on dry grounds was ruining my extraction from the very first second.
- Texture Trumps Design: You cannot pour a clean rosetta with soapy, bubbly milk. If you struggle to get that wet-paint texture, mastering how to stop your milk foam from being too dry will give you the liquid canvas you actually need to paint.
- Maintenance is Part of Technique: Your steam wand performance directly impacts your milk texture. Regularly clean your gear to ensure consistent steam pressure.
My Essential Toolkit for Better Espresso and Perfect Foam
If you want to stop guessing and start measuring, these are the specific tools and habits I personally rely on every single morning to keep my workflow consistent:
First, a heavy, stable tamping station is essential. Upgrading from a cheap plastic ring to a metal stand stabilized my horizontal tamping angle immediately. Second, a high-quality microfiber cloth dedicated solely to drying the portafilter basket before grinding has saved me from dozens of channeled extractions. Finally, I highly recommend keeping a dedicated nylon group head brush next to your machine; brushing away loose grounds after every single session preserves your group gasket and ensures a perfect, leak-free seal every time you brew.
Take the Lead on Your Next Morning Brew
The path to becoming a skilled home barista is filled with minor adjustments that yield major results. Don’t be discouraged by a few lopsided pours. Every single cup is an opportunity to refine your alignment, steady your hand, and perfect your extraction. By focusing on your body alignment and maintaining your machine, you will soon find yourself pouring symmetrical, cafe-quality art effortlessly. Mastering home espresso is a highly rewarding ritual, and you are already well on your way to mastering it.
Have you ever struggled with your designs drifting to the left or right of the mug? Let me know in the comments below—I would love to help you troubleshoot your pour!