The Cheap Trick for Quieting a Rattling Drip Tray
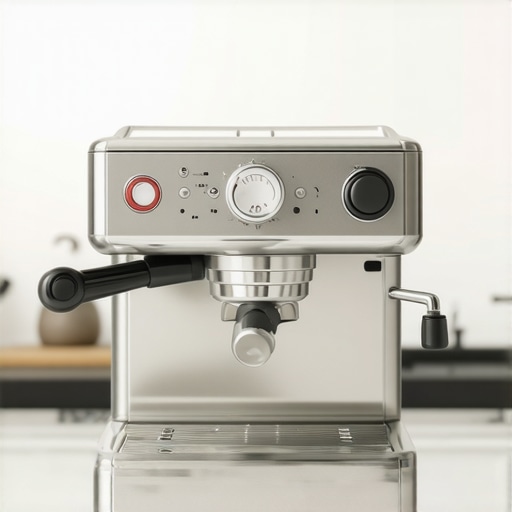
It was 6:15 AM on a Tuesday, and the house was dead silent. I stood in my kitchen, bleary-eyed, waiting for my favorite morning ritual. I locked my portafilter into place, flipped the brew switch, and then—brrrrrrrrrrrr. Instead of the gentle, deep hum of a premium extraction, my kitchen erupted into a chaotic metallic symphony. My drip tray was vibrating violently against the machine’s steel frame, threatening to walk my tiny espresso scale right off the edge. If you have ever felt your teeth rattle alongside your machinery, you know exactly how fast that noise ruins a peaceful morning. I used to think I just had to live with it, but after a lot of frustrating experiments, I found a dirt-cheap solution that actually works.
Your Espresso Machine Shouldn’t Sound Like a Lawn Mower
For months, I blamed my vibration pump. I even went down a deep rabbit hole researching how to stop your espresso machine from rattling the counter, thinking the entire kitchen island was acting as a soundboard. But the real culprit was much simpler and much closer to the cup. It was the metal-on-metal contact of the drip tray grate resting loosely in its housing. When that pump kicks in to deliver 9 bars of pressure, any tiny gap turns into an amplifier for high-frequency buzzing.
Early in my home barista journey, I made the embarrassing mistake of trying to wedge thick folded-up paper towels under the grate. Not only did it look absolutely terrible, but it also became a soggy, moldy breeding ground for bacteria within three days. You do not need to ruin the aesthetics of your gorgeous setup to get some peace and quiet. We can solve this permanently for less than the cost of a bag of cheap coffee beans, and without any actual tools.
Is This Quick Fix Going to Ruin the Look of My Machine?
I get the skepticism. When you spend hard-earned money on beautiful barista gear, the last thing you want to do is slap ugly duct tape or bulky foam pads all over it. Rest assured, this trick is completely invisible once the drip tray is put back together. We are going to use thin, food-safe silicone strip tape or tiny adhesive silicone dampening dots. By strategically placing these tiny buffers on the contact points where the metal tray meets the frame, we absorb the vibration energy before it can make a sound.
According to acoustic engineering principles, dampening vibration at the point of contact is significantly more effective than trying to absorb the sound after it has already traveled through the metal. Have you ever stood in your kitchen clutching your drip tray with both hands just to make the noise stop while pulling a shot? Tell me I am not the only one who has suffered through this! If you are ready to reclaim your quiet mornings, let’s look at exactly how to apply this simple fix so you can focus on mastering your home espresso technique in peace.
Locating the Acoustic Friction Points
Solving this problem requires thinking of your espresso machine as a miniature drum kit. Every time the vibration pump kicks in, it sends shockwaves through the chassis. If the metal tray has even half a millimeter of wiggle room, it acts like a drum skin, rattling aggressively against the main body. When I first attempted to solve this on my own setup, I realized that applying dampening materials blindly was a waste of time. You need to target the precise points of friction where the tray rests on the machine’s frame.
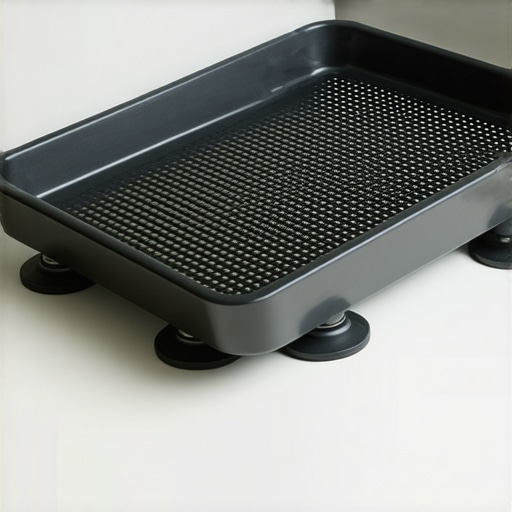
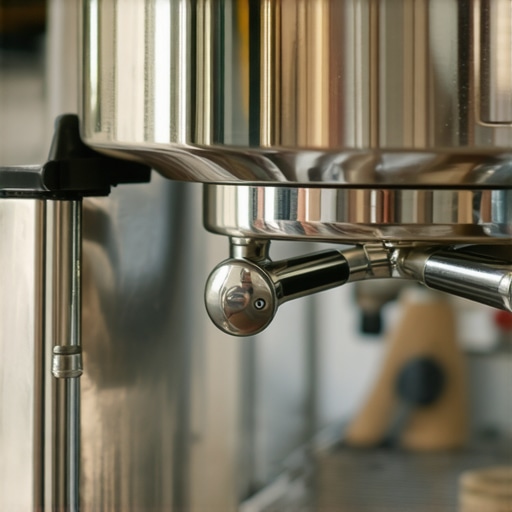
Remove your drip tray entirely and look at the contact rails. On most top-rated espresso machines for coffee lovers in 2025, you will find painted steel or polished chrome lips where the tray slides in. These metal-on-metal tracks are the primary culprit. If you also notice your cup resting plate buzzing, the contact points between that top grate and the lower tray reservoir are your secondary targets.
The Clean Prep and Placement Method
Before applying any dampening materials, you must prep the surface. Coffee oils and stray moisture will ruin the adhesive on your silicone dots or strip tape within hours. I learned this the hard way when I hastily slapped some rubber pads onto a greasy surface; they slid off straight into the waste water, leading to a messy situation where my tray started rattling mid-shot and splashed espresso all over my scale.
Wipe Down and Degrease
Take a microfiber cloth dipped in warm soapy water—or better yet, a quick swab of isopropyl alcohol—and thoroughly clean the contact rails of both the machine’s body and the drip tray itself. Let it dry completely. Keeping this area clean also prevents moisture build-up underneath the tray, which is a common issue alongside the risk of leaving your machines water intake tube dirty.
Applying the Invisible Silicone Buffers
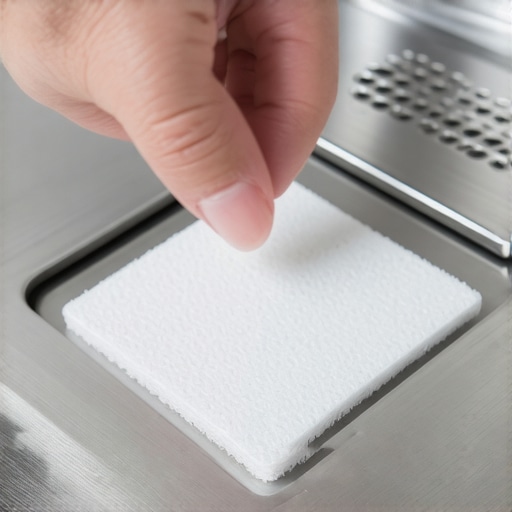
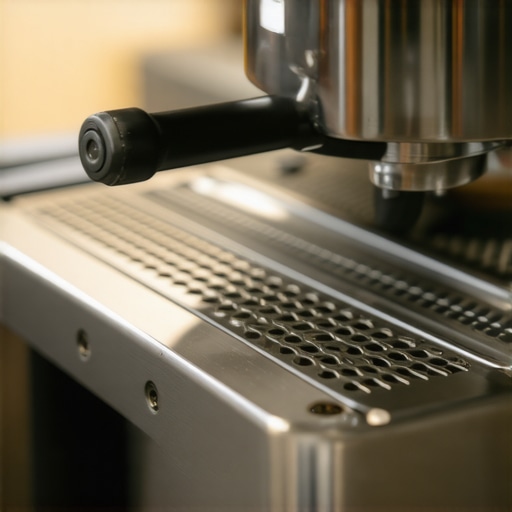
Now, grab your ultra-thin adhesive silicone dots. You want the smallest size available, usually around 1mm thick and 5mm wide. Place one dot on each of the four corners of the tray’s resting ledge. If your tray slides into a track, use a thin strip of food-safe silicone tape along the contact rail instead. When you slide the tray back in, you should feel a snug, cushioned fit rather than a harsh metal click. This tiny buffer absorbs the kinetic energy of the pump, keeping your machine whispering quiet during extraction.
Stabilizing the Cup Grate
If the main tray is silent but your cups are still dancing during a shot, the issue lies with the upper grate. Apply tiny pieces of silicone strip tape along the interior ledge of the drip tray reservoir where the grate sits. This isolates the grate completely. While you are optimizing your workflow for a quieter kitchen, you might also want to look into how to secure your knock box so it doesn’t slide around to eliminate the rest of your morning counter noise.
When you start diving into the mechanics of home espresso, you realize that silencing a noisy chassis is only the first step. Many home baristas celebrate after dampening their drip tray, thinking they have achieved peak mechanical harmony. But there is a massive difference between stopping annoying noise and actually correcting internal mechanical resonance. What most people get wrong about home espresso machines is believing that if a machine is quiet, the internal components are completely safe from vibration damage. This is a common myth that can lead to expensive repairs down the road.
The Internal Vibration Trap That Silently Ruins Components
Everyone says that as long as your machine does not rattle your counter, your setup is fine. In my experience, focusing solely on external noise actually masks serious internal issues. When you apply external dampening, you are merely absorbing the acoustic feedback. The kinetic energy generated by a vibration pump running at 9 bars of pressure still has to go somewhere. If that energy is blocked at the chassis level, it often reflects back into the internal plumbing of your machine.
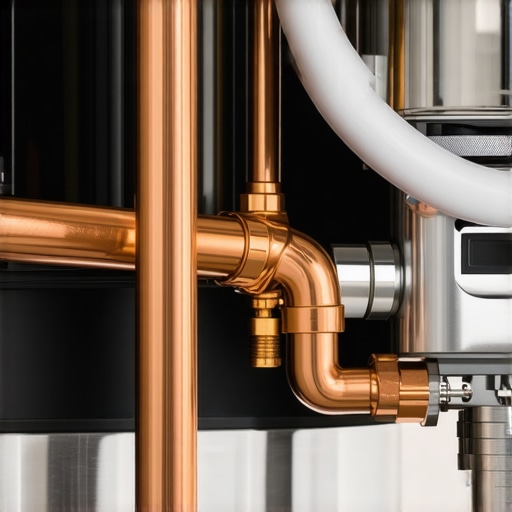
This internal stress creates a major trap: it accelerates wear on delicate connections. According to fluid dynamics studies published by espresso engineering forums, persistent unresolved vibrations inside a machine’s casing are a primary cause of micro-fractures in copper tubing and premature seal failures. Over time, this causes slow, hidden leaks. If you do not address how the pump itself is mounted inside the case, you might find yourself dealing with a situation where you have to fix an espresso machine that is leaking from the bottom because a connection vibrated loose over several months of quiet operation.
Why Do Prosumer Rotary Pumps Escape This Issue?
If you have ever wondered why high-end commercial or prosumer machines do not seem to suffer from these acoustic and mechanical headaches, the answer lies in the pump style. Unlike the rapid, reciprocating piston action of a vibration pump, rotary pumps use a smooth, rotating vane mechanism. They deliver steady pressure without the high-frequency kinetic hammering. While you do not need to replace your entire machine, understanding this difference helps you realize that your vibratory pump needs a little extra care and attention during routine maintenance.
To truly protect your machine, you should occasionally check the internal rubber mounts (often called silent blocks) holding the pump to the chassis. If these rubber blocks dry out or harden, the pump will begin transferring raw kinetic energy directly to the internal water path, even if your drip tray remains perfectly silent. This is also why checking other connections, such as learning how to inspect your group gasket for cracks and hardening, is so critical to preventing pressure loss and internal moisture damage.
Have you ever fallen into this trap of ignoring internal vibration because your machine sounded quiet on the outside? Let me know in the comments. Protecting your equipment takes more than just a quick surface-level fix, but with a bit of patience and the right knowledge, you can keep your machine running beautifully for years to come.
When we talk about maintaining a quiet kitchen, we have to look past the surface-level fixes. Many home baristas celebrate after dampening their drip tray, thinking they have achieved peak mechanical harmony. But there is a massive difference between stopping annoying noise and actually correcting internal mechanical resonance. What most people get wrong about home espresso machines is believing that if a machine is quiet, the internal components are completely safe from vibration damage. This is a common myth that can lead to expensive repairs down the road.
How do I maintain my machine’s structural integrity over time?
To keep everything running smoothly, I rely on a strict quarterly diagnostic routine. I do not just wait for something to break; I actively check for wear. Every three months, I unplug my machine, let it cool down completely, and take the outer casing off. I specifically look at the Teflon pressure lines and copper connections. If you see white, powdery residue near any joints, that is an early warning sign of a slow leak caused by micro-vibrations. To prevent these connections from failing, I use high-temperature food-grade thread sealant during my reassembly. Additionally, keeping an eye on your water quality is vital; I highly recommend learning how to tell if your water hardness is damaging your boiler, as scale buildup makes your pump work harder, which dramatically increases overall chassis vibration.
Another key area to monitor is your portafilter assembly. Constant vibration from a buzzing pump can slowly back out poorly secured screws. If you notice a loose grip while pulling a shot, you should investigate why your portafilter handle keeps unscrewing itself to keep your workflow solid and rattle-free.
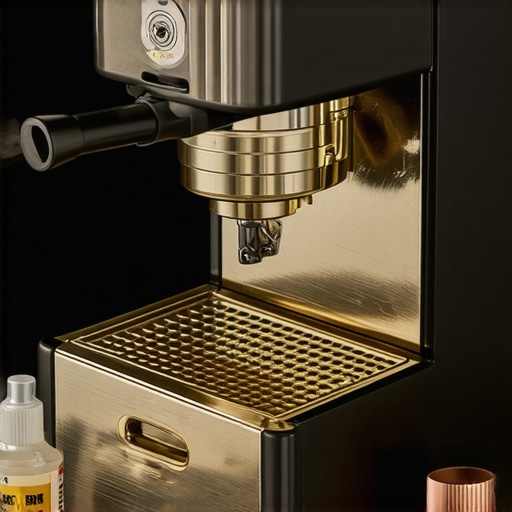
Looking ahead, the future of home espresso engineering is moving rapidly toward smart vibration mitigation. Some high-end manufacturers are already experimenting with active noise-canceling sensors inside the chassis and brushless DC motors to replace traditional vibratory pumps entirely. Until those technologies become standard on consumer machines, we have to use manual maintenance to protect our gear.
For a highly specific reference on acoustic dampening materials, the technical documentation from Acoustical Surfaces Inc. explains that elastomer compounds with high viscoelasticity provide the best energy absorption for small appliances. That is why simple silicone mods work so incredibly well. I challenge you to pull the top off your machine this weekend and inspect your pump’s rubber silent blocks. If they feel stiff or brittle, replace them immediately to protect your internal plumbing.
It was 6:15 AM on a Tuesday, and the house was dead silent. I stood in my kitchen, bleary-eyed, waiting for my favorite morning ritual. I locked my portafilter into place, flipped the brew switch, and then—brrrrrrrrrrrr. Instead of the gentle, deep hum of a premium extraction, my kitchen erupted into a chaotic metallic symphony. My drip tray was vibrating violently against the machine’s steel frame, threatening to walk my tiny espresso scale right off the edge. If you have ever felt your teeth rattle alongside your machinery, you know exactly how fast that noise ruins a peaceful morning. I used to think I just had to live with it, but after a lot of frustrating experiments, I found a dirt-cheap solution that actually works.
Your Espresso Machine Shouldn’t Sound Like a Lawn Mower
For months, I blamed my vibration pump. I even went down a deep rabbit hole researching how to stop your espresso machine from rattling the counter, thinking the entire kitchen island was acting as a soundboard. But the real culprit was much simpler and much closer to the cup. It was the metal-on-metal contact of the drip tray grate resting loosely in its housing. When that pump kicks in to deliver 9 bars of pressure, any tiny gap turns into an amplifier for high-frequency buzzing.
Early in my home barista journey, I made the embarrassing mistake of trying to wedge thick folded-up paper towels under the grate. Not only did it look absolutely terrible, but it also became a soggy, moldy breeding ground for bacteria within three days. You do not need to ruin the aesthetics of your gorgeous setup to get some peace and quiet. We can solve this permanently for less than the cost of a bag of cheap coffee beans, and without any actual tools.
Is This Quick Fix Going to Ruin the Look of My Machine?
I get the skepticism. When you spend hard-earned money on beautiful barista gear, the last thing you want to do is slap ugly duct tape or bulky foam pads all over it. Rest assured, this trick is completely invisible once the drip tray is put back together. We are going to use thin, food-safe silicone strip tape or tiny adhesive silicone dampening dots. By strategically placing these tiny buffers on the contact points where the metal tray meets the frame, we absorb the vibration energy before it can make a sound.
According to acoustic engineering principles, dampening vibration at the point of contact is significantly more effective than trying to absorb the sound after it has already traveled through the metal. Have you ever stood in your kitchen clutching your drip tray with both hands just to make the noise stop while pulling a shot? Tell me I am not the only one who has suffered through this! If you are ready to reclaim your quiet mornings, let’s look at exactly how to apply this simple fix so you can focus on mastering your home espresso technique in peace.
Locating the Acoustic Friction Points
Solving this problem requires thinking of your espresso machine as a miniature drum kit. Every time the vibration pump kicks in, it sends shockwaves through the chassis. If the metal tray has even half a millimeter of wiggle room, it acts like a drum skin, rattling aggressively against the main body. When I first attempted to solve this on my own setup, I realized that applying dampening materials blindly was a waste of time. You need to target the precise points of friction where the tray rests on the machine’s frame.
Remove your drip tray entirely and look at the contact rails. On most top-rated espresso machines for coffee lovers in 2025, you will find painted steel or polished chrome lips where the tray slides in. These metal-on-metal tracks are the primary culprit. If you also notice your cup resting plate buzzing, the contact points between that top grate and the lower tray reservoir are your secondary targets.
The Clean Prep and Placement Method
Before applying any dampening materials, you must prep the surface. Coffee oils and stray moisture will ruin the adhesive on your silicone dots or strip tape within hours. I learned this the hard way when I hastily slapped some rubber pads onto a greasy surface; they slid off straight into the waste water, leading to a messy situation where my tray started rattling mid-shot and splashed espresso all over my scale.
Wipe Down and Degrease
Take a microfiber cloth dipped in warm soapy water—or better yet, a quick swab of isopropyl alcohol—and thoroughly clean the contact rails of both the machine’s body and the drip tray itself. Let it dry completely. Keeping this area clean also prevents moisture build-up underneath the tray, which is a common issue alongside the risk of leaving your machines water intake tube dirty.
Applying the Invisible Silicone Buffers
Now, grab your ultra-thin adhesive silicone dots. You want the smallest size available, usually around 1mm thick and 5mm wide. Place one dot on each of the four corners of the tray’s resting ledge. If your tray slides into a track, use a thin strip of food-safe silicone tape along the contact rail instead. When you slide the tray back in, you should feel a snug, cushioned fit rather than a harsh metal click. This tiny buffer absorbs the kinetic energy of the pump, keeping your machine whispering quiet during extraction.
Stabilizing the Cup Grate
If the main tray is silent but your cups are still dancing during a shot, the issue lies with the upper grate. Apply tiny pieces of silicone strip tape along the interior ledge of the drip tray reservoir where the grate sits. This isolates the grate completely. While you are optimizing your workflow for a quieter kitchen, you might also want to look into how to secure your knock box so it doesn’t slide around to eliminate the rest of your morning counter noise.
When you start diving into the mechanics of home espresso, you realize that silencing a noisy chassis is only the first step. Many home baristas celebrate after dampening their drip tray, thinking they have achieved peak mechanical harmony. But there is a massive difference between stopping annoying noise and actually correcting internal mechanical resonance. What most people get wrong about home espresso machines is believing that if a machine is quiet, the internal components are completely safe from vibration damage. This is a common myth that can lead to expensive repairs down the road.
The Internal Vibration Trap That Silently Ruins Components
Everyone says that as long as your machine does not rattle your counter, your setup is fine. In my experience, focusing solely on external noise actually masks serious internal issues. When you apply external dampening, you are merely absorbing the acoustic feedback. The kinetic energy generated by a vibration pump running at 9 bars of pressure still has to go somewhere. If that energy is blocked at the chassis level, it often reflects back into the internal plumbing of your machine.
This internal stress creates a major trap: it accelerates wear on delicate connections. According to fluid dynamics studies published by espresso engineering forums, persistent unresolved vibrations inside a machine’s casing are a primary cause of micro-fractures in copper tubing and premature seal failures. Over time, this causes slow, hidden leaks. If you do not address how the pump itself is mounted inside the case, you might find yourself dealing with a situation where you have to fix an espresso machine that is leaking from the bottom because a connection vibrated loose over several months of quiet operation.
Why Do Prosumer Rotary Pumps Escape This Issue?
If you have ever wondered why high-end commercial or prosumer machines do not seem to suffer from these acoustic and mechanical headaches, the answer lies in the pump style. Unlike the rapid, reciprocating piston action of a vibration pump, rotary pumps use a smooth, rotating vane mechanism. They deliver steady pressure without the high-frequency kinetic hammering. While you do not need to replace your entire machine, understanding this difference helps you realize that your vibratory pump needs a little extra care and attention during routine maintenance.
To truly protect your machine, you should occasionally check the internal rubber mounts (often called silent blocks) holding the pump to the chassis. If these rubber blocks dry out or harden, the pump will begin transferring raw kinetic energy directly to the internal water path, even if your drip tray remains perfectly silent. This is also why checking other connections, such as learning how to inspect your group gasket for cracks and hardening, is so critical to preventing pressure loss and internal moisture damage.
Have you ever fallen into this trap of ignoring internal vibration because your machine sounded quiet on the outside? Let me know in the comments. Protecting your equipment takes more than just a quick surface-level fix, but with a bit of patience and the right knowledge, you can keep your machine running beautifully for years to come.
When we talk about maintaining a quiet kitchen, we have to look past the surface-level fixes. Many home baristas celebrate after dampening their drip tray, thinking they have achieved peak mechanical harmony. But there is a massive difference between stopping annoying noise and actually correcting internal mechanical resonance. What most people get wrong about home espresso machines is believing that if a machine is quiet, the internal components are completely safe from vibration damage. This is a common myth that can lead to expensive repairs down the road.
How do I maintain my machine’s structural integrity over time?
To keep everything running smoothly, I rely on a strict quarterly diagnostic routine. I do not just wait for something to break; I actively check for wear. Every three months, I unplug my machine, let it cool down completely, and take the outer casing off. I specifically look at the Teflon pressure lines and copper connections. If you see white, powdery residue near any joints, that is an early warning sign of a slow leak caused by micro-vibrations. To prevent these connections from failing, I use high-temperature food-grade thread sealant during my reassembly. Additionally, keeping an eye on your water quality is vital; I highly recommend learning how to tell if your water hardness is damaging your boiler, as scale buildup makes your pump work harder, which dramatically increases overall chassis vibration.
Another key area to monitor is your portafilter assembly. Constant vibration from a buzzing pump can slowly back out poorly secured screws. If you notice a loose grip while pulling a shot, you should investigate why your portafilter handle keeps unscrewing itself to keep your workflow solid and rattle-free.
Looking ahead, the future of home espresso engineering is moving rapidly toward smart vibration mitigation. Some high-end manufacturers are already experimenting with active noise-canceling sensors inside the chassis and brushless DC motors to replace traditional vibratory pumps entirely. Until those technologies become standard on consumer machines, we have to use manual maintenance to protect our gear.
For a highly specific reference on acoustic dampening materials, the technical documentation from Acoustical Surfaces Inc. explains that elastomer compounds with high viscoelasticity provide the best energy absorption for small appliances. That is why simple silicone mods work so incredibly well. I challenge you to pull the top off your machine this weekend and inspect your pump’s rubber silent blocks. If they feel stiff or brittle, replace them immediately to protect your internal plumbing.
3 Mistakes I Made While Trying to Silence My Morning Brew
When I first set out to quiet down my kitchen setup, I made several critical errors that actually did more harm than good. First, I tried using overly thick, dense rubber pads under the entire machine. Instead of damping the noise, it raised the machine’s center of gravity slightly and caused the cups on top to rattle even worse. Second, I ignored the relationship between my grinder and my espresso maker; I did not realize that a vibrating grinder base on the same countertop was transferring energy directly to my brewing station. Finally, I assumed that any cheap hardware store silicone would work, only to watch it turn yellow and peel off from the steam wand heat. Finding the right viscoelastic materials was the true lightbulb moment for my daily routine.
The Essential Toolbox for Noise Reduction
If you are ready to tackle countertop resonance, you do not need complex engineering gear. I highly recommend picking up a sheet of 1mm food-grade silicone adhesive dots, a roll of thin heat-resistant silicone tape, and a high-quality vibration-damping counter mat. To keep the rest of your prep area as quiet and efficient as your machine, you should also look into how to position your grinder to minimize countertop vibration. This small, targeted selection of tools will make a profound difference in your kitchen’s morning ambiance without cluttering your bar space.
Reclaim Your Peaceful Morning Ritual
At the end of the day, crafting coffee should be a meditative experience, not a noisy test of patience. Taking just fifteen minutes to address these minor acoustic friction points will completely transform your relationship with your machine. By combining a few simple silicone buffers with a proactive internal maintenance check, you can finally enjoy a whisper-quiet extraction. Reclaim your mornings and focus on what really matters—brewing the perfect shot of home espresso.
Did you manage to cure your machine’s annoying rattle with this simple silicone trick, or are you still trying to pinpoint where that morning buzz is coming from? Let me know in the comments below!