How to Fix an Espresso Machine That Is Leaking from the Bottom
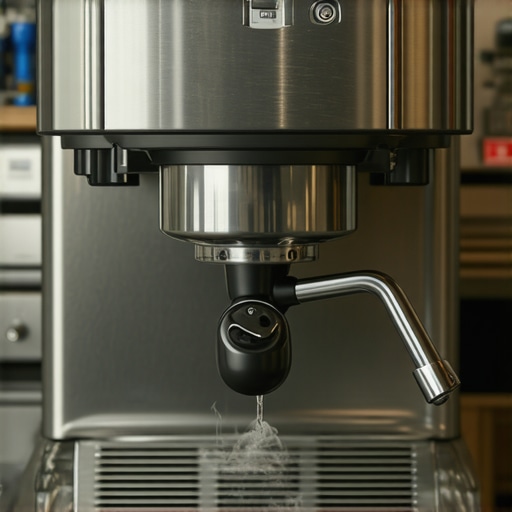
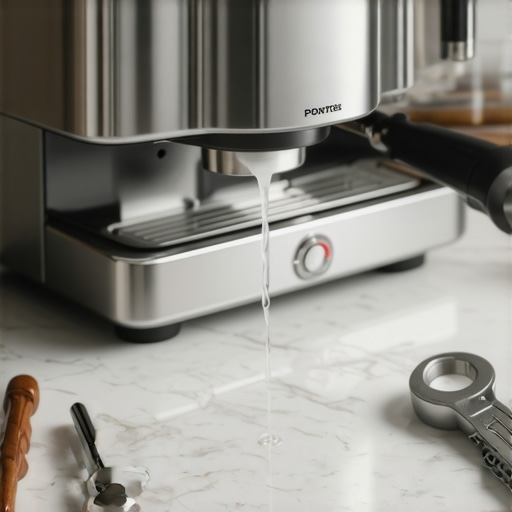
I remember it like it was yesterday—actually, it was a Tuesday. I walked into the kitchen, bleary-eyed and desperate for that first hit of caffeine, only to step right into a cold, brown puddle. My heart sank. I’d spent a small fortune on my setup, and here it was, weeping onto my hardwood floors. My first instinct? Total panic. I thought the boiler had literally exploded. I ended up making a classic rookie mistake: I just shoved a towel under the base and kept brewing for a week, hoping it would somehow “self-heal.” Spoiler alert: Italian engineering does not have an immune system. That delay turned a simple gasket swap into a much messier project involving warped wood and a very unhappy spouse. Today, I am going to help you stop that leak before it ruins your cabinetry or your morning. We are going to find out exactly why your machine is acting like a leaky faucet and how you can fix it without calling an expensive technician.
Is my machine basically a paperweight now?
It is a valid fear. You see water creeping out from the base and assume the internal plumbing has catastrophically failed. But more often than not, the culprit is something incredibly simple—like a loose silicone hose or a seal that has simply reached its retirement age. If you have been mastering the art of home espresso, you already know that these machines are high-pressure environments. A tiny leak is just the machine’s way of telling you it needs a little TLC, not a trip to the local landfill. According to Consumer Reports, small appliance leaks are among the most common reasons for premature replacement, yet over 60% of these issues are solvable with basic DIY maintenance.
My Kitchen Floor Became a Lake This Morning
When I first started my journey, I actually thought why the drip tray was full was the only water-related problem I had to worry about. I did not realize that a leak originating from the bottom of the chassis is a totally different beast. One of my biggest early blunders was assuming that if I just tightened my portafilter handle too far, I could stop any water from escaping. In reality, I was just crushing the group gasket and making the internal pressure build-up even more erratic. Don’t let your machine become a statistic. Have you ever looked under your machine only to find a surprise pond waiting for you? It is frustrating, but we can fix this. Shoot me a message if you’ve ever felt that ‘sinky’ feeling in your stomach seeing a wet counter!
Stop Guessing and Start Looking Under the Hood
The first step isn’t grabbing a pipe wrench; it’s being a bit of a detective. You need to know if the water is clear or if it is coffee-colored. This tells us if the leak is happening before or after the coffee grounds. If you notice the reason your portafilter gasket is getting brittle, that is a prime suspect for water that bypasses the group head and runs down the side of the machine. But if the water is fresh and cold, we are likely looking at the reservoir seating or the intake lines. Let’s roll up our sleeves and get into the guts of the machine to find the source.
Start by drying every square inch of your countertop and the machine’s exterior. It sounds obvious, but you cannot find a new leak in an old puddle. Once it is bone dry, place a single sheet of paper towel under the machine and run a blind backflush or a standard shot. If the paper towel stays dry, you’re likely dealing with a reservoir seating issue; if it gets soaked, the problem is internal and under pressure. This is the easy way to tell if your pump is sucking air or if a high-pressure line has finally given up the ghost.
Pinpoint the source before you grab the screwdriver
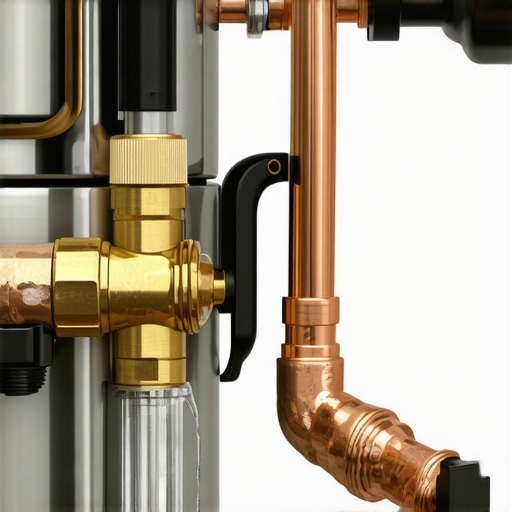
Think of your espresso machine like a miniature city’s plumbing system. You have the reservoir (the water tower), the pump (the station), and the boiler (the treatment plant). If water is clear and cold, the leak is happening at the ‘water tower’ level. This usually means the silicone intake hose has slipped or the rubber gasket at the bottom of the tank has flattened out. I remember tearing apart an old Rancilio Silvia for three hours, convinced a copper pipe had cracked, only to realize the water tank wasn’t pushed down all the way. I felt like a total amateur, but it taught me that the simplest solution is usually the right one. Before you panic about the boiler, check if why you should never leave water in your reservoir overnight has led to any slime or algae buildup that might be preventing a clean seal at the intake valve.
Check the reservoir seat and intake lines
If the leak is coming from the very back of the machine, it is almost always the reservoir O-ring. These little rubber circles are the unsung heroes of your morning caffeine routine. Over time, they get dry and brittle. You can often revive them with a tiny dab of food-grade bellows or Molykote 111 lubricant. If the hose itself is leaking, it’s usually at the point where it stretches over a plastic barb. Over hundreds of heat cycles, the plastic expands and the silicone loses its grip. The fix? Trim half an inch off the end of the hose and re-seat it for a fresh, tight fit. While you’re in there, make sure you aren’t dealing with how to stop your water tank from growing algae, as organic buildup can actually create gaps in these seals.
Look for the telltale white crust
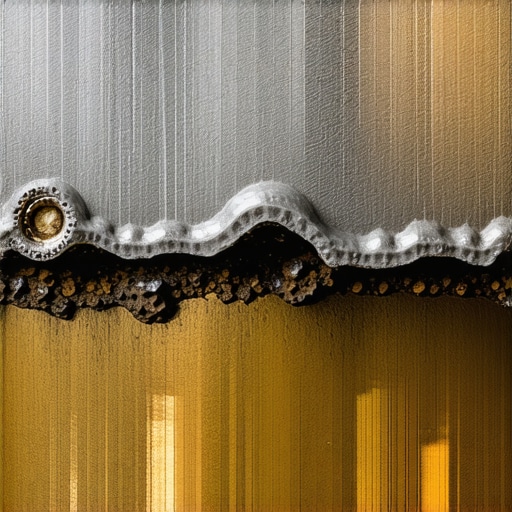
If you open the casing and see what looks like tiny white stalactites growing on a brass fitting, you’ve found your culprit. That is scale buildup from a slow, weeping leak. When water escapes a hot fitting, it evaporates instantly, leaving the minerals behind. This crust eventually acts like a wedge, prying the connection even further apart. This is a common symptom when how to tell if your water hardness is damaging your boiler becomes a reality rather than a warning. You’ll need to depressurize the machine, unscrew the fitting, clean the threads, and potentially apply some Teflon tape or a new copper crush washer. This is also a great time to ensure you know how to replace a group gasket without scratching the chrome, as a leaky group head often mimics an internal chassis leak by allowing water to run along the inside of the frame before dripping out the bottom.
Stop the vibration from loosening your fittings
Sometimes a leak isn’t caused by a failure of the part, but by the sheer violence of the pump. Vibratory pumps are notorious for shaking internal components until a nut literally backs itself off a thread. If your machine sounds like a jackhammer, you need to learn how to stop your espresso machine from rattling the counter. By dampening those internal vibrations, you aren’t just saving your ears; you are preventing the constant micro-movements that eventually turn a tight seal into a leaky one. Check every nut and bolt you can see; if it turns easily with your fingers, it was about five morning lattes away from causing a flood.
Most people think they are doing their machine a favor by using the purest water possible. If I had a nickel for every time a reader told me they switched to 100% distilled water to prevent scale leaks, I’d be brewing on a high-end commercial unit by now. Here is the contrarian truth: distilled water is actually hungry. Without minerals, it becomes chemically aggressive, leaching metals from your boiler and eventually causing pinhole leaks that are impossible to patch. You aren’t preventing a leak; you’re inviting a structural failure. According to the Specialty Coffee Association (SCA) water quality handbook, coffee extraction requires a specific mineral balance—typically 75–250 mg/L of total dissolved solids—to protect the equipment and ensure flavor. When you ignore this, you’re making the mistake of using distilled water in your boiler that leads to more than just bad taste; it leads to a total system meltdown. This is one of those cases where the truth about using distilled water in your machine is much more complex than the marketing on the bottle suggests.
Then there is the gadget trap. We spend a fortune on choosing the best barista gear, thinking precision solves every mechanical flaw. But I’ve seen enthusiasts spend so much time grooming the puck that they actually create air pockets. You might find that why your WDT tool is actually causing more channeling is because you’re over-processing the grounds. This leads to uneven pressure, which forces water out of the weakest points of your group head, often mimicking a gasket leak when it’s actually just a back-pressure blowout. Have you ever fallen into this trap of over-complicating the prep only to have a messier result? Let me know in the comments. We get so caught up in the accessories that we forget the basic mechanics of how water moves through the portafilter.
Why does my group head temperature drop mid-shot?
This is a nuance many prosumer owners miss. You see a steady PID reading on the display, but the espresso is sour and thin. Often, the reason your group head temperature drops mid-shot isn’t a heater failure; it’s a flow rate issue caused by an internal bypass. If your expansion valve is stuck open or adjusted incorrectly, cold water from the reservoir is flooding the system too fast. Learning how to adjust the expansion valve on your prosumer machine is the secret level of maintenance that separates the hobbyists from the experts. It keeps the pressure—and the temperature—exactly where it needs to be for that perfect syrupy extraction.
One final oops to watch for involves your puck preparation routine. Specifically, the problem with using a wet tamper on dry grounds can lead to a world of frustration. It seems minor, but that tiny bit of moisture creates a seal on the surface that prevents even saturation, leading to erratic pressure spikes that test your machine’s internal seals. If you’re already dealing with a minor leak, these spikes will turn a drip into a flood. If you are still looking for your first serious setup, make sure to check out the top rated espresso machines for coffee lovers in 2025 to find a unit that is as durable as it is beautiful.
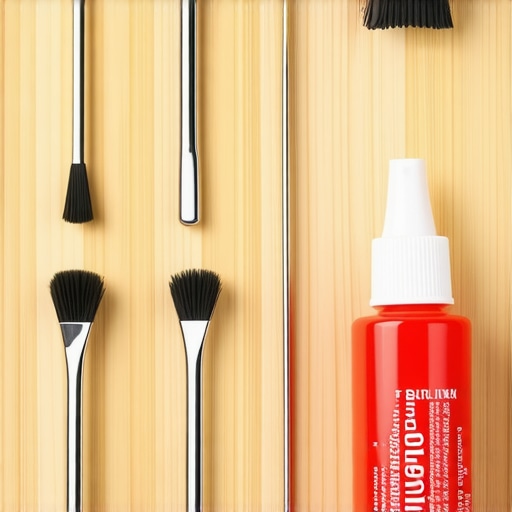
Beyond just fixing a leak, you need a toolkit that does not make the job harder. I used to use a generic kitchen sponge and a butter knife to pry out gaskets—do not do that. You will scratch the chrome and hate yourself for it. I now swear by a dedicated group head brush and a set of stainless steel dental picks. Why dental picks? Because they are the only thing that can grab a stuck O-ring or debris without marring the brass group. If you are serious about your gear, you should check out the best routine for a weekend deep clean to prevent these issues before they start. And do not ignore your grinder in this maintenance journey. Your machine might be the heart, but the grinder is the brain. If you how to select the perfect coffee grinder for your brew, you are already ahead of the curve, but even the best burrs need love. I have found that the trick for getting ground coffee out of tight corners often prevents that stale oil buildup that eventually gums up the motor. I once had a grinder start screaming like a banshee because I ignored a tiny bit of debris; knowing how to fix a squeaky grinder adjustment lever saved me a massive repair bill.
How can I keep my espresso setup running for a decade?
It comes down to a rhythm, not a once-a-year panic. Every three months, I pull the shower screen. Every six months, I swap the group gasket—even if it is not leaking yet. It is like changing the oil in your car; if you wait for the warning light to come on, the damage is already done. As noted by the experts at La Marzocco Home in their technical maintenance manuals, preventative replacement of wear-and-tear parts like gaskets and vacuum breakers is the only way to ensure 99% uptime for your machine. This is especially true if you are mastering the art of home espresso where consistency is your best friend. In the next few years, I predict we are going to see a massive shift toward smart maintenance. We are already seeing machines that monitor water hardness in real-time and ping your phone when the scale reaches a critical level. It will take the guesswork out of the is-it-leaking game. Until then, you have to be the sensor. If you have just bought a new unit, make sure you know the best way to season new grinder burrs fast so you are not chasing your tail with inconsistent shots for the first month. My challenge to you this week: Do not just wipe the counter. Actually take five minutes to look inside your reservoir and under the drip tray with a flashlight. Catching one tiny drip today saves you a flooded kitchen tomorrow.
I remember it like it was yesterday—actually, it was a Tuesday. I walked into the kitchen, bleary-eyed and desperate for that first hit of caffeine, only to step right into a cold, brown puddle. My heart sank. I’d spent a small fortune on my setup, and here it was, weeping onto my hardwood floors. My first instinct? Total panic. I thought the boiler had literally exploded. I ended up making a classic rookie mistake: I just shoved a towel under the base and kept brewing for a week, hoping it would somehow “self-heal.” Spoiler alert: Italian engineering does not have an immune system. That delay turned a simple gasket swap into a much messier project involving warped wood and a very unhappy spouse. Today, I am going to help you stop that leak before it ruins your cabinetry or your morning. We are going to find out exactly why your machine is acting like a leaky faucet and how you can fix it without calling an expensive technician.
Is my machine basically a paperweight now?
It is a valid fear. You see water creeping out from the base and assume the internal plumbing has catastrophically failed. But more often than not, the culprit is something incredibly simple—like a loose silicone hose or a seal that has simply reached its retirement age. If you have been mastering the art of home espresso, you already know that these machines are high-pressure environments. A tiny leak is just the machine’s way of telling you it needs a little TLC, not a trip to the local landfill. According to Consumer Reports, small appliance leaks are among the most common reasons for premature replacement, yet over 60% of these issues are solvable with basic DIY maintenance.
My Kitchen Floor Became a Lake This Morning
When I first started my journey, I actually thought why the drip tray was full was the only water-related problem I had to worry about. I did not realize that a leak originating from the bottom of the chassis is a totally different beast. One of my biggest early blunders was assuming that if I just tightened my portafilter handle too far, I could stop any water from escaping. In reality, I was just crushing the group gasket and making the internal pressure build-up even more erratic. Don’t let your machine become a statistic. Have you ever looked under your machine only to find a surprise pond waiting for you? It is frustrating, but we can fix this. Shoot me a message if you’ve ever felt that ‘sinky’ feeling in your stomach seeing a wet counter!
Stop Guessing and Start Looking Under the Hood
The first step isn’t grabbing a pipe wrench; it’s being a bit of a detective. You need to know if the water is clear or if it is coffee-colored. This tells us if the leak is happening before or after the coffee grounds. If you notice the reason your portafilter gasket is getting brittle, that is a prime suspect for water that bypasses the group head and runs down the side of the machine. But if the water is fresh and cold, we are likely looking at the reservoir seating or the intake lines. Let’s roll up our sleeves and get into the guts of the machine to find the source.
Start by drying every square inch of your countertop and the machine’s exterior. It sounds obvious, but you cannot find a new leak in an old puddle. Once it is bone dry, place a single sheet of paper towel under the machine and run a blind backflush or a standard shot. If the paper towel stays dry, you’re likely dealing with a reservoir seating issue; if it gets soaked, the problem is internal and under pressure. This is the easy way to tell if your pump is sucking air or if a high-pressure line has finally given up the ghost.
Pinpoint the source before you grab the screwdriver
Think of your espresso machine like a miniature city’s plumbing system. You have the reservoir (the water tower), the pump (the station), and the boiler (the treatment plant). If water is clear and cold, the leak is happening at the ‘water tower’ level. This usually means the silicone intake hose has slipped or the rubber gasket at the bottom of the tank has flattened out. I remember tearing apart an old Rancilio Silvia for three hours, convinced a copper pipe had cracked, only to realize the water tank wasn’t pushed down all the way. I felt like a total amateur, but it taught me that the simplest solution is usually the right one. Before you panic about the boiler, check if why you should never leave water in your reservoir overnight has led to any slime or algae buildup that might be preventing a clean seal at the intake valve.
Check the reservoir seat and intake lines
If the leak is coming from the very back of the machine, it is almost always the reservoir O-ring. These little rubber circles are the unsung heroes of your morning caffeine routine. Over time, they get dry and brittle. You can often revive them with a tiny dab of food-grade bellows or Molykote 111 lubricant. If the hose itself is leaking, it’s usually at the point where it stretches over a plastic barb. Over hundreds of heat cycles, the plastic expands and the silicone loses its grip. The fix? Trim half an inch off the end of the hose and re-seat it for a fresh, tight fit. While you’re in there, make sure you aren’t dealing with how to stop your water tank from growing algae, as organic buildup can actually create gaps in these seals.
Look for the telltale white crust
If you open the casing and see what looks like tiny white stalactites growing on a brass fitting, you’ve found your culprit. That is scale buildup from a slow, weeping leak. When water escapes a hot fitting, it evaporates instantly, leaving the minerals behind. This crust eventually acts like a wedge, prying the connection even further apart. This is a common symptom when how to tell if your water hardness is damaging your boiler becomes a reality rather than a warning. You’ll need to depressurize the machine, unscrew the fitting, clean the threads, and potentially apply some Teflon tape or a new copper crush washer. This is also a great time to ensure you know how to replace a group gasket without scratching the chrome, as a leaky group head often mimics an internal chassis leak by allowing water to run along the inside of the frame before dripping out the bottom.
Stop the vibration from loosening your fittings
Sometimes a leak isn’t caused by a failure of the part, but by the sheer violence of the pump. Vibratory pumps are notorious for shaking internal components until a nut literally backs itself off a thread. If your machine sounds like a jackhammer, you need to learn how to stop your espresso machine from rattling the counter. By dampening those internal vibrations, you aren’t just saving your ears; you are preventing the constant micro-movements that eventually turn a tight seal into a leaky one. Check every nut and bolt you can see; if it turns easily with your fingers, it was about five morning lattes away from causing a flood.
Most people think they are doing their machine a favor by using the purest water possible. If I had a nickel for every time a reader told me they switched to 100% distilled water to prevent scale leaks, I’d be brewing on a high-end commercial unit by now. Here is the contrarian truth: distilled water is actually hungry. Without minerals, it becomes chemically aggressive, leaching metals from your boiler and eventually causing pinhole leaks that are impossible to patch. You aren’t preventing a leak; you’re inviting a structural failure. According to the Specialty Coffee Association (SCA) water quality handbook, coffee extraction requires a specific mineral balance—typically 75–250 mg/L of total dissolved solids—to protect the equipment and ensure flavor. When you ignore this, you’re making the mistake of using distilled water in your boiler that leads to more than just bad taste; it leads to a total system meltdown. This is one of those cases where the truth about using distilled water in your machine is much more complex than the marketing on the bottle suggests.
Three Hard Truths About Leaky Gaskets and Loose Fittings
After years of tinkering with every type of setup imaginable, I have realized that the biggest threat to your machine is not wear and tear—it is overcorrection. I used to think that if a fitting was leaking, I just needed to apply more muscle. In the world of high-end espresso machines, that is a recipe for a snapped copper pipe or a stripped brass thread. Hand-tight plus a quarter turn is usually the golden rule. Another thing experts rarely mention is the ‘silent leak.’ This is the steam that escapes from a vacuum breaker and condenses inside the machine until it pools at the bottom. If you hear a faint hissing, don’t ignore it just because the counter is dry. It is only a matter of time before that steam turns back into a puddle. Finally, remember that your internal electronics are incredibly sensitive. If you have been trying to diagnose a faulty espresso machine thermostat, a tiny water spray from a loose line could be the real reason your readings are jumping all over the place. Moisture and high-voltage wiring are never friends.
The Maintenance Kit You Cannot Live Without
To keep your setup pristine, you need more than just a screwdriver. I have curated a specific kit that stays right next to my machine. First, a high-quality set of stainless steel dental picks is non-negotiable for removing old gaskets. Second, I always keep food-grade silicone grease (Molykote 111) handy to keep O-rings supple. When you are choosing the best barista gear for your maintenance routine, don’t skimp on a stubby Phillips head screwdriver; most internal components are tucked into corners a standard driver can’t reach. If you are also managing a grinder, remember that how to select the perfect coffee grinder for your brew involves looking at how easy it is to open for cleaning. I trust these tools because they have saved me from thousands of dollars in repair bills over the last decade.
Take Charge of Your Home Espresso Lab
Fixing a leak is more than just a chore; it is the moment you truly become the master of your morning routine. When you understand the internals of your setup, you stop being a passive user and start being a true enthusiast. Don’t let a small drip discourage you from the hobby. Whether you are working on entry-level gear or the top rated espresso machines for coffee lovers in 2025, a little bit of proactive care goes a long way. Stick to the best routine for a weekend deep clean and you will likely catch every potential leak before it ever touches your kitchen floor. Your machine works hard for you every single morning—now it’s time to return the favor. Have you ever discovered a leak right when you were about to pull a shot, and how did you handle the panic? Let me know in the comments below!