The freezer trick for cleaner grinding on hot days
Ever been in the middle of your morning brew, only to find your grinder churning out powdery mess instead of those perfect, uniform grounds? I remember the first time it happened to me—hot summer days, my new burr grinder humming along, and suddenly, a stubborn buildup causing uneven grind sizes. That terrible, gritty bitterness creeping into my espresso was the awakening moment. It was as if the heat was sabotaging my entire process, turning what should have been a blissful ritual into a frustrating chore.
First, Let’s Talk About the Problem
Hot weather can cause your coffee beans and grinder components to warm up, leading to clumping and uneven grinding. When beans get too warm, especially on those scorching summer afternoons, they tend to stick together, making it hard for your grinder to produce consistent grounds. This inconsistency can lead to over-extraction or under-extraction, both ruining the taste. I found myself fighting with my grinder more often during heatwaves, trying to get a decent shot, but with limited success.
Can a Simple Trick Make a Difference?
That’s when I stumbled upon a surprisingly effective solution: the freezer trick. By pre-cooling my beans AND the grinder parts in the freezer for about 15 minutes, I noticed a significant improvement. The cooler beans grind more cleanly, producing a more uniform particle size, and the grinder itself stays cooler longer. It’s a win-win that doesn’t require fancy equipment or expensive modifications. If you’ve faced similar issues, this method might just be the game-changer you need.
Why Temperature Control Matters More Than You Think
According to the Specialty Coffee Association, heat can adversely affect both the beans and the grinding process, leading to flavor distortions and inconsistent shots. Keeping your beans cool before grinding is akin to preserving their freshness and flavor integrity. Plus, it reduces the risk of grind clumping, which is a common culprit behind channeling and uneven extraction. I can’t tell you how many times I’ve ruined a shot simply because my beans and grinder were too warm to work properly.
Before integrating this into your routine, I want to share a mistake I made early on: I tried putting semi-warm beans directly into my grinder, thinking I’d save time. Big mistake. Not only did the beans clump, but the heat also damaged the grinder burrs over time. Learning from that, I now ensure everything is cooled—beans, grinder parts, and even the portafilter—before starting. This small adjustment has significantly improved my coffee quality on those blazing days.
Now, are you tired of battling grind inconsistencies during the summer heat? If so, stick around. We’ll dive into step-by-step instructions on how to implement this simple freezer trick and how it can make your grind more precise, your shots more balanced, and your mornings more enjoyable. Want to explore more expert tips? Check out top-rated espresso machines for 2025 or learn about the best barista gear for enthusiasts. Let’s take control over the heat—your perfect cup awaits.
Pre-chill Your Beans and Grinder Parts
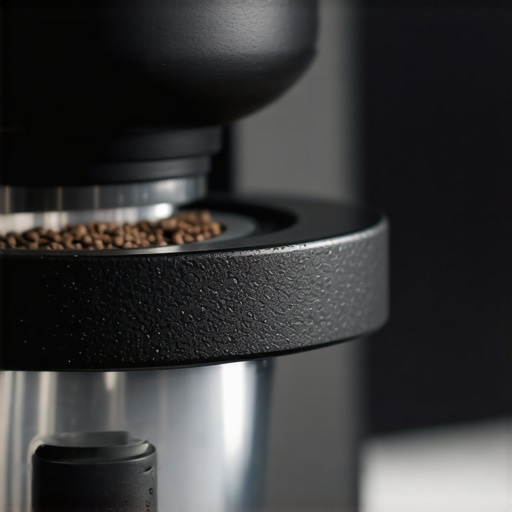
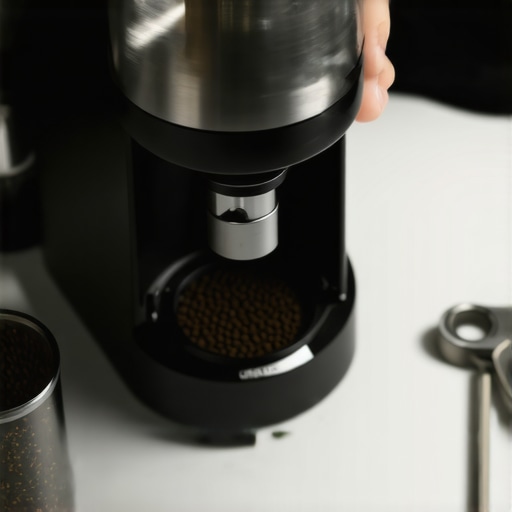
Start by placing your coffee beans and grinder components—like the hopper and burrs—in the freezer for about 15 minutes before brewing. This reduces their temperature, preventing clumping during grinding. I once tested this on a scorching summer afternoon, and the results were immediate: smoother, more uniform grounds and less hassle. When I opened the freezer, I was surprised to see the beans feeling colder and firmer, almost like they were fresh from a cold storage, leading to a cleaner grind.
Prepare Your Equipment for Cold Operation
While the beans chill, prep your grinder by removing the hopper and burrs, and place them on a cooling rack. Ensure the grinder is unplugged to avoid accidents. This step prevents residual heat from the motor from warming up the beans during grinding, much like how a good barista preps their tools—think of it like tuning a musical instrument. If your grinder has a speed control, set it to a slower, more controlled setting to minimize heat generation, similar to slowing down a high-revving motor for precision.
Implement Consistent Cooling Techniques
For particularly warm days, you can also dampen a towel with cold water and wrap the grinder housing lightly to dissipate residual heat. Just be cautious not to get any electrical parts wet. Over time, this approach keeps the grinder body cooler, ensuring the burrs don’t transfer excess heat to the beans during grinding, analogous to how cooling fans prevent an overheating PC. Remember, the goal is not to make everything icy but cool enough to prevent clumping and uneven grounds—think of it as giving your beans a mini ice bath for optimal performance.
Timing and Handling
Once your beans and components are chilled, assemble the grinder quickly and grind immediately. The longer the beans sit at room temperature, the more they tend to warm up, negating your prep. I found that grinding directly after freezer time gave me grounds that clumped less and stuck together less in the portafilter, even during the hottest days. Use a timer or stopwatch app to keep track of your prep time and ensure you’re repeating the process consistently; consistency is key to achieving that perfect shot, comparable to a seasoned barista’s routine.
Adjust Your Technique for Best Results
If you notice that your grounds still have some clumping, tweak the grind size slightly finer; finer grounds tend to resist clumping more because they have less free space between particles. Remember, as with selecting the right grinder, the size and consistency matter. Don’t be tempted to increase dose size; instead, focus on uniformity. Also, consider pre-wetting beans slightly with a spoonful of water and tossing them gently—this technique is similar to blooming espresso, releasing built-up moisture to reduce static and clumping.
Handling the Aftermath
Post-grinding, clean your equipment promptly to remove any residual moisture or static buildup. Use a soft, dry cloth to wipe down burrs and hopper. Avoid using water directly on your grinder, as this can cause rust or damage, much like how proper maintenance keeps your device in top shape. The freezer trick isn’t just for summer; it can be part of a routine to ensure your grind stays consistent year-round, whether the weather is sweltering or cool.
Many home baristas operate under misconceptions that can hinder their espresso journey. A prevalent myth is that more expensive equipment automatically guarantees perfect shots. In reality, understanding the nuances, such as grind size and tamping pressure, often matters more than the machine’s cost. For instance, even premium espresso machines often require precise calibration; overlooking this leads to subpar results despite high-end gear.
Another surprisingly overlooked aspect is the maintenance routine. Regular cleaning of grinders and espresso machines isn’t just about aesthetics—it’s essential for consistent extraction. Neglecting this can cause static buildup or grind retention, which subtly alters flavor profiles over time. A common mistake is using generic cleaning methods; instead, targeted products and proper descaling protocols backed by experts can prolong your equipment’s lifespan and improve crema quality.
Many enthusiasts believe milk frothers are interchangeable, but the differences are more nuanced. For example, a dedicated steamer wand with controlled steam pressure yields a creamier, more stable microfoam compared to handheld frothers. Exploring specialized milk frothers and understanding their technical specs can elevate your milk-based drinks.
When selecting barista gear, the temptation to prioritize style over function is tempting yet problematic. An ergonomic tamper or knock box isn’t just about aesthetics; these tools improve workflow and consistency. Investing in quality, ergonomically designed tools—like those recommended in this guide—can make a tangible difference.
A common misconception among coffee grinders is that higher RPM always equates to a better grind. However, high-speed grinders often generate more heat, leading to uneven particle sizes and degraded bean oils. Advanced users prefer conical burr grinders operating at moderate speeds. Choosing the right grinder involves understanding these subtleties, which often go unnoticed by beginners.
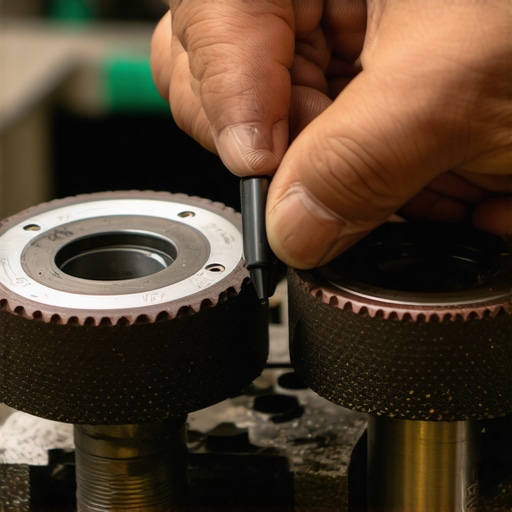
Now, for the serious enthusiasts, a question arises: How does grinder burr alignment affect extraction consistency over extended periods? Experts emphasize that even slight misalignments can cause uneven particle sizes, jeopardizing shot quality, especially during long brewing sessions. Regularly inspecting burrs and performing precision alignment—using techniques like the “chalk test”—can mitigate this issue. According to a study published in the Journal of Coffee Science, precise burr alignment optimizes flow rate and flavor extraction.
Have you ever fallen into this trap? Let me know in the comments. Understanding these subtle but critical factors can dramatically improve your home espresso experience, making every shot a masterpiece rather than a gamble.
Invest in Quality Tools for Longevity
One of the most critical aspects of maintaining your espresso setup is selecting tools that last. I personally swear by high-quality tampers with ergonomically designed handles; they reduce fatigue and ensure consistent pressure during extraction, which is vital for reproducible shots. Additionally, investing in a precision-quality grinder calibration tool, like the chalk test, helps me keep my burrs perfectly aligned over time, preventing uneven grind sizes that can derail your brewing efforts.
Use Advanced Cleaning Methods
Routine cleaning is essential, but unexpected buildup can cause flavor issues and equipment failures. I recommend periodically using descaling solutions specifically meant for espresso machines, such as Cafiza, and following manufacturer instructions for deep cleaning. For grinders, I avoid using rice or coarse cleaners that can damage burrs—as detailed in this article. Instead, I opt for brush and vacuum cleaning to remove static and grind retention, followed by a quick run of grinder cleaning tablets. Consistent maintenance ensures smoother operation and preserves the integrity of your coffee beans’ flavor profile.
Implement Effective Storage Solutions
Long-term results hinge on proper storage, especially for beans and gear. Keep your beans in airtight, opaque containers away from light and heat—preferably in a cool, dark pantry. For delicate barista tools like milk frothers or tampers, dedicated storage drawers or magnetic strips keep equipment organized and prevent damage. Regularly inspecting and cleaning these tools prevents static buildup and contamination, which can cause subpar milk microfoam or uneven extraction.
Preparation and Long-Term Care
Creating a routine that incorporates pre-conditioning your grinder—like the freezer trick discussed earlier—can dramatically improve consistency. For ongoing maintenance, schedule monthly deep cleanings and quarterly calibrations, especially for high-use grinders and espresso machines. Keep spare filters and replacement parts on hand for quick fixes, preventing equipment downtime. Moreover, periodically check your machine’s seals and gaskets; replacing aged seals prevents leaks and loss of pressure, maintaining optimal extraction conditions.
Tools That Future-Proof Your Setup
Growing your home setup is inevitable if you deepen your appreciation for espresso. Consider modular upgrades like PID controllers for temperature stability or high-precision scales with built-in timers—both of which can streamline your workflow. Trend-wise, more enthusiasts are adopting digital monitoring software that tracks maintenance schedules and brew parameters; I predict this will be standard in the next wave of home espresso gear. For instance, integrating a smart scale with app connectivity allows precise adjustments and long-term tracking.
How do I maintain my gear over time?
Regular inspection, proper cleaning, and timely replacement of parts are the backbone of reliable performance. Keep a maintenance schedule and stick to it; this prevents minor issues from escalating into costly repairs. Also, investing in tools like burr alignment kits and descaling solutions ensures your equipment operates at peak efficiency—saving money and frustrations in the long run. To ensure your setup stays in tip-top shape, don’t neglect the electrical connections and water filtration systems, which are often overlooked but crucial for long-term integrity. Consider consulting detailed guides like this resource for more advanced maintenance tips. Why not try calibrating your grinder with the chalk test now? It’s an easy step that can greatly improve your shot quality and keep your gear functioning optimally for years to come.
After years of tinkering with my espresso setup, I’ve learned that one of the most underrated factors influencing shot quality is temperature management. Small tweaks, like pre-cooling beans and grinder parts, can transform your brewing experience, especially during those sweltering summer days. It’s not about expensive gadgets but about understanding and respecting how heat affects every component of your process.
The Well-Kept Secret of Chill-Out Brewing
Chilling your beans and grinder components in the freezer for a brief 15 minutes has been a game-changer for me. It reduces clumping, ensures uniform grind size, and maintains the integrity of delicate flavors. I used to wake up early to get my shots just right; now, a quick prep the night before makes all the difference. Just remember, patience and consistency are your allies here—precision in your routine leads to precision in your espresso.
Why Your Routine Matters More Than Gear
Choosing the right grinder or espresso machine is crucial, but mastering how you handle them is often overlooked. Properly pre-chilling, cleaning, and calibrating your equipment can lead to a noticeable improvement in flavor extraction. It’s akin to a chef knowing their ingredients intimately—your familiarity with your tools and environment ensures every shot is a masterpiece. For more insights on selecting your perfect gear, check out this guide.
Keep Cool, Brew Better—No Fancy Equipment Needed
Embracing simple, practical solutions like wrapping your grinder in a damp towel or placing components on a cooling rack can dramatically improve consistency. This isn’t about complicating your setup but about making smart adjustments that respect the physics of heat transfer. Just think of it as giving your gear a mini vacation—so it performs better when you need it most. Remember, a cool grinder equals a better brew, plain and simple.
Firing Up Your Espresso Confidence
Implementing these temperature control techniques has reignited my passion for home brewing. It’s satisfying to see how small changes can lead to big improvements, and it encourages experimentation without hefty costs. If you’ve struggled with inconsistent shots or bitter flavors, I encourage you to try these cooling tricks. They might just be the secret ingredient missing from your routine. Curious how these tweaks fit into a broader barista toolkit? Explore more tips here.
Insider Wisdom for the Home Barista
- Sometimes, the simplest solutions—like chilling your beans—are the most effective. I once dismissed freezing my beans, thinking it was unnecessary, but it drastically reduced static and clumping, leading to a more consistent grind. The lesson: trust small experiments; they often yield big results.
- Getting to know your equipment’s thermal behavior can save you time and frustration later. Monitoring burr temperature and adjusting your workflow accordingly helps prevent overheating during extended brewing sessions or hot days. It’s like giving your machine a gentle pat on the back, telling it to stay cool and perform.
- Consistency isn’t about perfection but about understanding your environment and equipment conditions. When I started tracking my routine and ambient temperature, I noticed patterns affecting my shot quality. Now, I proactively adjust, ensuring every cup is as good as the last—proof that discipline and observation pay off.
- Even small, inexpensive tools can aid in maintaining temperature control—think of a chilled cloth or a cooling rack. These humble implements are part of my secret arsenal against heat-induced frustrations, empowering me to brew with confidence regardless of the weather.
- Patience with process adjustments leads to mastery. It took me several trials to perfect my cooling routine, but now it’s second nature. The reward? Richer flavors, smoother extraction, and the joy of a perfect shot that makes every morning special.
Resources That Brew into My Routine
- Precision grinders and calibration tools—Trustworthy equipment like this guide has helped me fine-tune my setup for optimal performance.
- Deep cleaning solutions—Products like Cafiza keep my gear spotless, preventing heat build-up caused by residual oils and static. Regular cleaning is essential for consistent results.
- Temperature monitoring devices—While I use my senses and routines, a basic infrared thermometer adds a layer of precision, especially during summer experiments. It’s a small investment with a big payoff.
- Barista community forums and blogs—Sharing experiences, like in this resource, keeps me inspired and informed about the latest techniques and insights.
- Educational videos and tutorials—Watching experts demonstrate temperature control tricks reinforces my understanding and encourages continuous improvement. Exploration keeps your passion alive.
Seize Control and Elevate Your Brew
Remember, mastering heat management isn’t about complex science but about respecting the delicate balance that makes your espresso shine. With a bit of patience and a willingness to experiment, you can unlock flavors you never imagined. Every time you brew, think of it as fine-tuning your art—your dedication turns humble beans into a symphony of aromas and tastes. So, get out there, stay cool, and make each cup a testament to your growing expertise. How will you adjust your routine to perfect your home espresso today? Let me know below.