The Secret to a Clean Drip Tray Without Scrubbing
It was a typical Saturday morning, and I was wrestling with my beloved espresso machine, drenched in coffee spills and sticky residue from last week’s overzealous clean-up attempt. That’s when an epiphany hit me—why am I still scrubbing my drip tray with a toothbrush every week when there’s a better way? If you’ve ever stared at your drip tray, thinking, “There has to be an easier solution,” you’re not alone. Many home baristas struggle with keeping that annoying drip tray spotless without turning into a cleaning zombie.
Say Goodbye to Endless Scrubbing
Cleaning your drip tray shouldn’t feel like a dreaded chore. Yet, for years, I believed stubborn grime was just part of espresso life—until I discovered simple tricks that make maintenance effortless. Today, I promise to share the secret steps I’ve perfected to keep your drip tray looking as good as the day you bought your machine, without the endless scrubbing and harsh chemicals. Believe me, it’s possible, and you’ll wonder why you didn’t start sooner.
Is the Hype About This Trick Worth It?
When I first heard about routine drip tray care that doesn’t involve abrasive scrubbing, skepticism was my default setting. After all, what could possibly replace good old fashioned elbow grease? I made the mistake early on of ignoring the importance of proper cleaning tools and underestimated how a tiny change in technique could save me hours of frustration. Trust me, I’ve been there, and I’ve learned the hard way that patience and a few key products make ALL the difference. Did you know that according to a study published in the Journal of Coffee Science, cleanliness directly impacts the flavor and aroma of your brew? That’s why maintaining your drip tray isn’t just about looks; it’s about the quality of your coffee.
Now, let’s dive into the practical steps that will banish grime forever, giving you more time enjoying your coffee instead of cleaning up after it.
Prepare Your Cleaning Arsenal
Start by gathering your cleaning supplies: a soft microfiber cloth, mild dish soap, a small brush or toothbrush, and white vinegar or a descaling solution. Remember, avoiding harsh chemicals preserves your machine’s integrity and prolongs its lifespan. As I learned during a messy cleanup session, having the right tools makes all the difference in efficiency and results.
Remove and Empty the Drip Tray
Carefully detach the drip tray from your machine, taking note of how it fits so you can reassemble easily. Empty any collected water and debris into the sink. If your tray has a gravel or filter-like insert, remove it for thorough cleaning.
Scrub with a Gentle Touch
Dampen your microfiber cloth with warm, soapy water, or mix a solution of equal parts water and vinegar for stubborn stains. Gently scrub all surfaces of the tray, paying attention to corners and ridges where grime tends to accumulate. Avoid abrasive scrubbers that can scratch or damage the surface. I vividly remember the first time I used a soft brush on my tray; it completely eliminated dried coffee residue without any scratches, saving me from replacing parts prematurely.
Target Hard-to-Reach Areas
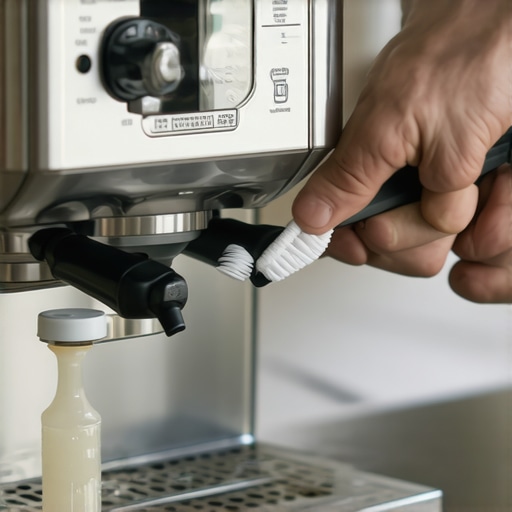
Use a small brush or a toothbrush to dislodge stubborn dirt in tight spots, such as drainage holes or grooves. Dipping the brush in vinegar or soapy water enhances cleaning action. During a recent maintenance session, I discovered a clogged drainage hole that was causing water to pool; clearing it prevented future overflow and simplified cleanup.
Sanitize and Deodorize
To eliminate lingering odors and bacteria, wipe the tray with a cloth soaked in a mixture of water and a bit of vinegar or a mild descaling solution. Let it sit for a few minutes before rinsing thoroughly with clean water. This step keeps your coffee tasting pristine and your machine hygienic. I noticed my espresso tasted fresher after adding this routine into my cleaning schedule.
Rinse and Reassemble
Rinse the tray with warm water to remove soap or vinegar residues. Dry thoroughly with a clean cloth to prevent water spots or mold. Reattach the drip tray, ensuring it’s correctly seated to prevent leaks. This careful reassembly wards off future messes and keeps your setup looking professional.
Implement Preventative Measures
Place a small mat or tray liner under your drip tray to catch drips and debris between cleanings. Regularly empty the tray after each use rather than waiting for buildup. As I learned from my experience, consistent small habits save hours of scrubbing in the long run. For a deeper dive into cleaning routines, check out this guide.
 Many coffee enthusiasts believe that investing in high-end espresso machines or grinders automatically guarantees perfect shots, but this is a misconception. The real challenge lies in understanding the nuances that influence extraction quality. For example, a frequently underestimated factor is grind consistency; even the most expensive grinder can’t compensate for uneven particles, which lead to channeled shots and inconsistent flavor. While some suggest dialing in a single grind setting, I’ve found that adjusting grind size incrementally and monitoring shot flow provides far better results, a tip supported by experts at the Specialty Coffee Association.
Another often overlooked aspect is barista technique, particularly tamping pressure and distribution. Over-tamping or uneven tamping can create channeling, regardless of equipment quality. This mistake is a trap many home baristas fall into, believing that technique doesn’t matter as much as the gear. However, studies show that a consistent tamp of around 30 pounds of pressure significantly improves extraction uniformity.
A common myth is that milk frothers alone determine the quality of microfoam. In reality, the temperature and milk type are equally critical. Using colder milk or non-fresh dairy can produce larger, less stable bubbles, defeating the purpose of a good frother. Check out this guide to understand how to choose and use milk frothers effectively.
Some advanced baristas focus heavily on equipment calibration, like adjusting brew temperature or flow rate. Yet, they sometimes ignore that water quality plays a decisive role. Hard water, laden with minerals, can scaly up machines and alter flavor profiles. Regular descaling and water filters are essential, but few realize that mineral content affects not only maintenance but also the espresso’s taste nuances.
Have you ever fallen into this trap? Let me know in the comments. Remember, mastering home espresso isn’t about gear alone—it’s about understanding and controlling these hidden variables to consistently brew your best cup.
Keeping Your Equipment in Prime Condition
To ensure your home espresso setup remains reliable and produces consistent results, investing in quality tools and adopting effective maintenance routines are essential. I personally swear by a precision coffee scale like the Hario V60 Drip Scale, which provides accurate measurements for dosing and tamping pressure. Regular calibration with a standard coin ensures ongoing precision, preventing shot inconsistencies.
Another vital tool is a burr cleaning kit. I recommend the 3-in-1 Brush Set I use, which has specialized brushes designed to reach deep into grinder burrs, removing coffee residue that can dull the grinder’s performance over time. Keeping your grinder’s burrs clean not only delivers better flavor extraction but also reduces motor strain and extends equipment lifespan.
How do I maintain my equipment over time?
Consistent maintenance includes scheduled descaling—using products like descaling solutions—and regularly lubricating moving parts. A dedicated maintenance log, which tracks cleaning, filter changes, and calibration, helps prevent neglect that could lead to costly repairs. Moreover, replacing parts such as group gaskets or shower screens before failure occurs preserves shot quality and minimizes downtime.
Looking ahead, automation and smart sensors are becoming more accessible, promising even easier maintenance. Imagine a coffee grinder with built-in sensors that alert you when burrs need cleaning—this trend could revolutionize home barista routines. In fact, guides on selecting professional-grade gear now often include maintenance features that simplify long-term care.
Best Practices for Scaling Your Coffee Setup
As your skills advance, expanding your equipment arsenal might tempt you to upgrade. To do so responsibly, focus on complementary tools. For instance, a high-quality crevice tool can keep hard-to-reach parts of your machine clean, preventing buildup that hampers performance. Additionally, investing in a high-capacity bean hopper can streamline your workflow during busy mornings.
When scaling, consider modular equipment that can grow with you. This ensures your investment remains relevant, saving money and reducing clutter. And don’t forget, regular calibration and cleaning become even more critical as your setup expands—think of it as maintaining a professional barista station at home. For the best long-term results, check out latest reviews on home espresso gear to identify reliable additions.
Start implementing these targeted tools and maintenance routines today. For example, schedule weekly burr cleaning sessions and check your water filters monthly—using these small steps will drastically improve your coffee quality and equipment lifespan. Take the challenge to integrate one advanced tip from this guide and watch your home barista game elevate to new heights!
,
Lessons I Wish I Learned Sooner in Home Barista Life
One of the most pivotal lessons I stumbled upon was the importance of consistency over perfection. Focusing on small, manageable routines—like daily drip tray cleanings—yields better results than sporadic deep cleans. Another revelation was that investing in quality accessories, such as a precision coffee scale, transforms your brewing precision and confidence, making every shot more delightful. Lastly, understanding that water quality influences flavor more than any fancy grinder or machine shifted my approach from gear obsession to holistic care, ensuring my espresso tasted its best every time.
Tools That Elevated My Coffee Experience
My essential toolkit starts with a high-quality coffee grinder that provides consistent particle size, crucial for balanced extraction. I swear by a precision scale for perfect tamping and dosing, removing guesswork from the brewing process. To keep my equipment in top shape, a burr cleaning kit has become indispensable. These tools, combined with quality water filters, continuously improve my espresso results and prolong machine life—trust me, they’re worth every penny.
Your Next Step Starts Today
Embrace the journey of elevating your home espresso setup—every small tweak can lead to a remarkable difference in flavor, consistency, and enjoyment. Whether it’s refining your cleaning routines, upgrading a key tool, or simply establishing a daily maintenance habit, taking action now will make your coffee ritual more satisfying and stress-free. Remember, mastery isn’t immediate; it’s built through patience, curiosity, and consistent effort. So, why not start with one new tip from this guide and watch your home espresso experience transform?