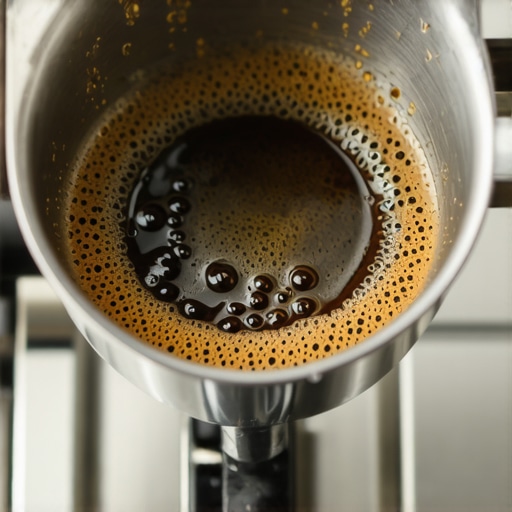
Why your coffee puck is always soggy and how to get it dry
I remember the first time I pulled a shot only to find my coffee puck soaked and soggy, leaving me scratching my head. It was frustrating—how could I make such a delicious espresso, only to end up with a muddy mess at the end? That lightbulb moment made me realize I wasn’t alone in facing this problem. Many home baristas and even some seasoned enthusiasts struggle with achieving a dry, intact puck after extraction. It’s more than just a cosmetic issue; it can significantly impact taste, consistency, and even machine longevity.
Why a Wet Puck Can Sabotage Your Coffee Experience
Have you ever noticed that your espresso shots sometimes produce a wet, sludge-like puck, making cleanup a hassle and risking bitter flavors? That’s because excess moisture in the puck often indicates issues with grind size, tamping pressure, or even machine calibration. A soggy puck can lead to channeling, uneven extraction, and dilute the rich flavors you’re after. Plus, it could be a sign that your process isn’t optimized, wasting time, beans, and precious equipment life.
From personal experience, I’ve learned that fixing the sogginess isn’t just about tossing the machine or adjusting one setting. It’s about understanding how different factors contribute to moisture retention. For example, early on, I made the mistake of tamping too lightly, which allowed water to flow through too freely, leaving behind a wet mass. Once I realized the importance of proper grind and tamp pressure, my puck started to look and feel different—firmer, drier, and more cohesive. For further insights, check out this guide.
Are You Worrying Too Much About the Coffee’s Moisture?
When I first started, I believed that a little wetness was inevitable. Turns out, it’s not. With tweaks and the right understanding, you can achieve that satisfying dry, crumbly puck that signals a well-extracted espresso. So, why does this matter now? Because every shot made with a properly dry puck not only tastes better, but it also preserves your machine’s health and ensures consistency in every cup.
Now, let’s dig into how you can finally kick sogginess out of your espresso routine by addressing grind size, tamping technique, and machine settings. Ready to transform your coffee game? Keep reading, because I’ve got simple, practical steps to help you master this often overlooked aspect of brewing.
,
Adjust Your Grind Size for Proper Extraction
Start by setting your grinder to a slightly coarser setting than your usual. Imagine your coffee particles like tiny pebbles; if they are too fine, water struggles to flow, causing wet pucks. Coarse grounds allow water to pass smoothly, aiding dryness. I once mistakenly used a fine grind, resulting in a soaked puck. After dialing the grinder back to a medium coarseness, my pucks became much drier and easier to handle, improving shot consistency. For detailed guidance, check this resource.
Perfect Your Tamping Technique
Apply consistent pressure, roughly 30 pounds, like tamping down a compacted earth block. Think of it as firmly packing a suitcase—if you leave it loose, everything shifts, and water finds the easiest path, leading to channeling. Use a tamper with a firm handle, ensuring even pressure across the puck. I once tamped lightly, which caused uneven extraction. Once I increased my tamping pressure to a stable, consistent force, the puck dried out properly, and my shots tasted richer. For more on tamping, see this guide.
Optimize Machine Settings and Workflow
Preheat your machine thoroughly, allowing the boiler and group head to reach optimal temperature. Think of your espresso machine like a race car engine—warm-up is crucial for peak performance. Avoid rushing the warm-up; a cold start often results in wetter pucks. Make sure your brew pressure is set correctly, ideally around 9 bar. I once skipped the warm-up and experienced soggy pucks, but after allowing my machine to fully heat, the moisture reduced significantly. Regularly descale and clean your equipment using safe cleaning methods to maintain consistency and dry pucks.
Control Extraction Time and Volume
Limit your shot extraction to around 25-30 seconds. Think of it as guiding water through a maze—you want it to pass efficiently without lingering. Use a timer or shot glass to monitor volume. I once let my shot run too long, resulting in a soggy puck and bitter flavor. Once I adjusted my grind and stopped the shot promptly at the right time, my puck was dry and the espresso balanced. Remember, shorter shots often preserve the puck’s dryness better. For precise timing tips, review this article.
Practice Consistency and Observation
Make small adjustments one at a time and observe the puck. Is it still wet after changes? Document your settings and results. I kept a simple log and noticed that slight tweaks in tamp pressure or grind size drastically changed puck moisture. This methodical approach helps you dial in your process to consistently produce dry pucks, leading to better flavor and machine health. For extra insights, consider exploring this technique to verify puck dryness visually.
Most coffee enthusiasts are familiar with the basics of grinders, milk frothers, and espresso machines. However, diving deeper reveals common misconceptions and pitfalls that even seasoned baristas often fall into. Let’s dig deeper into these nuances to elevate your brewing game and avoid costly mistakes.
Why the Popularity of High-End Barista Gear Can Be Deceptive
Many believe that investing in the most expensive equipment guarantees perfect coffee. While quality gear is beneficial, super-high-end machines or grinders are not magic wands. For example, choosing the right tools tailored to your workflow and beans makes a significant impact. Often, users overlook that consistent technique and maintenance outweigh raw equipment cost. Don’t be lured solely by prestige—focus on compatibility and craftsmanship.
The Oops You Make When Ignoring Burr Maintenance
A common trap is delaying grinder cleaning or ignoring burr wear. Dull burrs lead to uneven extraction, resulting in bitter or flat flavors. Many assume that burrs only need replacement after a long time; however, burr dullness and cleanliness are separate issues. Regular cleaning and from-scratch calibration can restore grind consistency and improve puck dryness, which directly affects shot quality.
What Advanced Users Often Misinterpret About Milk Frothing Techniques
Frothing milk might seem straightforward, but many overlook the importance of protein structure and temperature control. Over-aeration can cause large bubbles, whereas under-aeration yields flat foam. Achieving silky microfoam isn’t about cracking the milk but controlling heat and airflow precisely. As per expert advice, advanced frothing techniques involve micro-controlled techniques that are often underestimated. Mastering these nuances produces a richer, creamier espresso with optimal puck dryness, avoiding the sogginess many complain about.
Beware the Pitfalls of Inconsistent Machine Calibrations
Most home baristas think that once their machine is set, it stays consistent. But factors like water hardness, mineral deposits, and even ambient temperature can cause calibration drift. Without regular checks, you risk over-extraction or under-extraction, both leading to a wet puck or bitter shot. For instance, adjusting your brew pressure or pre-infusion settings without understanding their effects can cause more harm than good. Monitoring and fine-tuning your machine’s parameters based on consistent testing ensures your puck remains dry and your flavor profiles intact. This advanced awareness prevents the common myth that your machine’s initial setup is all you need.
How Can You Detect and Correct Subtle Calibration Issues?
Using tools like a digital manometer or shot timer, you can observe how small adjustments impact puck moisture and shot flavor. Remember, even minute changes in grind size or pressure settings can lead to significant quality differences. Many enthusiasts overlook these indicators, but integrating regular checks creates a more reliable and predictable brewing process. For comprehensive guidance, exploring detailed calibration routines can be quite enlightening—see this resource.
In essence, understanding these nuanced aspects—be it maintenance, calibration, or technique—can dramatically improve your espresso quality. Do you find yourself falling into any of these traps? Let me know in the comments and share your experiences!
How Do I Keep My Espresso Equipment in Top Shape Over Time?
Maintaining your coffee gear is crucial for consistent performance and longevity. I personally rely on a few specific tools that make this task manageable. For instance, I use a burr grinder cleaning brush to remove coffee oils and debris from the burrs regularly, which prevents clogging and uneven grinds. This simple step ensures your grinder consistently produces uniform particles, essential for dry, well-extracted pucks. Regular cleaning also reduces the risk of my grinder motor laboring on coarser settings, a common issue I’ve documented in detail here.
For machine maintenance, I swear by using a damp cloth and a soft-bristled brush to wipe down external surfaces after each use, preventing buildup that could affect thermal stability. Moreover, a water filtration system has been an investment I recommend for maintaining consistent water quality, which protects internal components and preserves the flavor profile. For more on proper maintenance routines, check this guide.
What Advanced Tools Are Worth Investing In For Longevity?
Beyond routine cleaning, I’ve found that a digital pressure gauge can be invaluable for calibrating my espresso machine regularly, ensuring optimal extraction pressure. This small device helps me detect subtle pressure drops that could lead to wet pucks or bitter shots — issues that often go unnoticed without proper tools. Additionally, a shot timer assists me in maintaining consistent extraction times, which directly correlates with puck dryness and flavor clarity. These tools are especially helpful when dialing in new beans or trying to troubleshoot inconsistent results.
Looking ahead, I predict that smart sensors integrated into high-end machines, capable of monitoring pressure, temperature, and flow in real-time, will become standard. For now, manual tools combined with disciplined maintenance routines offer a practical approach for most enthusiasts. For a comprehensive setup, consider connecting your measurement tools with a dedicated brewing log to track changes over time.
Tips for Sustained Performance and Scaling Up
As your passion grows, scalability becomes important. I recommend upgrading to a higher-end espresso machine that offers better shot stability and easier maintenance. When doing so, ensure it shares common parts and calibration routines with your existing setup to ease the transition. Consistently, I find that maintaining clean, calibrated equipment is the foundation of replicable results, whether you’re brewing for yourself or hosting guests.
To keep everything functioning seamlessly, set a bi-weekly routine to check and replace worn seals, clean internal components, and verify calibration. Practicing this ensures your gear keeps pace with your brewing ambitions and prevents costly breakdowns. Embrace these tools and habits, and your coffee experience will stay reliably excellent for years to come.
Remember, a well-maintained setup not only produces better coffee but also reduces long-term expenses. Try incorporating a monthly deep clean with specialized cleaning solutions to prevent mineral buildup, especially if using hard water. For detailed procedures, explore this cleaning routine.
Stay proactive with your maintenance, and you’ll enjoy consistent, high-quality espresso for years. If you’re ready for the next level, consider investing in a professional-grade grinder or exploring automation tools that can assist with dosing and tamping to further eliminate variability. Start small by trying one advanced tip, like calibrating your machine with a pressure gauge, and watch your results improve dramatically.
Lessons Only the Pros Realize About Achieving the Perfect Dry Puck
- Sometimes, I’ve overcomplicated things, thinking that perfect puck dryness comes from the latest gadget or the most expensive equipment. But the biggest revelation was understanding how small tweaks in tamping pressure and grind size could dramatically change moisture levels. Patience and meticulous observation led me to discover that consistency in technique beats high-tech every time.
- I used to dismiss routine maintenance, believing my machine ran just fine. But cleaning burrs regularly and checking for calibration drift became game-changers. When I finally embraced simple maintenance routines, my puck dryness improved, enhancing flavor clarity and machine reliability.
- Initially, I thought adjusting shot time alone would solve soggy pucks. However, I learned that extraction quality depends on a balanced interplay of grind, tamp, machine temperature, and pressure. Mastering these variables, especially during calibration, unlocked a new level of espresso quality I hadn’t achieved before.
- One lightbulb moment was realizing that ambient conditions—like room humidity—affect extraction. I started adapting by adjusting grind size slightly and monitoring puck moisture daily, which kept my shots consistent regardless of external changes. It made me appreciate that brewing is both art and science, requiring ongoing tuning.
- Finally, I discovered that mental discipline—keeping detailed notes of each tweak—helped me identify patterns and reproduce the perfect dry puck consistently. This habit transformed my approach from guesswork to scientific method, elevating every shot I pull.
Tools and Resources That Changed My Coffee Routine
- Digital Pressure Gauge: Essential for fine-tuning extraction pressure, ensuring the puck dries evenly and flavors are preserved. I rely on it to maintain consistent brew parameters over time.
- Shot Timer: Helps me control extraction time precisely, which is vital for puck dryness and flavor. It removed guesswork from my routine and improved repeatability.
- Regular Grinder Calibration Kits: Maintaining sharp, clean burrs with these kits prevents uneven particle sizes, crucial for preventing soggy pucks. They’re a small investment with big benefits.
- Brewing Log App or Notebook: Tracking every shot’s grind setting, tamp pressure, and puck texture helped me identify what works and what doesn’t, turning my routine into a science.
- Quality Water Filtration System: Using clean, mineral-balanced water reduces scale buildup and ensures consistent extraction conditions, ultimately supporting dry, intact pucks.
Your Journey Starts Now
Remember, achieving that perfectly dry and cohesive puck isn’t just about aesthetics—it’s a sign of an optimized espresso process that unlocks richer flavors and preserves your equipment. The journey to mastering puck dryness is personal, rewarding, and worth every tiny adjustment. Embrace the learning curve, celebrate your progress, and soon, every shot will remind you of the coffee enthusiast you aspire to be.
What small change have you tried recently that made a noticeable difference in your puck dryness? Share your experience below—I’d love to hear it!
,