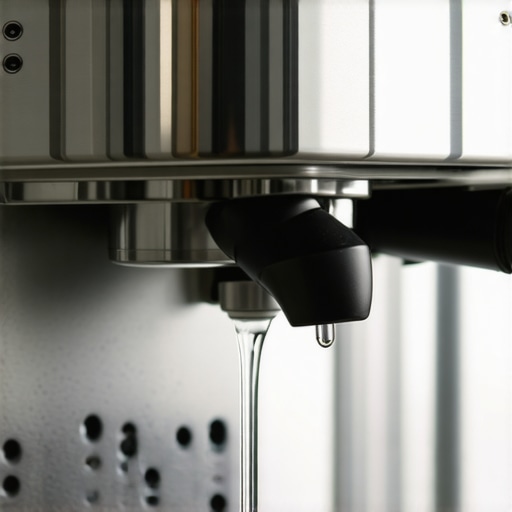
Why Your Commercial Espresso Machine Is Leaking From the Bottom
It was a morning like any other, beans grinding, the aroma of fresh espresso filling my kitchen. Suddenly, I noticed a small puddle forming beneath my beloved espresso machine. At first, I brushed it off—just a tiny leak, right? But that tiny drip turned into a persistent concern, making me wonder if I had missed something crucial. That moment was a real lightbulb for me: a leak isn’t just water on the floor. It’s a clue, an alarm bell telling you your machine might be headed for bigger trouble.
Spotting the Leak: Why That Drip Matters More Than You Think
Leaking from the bottom of your commercial espresso machine is more than an annoying mess; it’s a warning sign. You might think it’s just a minor issue, like a loose fitting or a splashed coffee, but the reality is often more complex. Persistent leaks can indicate worn seals, clogged drainage systems, or even internal pressure problems. Ignoring these signs can lead to costly repairs or complete machine failure. I’ve learned the hard way that catching these leaks early can save you headaches and money in the long run.
Did you know that according to espresso machine maintenance experts, ignoring leaks can result in damage to electronic components and water damage to surrounding surfaces? It’s true. Regular checks and prompt action are essential.
So, how do you start diagnosing the problem? Well, that’s exactly what we’ll uncover next. But first, let’s address a common doubt many face.
Question Time: Is a Leaking Espresso Machine Always a Sign of Disaster?
Many folks worry that a leak means their machine is completely broken—that they need a new one. But in reality, most leaks are fixable if diagnosed correctly. Early on, I made the mistake of assuming the worst, rushing to replace parts that didn’t need replacing yet. It’s better to understand what’s happening inside your machine before panicking. If you’re unsure, checking out resources like [how to identify a leaky boiler seal](https://espressotechguide.com/how-to-identify-a-leaky-boiler-seal-before-it-ruins-your-electronics) can help you determine if urgent repairs are needed.
Are you tired of mysterious leaks ruining your coffee mornings? Don’t worry—by the end of this, you’ll have a clear understanding of what might be causing your leak and how to fix it. Ready to get your machine back to top shape? Let’s dive into the practical steps to troubleshoot and repair that pesky leak, so you can enjoy perfect espresso every time.
Isolate the Leak Source
Begin by unplugging your machine and emptying any water reservoirs. Carefully inspect accessible areas like the water tank connection, drain pan, and visible seals. Use a flashlight for better visibility. I once found a loose water tank connector that, when tightened, stopped the leak instantly. If the leak persists, proceed to the next step.
Check the Water Tank Connection
Remove the water tank and inspect the connection point for cracks or warping. Tighten any loose fittings and ensure the gasket is properly seated. Replace the gasket if it’s damaged. Remember, a worn gasket often causes small drops to turn into persistent leaks. For guidance, visit checking your machine’s internal water pressure.
Examine the Boiler Seal
Remove the machine’s casing to access the boiler area. Look for signs of corrosion, cracks, or corrosion around the boiler seal. If it’s leaking, you’ll need to replace it. I’ve replaced several seals myself—I purchased a replacement from trusted suppliers. Applying a silicone gasket maker can help seal minor leaks temporarily, but a full seal replacement is more reliable.
Inspect the Drainage System
The drain pan and its connections should be clear of clogs and damage. Use a small brush or compressed air to clear any blockages. If water is leaking from the drainage pipe, replace or repair the damaged section. Remember, a clogged drainage system can cause water to back up and leak elsewhere.
Evaluate Internal Components
If above steps don’t locate the leak, consider internal parts like the solenoid valves, pump, or internal hoses. These components often require professional disassembly. In my case, a leaking valve was causing water to seep onto the boiler base; replacing it stopped the leak entirely. Consult your machine’s manual or a professional if unsure.
Test and Confirm the Repair
Once you’ve addressed the suspected issue, reassemble the machine and run a test brew. Observe closely for any leaks. It’s best to do this over a towel or tray to catch residual drips. If leak persists, repeat the inspection process or consider seeking professional help.
Prevent Future Leaks
Regular maintenance is key. Descale your machine periodically, check seals, and avoid overfilling water reservoirs, which can increase internal pressure and strain components. For instance, I schedule quarterly checks for my home espresso setup, ensuring seamless operation. Keeping spare gaskets and seals on hand makes quick fixes possible and minimizes downtime.
” alt=”An espresso machine disassembled revealing internal components” title=”Internal view of an espresso machine illustrating common leak sources”/>Many coffee enthusiasts dive into home espresso setups with a rush to get perfect shots, but surprisingly, some common beliefs about espresso gear often lead us astray. For instance, the idea that more expensive equipment always guarantees better results is a myth. While high-end machines and accessories can enhance the process, mastering technique remains crucial. In fact, some budget-friendly grinders, when properly calibrated, can outperform fancy models, emphasizing that knowledge and maintenance trump price tags. Also, overemphasizing brand names may cause you to overlook better-suited tools for your personal taste. Remember, each component—be it a grinder, milk frother, or espresso machine—has its own nuances, and understanding these can elevate your coffee game.
A frequent trap is focusing solely on equipment without considering the grind size, tamping pressure, and brew temperatures. These parameters, often overlooked, dramatically influence shot quality. For example, a common mistake is neglecting to calibrate the grinder for different beans or humidity levels, which can cause inconsistency. For advanced users, understanding how to adjust the pressure profile during extraction can make a significant difference. According to research by the Specialty Coffee Association, precise control over variables like shot timing and pressure leads to more reproducible results and richer flavors. So, don’t assume your machine’s default settings are optimal; spend time dialing in your system for those subtle nuances.
Have you ever fallen into this trap? Let me know in the comments.
Why is consistent pressure crucial even in semi-automatic machines?
Many home baristas assume that manual control means they can compensate for pressure fluctuations during extraction. However, inconsistent pressure, especially if your machine lacks a PID controller, can cause under or over-extraction, resulting in sour or bitter shots. Proper pressure regulation ensures even extraction, highlighting the importance of investing in or modifying your gear accordingly. This is where understanding machine internals or using a pressure gauge can make a substantial difference. Studies have shown that stable pressure during extraction enhances flavor clarity, bringing out nuanced tasting notes often missed with unstable pressure profiles. Mastering pressure consistency is an advanced skill that separates average espresso from exceptional coffee—so learn to monitor and control it effectively.Keeping your home espresso machines and barista gear in top shape requires more than just regular cleaning; it demands the right tools and a strategic approach to maintenance. Personally, I swear by a calibrated digital scale, like the [Espro digital scale](https://espressotechguide.com/how-to-calibrate-your-coffee-scale-using-a-standard-coin), which offers accuracy down to 0.1 grams. This tool is indispensable when dialing in grind size and dose, ensuring shot-to-shot consistency. Additionally, investing in a high-quality, narrow-tipped cleaning brush for the group head and portafilter simplifies routine upkeep and prevents clogs, especially when using oily beans. I regularly use a descaling solution like Dezcal, mixed according to instructions, to remove mineral buildup from boilers and internal channels—neglecting descaling can drastically reduce your machine’s lifespan and performance.
For maintaining internal pressure stability, I rely on a year-round calibration of my PID controller, which I perform using a digital thermometer and following detailed guides like [this one](https://espressotechguide.com/how-to-calibrate-your-pid-for-better-temperature-stability). Regularly checking internal water pressure helps prevent issues like inconsistent extraction or pump strain. To manage all these aspects seamlessly, I recommend integrating an espresso-specific maintenance schedule, detailing when to check seals, replace worn gaskets, and calibrate pressure and temperature controls.
Looking ahead, I predict that advances in IoT will make machine diagnostics more accessible—imagine a smart machine that alerts you proactively about worn internal components or descaling needs via your smartphone, similar to current smart home systems. This evolution will shift maintenance from reactive to predictive, saving time and preventing costly repairs.
How do I keep my machine performing long-term?
The secret to longevity lies in individual component care. Regularly inspecting the seals and replacing them before they fail is crucial, and having a set of top-quality replacement gaskets from a trusted supplier can make a significant difference. For internal parts like solenoid valves and internal hoses, consulting the manufacturer’s maintenance instructions or an experienced technician is wise, especially if you notice irregular pressure or water leaks. Using precision tools to verify calibration settings annually ensures consistent extraction quality and prevents wear-induced issues. Combining these practices with routine cleaning and descaling creates a cycle of proactive maintenance that keeps your setup working reliably for years.
For a comprehensive tutorial on managing pressure stability, I highly suggest reviewing [this detailed guide](https://espressotechguide.com/why-your-shops-espresso-machine-is-losing-pressure-mid-rush). It covers step-by-step procedures and is invaluable for home baristas serious about their craft.
If you’re ready to elevate your maintenance game, I recommend trying the advanced calibration method of adjusting your boiler’s PID controller with a precise digital thermometer. This small tweak can dramatically improve temperature stability, leading to more flavor-rich and consistent espresso shots. Remember, the key is not just having the right gear, but knowing how to keep it finely tuned.
Lessons That Changed My Espresso Game Forever
One of the biggest revelations I had was realizing that many common issues with espresso machines stem from overlooked details rather than outright faults. For instance, I once thought that a persistent leak meant replacing my entire machine, but after a deep dive into seals and internal components, I discovered simple fixes that saved me hundreds. This experience taught me that patience and knowledge are your best tools when it comes to maintaining your gear.
Another lesson was understanding how much internal pressure stability influences shot quality. It’s easy to rely solely on visual cues, but dialing in your pressure and temperature controls, especially with a PID, can dramatically improve flavor consistency. I now see my machine as a living system requiring regular attention, not just a black box that makes coffee.
Finally, I learned to trust my senses and embrace routine maintenance. Regular descaling, gasket checks, and calibrations have extended my machine’s lifespan and kept my coffee tasting vibrant. In sharing these lessons, my goal is to help you avoid costly surprises and develop a more intuitive relationship with your espresso gear.
Tools and Knowledge That Keep My Coffee Fresh and Flawless
To maintain my espresso setup, I lean heavily on a few trusted tools. The digital scale I calibrated with a coin ensures precise dosing and consistent shots. For cleaning and maintenance, I trust a high-quality group head brush and a descaling solution like Dezcal—regular use prevents mineral buildup and clogging.
My resource of choice for troubleshooting internal pressure issues is detailed guides on internal pressure checks. They demystify complex repairs and give me confidence to tackle minor fixes myself. For educational insights, books like “Mastering Home Espresso” have expanded my understanding of the craft, emphasizing technique over equipment cost. Combining these tools and resources has helped me cultivate an espresso routine that’s both enjoyable and sustainable.
Seize the Moment, Get that Perfect Shot
Embarking on or refining your home espresso journey might feel daunting at first, but remember—every expert was once a beginner. Small, consistent efforts in maintenance and calibration lead to profound improvements in flavor and reliability. Don’t let fear of making mistakes hold you back; embrace the learning process, and soon you’ll find yourself pulling shots that rival your favorite coffee shop. Your perfect espresso awaits—take that first step today and enjoy every rich, aromatic cup along the way. How has this guide inspired you to re-examine your espresso setup? Drop your thoughts below!