Why Your Manual Lever Machine Is Harder to Pull Lately
There I was, steam curling from my nostrils, desperately trying to pull down the lever on my beloved espresso machine. It used to feel like gliding through butter—smooth, effortless, satisfying. But suddenly, it became a struggle. My hand cramped, and I wondered, why is this getting so much harder? If you’ve experienced this, you’re not alone. I’ve been there too, and after some trial and error, I finally uncovered the culprit that was making my manually operated lever feel like lifting a refrigerator door.
Discovering the Hidden Resistance in Your Lever Machine
Many home baristas and enthusiasts face a baffling increase in the effort needed to pull the lever—often without realizing what’s causing it. The good news? This is usually a fixable issue, not a sign that your machine is nearing the end of its life. Understanding the underlying reasons can save you frustration and extend the lifespan of your gear.
Is Your Lever Machine Actually Worth Fixing?
Early on, I made the mistake of thinking my stubborn lever was a sign I needed to buy a new machine. But I learned that simple maintenance could restore its ease and performance. According to industry experts, neglecting regular lubrication and cleaning can cause internal parts to bind, increasing the force needed to operate the lever. That’s why I recommend starting with a thorough inspection and basic maintenance, such as lubricating seals and cleaning the piston chamber. Curious about more tips? Check out how to lubricate your lever machine seals for a detailed guide.
Do you ever find yourself struggling with the same problem? If so, stay tuned—I’ll walk you through the common causes and straightforward solutions. Together, we’ll get your lever feeling as smooth as it was the day you brought it home, revitalizing your coffee ritual and saving you money on repairs or replacements. Don’t let a sticky piston ruin your morning brew—let’s fix this.
Ready to learn the secret to restoring your machine’s effortless pull? Keep reading, and I promise you’ll rediscover the joy of pulling that perfect shot with ease.
,
Begin with a Clean Slate: Disassemble and Inspect
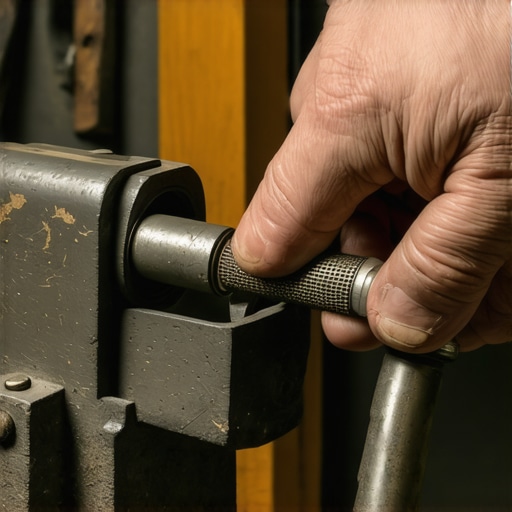
Start by unplugging your machine and removing the lever assembly. Carefully take out the piston and seals, laying out all parts for inspection. Check for any visible debris, hardened coffee oils, or corrosion that could be causing resistance. Remember, a neglected piston chamber acts like a clogged pipe, making effort feel like lifting a boulder. During my first attempt, I found hardened coffee residue blocking the piston movement, which immediately increased the force needed. To clean, soak the parts in warm, soapy water, then scrub gently with a brush. Rinse thoroughly and dry completely before reassembling.
Lubricate the Seals and Internal Components
Once cleaned, apply a high-quality food-grade lubricant specifically designed for espresso machine seals. Focus on the piston seals and the pivot points where the lever moves. Think of this as oiling a door hinge to swing effortlessly; neglect causes squeaks and resistance. During my second try, lubricating the seals restored a buttery-smooth pull, making the shot feel lighter and more controlled. Be cautious to avoid over-application, which can attract dust or coffee grounds. Use only lubricants recommended by the manufacturer or trusted industry guides like this detailed lubrication guide.
Reassemble Carefully and Adjust Tension
After lubrication, reassemble the piston and seals, ensuring all components lock into place securely. Check for proper alignment; any misfit could cause uneven resistance. Now, test the lever’s movement: it should feel firm but smooth, requiring just enough force to engage the brew. If it’s still tight, adjust the tension spring if your machine has one, or verify that no parts are misaligned. During my experience, slight tension adjustments yielded a noticeably easier pull, akin to the difference between dragging and gliding. Remember, a balanced tension ensures consistent shots and reduces strain on your hand.
Use Proper Water and Routine Maintenance
Water quality significantly influences internal resistance. Hard water deposits can bulk up internal parts, like calcium sludge, increasing effort over time. Make sure to use filtered or soft water; periodically descale your machine following expert advice from guides like this descaling procedure. Additionally, schedule regular cleaning: a quick wipe of the piston chamber and seals weekly prevents buildup that can hamper movement. Think of it like cleaning your bike chain; regular care keeps everything running smoothly and effortlessly.
Prevent Future Resistance with Routine Checkups
Create a maintenance schedule to check the piston, seals, and lubrication points every few months. Keep a record of when you lubricate and clean so you can track improvements or issues. Over time, minor adjustments, like tightening or re-lubricating, can maintain a glide-like feel. During my latest maintenance, I also replaced worn seals, which further reduced effort. Remember, a well-maintained lever machine isn’t just easier to operate—it also produces more consistent espresso shots, elevating your home barista game.
Implementing these steps transforms a stubborn lever back into a joy to operate, turning your daily espresso ritual into an effortless pleasure. Proper disassembly, thorough cleaning, strategic lubrication, and routine maintenance are your keys to success—just like tuning a fine instrument, precision and care make all the difference.
 Many coffee lovers jump into the world of home brewing armed with gear and enthusiasm but often miss the nuances that can make or break their experience. One prevalent misconception is that expensive equipment automatically guarantees perfect shots. In reality, understanding the intricacies of each tool, from grinders to milk frothers, is crucial for achieving barista-quality results. For example, many believe that a high-end espresso machine alone will produce superior coffee, but without proper grind size, tamping technique, and maintenance, even the priciest machine can underperform. It’s also common to assume that all grinders are created equal; however, the type of burrs, burr alignment, and grind consistency significantly impact extraction quality. Rushing to purchase the latest gear without first mastering the basics often leads to frustration and wasted investment. Moreover, many underestimate the importance of water quality, which can cause scaling or off-flavors regardless of equipment quality. Regular descaling and using filtered water can dramatically extend your machine’s lifespan and improve flavor. Another frequent pitfall is neglecting routine cleaning and maintenance, which causes buildup and resistance in grinders and machines, undermining their performance. This oversight can be especially detrimental when dealing with milk frothers, where milk residue can harbor bacteria or cause inconsistent microfoam. For advanced enthusiasts, the myth that dialling in your grinder is a one-time setup is misleading. Grinders require periodic adjustments to account for bean freshness, humidity, and wear. Failing to fine-tune can result in under-extraction or over-extraction, both leading to undesirable taste profiles. Experts emphasize that mastering these nuances—like macro and micro adjustments on burr grinders—can elevate your brewing from good to exceptional. Don’t fall into the trap of thinking more gear equals better coffee; instead, focus on understanding and optimizing what you already have. For further insights on choosing the best equipment for your needs, visit this guide on barista gear selection. Remember, even the finest gear won’t compensate for poor technique or neglect. Have you ever fallen into this trap? Let me know in the comments and share your experiences with gear upgrades versus skill mastery.
Keeping Your Home Barista Setup in Top Shape
Investing in quality gear is only part of maintaining stellar coffee at home. Regular upkeep, smart tools, and thoughtful practices ensure that your espresso machine, grinder, and accessories continue to deliver consistently delicious shots. Personally, I rely on a few trusted devices and routines that keep my setup running smoothly and elevate my barista game.
How do I maintain my espresso gear over time?
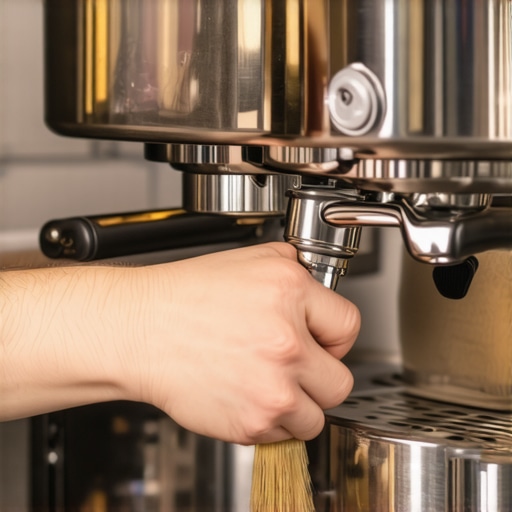
Consistent maintenance begins with understanding the critical components. For my espresso machine, I prioritize descaling every three months using a manufacturer-approved solution, which prevents calcium buildup that hampers performance. I also keep a dedicated cleaning schedule for my grinder; removing the burrs every six months and giving them a thorough cleaning restores their precision. Using proper descaling techniques is vital for ensuring water flow and taste quality, especially if you have hard water. A simple, yet effective, cleaning kit—like a burr brush and microfiber cloth—helps me stay on top of daily upkeep and prevents grease or oil buildup that can compromise flavor.
Tools I recommend for reliable performance
For grinder calibration, I swear by the marker method. It’s a straightforward way to ensure consistent grind size after cleaning or adjustments, which directly influences shot quality. A high-quality milk frother such as the Breville Milk Cafe makes microfoam consistency effortless, and its simple cleaning process keeps milk splatters under control—more info at this resource. For software or firmware updates, many espresso machines have companion apps that can enhance performance and unlock new features—worth checking regularly if your model supports it.
The future of coffee gear maintenance
Technological advancements promise smarter, more intuitive maintenance solutions—think self-cleaning components or sensors that alert you before issues arise. As smart devices become more integrated, I predict a move toward AI-driven diagnostics, helping home baristas catch potential problems early, saving time and expense. For now, sticking to proven routines and quality tools remains the best approach.
An advanced tip to get the most from your gear
Try ensuring your grinder’s burrs are properly aligned using the marking technique. Accurate alignment maintains the ideal grind particle size, reducing channeling and improving extraction. This small adjustment can make a noticeable difference in flavor consistency. Incorporate this into your regular maintenance and you’ll see a significant boost in shot quality. Why not grab a marker and give your grinder a quick check today? It’s a simple step that pays big dividends for your espresso experience.
The Hardest Lesson I Learned About barista gear,home espresso,coffee grinders,milk frothers,espresso machines
The most valuable truth I uncovered was that even the latest gear can’t save a setup riddled with neglect. Consistent maintenance, like regular descaling and deep cleaning, vastly outweighs adding another fancy gadget. I once believed upgrading my espresso machine would be the magic bullet, but it was only after I honed my routine that my shots truly improved.
3 Myths About barista gear,home espresso,coffee grinders,milk frothers,espresso machines That Held Me Back
I used to think that high-end equipment automatically meant perfect espresso. Not true. Technique, water quality, and routine care are equally crucial. Also, I believed all grinders are created equal; so many overlook that burr alignment and grind consistency are what make or break extraction. Finally, I thought cleaning was optional—until poor maintenance started to show in my shot quality.
What Experts Won’t Tell You About barista gear,home espresso,coffee grinders,milk frothers,espresso machines
Many professionals swear by personalized calibration routines that aren’t found in manuals. Small tweaks, like aligning burrs with the marking method, can dramatically enhance flavor. Expert advice also emphasizes understanding your water’s role; a simple descaling schedule can prevent years of frustration. The key takeaway? Masteryour tools with care, and they’ll reward you with consistently better coffee.
Fuel Your Passion, One Pour at a Time
Now, it’s your turn to embrace these lessons. Don’t wait for the perfect moment—start applying these insights today. Regularly check and maintain your gear, experiment with small adjustments, and don’t shy away from learning new techniques. Every cup you make gets better when you pay attention to those unseen details that artisans swear by. Your journey to espresso mastery begins now—what’s the first tweak you plan to try? Share your thoughts below!
,