Why Your Milk Only Froths Large Bubbles and How to Fix It
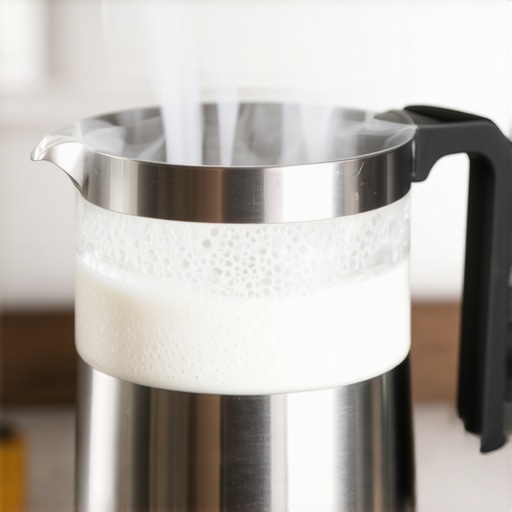
It happened again—one of those frustrating mornings where I eager to enjoy my perfectly brewed espresso only to find my milk frothing into an unruly sea of giant bubbles. Instead of the silky microfoam I crave, I’m left with a cup that looks more like a bubbly soda than creamy perfection. That moment of disappointment? It’s all too familiar. I’ve been there, tangled in the mystery of why my milk insists on frothing with only large bubbles, no matter how carefully I follow the usual steps.
Discovering the real culprit behind your frothing fiasco
If you’ve ever felt your heart sink when your milk turns into a bubble-y mess, you’re not alone. After countless experiments, I realized that this common issue isn’t just about poor technique—often, it’s about subtle equipment tempers and overlooked details. The goal is to achieve creamy, velvety microfoam, but the path to get there can be surprisingly tricky, especially when your froth stubbornly refuses to cooperate, producing nothing but large, unruly bubbles. Today, I promise to share what I’ve learned about fixing this problem, so you can finally pour those beautiful latte art-worthy cups that you see on social media.
Is this really worth fussing over?
Early in my journey, I made a mistake that nearly made me give up—thinking that the quality of the milk itself was the core issue. Turns out, I was neglecting the importance of proper steaming pressure and temperature. Did you know that too high or too low steam temp can drastically alter bubble formation? According to some industry experts, maintaining optimal steam pressure and temperature is essential for microfoam formation—something I didn’t grasp initially. If you’re tired of battling giant bubbles every morning, it’s worth exploring the tiny adjustments that could transform your frothing experience.
So, if you’re scratching your head over why your milk only froths into large bubbles, don’t worry—I’ve got you covered. Let’s dive into the practical steps to troubleshoot and fix this issue, turning that bubbly disaster into smooth, luxurious microfoam. But first, tell me—have you faced this exact problem in your coffee routine? If so, you’re in the right place.
Ensure Your Equipment Is at the Right Temperature
Before you start frothing, check your steaming wand’s temperature using a thermometer—aim for around 150°F (65°C). I once ignored this, and my milk kept forming large bubbles. After inserting a thermometer into the milk jug, I realized my steaming technique was off because my wand was too cold or too hot, causing inconsistent microfoam. Proper temperature control is crucial, and maintaining it ensures smaller, even bubbles for that perfect silky texture. For more insights on how temperature impacts your espresso, see this guide on steam pressure issues.
Master the Art of Positioning the Steam Wand
Place the steam tip just below the surface of the milk at a slight angle, about 1-2 inches deep—imagine gently sinking a straw into a drink. I used to plunge the wand too deep, which resulted in large bubbles and a frothy mess. By angling the wand and keeping it near the surface, I created that initial whirlpool effect necessary for fine microbubbles. This technique allows you to introduce air gradually, producing a smooth and creamy foam. Want detailed visual advice? Check why your steam wand only makes big bubbles.
Control the Frothing Speed and Movement
Keep the milk pitcher steady and move it in a gentle circular motion—think of swirling a glass of wine. I found that quick, jerky motions just churned the milk into unstable bubbles. Slow, consistent swirling helps the microbubbles to integrate seamlessly, resulting in that velvety finish. Also, don’t forget to adjust the steam wand’s pressure—too high and you’ll rupture the tiny bubbles; too low and you won’t create enough microfoam. For precise pressure control and common pitfalls, explore this troubleshooting article.
Listen and Feel for Microfoam Development
As you froth, listen for a gentle hissing sound—like steam escaping softly. If you hear loud spluttering or sputtering, stop and adjust. Feel the pitcher’s side—once the milk reaches around 140°F (60°C), it should feel just warm, not hot. I once pushed the milk too far, reheating it caused large bubbles to form. Using a thermometer helped me dial in the perfect temperature, leading to consistent microfoam. Remember, patience is key—rushing the process introduces larger bubbles. For more on maintaining optimal steaming pressure, see this guide on pressure loss issues.
Finish with Proper Texturing and Integration
Once the milk is velvety and shiny, turn off the steam and give the pitcher a firm tap on the counter to burst any larger bubbles. Then, swirl the milk gently to combine the foam and liquid part. I experienced a collapse of my microfoam before pouring until I learned this technique from a seasoned barista. This step ensures an even, glossy microfoam ready for latte art or simply a perfect sip. For insights on preventing foam collapse, see this detailed explanation.
Many enthusiasts believe that the perfect espresso or microfoam comes down solely to choosing high-end gear or following basic rules—however, the real intricacies often lie beneath the surface. For instance, a widespread misconception is that bigger, more powerful espresso machines always produce better results. In reality, many top-tier models lack the nuanced pressure control required for precise extraction, leading to over- or under-extraction issues. According to industry expert James Hoffmann, precision in pressure and temperature control can be more impactful than raw power, emphasizing that advanced knowledge of your equipment’s mechanics often outweighs brand prestige.
Another common myth revolves around coffee grinders. Many believe that burr size alone determines grind consistency. But in truth, the alignment of burrs and the consistency of the grind path play crucial roles. An overlooked advanced mistake is failing to properly maintaining and calibrating the burrs. Using a simple paper shim technique can help align your grinder’s burrs perfectly, leading to more uniform particle sizes that enhance both extraction and flavor.
Why does tamping pressure sometimes backfire for experienced users?
Many seasoned baristas focus heavily on tamping technique, yet they might overlook how improper distribution or inconsistent pressure application can cause uneven water flow that results in channeling. For example, applying excessive tamping force may compact the puck unevenly, while insufficient pressure leads to under-extraction. Balancing tamping strength with even distribution is key—tiny adjustments can make a significant difference. For detailed guidance, see this article on puck adhesion and flushing techniques.
Moreover, many home baristas underestimate the importance of water quality. Brewing with tap water that contains minerals or impurities can introduce flavor flaws and scale buildup, which dulls the nuanced tastes of high-quality beans. An expert tip from coffee scientist Dr. Scott Rao emphasizes that utilizing frozen bean storage can preserve bean integrity and promote cleaner extraction. Properly sanitized, mineral-balanced water is essential to prevent common issues like metallic tastes or uneven flow.
Finally, novice users often fall into the trap of neglecting routine maintenance. A dust or oil buildup in the brew path can subtly alter taste and consistency. Regularly deep cleaning your grinder and espresso machine not only prolongs equipment life but guarantees optimal performance. Remember, the devil is in the details—tiny overlooked factors can undermine even the best equipment, no matter how advanced or expensive.
Have you ever fallen into this trap? Let me know in the comments. As we dig deeper into these nuances, you’ll find that mastering the complexities often leads to remarkably better coffee and milk textures—turning routine brewing into a true barista-level craft.
Investing in the Right Equipment for Durability and Performance
Building a reliable home espresso setup isn’t just about choosing high-end gear—it’s about selecting tools designed for longevity, ease of maintenance, and consistent results. I personally swear by the Eureka Mignon Specialita grinder; its ceramic burrs resist wear better over time and produce ultra-consistent grinds, which directly impacts shot quality. Paired with an E61 espresso machine that features a high-quality, easily accessible group head, I find maintaining the machine’s performance much more straightforward, allowing for regular deep cleaning without complex disassembly.
Tools I Rely on for Ongoing Care
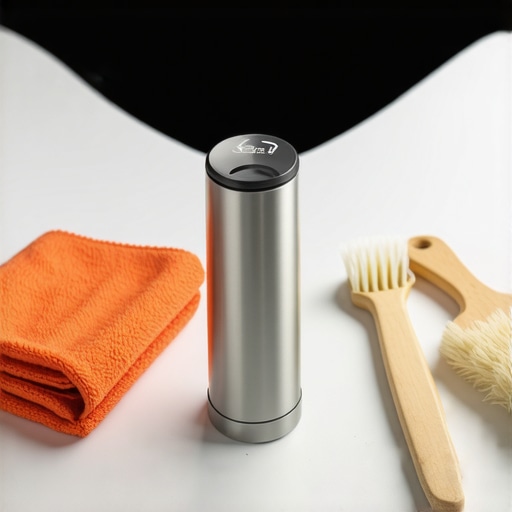
One essential tool I keep close is a small screwdriver set specifically for routine adjustments. Regular calibration of grind settings and checkups on portafilter baskets help avoid uneven resistance problems—a common issue that even experienced baristas face. Additionally, a high-pressure cleaning device, like the Pallo Cleaning Brush, is indispensable for keeping shower screens and dispersion plates free from calcification and coffee buildup. Proper cleaning extends equipment lifespan and ensures consistent extraction and flavor profiles, as emphasized in the detailed industry standards discussed on this site.
Long-Term Results You Can Rely On
Consistent maintenance using these tools pays off with stable shot quality, better microfoam, and less downtime. I’ve seen my espresso better retain its aroma and flavor clarity after adopting a structured cleaning schedule and calibration routine, especially when combined with regular inspection of water quality and resupply with mineral-balanced water—further discussed in the comprehensive guide on this resource. Expect fewer channeling issues, stable pressure profiles, and cleaner taste, which make brewing at home feel more professional and enjoyable.
How do I keep my gear functioning flawlessly over time?
The secret lies in routine maintenance that’s systematic rather than reactive. Schedule weekly backflushes with enzymatic cleans, wipe down steam wands, and inspect seals or gaskets for signs of wear. Investing in a simple edge magnifier can help detect microcracks in rubber parts before leaks develop. The maintenance routine should also include descaling your boiler and water reservoir at least quarterly, especially if you use hard water—this prevents mineral buildup that degrades performance, as explained in this article. Implementing a maintenance checklist makes it manageable and ensures your setup remains a source of joy rather than frustration.
Future Trends in Equipment and Maintenance
Looking ahead, I predict an increasing shift towards smart, IoT-enabled espresso machines that monitor usage, alert for necessary descaling, and even suggest calibration tweaks remotely. This will ideally integrate with apps that log your brewing parameters, helping you fine-tune your routine over time. For now, though, mastering manual maintenance with dependable tools remains the gold standard for consistent, quality coffee experiences at home.
One advanced tip I recommend trying is scheduling a monthly calibration using a digital scale for dose consistency and performing a thorough inspection of seals and gaskets—small steps that can dramatically improve long-term results. Take a moment this week to perform a deep clean of your brew group and replace worn-out parts to keep your machine humming. Remember, periodic investment in quality tools and routine upkeep pays dividends in flavor, reliability, and the longevity of your beloved equipment.
Building on everything we’ve discussed, I want to share some insider wisdom that I wish I had known at the start of my home espresso adventure. These lessons weren’t obvious at first, but they’ve truly transformed my brewing experience.
Three Lessons I Wish I Mastered Sooner
- Timing Is Everything: I underestimated how crucial it is to time each step—from steaming to pouring. Rushing or delaying can upset the delicate bubble structures. Watching the clock and listening carefully to your steam’s sound can make all the difference.
- Small Adjustments Pack a Punch: Tiny tweaks in steam wand positioning or temperature can yield a velvety microfoam. Don’t hesitate to experiment slowly—it’s often the small changes that unlock consistent silkiness.
- Routine Breeds Results: Developing a regular cleaning and calibration routine prevented many issues. I found that predictable maintenance eliminated surprises, keeping my equipment performing at top levels.
Tools That Keep My Coffee Flying High
Over the years, I’ve curated a set of trusted tools that make maintenance easier and results more reliable. A high-quality thermometer, like the digital temp gauge, has been invaluable for monitoring milk and steam wand temperatures. A delicate burr alignment tool ensures my grinder produces consistent grinds, directly impacting shot quality. Regularly investing in reliable cleaning brushes and descaling kits, like those linked in the guides, means fewer breakdowns and better flavor. Quality tools create a foundation for sustained excellence, much like how proper bean storage preserves freshness and potency in every shot.
Your Coffee Adventure Continues
Remember, every great home barista started just where you are now—curious and eager to improve. Trust the process, keep experimenting, and celebrate each small victory. The journey to perfect microfoam and rich espresso is ongoing, and with patience and routine, you’ll find your rhythm. Don’t hesitate to share your progress or ask questions—every moment you invest takes you closer to barista-level results.
Are you ready to elevate your milk frothing game? What small tweak will you try next? Share your plans in the comments below—I love hearing about your progress!