Why Your Tamper Diameter Might Be Leaving Unpressed Edges
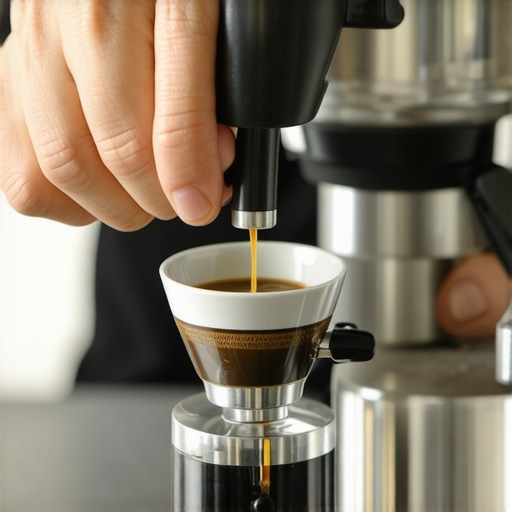
I remember the first time I pulled an espresso shot and noticed something off — a thin ring of coffee grounds stubbornly clinging to the edges of my puck, despite my best tamping efforts. It was frustrating, almost like my tamper was punishing me. Turns out, that seemingly minor issue had a lot to do with the size of my tamper fitting my basket perfectly. That lightbulb moment made me realize that the diameter of my tamper was leaving unpressed edges, directly impacting my shot quality. If you’ve ever experienced similar struggles, you’re not alone. It can feel like a tiny detail but makes a world of difference in your espresso game.
The Hidden Impact of Tamper Diameter on Your Espresso
Many home baristas don’t realize that an ill-fitting tamper can be the root of uneven extraction and inconsistent flavor. When the tamper is slightly too small, it leaves around the edges of the coffee puck unpressed, allowing water to flow unevenly during extraction. This results in under-extracted, sour shots, or at best, a less-than-ideal flavor profile. Conversely, a tamper that’s too large can be impossible to use comfortably and might even damage your basket over time.
From my experience and the countless conversations I’ve had with fellow enthusiasts, the fix is often surprisingly simple: matching the tamper diameter precisely to your basket size. But it’s not just about the size—pressure, technique, and even the shape of the tamper matter. And trust me, initial missteps—like pressing too hard or ignoring basic compatibility—can further compound the problem. So, how do we get this right?
Is Size Really the Issue or Just a Legend?
This question haunted me early on. I kept hearing that minor size variations didn’t matter, but then I kept getting inconsistent shots. After some digging, I found that even a millimeter difference in tamper diameter could distort the entire extraction. An authoritative guide I trust states that, “Proper tamping pressure and fit are crucial for a balanced extraction” (source), underscoring the importance of choosing the right size. My early mistake was assuming that a slightly loose fit wouldn’t matter, but it does. That realization changed my approach entirely.
But before we dive into how to measure and select the perfect tamper, I want to ask: have you faced unpressed edges or uneven shots that left you scratching your head? If so, stick around — because getting your tamper size right is the game-changer you’ve been searching for, and I’ll walk you through it step-by-step.
Let’s get started on fixing this common yet overlooked issue, and ensure every shot you pull is smooth, balanced, and flavorful from start to finish.
Measure Your Basket Diameter Precisely
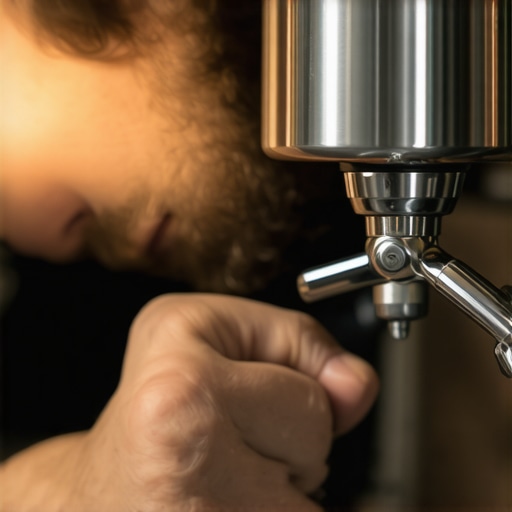
Start by removing your portafilter and measuring the inner diameter of the basket with a digital caliper. Firmly grip the caliper and note the measurement in millimeters, ensuring accuracy within 0.1mm. I once neglected this step and used a generic 58mm tamper on my basket; the result was uneven extraction and unpressed edges. The fix was simply ordering a tamper matching my exact measurement, which immediately improved shot consistency.
Choose the Right Tamper Size
Use the measurement to select a tamper with a diameter matching your basket, plus or minus 0.2mm to account for manufacturing tolerances. For example, if your basket measures 58.05mm, a 58mm tamper works well. Avoid cheap adjustable tampers that can slip or wobble during pressing. I recommend buying a high-quality, precision-made tamper from a trusted supplier, which provides consistent pressure across the puck.
Check for Wobble and Fit
Place the tamper into the basket and observe whether it sits evenly without rocking side to side. A wobbling tamper can cause uneven tamping pressure, leading to channeling. To test, press lightly and see if the tamper maintains full contact across the entire surface. If it wobbles, consider a slightly smaller size or a custom tamping ring to improve consistency. I added a thin silicone ring around my tamper edge, which eliminated wobble and smoothed my tamping action.
Master Consistent Tamping Pressure
Apply firm, even pressure—about 30 pounds—as you press down on the tamper. Think of it like stamping a perfect seal; you want uniform force without excess. Use your body weight, not just arm strength. Rest your wrist on the counter to stabilize your movement, and apply gradual pressure until you feel resistance. During my early attempts, I leaned in too hard, deforming the puck; over time, I calibrated my pressure with a portafilter scale to ensure consistency for every shot.
Distribute Grounds Evenly Before Tamping
Before pressing, ensure the grounds are spread evenly using a distribution tool or by gently tapping the side of the basket. This prevents thin spots that can cause uneven extraction. I recommend a few light taps on the side of the basket or using a dosing funnel to control the grounds. I once had a shot that channeled because I hadn’t evenly distributed the coffee, but after adopting this simple step, my shots became more uniform, improving flavor clarity.
Ensure Proper Basket and Tamper Compatibility
Stay aware of your equipment’s specifications. Some baskets are designed for larger tampers with precision baskets or flow restrictors. Check the manufacturer’s recommendations and avoid forcing a tamper that’s slightly too large or small. If your tamper fits perfectly but your shots are still inconsistent, inspect your basket for wear or damage, or consider upgrading to a precision basket that matches your tamper size better. I replaced my stock basket with one designed for my tamper, which reduced side-channeling episodes and made my shots more predictable.
Implementing these steps meticulously will dramatically improve your espresso quality. Remember, the key is precision, control, and understanding your gear’s specific fit. With every adjustment, you’re honing your craft in pursuit of that perfect shot, reminiscent of the one I once struggled with but now enjoy every morning.
 When it comes to espresso machines, milk frothers, and barista gear, many enthusiasts operate under assumptions that can sabotage their results. A common myth is that more expensive equipment automatically guarantees superb shots. While high-quality gear can make a difference, neglecting proper technique and nuanced adjustments often causes more problems than gear quality itself. For example, many home baristas overlook the significance of machine calibration, leading to inconsistent temperature and pressure, which directly affects extraction quality. According to expert barista training programs, precise control over brewing parameters is paramount, often more so than equipment investment alone.
Why Do So Many Get the Grind Wrong Even When They Have Good Equipment?
One of the biggest mistakes is assuming that a revolutionarily fine grind set-up solves all extraction issues. In reality, grind size is part of a complex system, including tamping pressure, dose, and machine temperature. Overly fine grounds can cause over-extraction, resulting in bitter flavors—yet some users keep dialing in their grinder without considering variable factors like bean freshness or machine maintenance. A study published in the Journal of Coffee Research emphasizes that inconsistent grinder burrs and static build-up significantly impact particle size distribution, making it harder to hit that sweet spot consistently. This illustrates that paying attention to grinder condition and environment is often overlooked but crucial for espresso perfection.
To avoid pitfalls, it’s vital to periodically assess your grinder’s performance with a simple dull burr check. Neglecting this can lead to uneven grounds and inconsistent shots, regardless of machine quality. Have you ever fallen into this trap? Let me know in the comments.
Meanwhile, many enthusiasts focus solely on tamping pressure, believing that brute force is the key. But pressing too hard can lead to channeling and uneven extraction. Skilled baristas recommend controlling tamping force and technique, not just applying maximum pressure. Instead, uniformity and consistency matter more than raw force, which can cause puck damage and airflow issues, compromising shot clarity.
Advanced Question: How Can High-End Equipment Still Fail to Deliver Perfect Espresso?
Even with top-tier machines and premium accessories, mistakes in calibration or neglecting cleaning routines can ruin results. For instance, a high-end espresso machine needs regular descaling and internal maintenance; failure to do so leads to scale buildup that hampers heat transfer and pressure stability. Furthermore, improper PPI (parts per inch) calibration of grinders or neglecting to preheat the portafilter can introduce subtle yet impactful errors. Experts recommend routine checks—like quick purges before brewing—to ensure consistent temperatures. Remember, even the best gear responds poorly to neglect or improper use. If you’re serious about elevating your espresso craft, embrace a comprehensive approach that includes meticulous maintenance, precise calibration, and technique refinement. How do you ensure your gear stays in peak condition? Share your tips or questions in the comments.
Investing in quality espresso machines, grinders, and accessories is just the starting point for crafting exceptional coffee at home. To sustain top performance over time, diligent maintenance and using the right tools are essential. I personally rely on a few specific equipment and routines to keep everything functioning smoothly, and I encourage you to implement these in your routine to enjoy consistently great shots.
Essential Tools for Maintenance and Calibration
One of my must-have tools is a digital caliper. I use it regularly to verify the diameter of my tamper and the internal dimensions of my portafilter baskets, ensuring perfect fit and preventing issues like uneven tamping or unpressed puck edges. Accurate measurements help me select the right accessories and avoid costly mistakes. Additionally, a precision_cleaning brush is indispensable for maintaining the group head and portafilter, removing coffee oils and residue that can impair flavor and flow.
For ongoing calibration, I rely on a tamping station with a built-in force gauge. This allows me to apply consistent pressure—around 30 pounds—every single time, which is crucial for reproducibility. Regularly checking and calibrating your tamping force with such a tool can dramatically improve shot consistency, as described in the tamping force calibration article.
Implement Routine Maintenance Practices
Keeping your equipment clean is vital. Descale your espresso machine every 3-6 months, depending on usage and local water hardness, using a high-quality descaling solution. Don’t forget to clean the steam wand and milk frother thoroughly after each use to prevent milk build-up and microbial growth. For that, I often use a small brush and a cleaning cloth to reach tricky spots. Regular cleaning not only prolongs the lifespan of your gear but also ensures the best possible flavor extraction.
Don’t overlook grinder maintenance—dull burrs can produce inconsistent grind sizes over time. I check my grinders with this simple test to determine when it’s time for a burr replacement. Replacing burrs at the right interval ensures uniform grounds and facilitates better extraction.
Stay Ahead with Equipment Upgrades
As your skills progress, consider upgrading components such as the precision basket or installing a flow control device. These tweaks can enhance consistency and allow finer control over extraction parameters. Furthermore, implementing a noise reduction setup can create a quieter, more enjoyable brewing environment, particularly beneficial if you share your space or record videos.
Future Trends in Espresso Maintenance
Looking ahead, smart diagnostics integrated into espresso machines are on the rise. Equipment equipped with sensors can alert you to descaling needs, burr wear, or blockages, reducing downtime and preventing small issues from becoming costly repairs. Companies are already developing apps that interface directly with machines, guiding users through maintenance routines step-by-step, much like the capacitor testing process for early fault detection. Expect these innovations to become standard in high-end home and commercial machines, making upkeep more intuitive.
How do I keep my espresso gear running smoothly over time?
Regularly scheduled maintenance, using precise measurement tools, and staying updated on upgrade options ensure your setup remains reliable and efficient. Remember, a well-maintained machine can last years longer and produce better shots consistently. I highly recommend trying out a pressure force gauge for tamping—it’s a game-changer for dialing in perfect, reproducible pressure and elevating your craft.
What I Wish I Knew Before My First Shot
The most valuable lesson I learned was that precision in every detail matters. I used to dismiss small discrepancies in tamper size or pressure as insignificant, only to realize they could sabotage an entire extraction. That revelation pushed me to measure meticulously and respect the nuances that make or break an espresso shot. Sometimes, the smallest tweak—like refining my tamping force—transformed my experience from inconsistent disappointment to consistent delight.
Tools That Elevated My Espresso Craft
Over time, I found that investing in a digital caliper for precise measurements, a tamping force gauge, and a quality distribution tool made a significant difference. These tools keep my process consistent, reduce guesswork, and give me confidence that every shot is optimized. Trust me, quality gear isn’t just a luxury; it’s a necessity for serious home baristas.
Your Next Steps in Espresso Mastery
Don’t wait for perfect conditions—start experimenting today. Small adjustments in tamping technique, measurement, and routine maintenance can elevate your coffee to new heights. Remember, every barista was once a beginner; the key is persistence and curiosity. Embrace the process, refine your setup, and enjoy the journey toward that ideal shot. Your future self will thank you for the effort, and every sip will be worth it.
Have you ever struggled with maintaining consistent tamping pressure? Share your experiences below—I’d love to hear your story!