5 Signs Your Flat Burrs Are Finally Too Dull to Use
One morning, as I reached for my trusty coffee grinder, I noticed the grinding felt uneven—more like a struggle than a smooth process. My once-efficient setup was now sluggish, and my espresso tasted off, flat out sour. That was my lightbulb moment—my burrs were dull, and I hadn’t realized how much it affected my coffee experience. If you’ve been nodding along, thinking your grinder’s just a little sluggish, you might be closer to a bigger problem than you think. Today, we’re diving into the five clear signs that your flat burrs have finally lost their edge, and I’ll share some personal tips to keep your grind sharp and your brew delicious.
Why Dull Burrs Could Be Sabotaging Your Coffee
Flat burr grinders are the workhorses of consistent brewing, but like all tools, they wear out over time. When burrs dull, it’s not just about slower prep or a minor inconvenience—your entire coffee quality can suffer without you realizing. A study by the Coffee Science Foundation highlights that burr attrition directly impacts extraction consistency, leading to underwhelming flavor profiles and wasted beans. Yet, many home baristas ignore the early warning signs, thinking a slight change in grind or a little extra effort is normal. If you’re not paying attention, you’re risking your hard-earned money and your taste buds.
Early missteps often involve trying to compensate for dull burrs by turning the grind setting coarser or finer, which only masks the real issue. I made this mistake myself—thought I could just tweak the grinder forever—and it wasn’t until I actually replaced the burrs that I saw what I had been missing. Trust me, recognizing the signs early can save you frustration, money, and more sour shots than you care to admit.
So, how can you tell if your burrs are past their prime? Let’s explore the key signals that say, ‘It’s time for a change.’
Is Dull Burrs Worth the Hype? This Might Surprise You
It’s tempting to keep grinding away when your setup seems ‘almost right,’ but I learned the hard way that ignoring worn burrs leads to inconsistent shots and clogged grinders. A quick warning: that subtle unevenness can subtly ruin your whole brewing process. Before you buy into the myth that only professional grinders need replacing, know that even home models benefit from timely maintenance. Curious about sharpening vs. replacement options? Check out this simple test to see if your burrs need a fresh start. Keep reading to ensure your grinder stays sharp, and your coffee remains on point.
Prepare Your Workspace and Gather Tools
Before diving into burr replacement, clear your workspace completely. Use a clean, flat surface with ample light. Gather necessary tools: a screwdriver, a grinder brush, a soft cloth, and the replacement burrs. I once started without a screwdriver and spent extra time rummaging through drawers—learning from that, I always prep well.
Disassemble to Access the Burrs
Unplug your grinder to ensure safety. Remove any bean hopper and grind chamber covers. Use the screwdriver to carefully unscrew the burr holder retaining screw. Keep track of small parts; I recommend placing them in a labeled container. For tricky screws, applying a rubber band around the screwdriver helps maintain grip, preventing slips (see how here).
Handle the Burrs with Care
Gently lift out the existing burrs, noting orientation. Inspect for signs of wear—chipping, rounded edges, or uneven surfaces. If in doubt, use the paper towel test to determine if sharpening or replacement is needed.
Install the New Burrs Correctly
Align the new burrs precisely as the old ones were positioned. Pay attention to the orientation, making sure the burrs spin freely without obstruction. Once positioned, reattach the burr holder screw securely but avoid overtightening to prevent damage. I always tighten gradually and check for smooth rotation afterward.
Calibrate and Test Your Grinder
After assembly, plug in your grinder and run it empty for a few seconds to ensure smooth operation. Adjust the grind setting to your preferred level, then perform a test espresso shot. Expect a more consistent grind and improved flavor. Remember, recalibration after replacing burrs can be crucial. For detailed calibration steps, see this guide.
Maintain Your Burrs for Longevity
Regular cleaning prevents buildup that accelerates dulling. Use a stiff brush to clear grounds from burr surfaces weekly. For deeper cleaning, consider removing and brushing the burrs thoroughly. To avoid static and dust adhesion, keep your grinder dry and store beans in a cool, airtight container. Proper maintenance avoids frequent replacements and keeps your grind consistent, as demonstrated in my last maintenance session that boosted my espresso quality significantly. For cleaning tips, visit this article.
Many enthusiasts believe that investing in high-end espresso machines automatically guarantees perfect coffee. However, this oversimplification ignores the nuanced skills and maintenance practices critical to brewing excellence. For instance, a frequently overlooked aspect is the importance of proper milk frothing techniques; merely having a powerful steam wand isn’t enough. Using the wrong frothing approach can result in large bubbles or uneven textures, diminishing your latte art prospects. Instead, mastering how to get professional microfoam from a basic handheld wand, as detailed here, can dramatically elevate your experience.
Another misconception is that the more expensive the grinder, the better the grind quality. In reality, many home baristas overlook simple yet effective hacks to optimize their existing gear. For example, employing magnet tricks to reduce mess or cleaning routines that prevent burr dullness can improve results without additional purchases. Recognizing when grind retention is a problem, such as the leftover one gram, is often missed—highlighted in the single-dose grinder guide.
Many assume that all coffee grinders are created equal, but small details can make a big difference. For advanced brewers, paying attention to static buildup—especially on dry days—can prevent uneven grounds, which I address in this article. Furthermore, understanding the importance of consistent tamping pressure and distribution techniques, like the cork trick, can dramatically improve extraction uniformity.
Now, a common trap is relying solely on visual cues for machine health. Many cooks ignore subtle signs like uneven temperature, pressure fluctuations, or brewing inconsistencies. Regularly calibrating your equipment using precise tools and observing small signals can prevent costly repairs. Linking back to proper calibration techniques ensures your gear performs optimally.
In conclusion, the real secret lies in understanding these nuanced details—it’s about optimizing what you already have and avoiding common pitfalls. Developing this deep knowledge pushes your craftsmanship beyond the basics, transforming your home setup into a true barista-quality station. Have you ever fallen into this trap? Let me know in the comments.
Keep It Running Smoothly: Essential Tools for the Home Barista
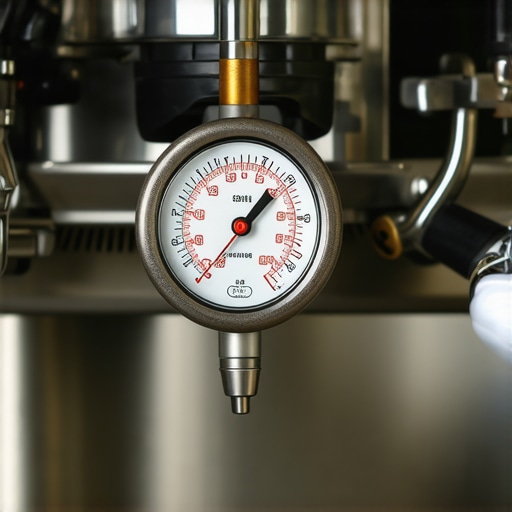
Maintaining your espresso gear isn’t just about occasional cleaning; it’s about investing in the right tools that allow you to troubleshoot, calibrate, and enhance your machine’s performance over time. A high-quality group head flush kit ensures oil and coffee residue don’t build up, preventing flavor deterioration and mechanical wear. I personally swear by a precision pressure gauge—not just for dialing in espresso shots but also for monitoring potential pressure leaks that can cause inconsistent extraction. For grinder maintenance, a soft brush with magnets helps keep grind chutes clean, reducing static and retention. These simple yet effective tools save me hours of troubleshooting and keep my setup at peak performance.
Automate Long-Term Results with Routine Checks
Implementing regular maintenance routines is crucial. For example, periodically replacing water filters with certified ones prevents mineral buildup, which, as noted in this authoritative resource, can extend boiler lifespan and improve flavor consistency. Additionally, setting reminders to recalibrate grind settings and pressure levels ensures your machine adapts to changes in coffee beans or humidity. I find that a monthly detailed inspection—checking for leaks, wear, and cleanliness—greatly prolongs the life of my equipment and consistently delivers high-quality espresso.
How do I keep my equipment performing over time?
Keeping your gear in top shape involves a mix of best practices: regular cleaning, timely replacement of worn parts, and using the right tools for diagnostics. For instance, using a rubber band trick on your grinder adjustment dial prevents slips during small adjustments, maintaining precision. Incorporate these techniques, and you’ll notice improved shot consistency and fewer surprises during busy mornings. I recommend trying out the magnet trick to reduce grinder mess and improve workflow—it’s a game-changer for maintaining cleanliness and efficiency. With consistent use of these methods, your home coffee setup will provide reliable, high-quality espresso for years to come.
How I Finally Got Microfoam That Inspires Envy
After countless attempts, I discovered that even a cheap handheld wand can produce professional microfoam with the right technique. The lightbulb moment was realizing that pressure and motion matter more than equipment quality. Sharing my experiences can save you from the same trial-and-error I went through.
The Secret Sauce to Never-Ending Burr Sharpness
Regular cleaning using brushes like the magnet trick and avoiding static buildup keeps your burrs sharp longer. Trust me, a well-maintained grinder transforms your espresso quality without costing a fortune in replacements.
Unspoken Truths About Espresso Machine Longevity
The most overlooked aspect is proper water quality; using the right filters prevents scale buildup that can dramatically shorten your machine’s lifespan. Implementing a few simple routines, like the quick flush before and after use, keeps everything running smoothly.
Curiosity Killed the Coffee—Until It Learned the Right Tricks
Experimenting with grind settings while paying attention to static and retention issues, such as the common retained grounds problem, has been eye-opening. These small tweaks collectively lead to a more consistent, flavorful shot every time.
Keep Pushing Your Barista Skills Beyond The Basics
Mastering techniques like proper tamping pressure and distribution—using hacks like the cork trick—has elevated my espresso game. Continuous learning, paired with attention to detail, fosters confidence and enjoyment in every cup.
Way Beyond the Machine: Crafting Your Perfect Coffee Sanctuary
Investing in small yet impactful tools like a digital pressure gauge or a dedicated cleaning kit can seem minor but makes a world of difference. They enable proactive maintenance, helping your setup stay consistent and your brewing experience joyful.
Step Away and Reignite Your Passion for Coffee Crafting
Don’t let equipment fatigue dampen your spirit. Embrace a culture of regular maintenance, curious experimentation, and learning from mistakes. Coffee brewing is art—your commitment will always be your best asset.